
Introduction
Welcome back to Earth Volumetric Studio. In this tutorial, we'll explore the Options page.
Options controls program-wide preferences, including system behavior, data formatting, interface appearance, and the default settings used for new applications and modules. We'll focus on the organization of this page and the settings most users should recognize. We won't modify the open Painting Facility project.
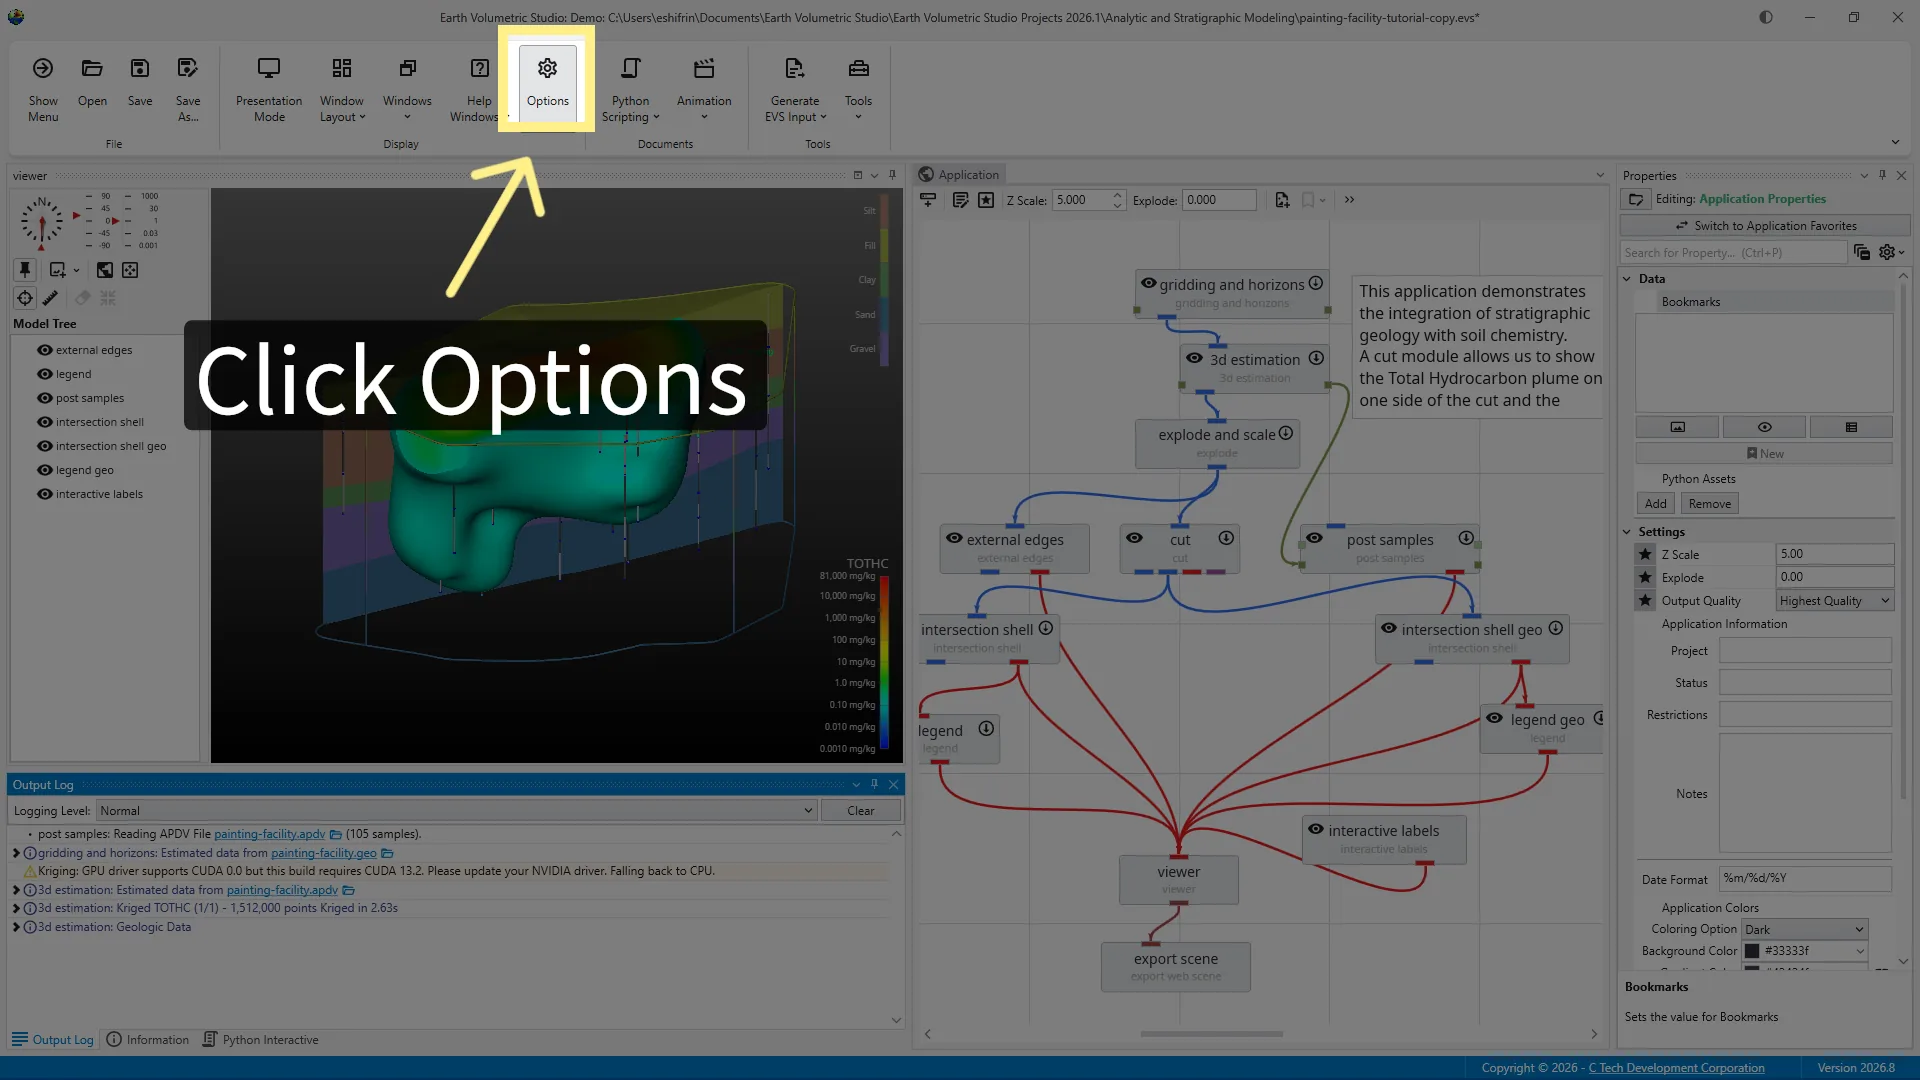
To open the Options page, select Options from the Display section of the Main Toolbar.
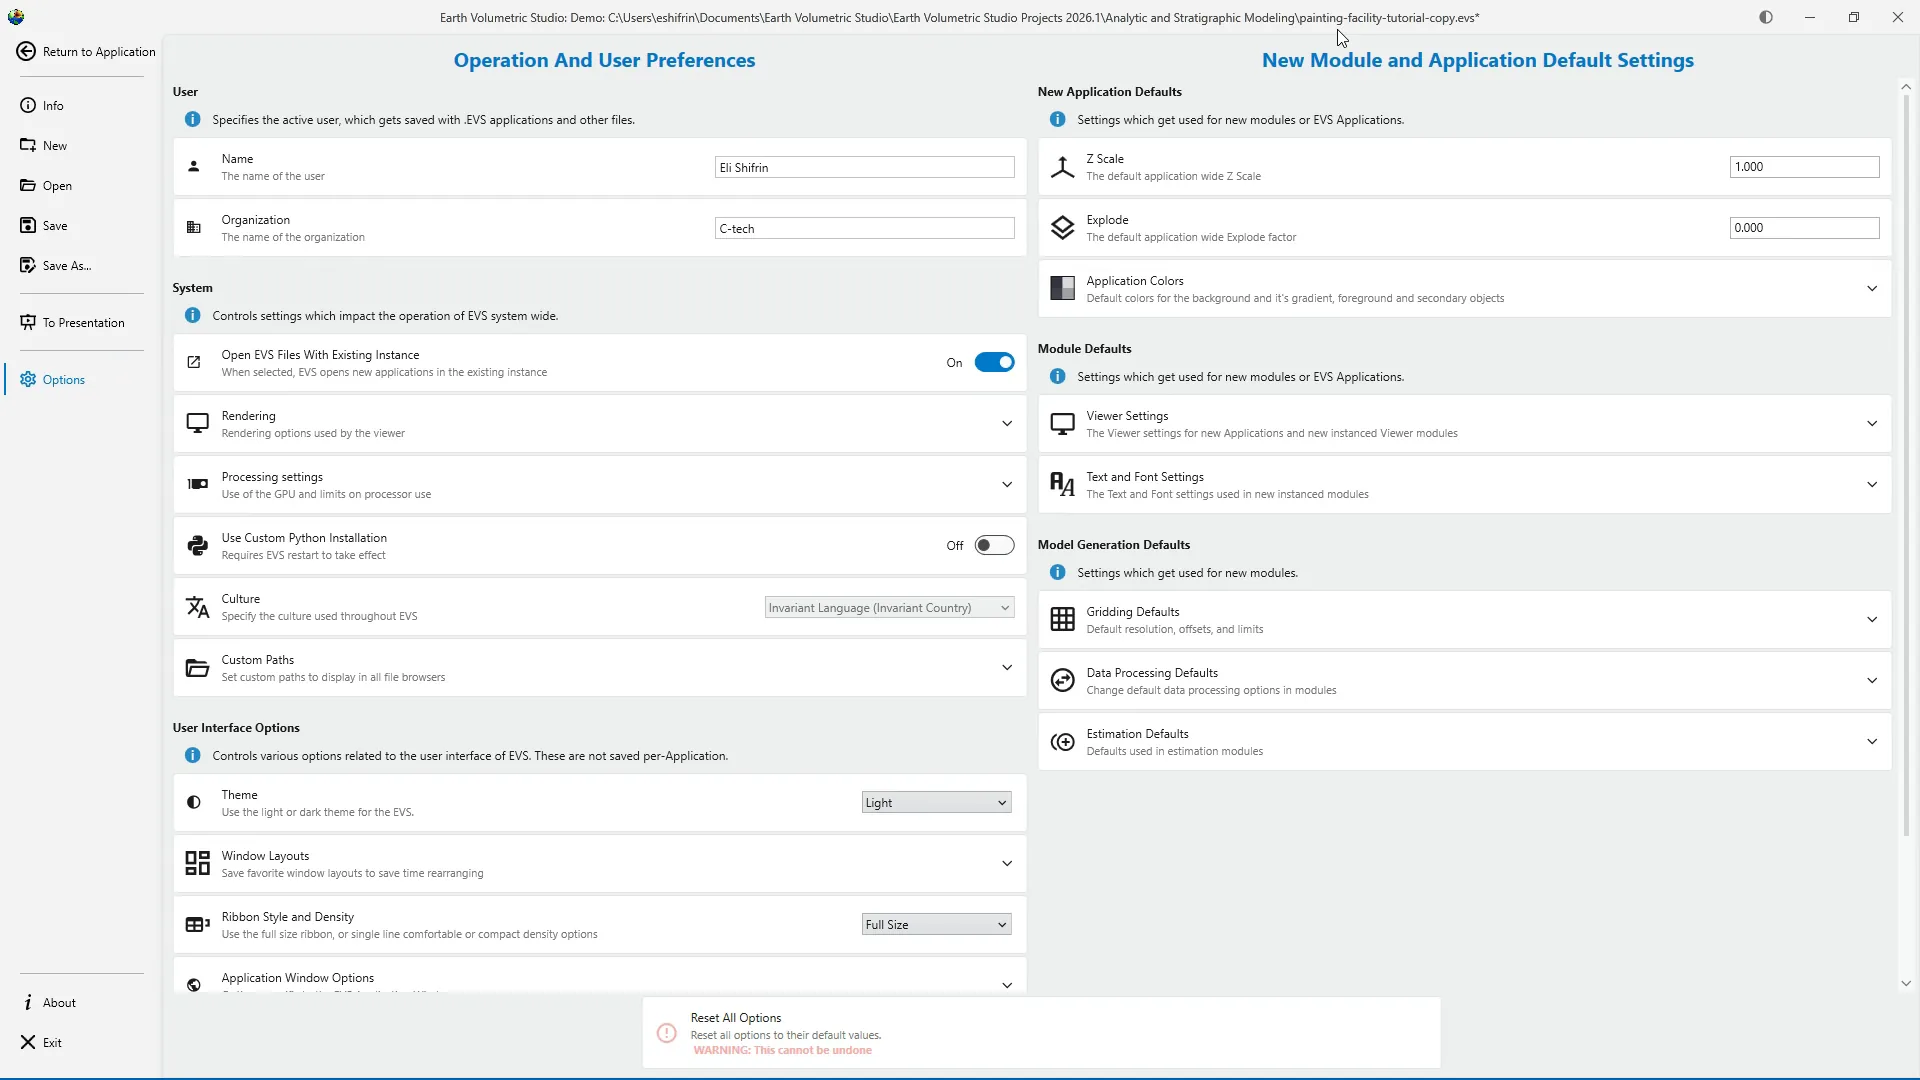
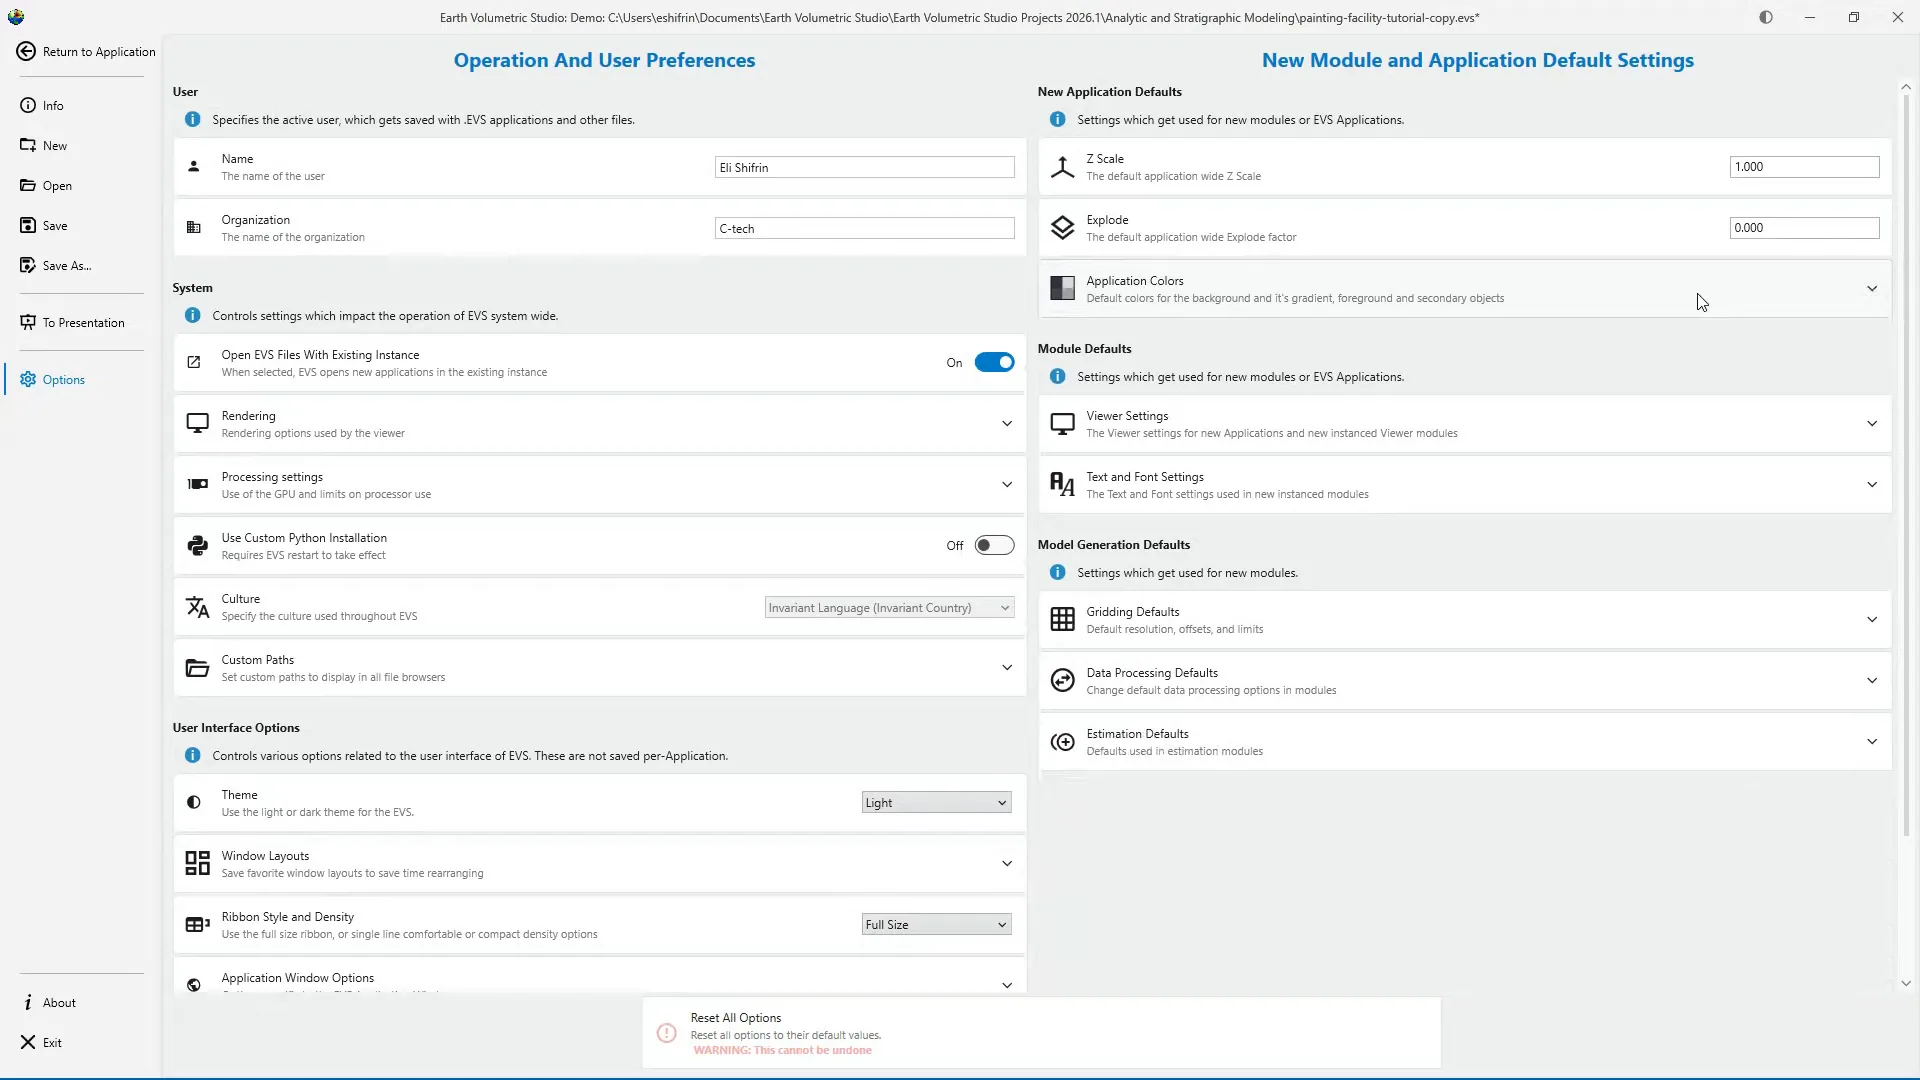
The Options page is divided into two main columns. Operation and User Preferences appears on the left, while New Module and Application Default Settings appears on the right. The settings on the left control how EVS operates for the current user. The settings on the right define the starting values used when new applications and modules are created.
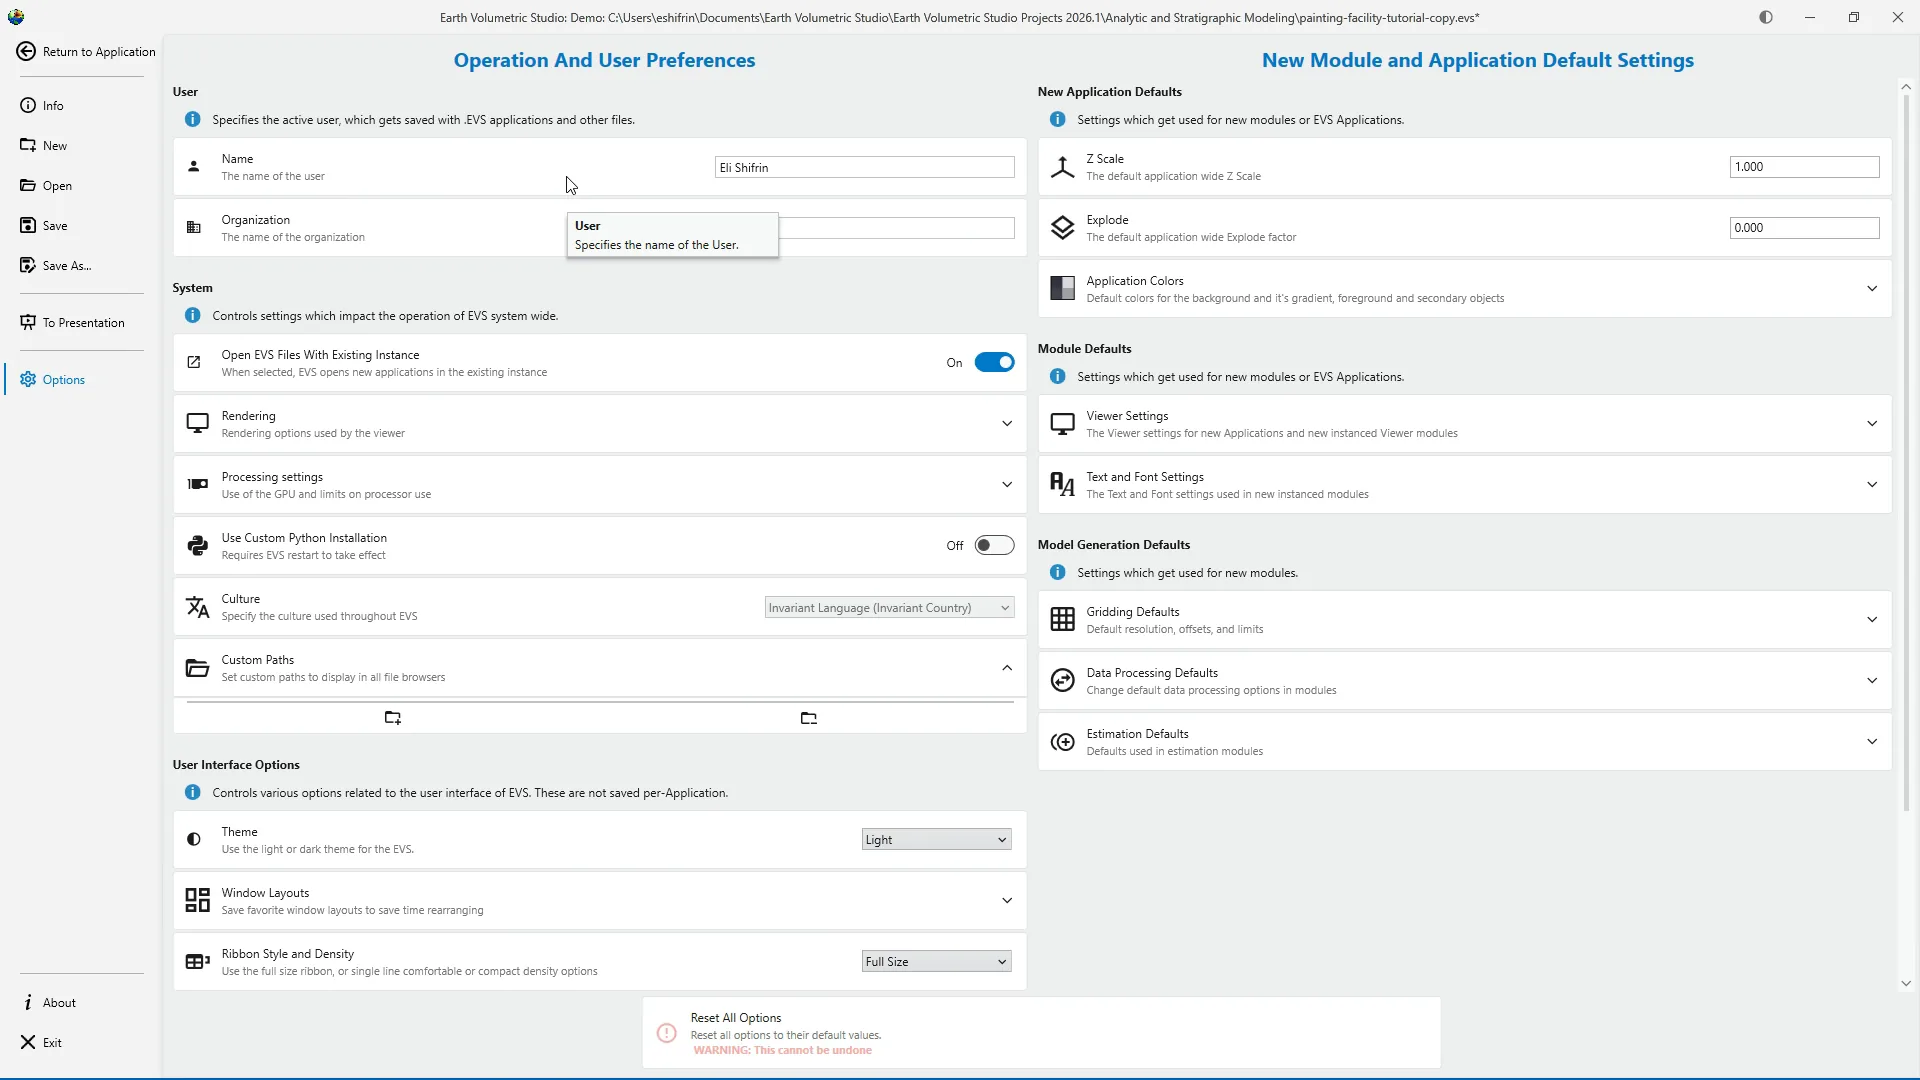
The User section identifies the active EVS user. Enter your name and organization in the fields provided. This information can be saved as metadata with EVS applications and other output files, helping identify the person and organization associated with the project.
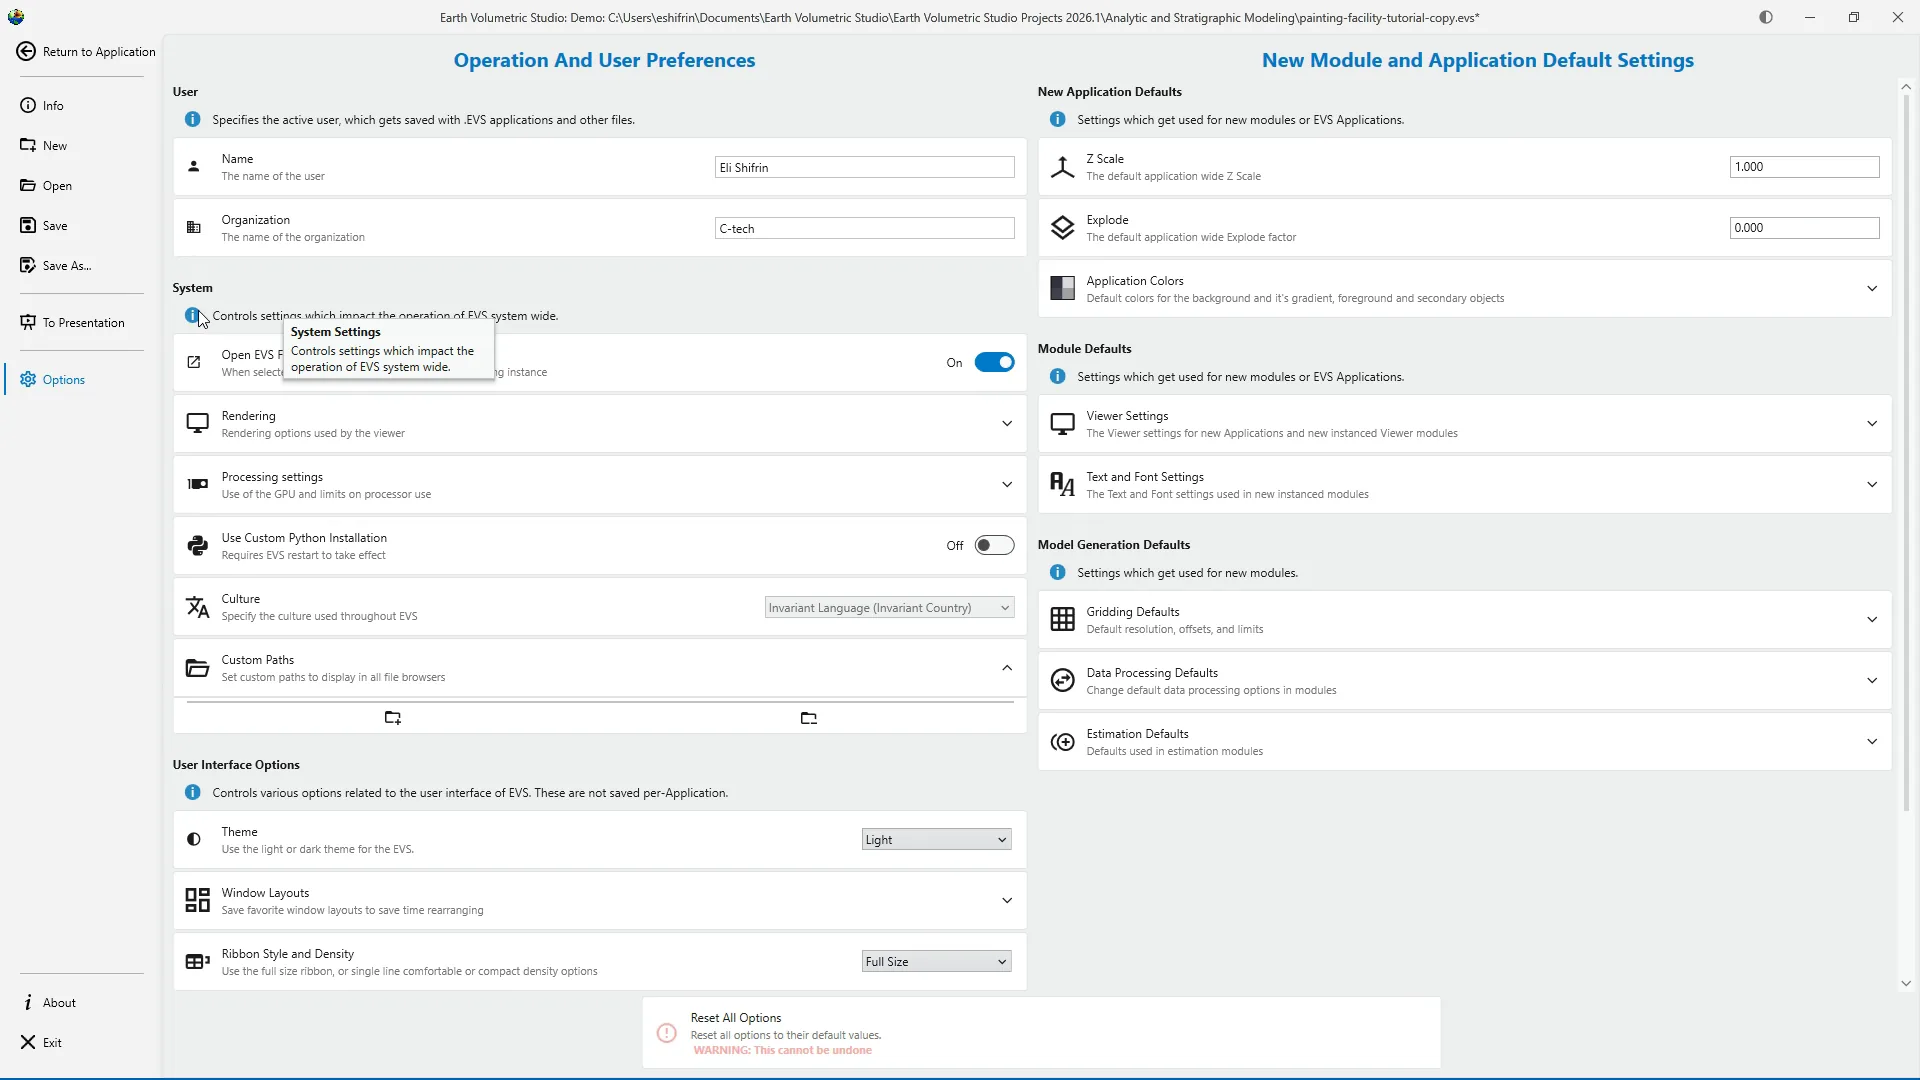
The System section contains preferences that affect how EVS operates. Open EVS Files With Existing Instance determines what happens when an EVS file is opened from Windows File Explorer. When this setting is enabled, the project opens in the EVS session that is already running. When it's disabled, EVS opens a new program instance.
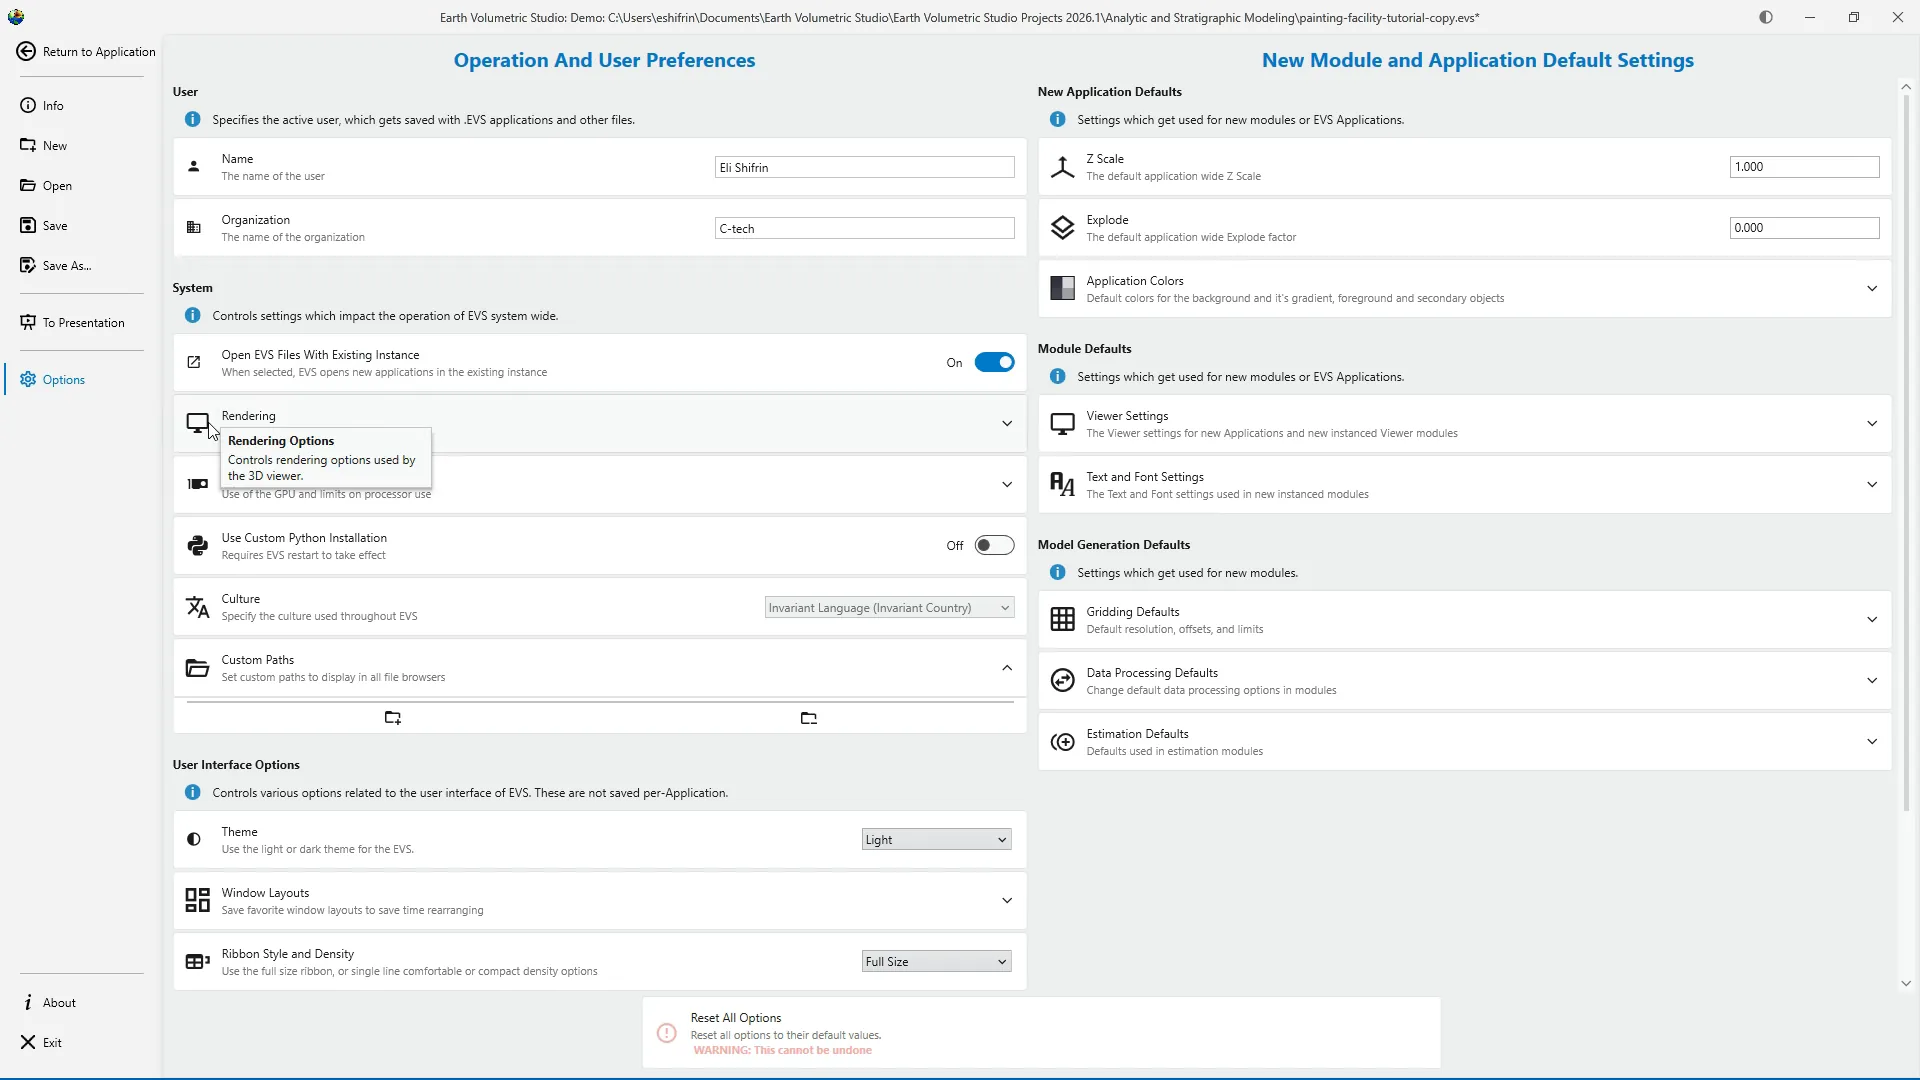
The Rendering section contains options used by the Viewer when displaying visualizations. These settings can affect graphical behavior and performance. Unless you have a specific display requirement or are troubleshooting a rendering problem, you can normally leave them at their established values.
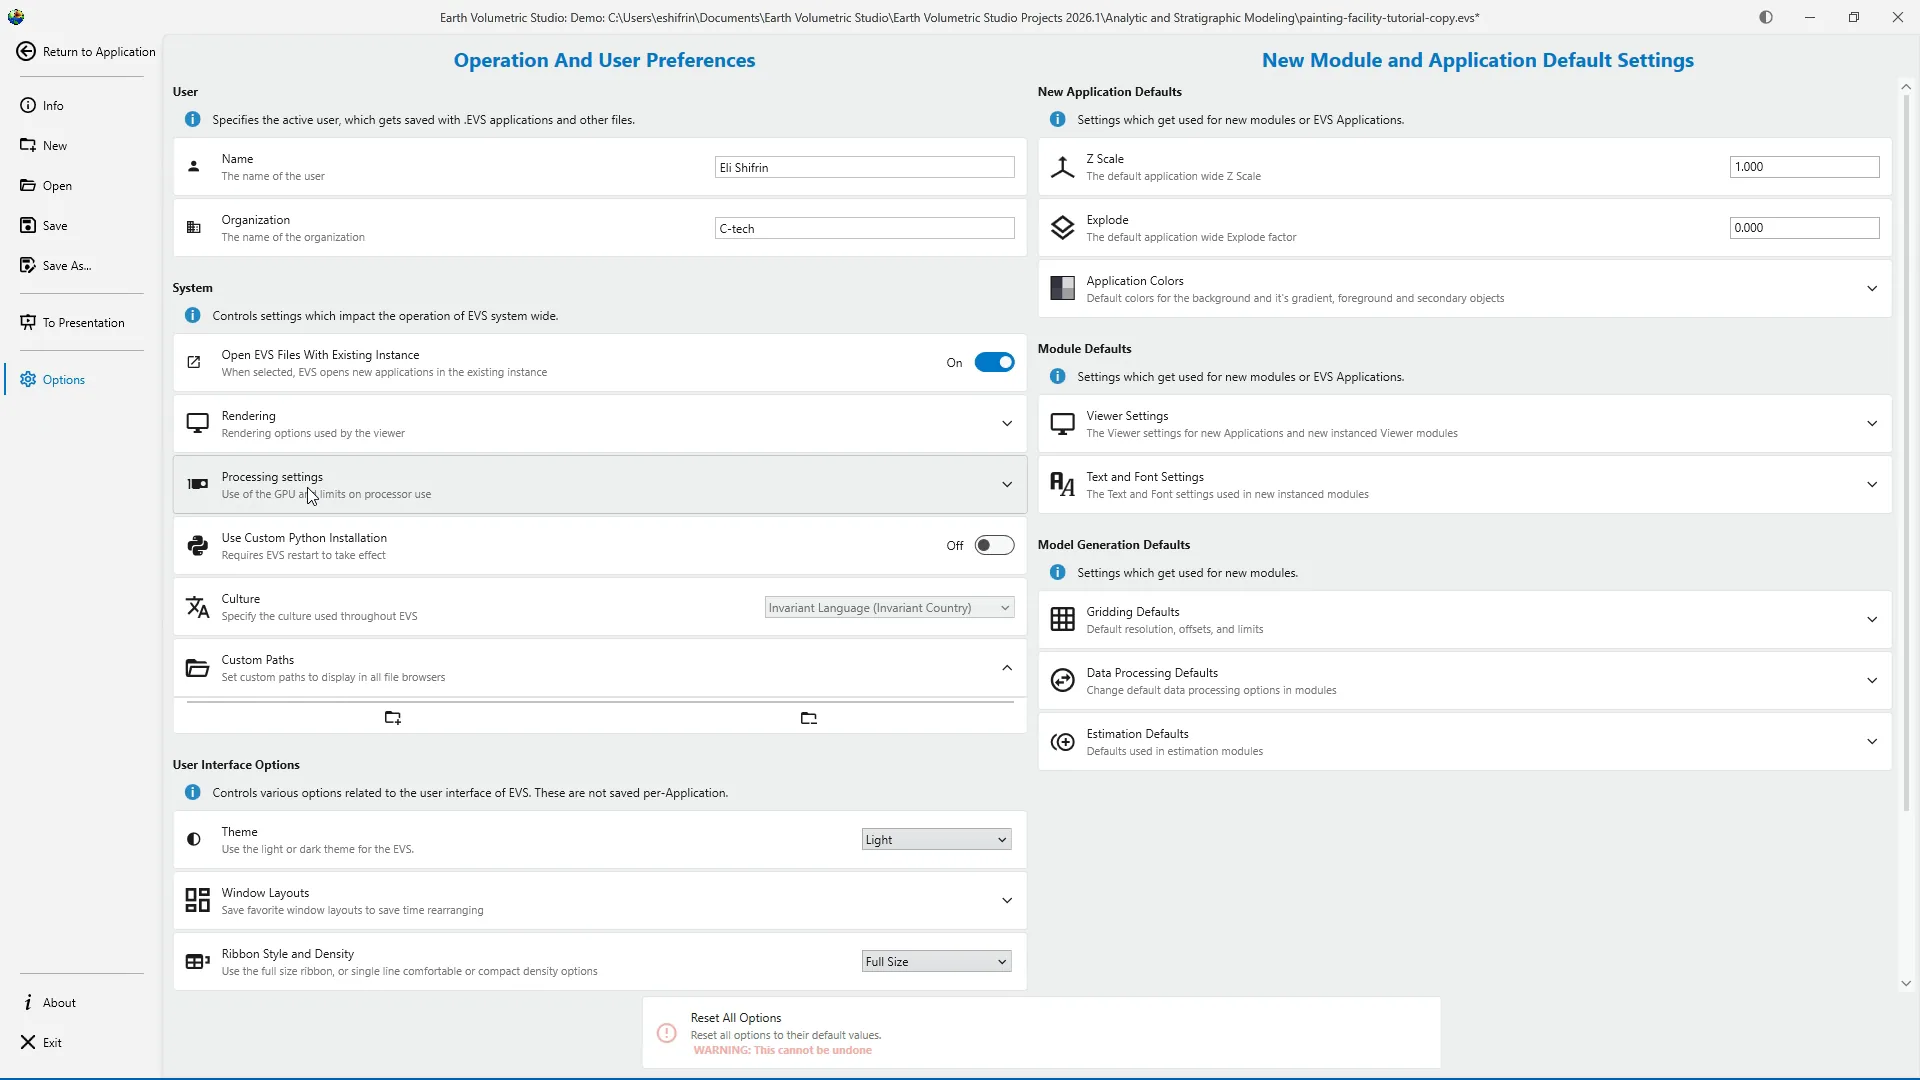
You can reserve one or more logical processors for Windows and other programs. This can help the computer remain responsive while EVS performs demanding calculations. EVS can also use a supported graphics processor to accelerate certain calculations. The GPU setting is intended for advanced troubleshooting and can significantly reduce performance, so it should normally remain unchanged unless recommended by technical support.
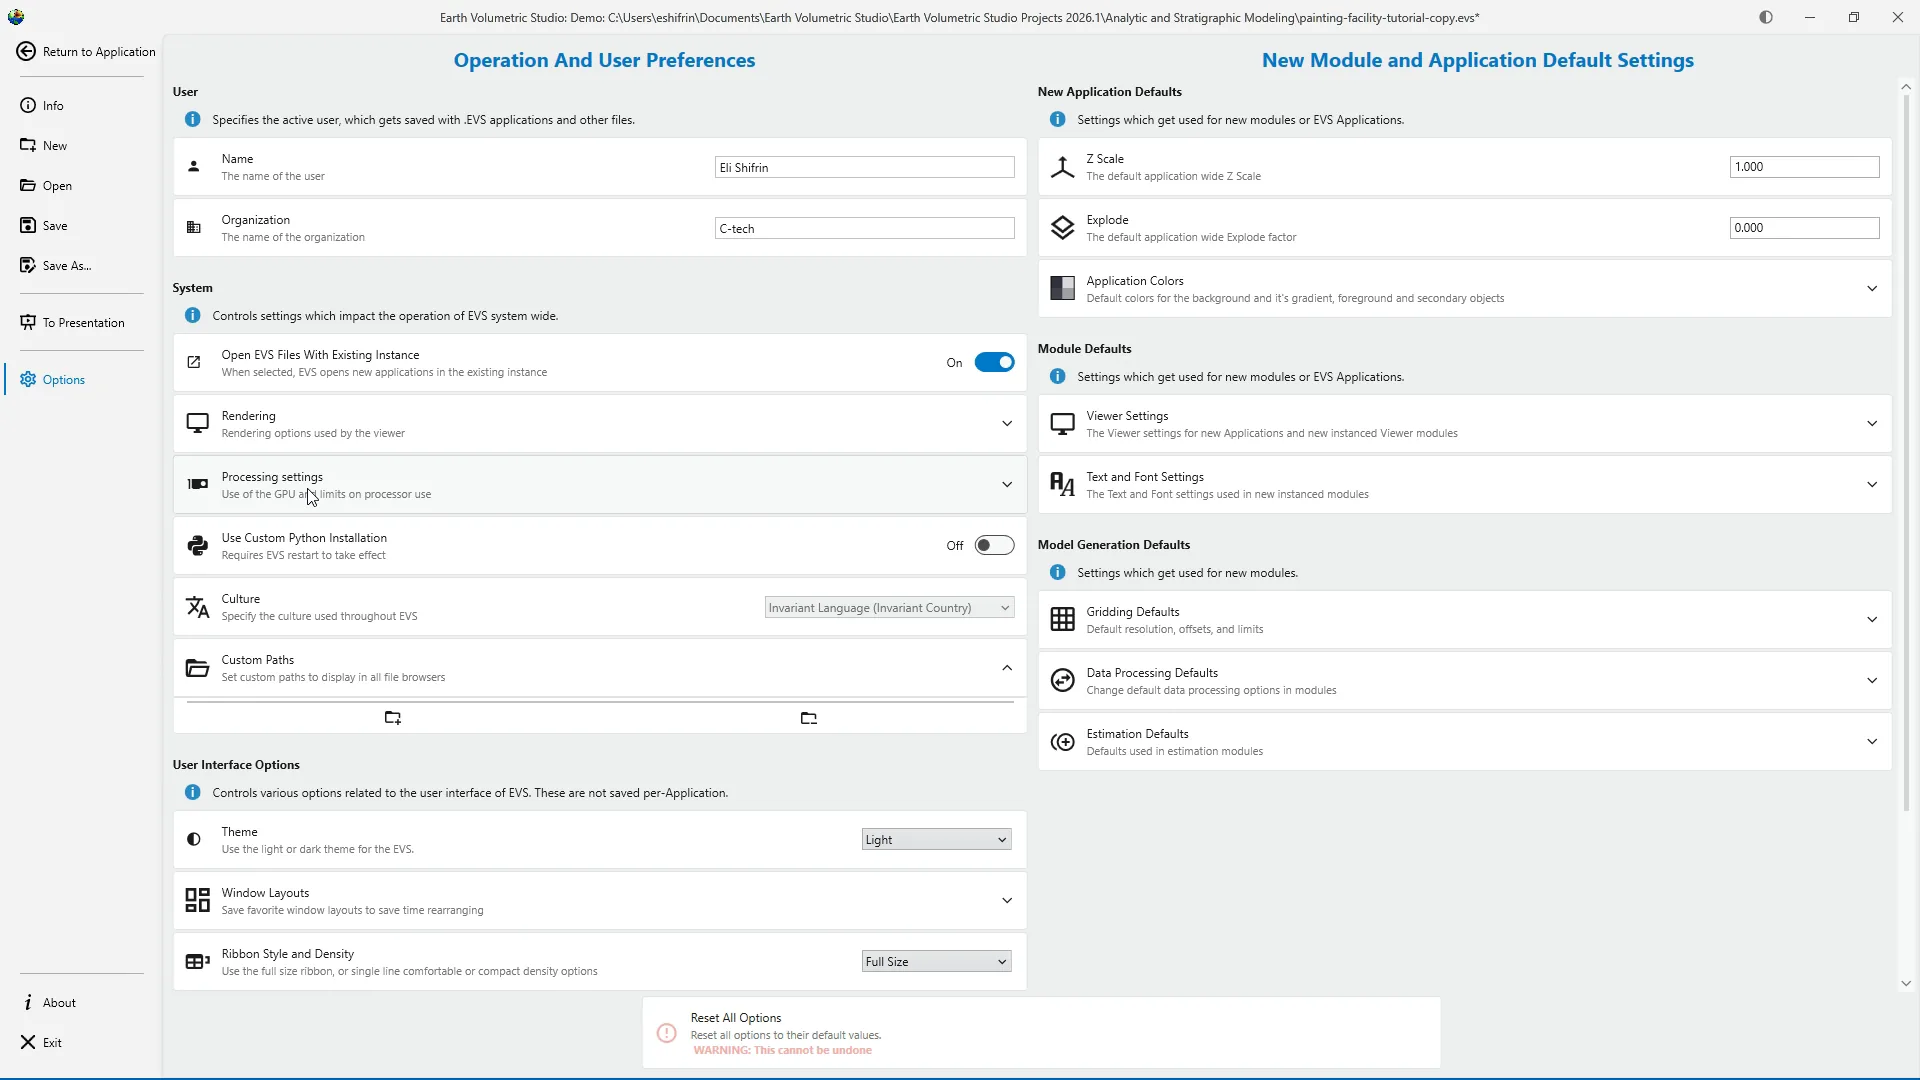
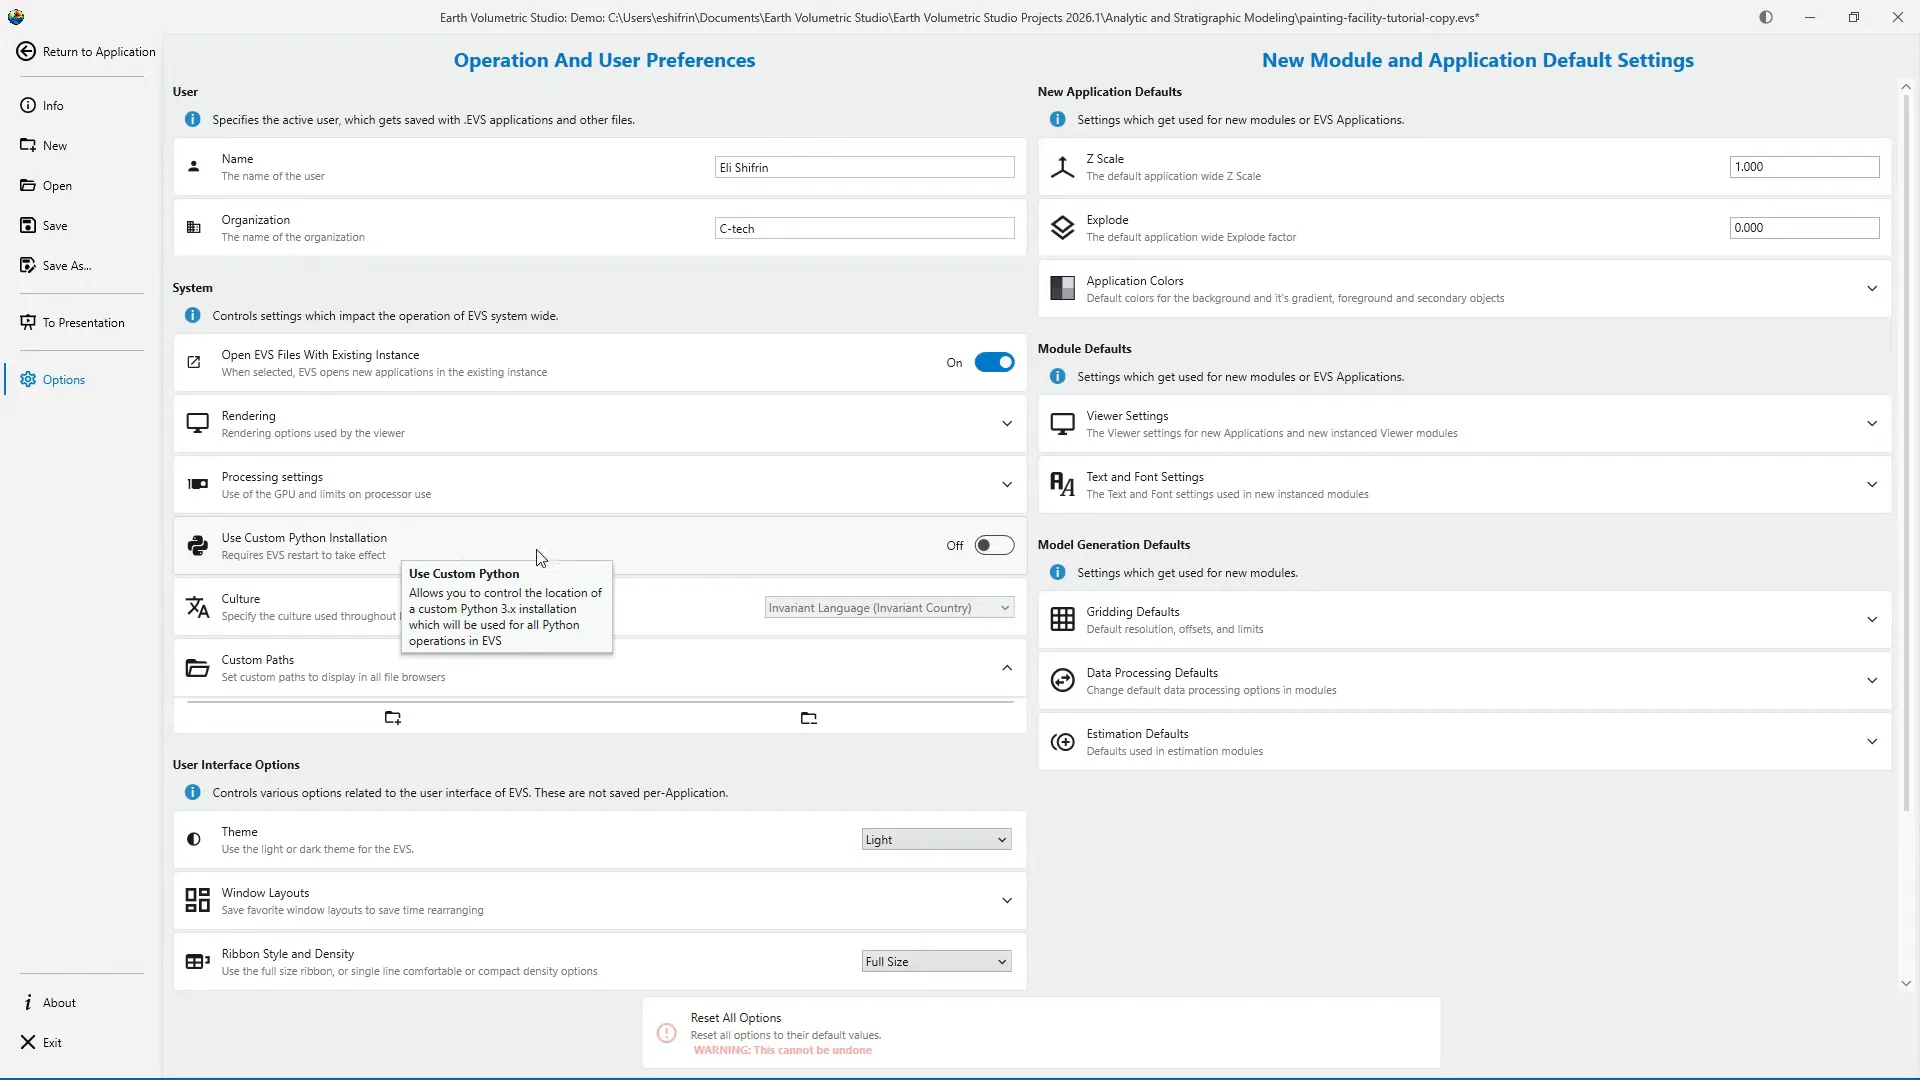
Use Custom Python Installation allows advanced users to connect EVS to a compatible Python installation instead of the version provided with EVS. Changing this setting requires EVS to restart. If you don't have a specific scripting requirement, leave the custom Python option turned off.
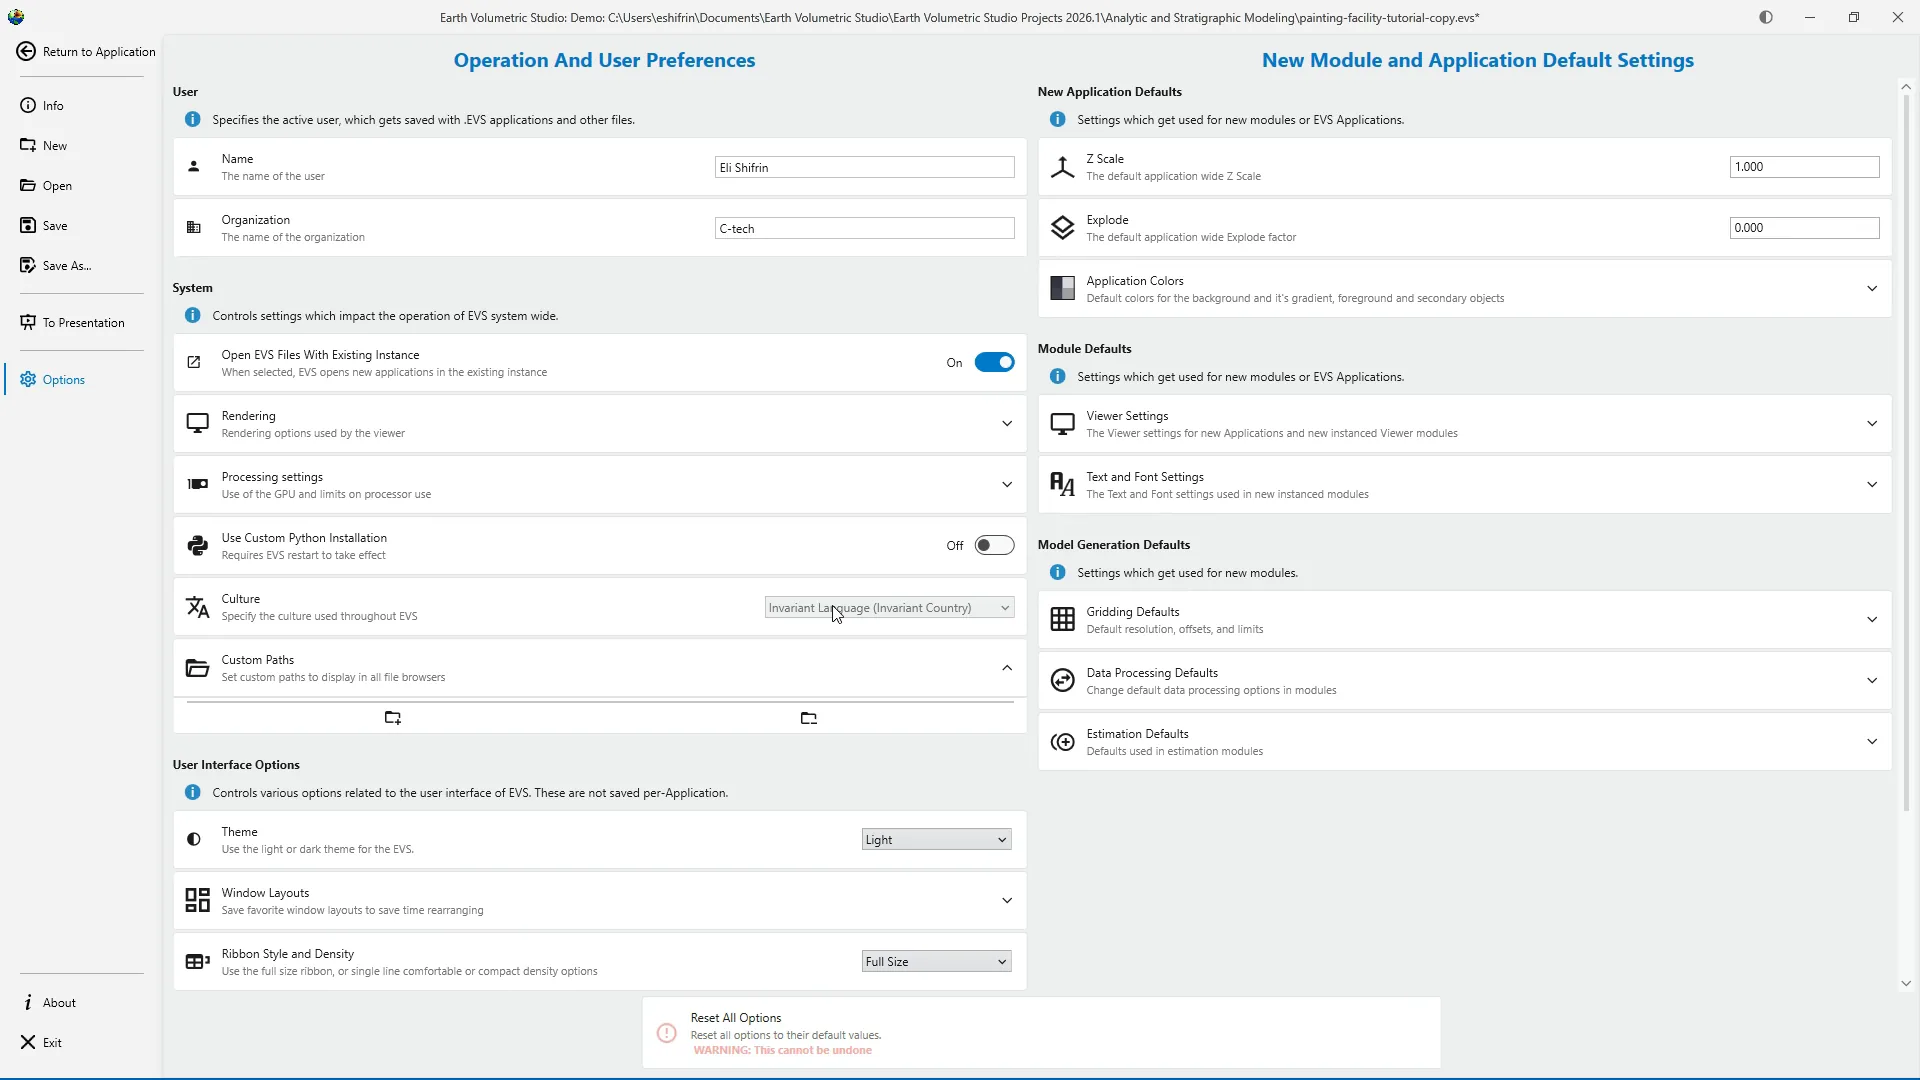
The Culture setting controls the language and regional formatting used throughout EVS. This includes how numbers, dates, and times are displayed. For this tutorial series, set Culture to Invariant Language, Invariant Country. This provides a consistent, country-independent format for values. It helps prevent confusion when data moves between users or systems that may use different conventions for decimal points, commas, dates, or number grouping. Using the invariant option helps ensure that the values shown in EVS are interpreted consistently throughout these tutorials. If your organization requires a specific regional standard, follow that standard instead.
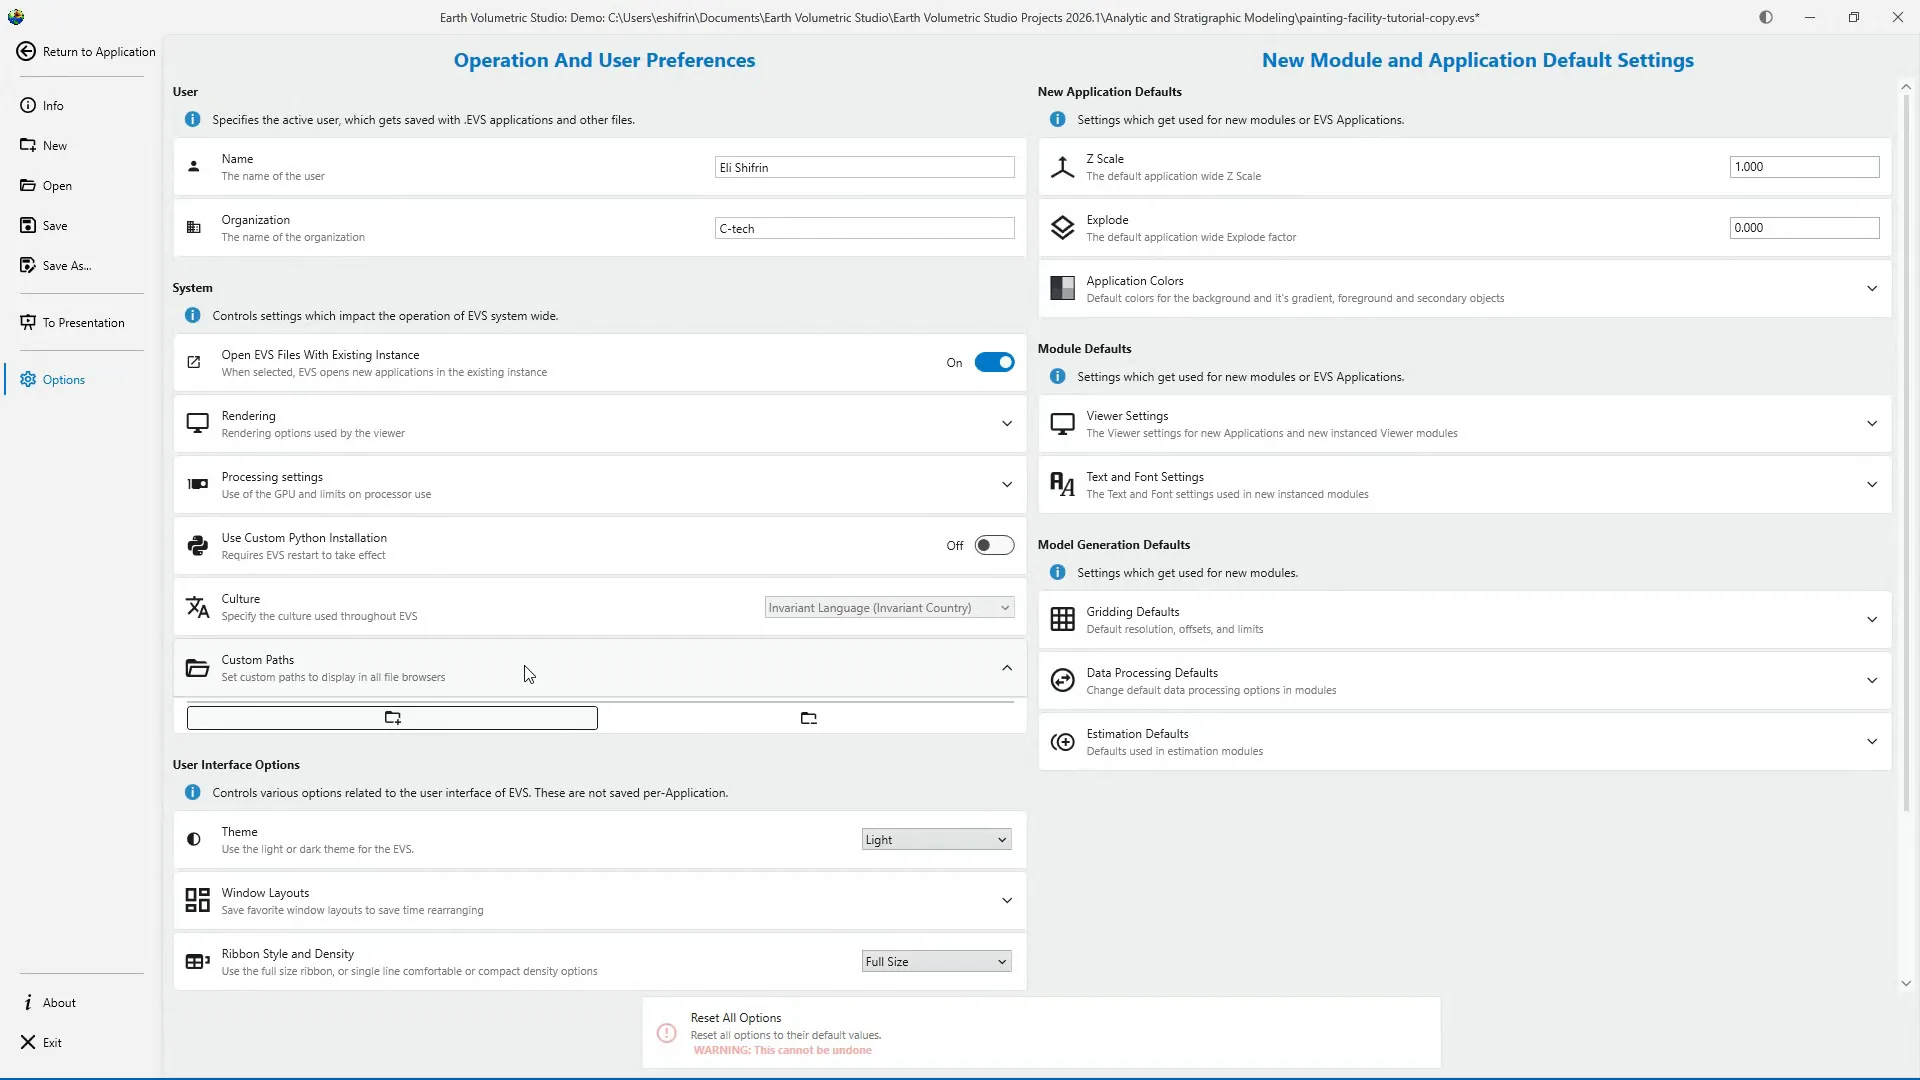
Custom Paths lets you create shortcuts to folders you use frequently. Once a custom path is added, it can appear in the EVS Open menu and other file browsers. This can make project and data folders easier to access without browsing to the same location each time.
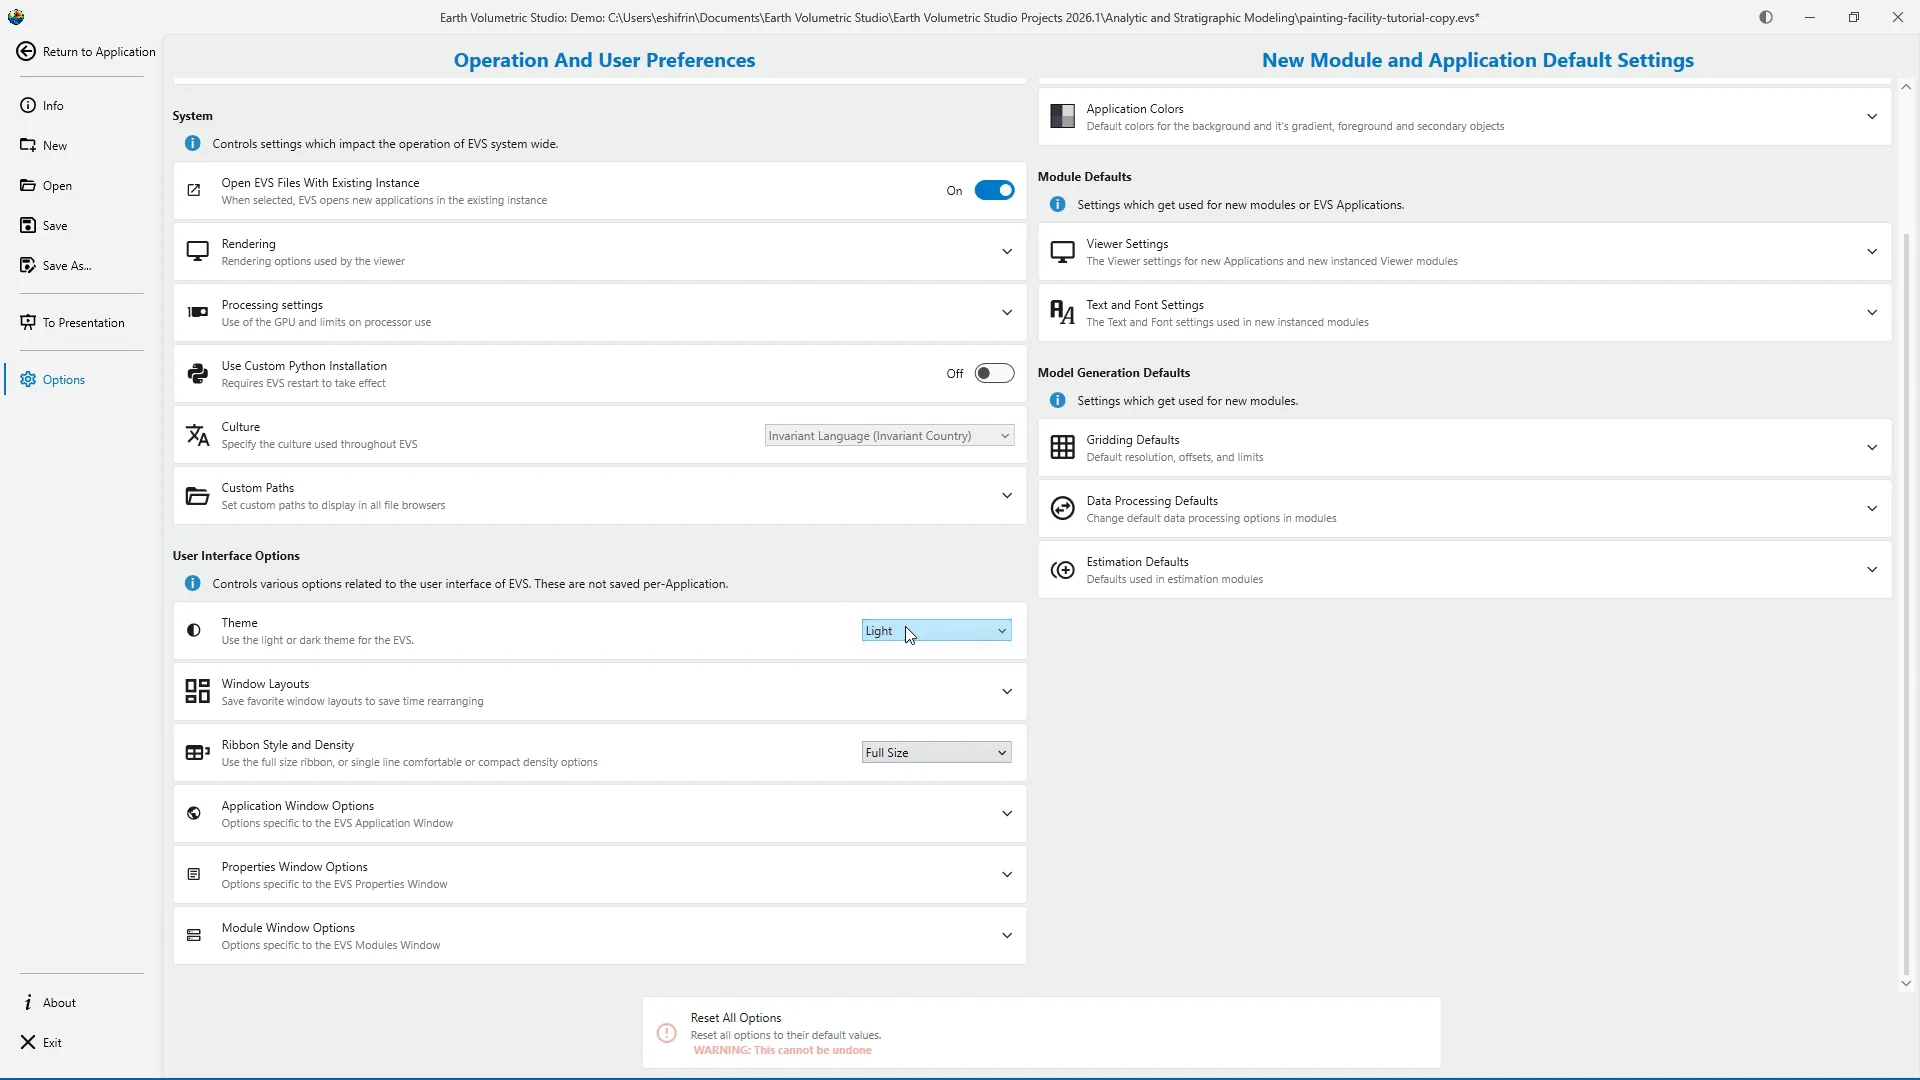
The next group contains preferences for the appearance and behavior of the EVS user interface. These are user preferences and are not saved separately with each application.
Theme switches the EVS interface between light and dark appearances. This is the same interface preference controlled by the half-moon toggle in the upper-right corner of EVS. Changing the theme affects the appearance of the workspace, but it doesn't change the colors of the project visualization.
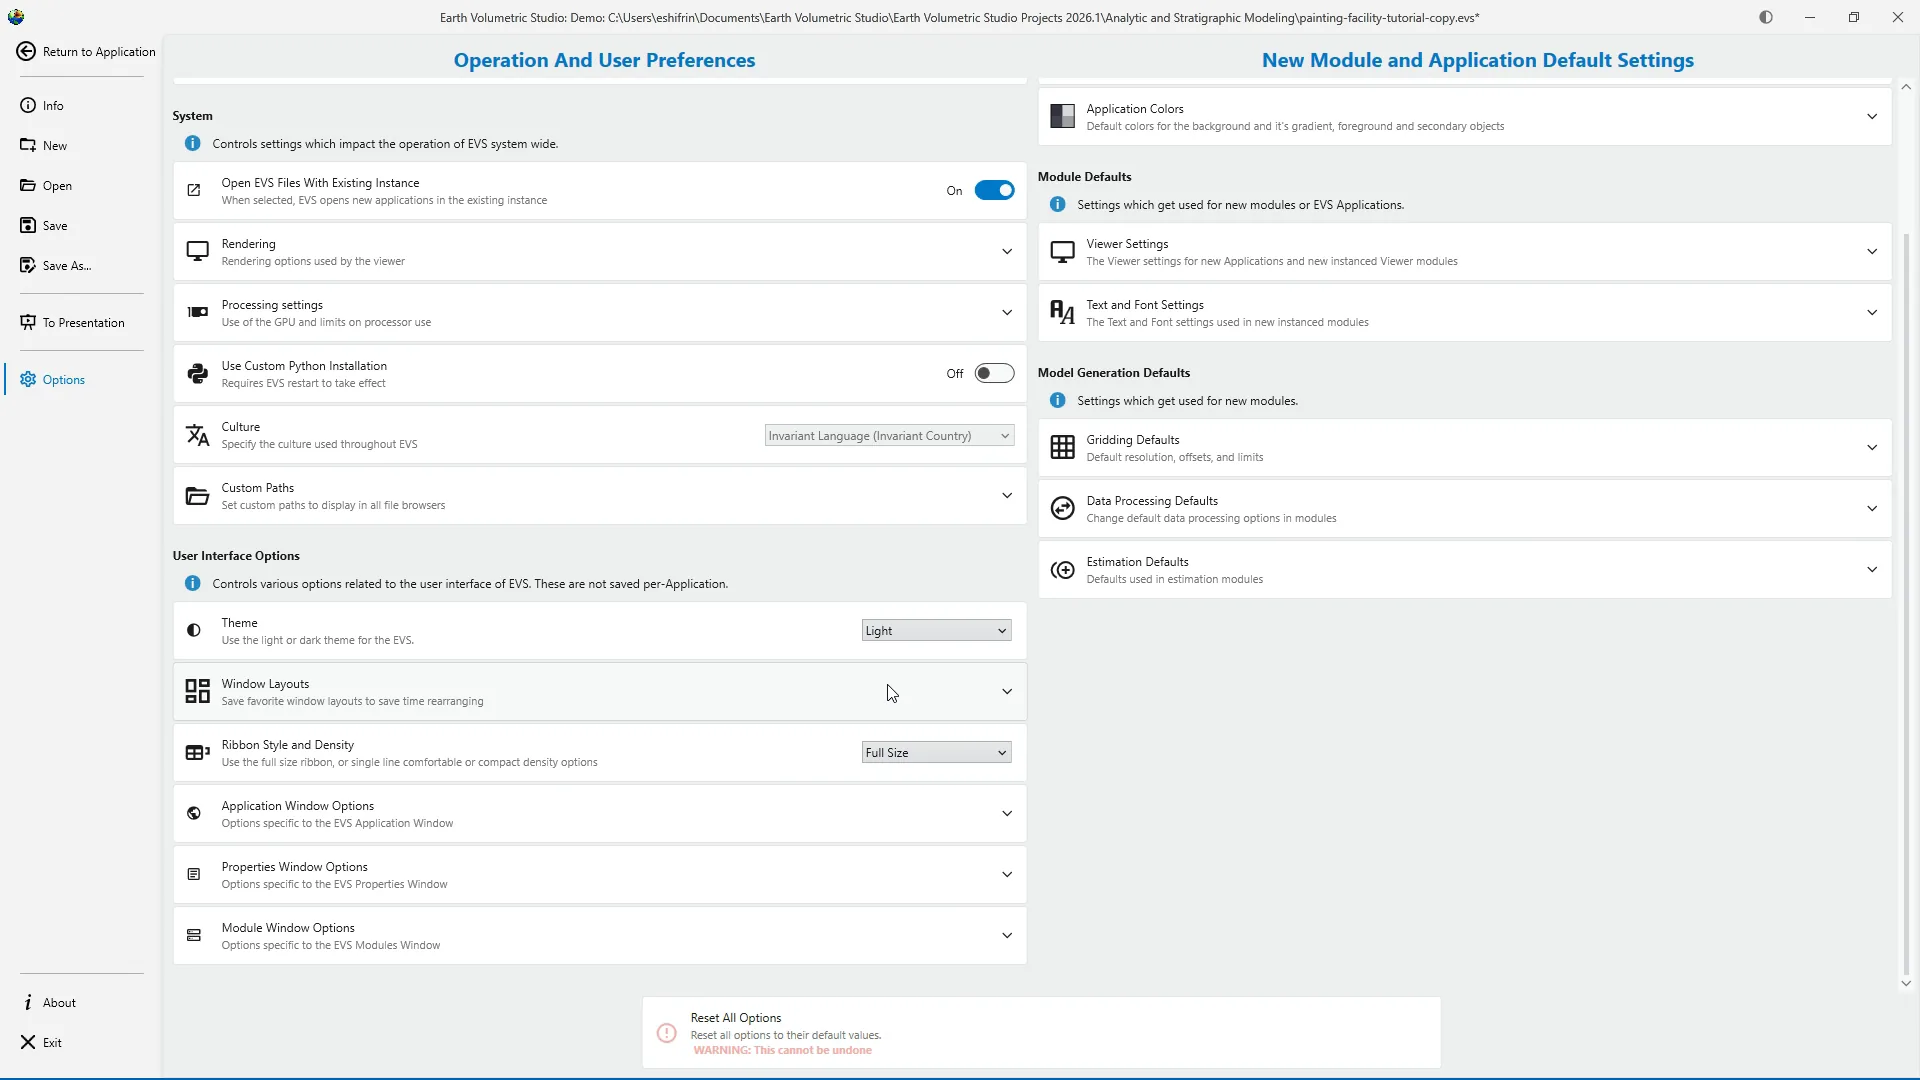
Window Layouts is used to save, apply, update, and remove customized arrangements of the EVS windows. We'll cover this section in the dedicated Window Layout tutorial, so we'll leave it unchanged for now.
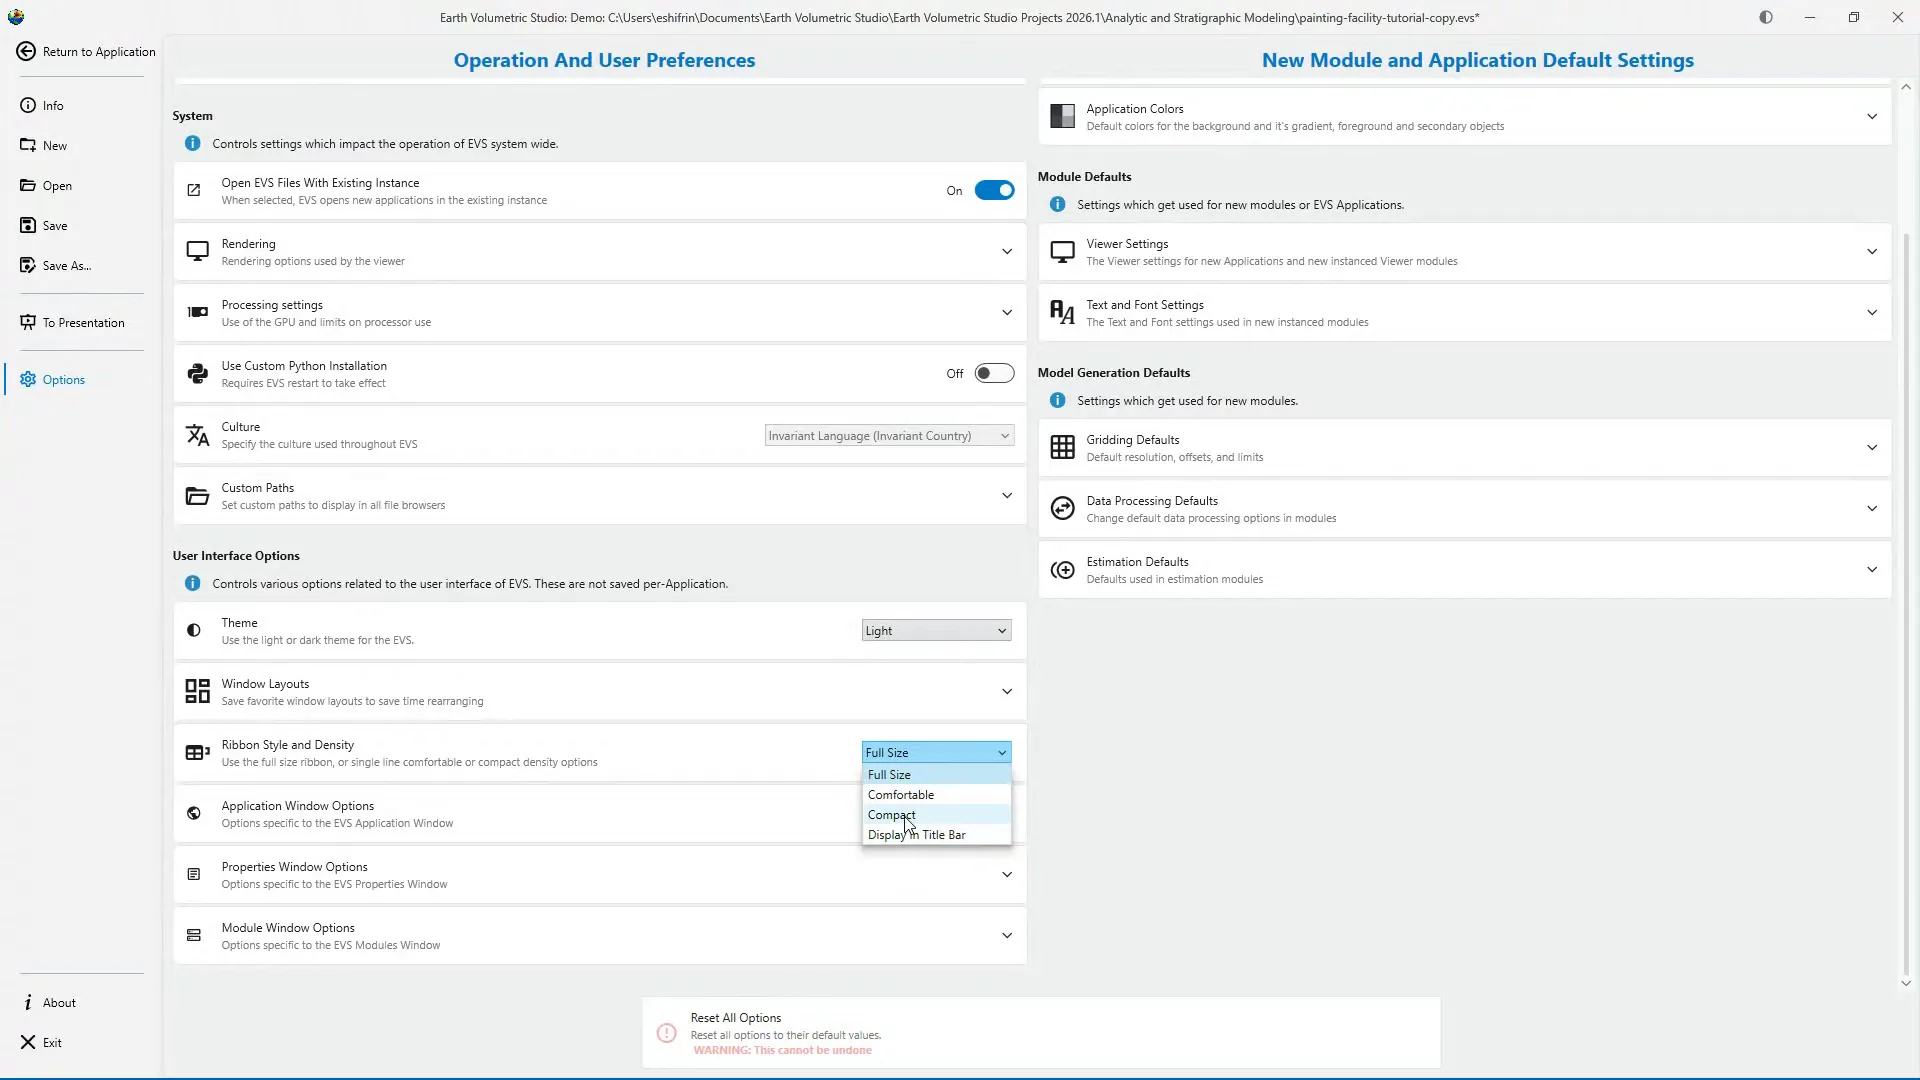
Ribbon Style and Density changes the size and appearance of the Main Toolbar. Full Size displays large icons with text labels. Comfortable uses smaller icons while retaining the labels. Compact saves the most space by displaying icons without text. These controls can also be opened from the arrow at the right end of the Main Toolbar.
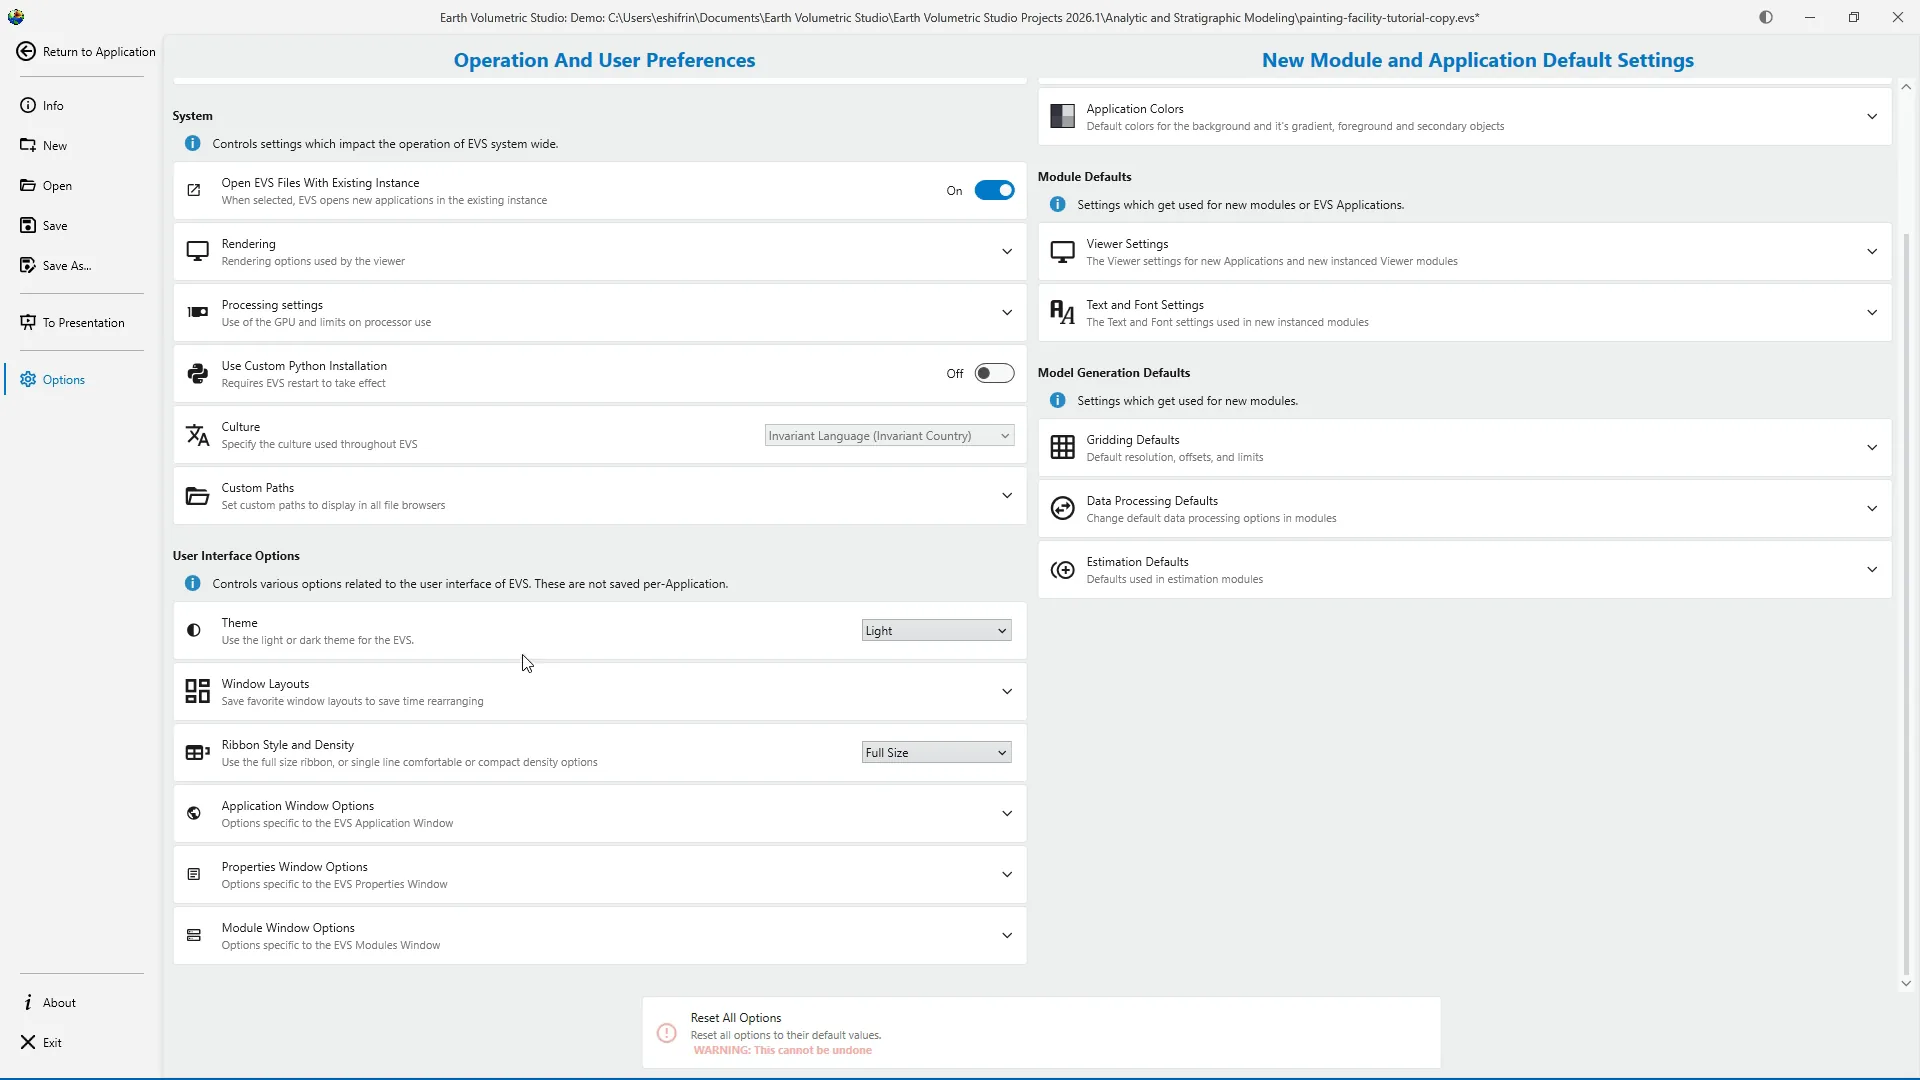
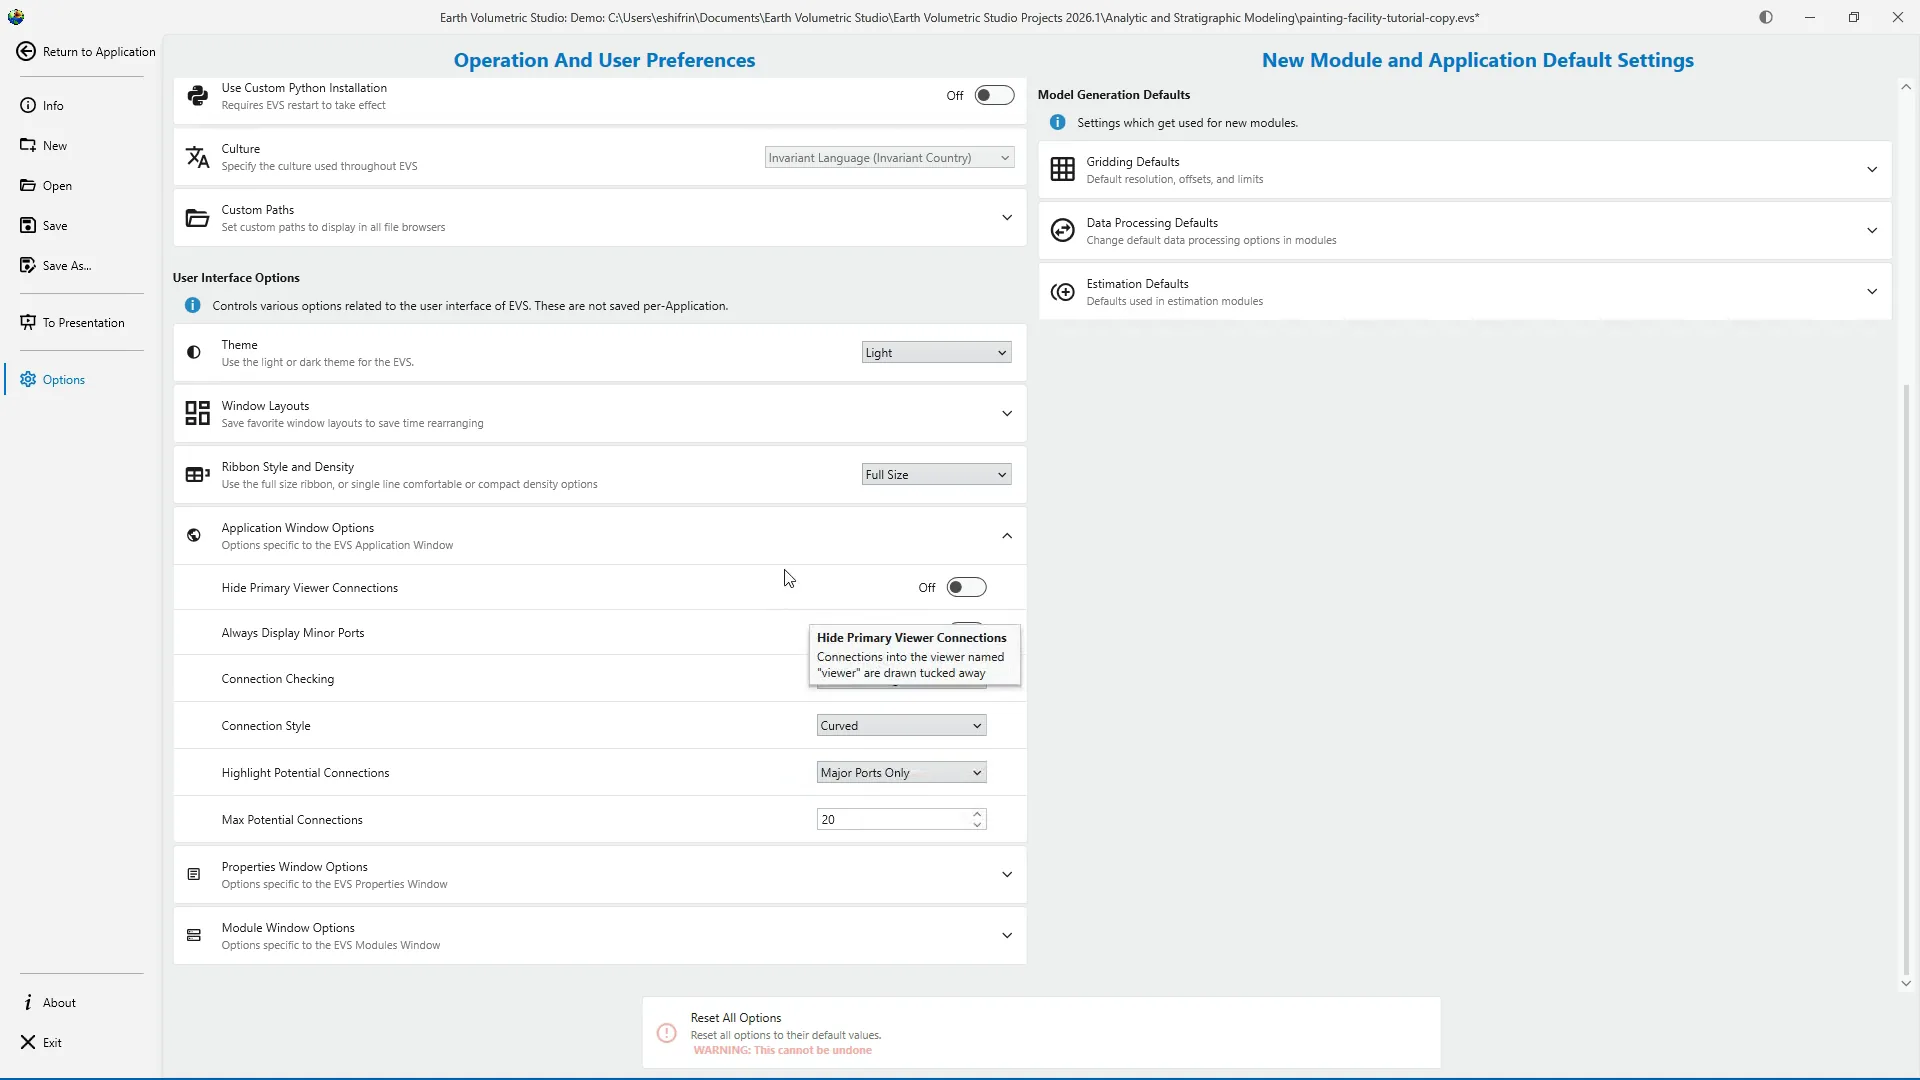
Application Window Options controls how modules, ports, and connections appear in the Application window. These settings can hide Viewer connections, display minor ports, change connection lines between curved and straight styles, and control how EVS highlights potential connections. These options affect the appearance and behavior of the Application window. They don't change the underlying project data.
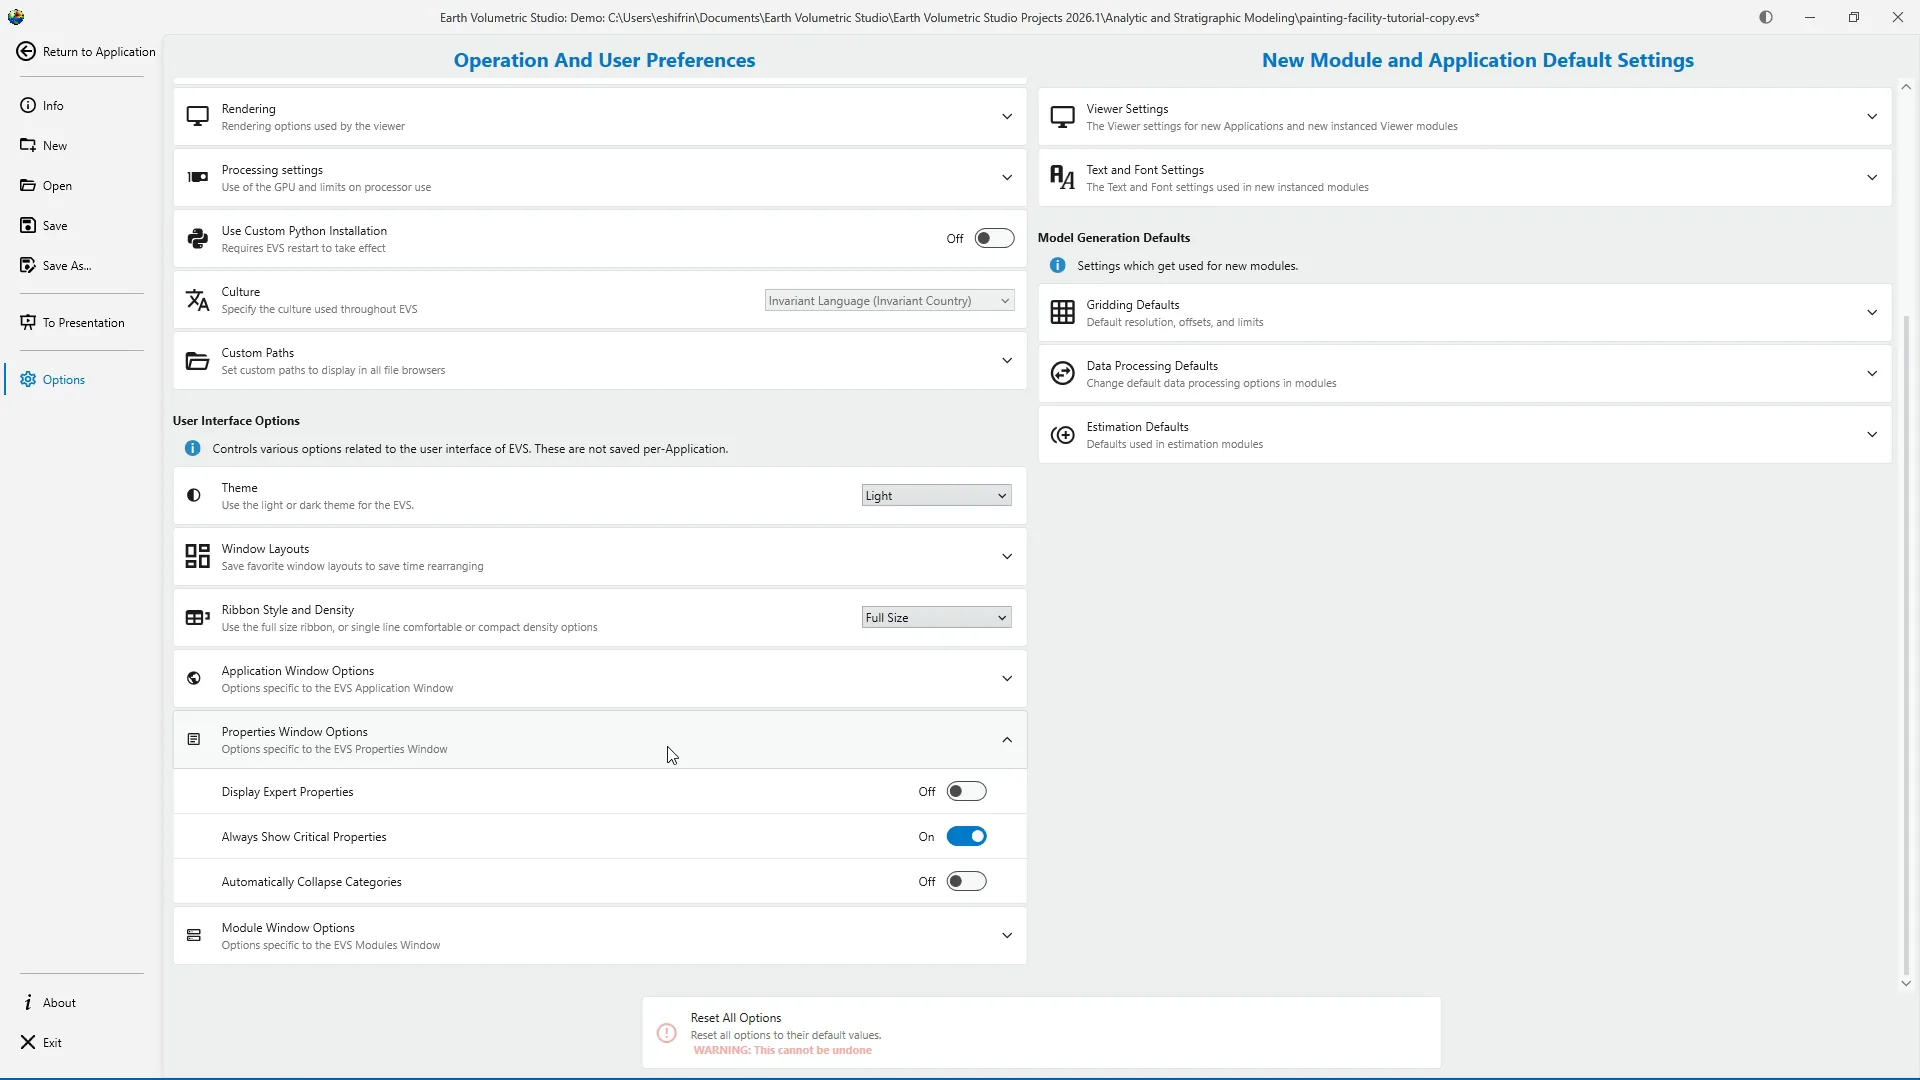
Properties Window Options controls how information appears in the Properties window. Display expert Properties reveals advanced parameters. Always Show Critical Properties keeps important settings visible, and Automatically Collapse Categories collapses property groups when another module is selected. If you're new to EVS, leave Expert Properties hidden until a workflow requires access to those additional settings.
Module Window Options controls what appears in the Modules window. Automatically Collapse Module Categories controls whether module groups begin in a collapsed state.
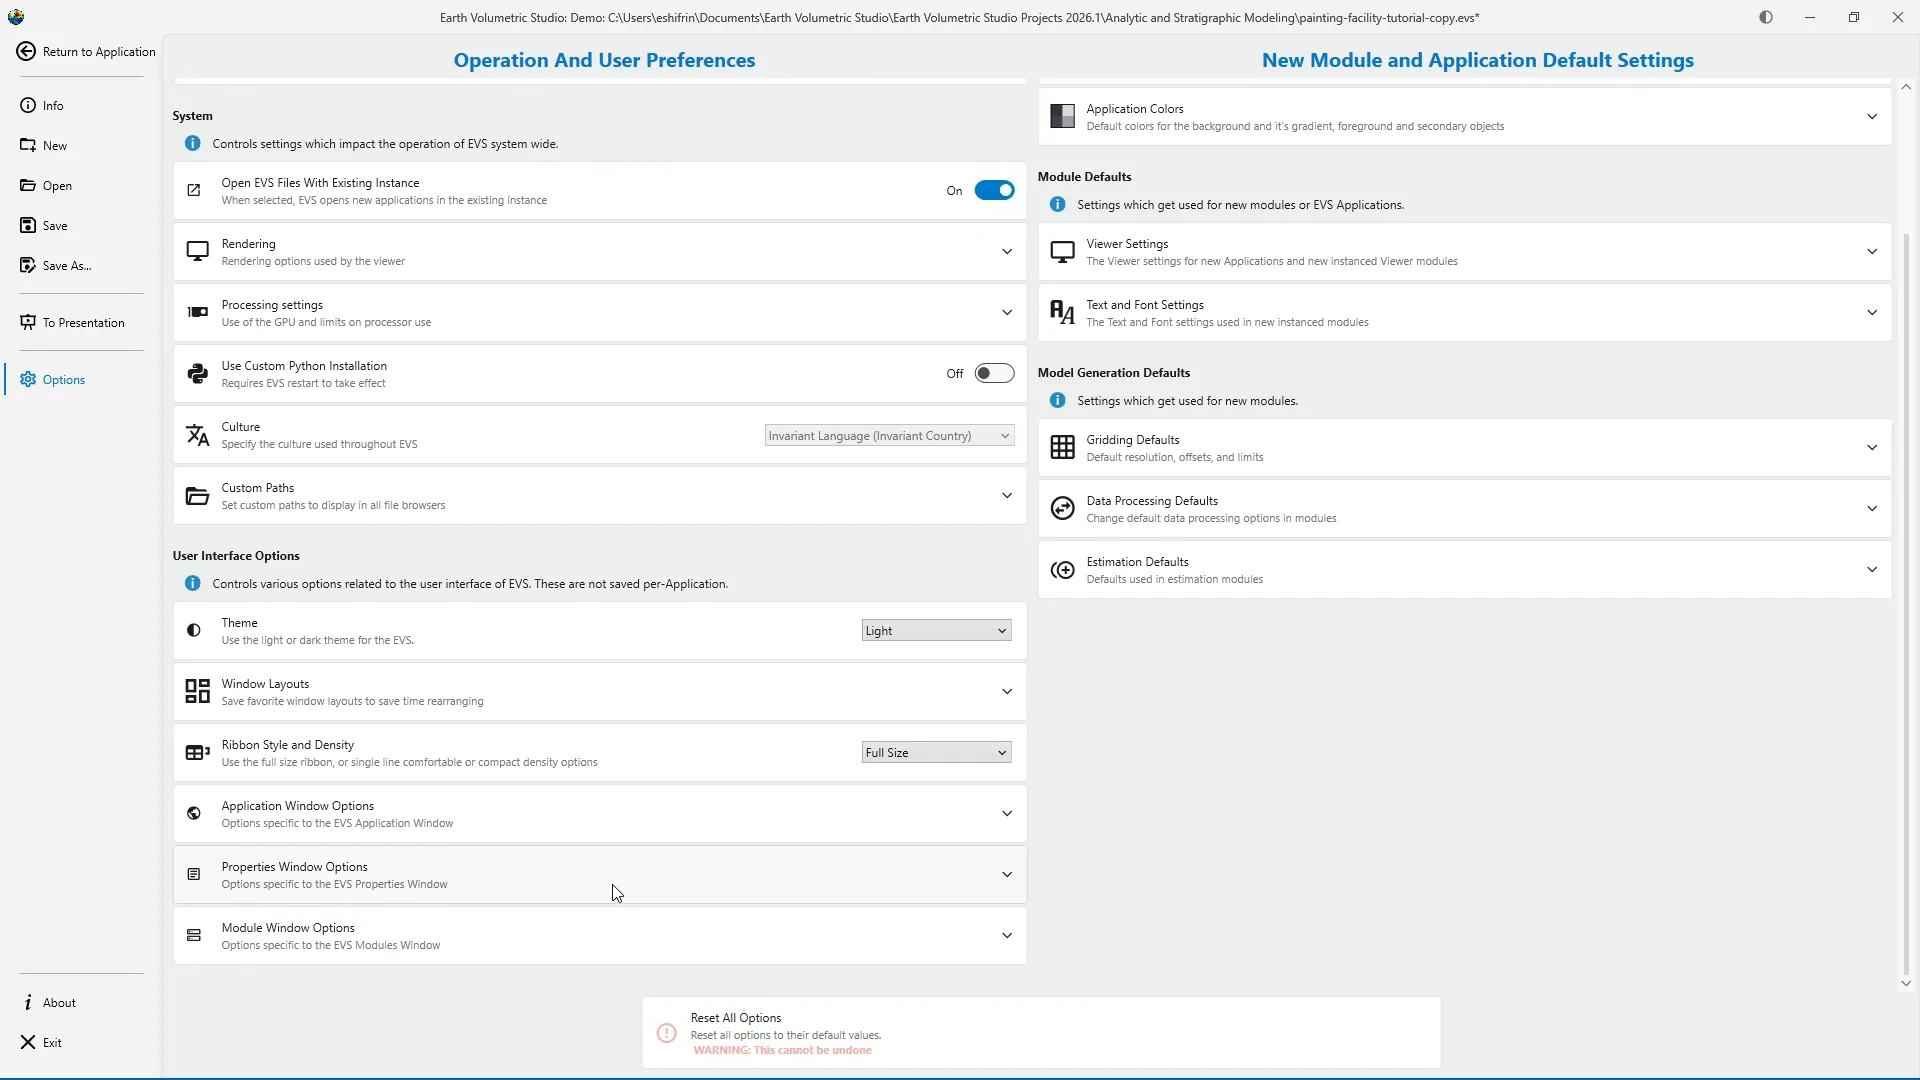
The right side of the page contains the default settings for new applications and modules. These values provide starting points for future work. Changing them doesn't automatically replace settings already saved in the Painting Facility application.
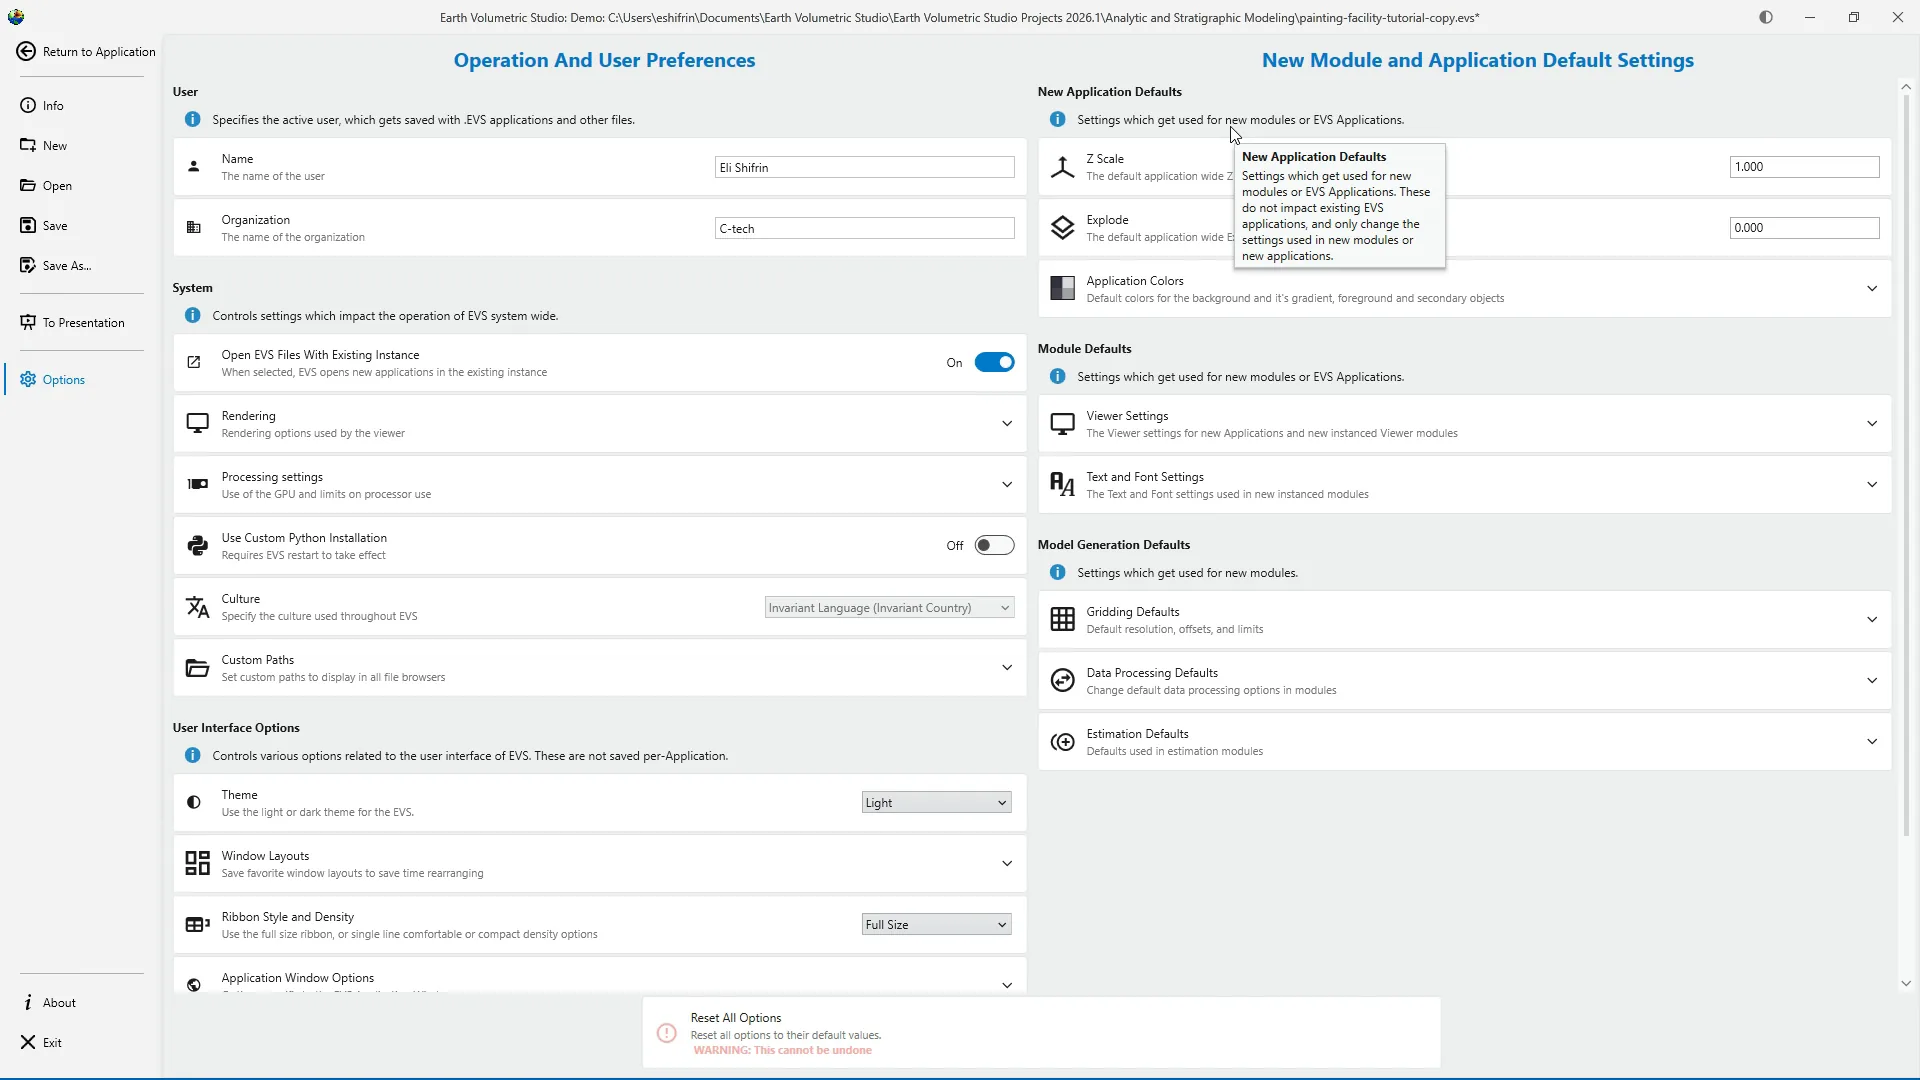
Under New Application Defaults, Z Scale sets the initial vertical exaggeration for new applications. Explode sets the initial explode factor.
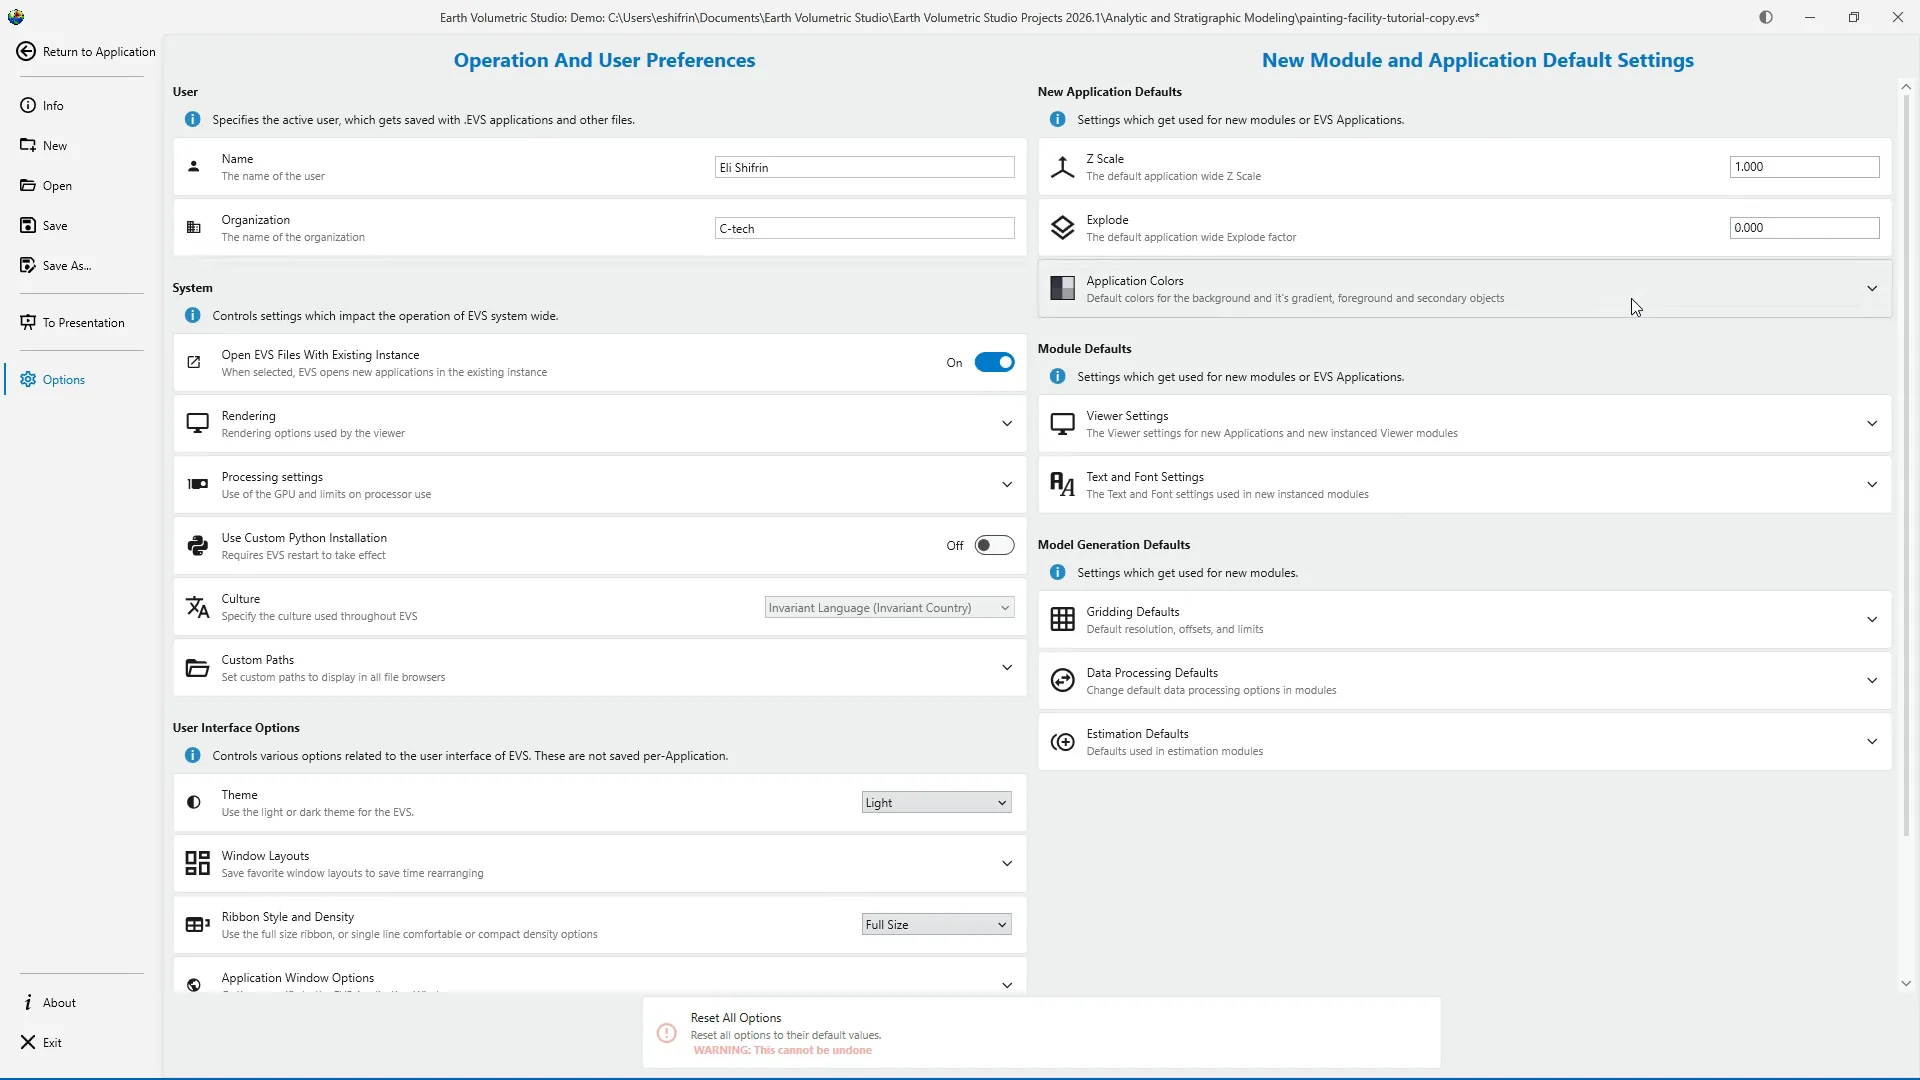
Application Colors defines the initial Viewer background, gradient, foreground, and secondary colors for new applications.
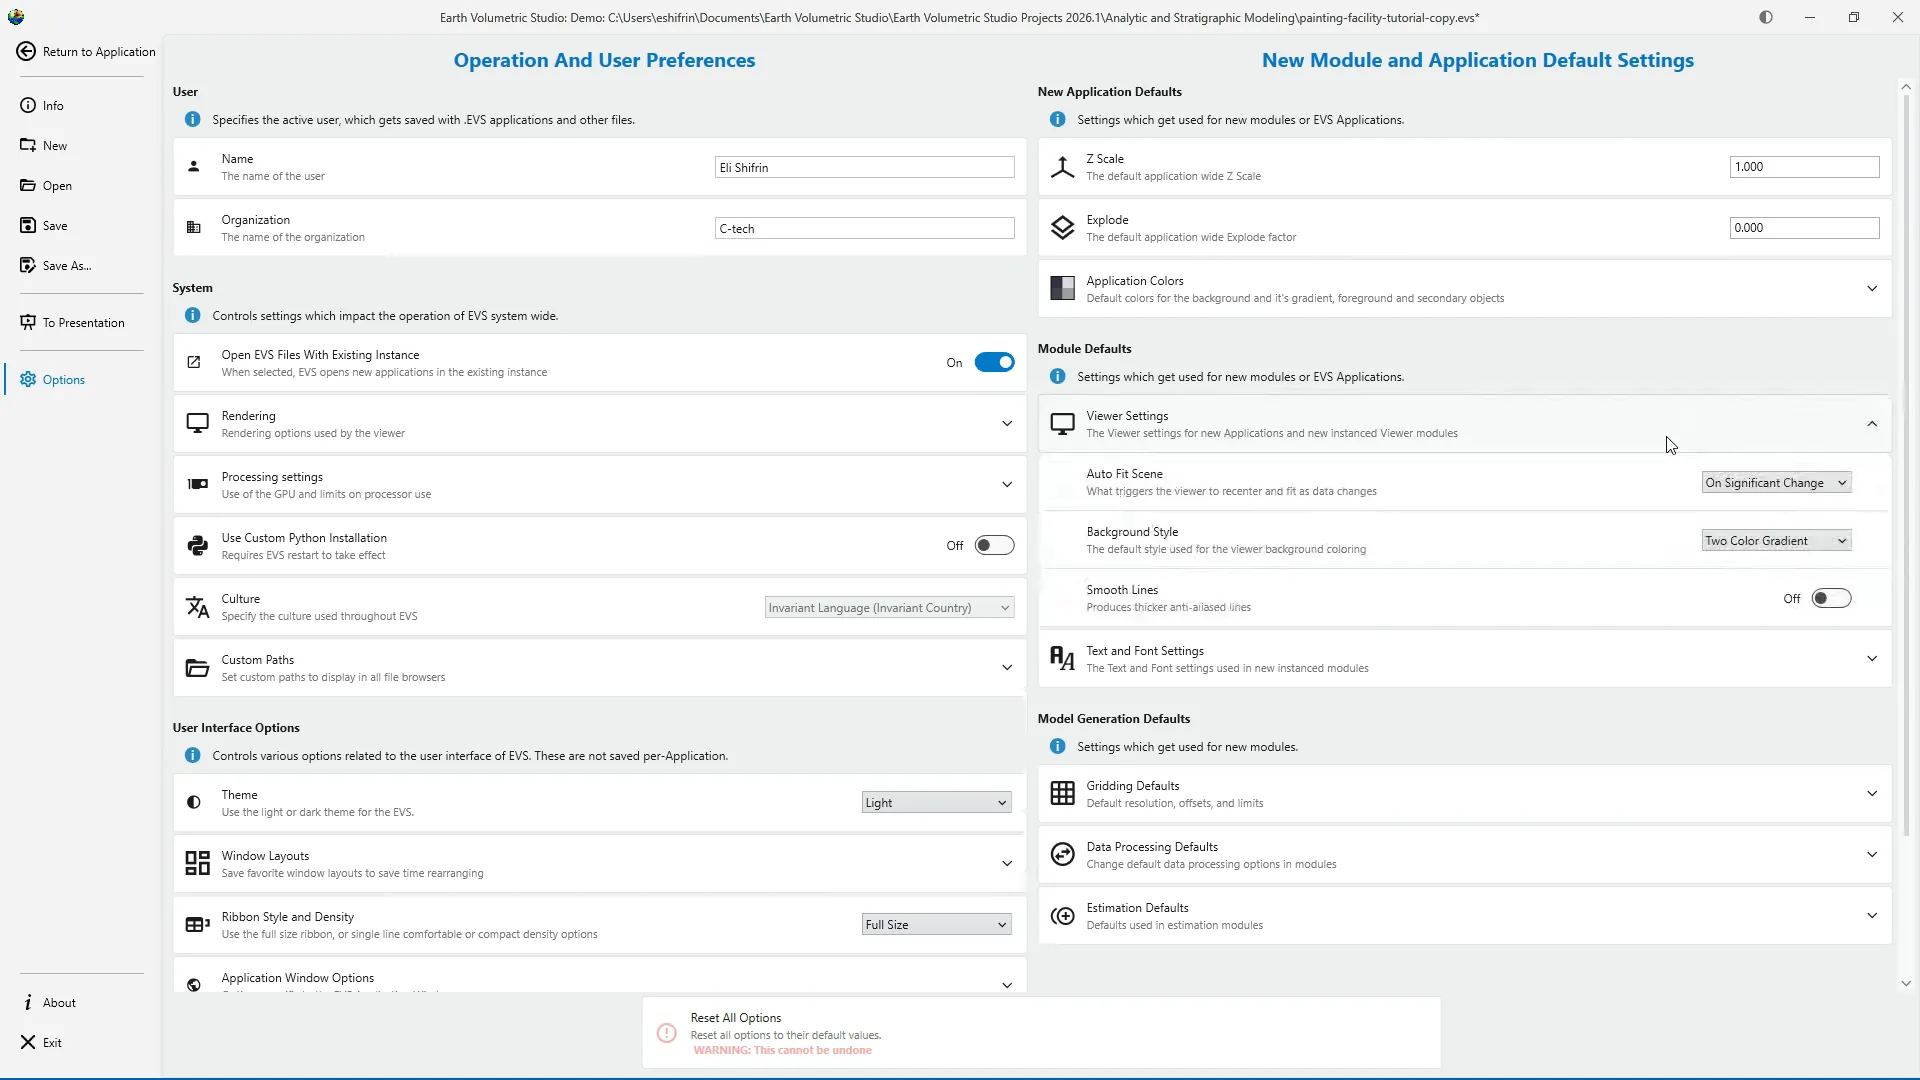
Viewer Settings controls the initial behavior of new Viewer modules. This includes when the scene automatically fits the available view, the default background style, and whether line smoothing is enabled.
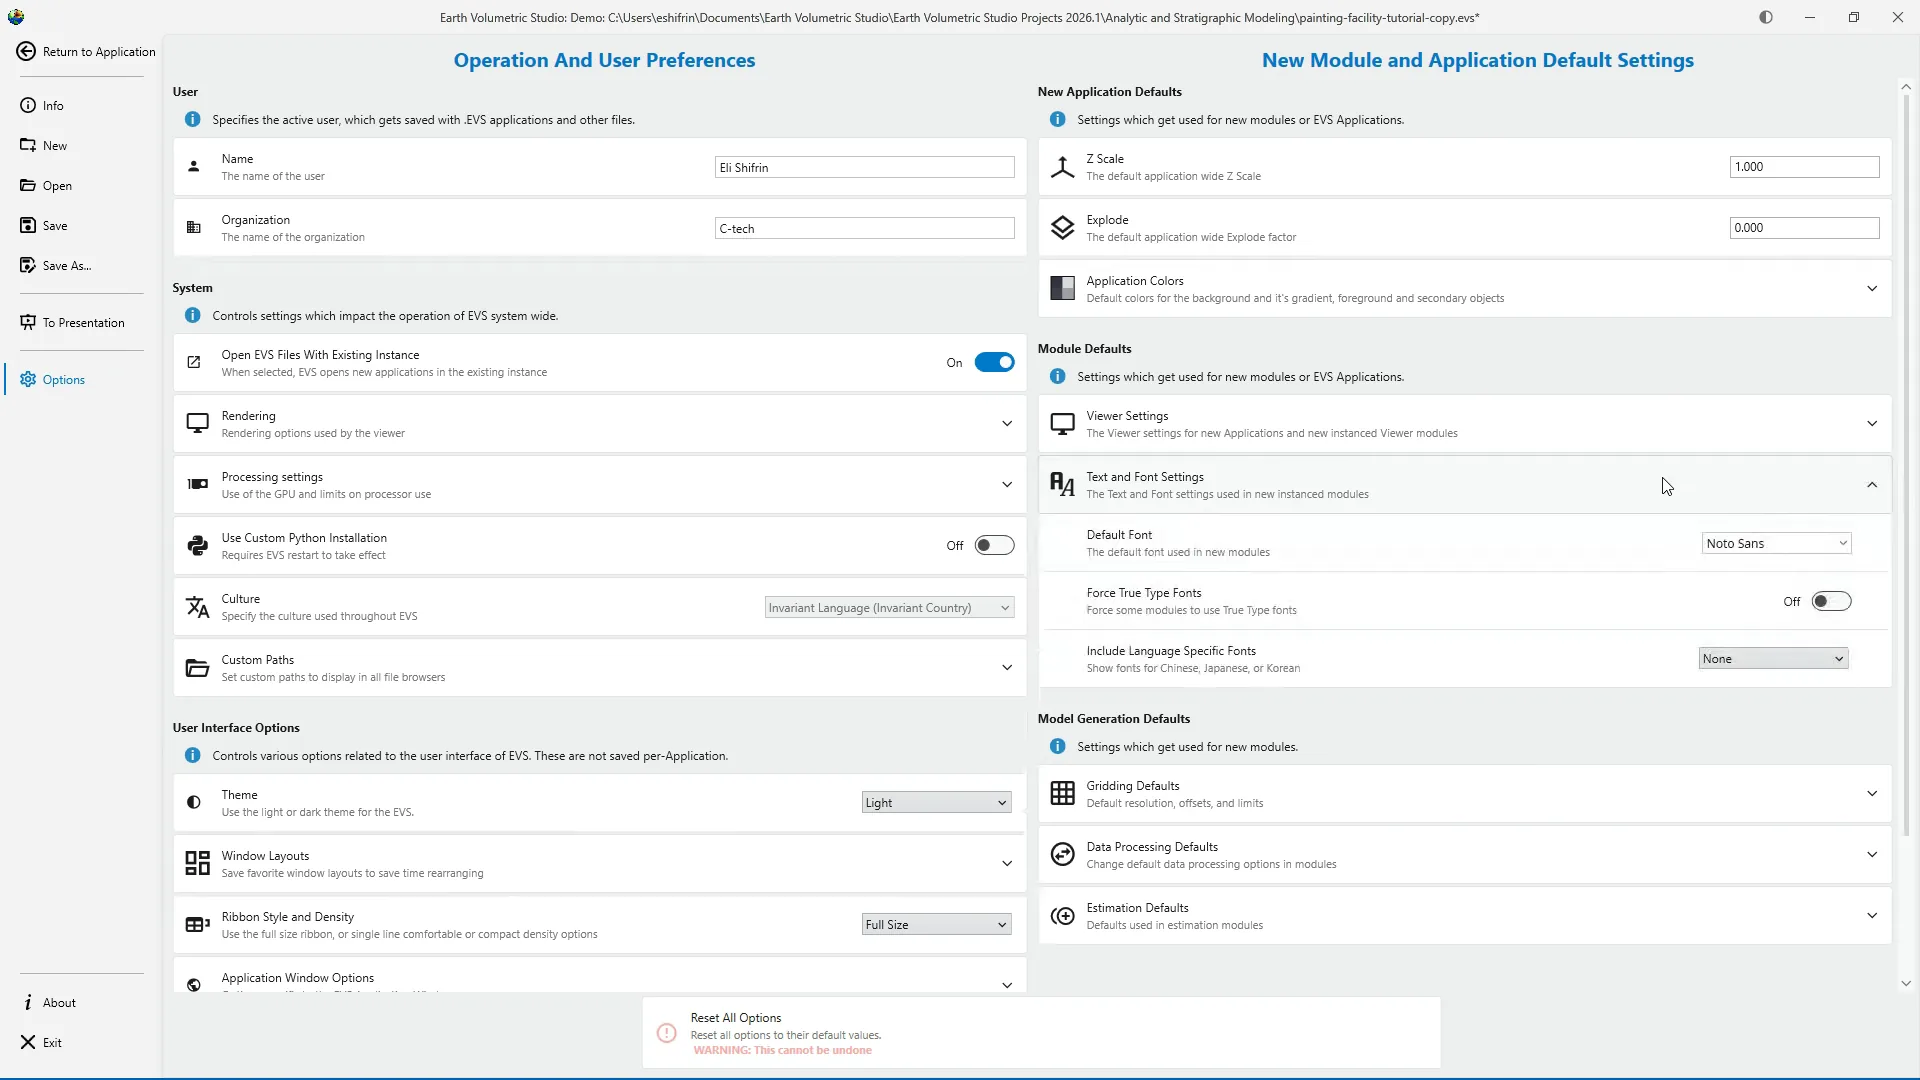
Text and Font Settings defines the initial font options for new modules that display text. This section also includes controls for TrueType fonts and additional language-specific character sets.
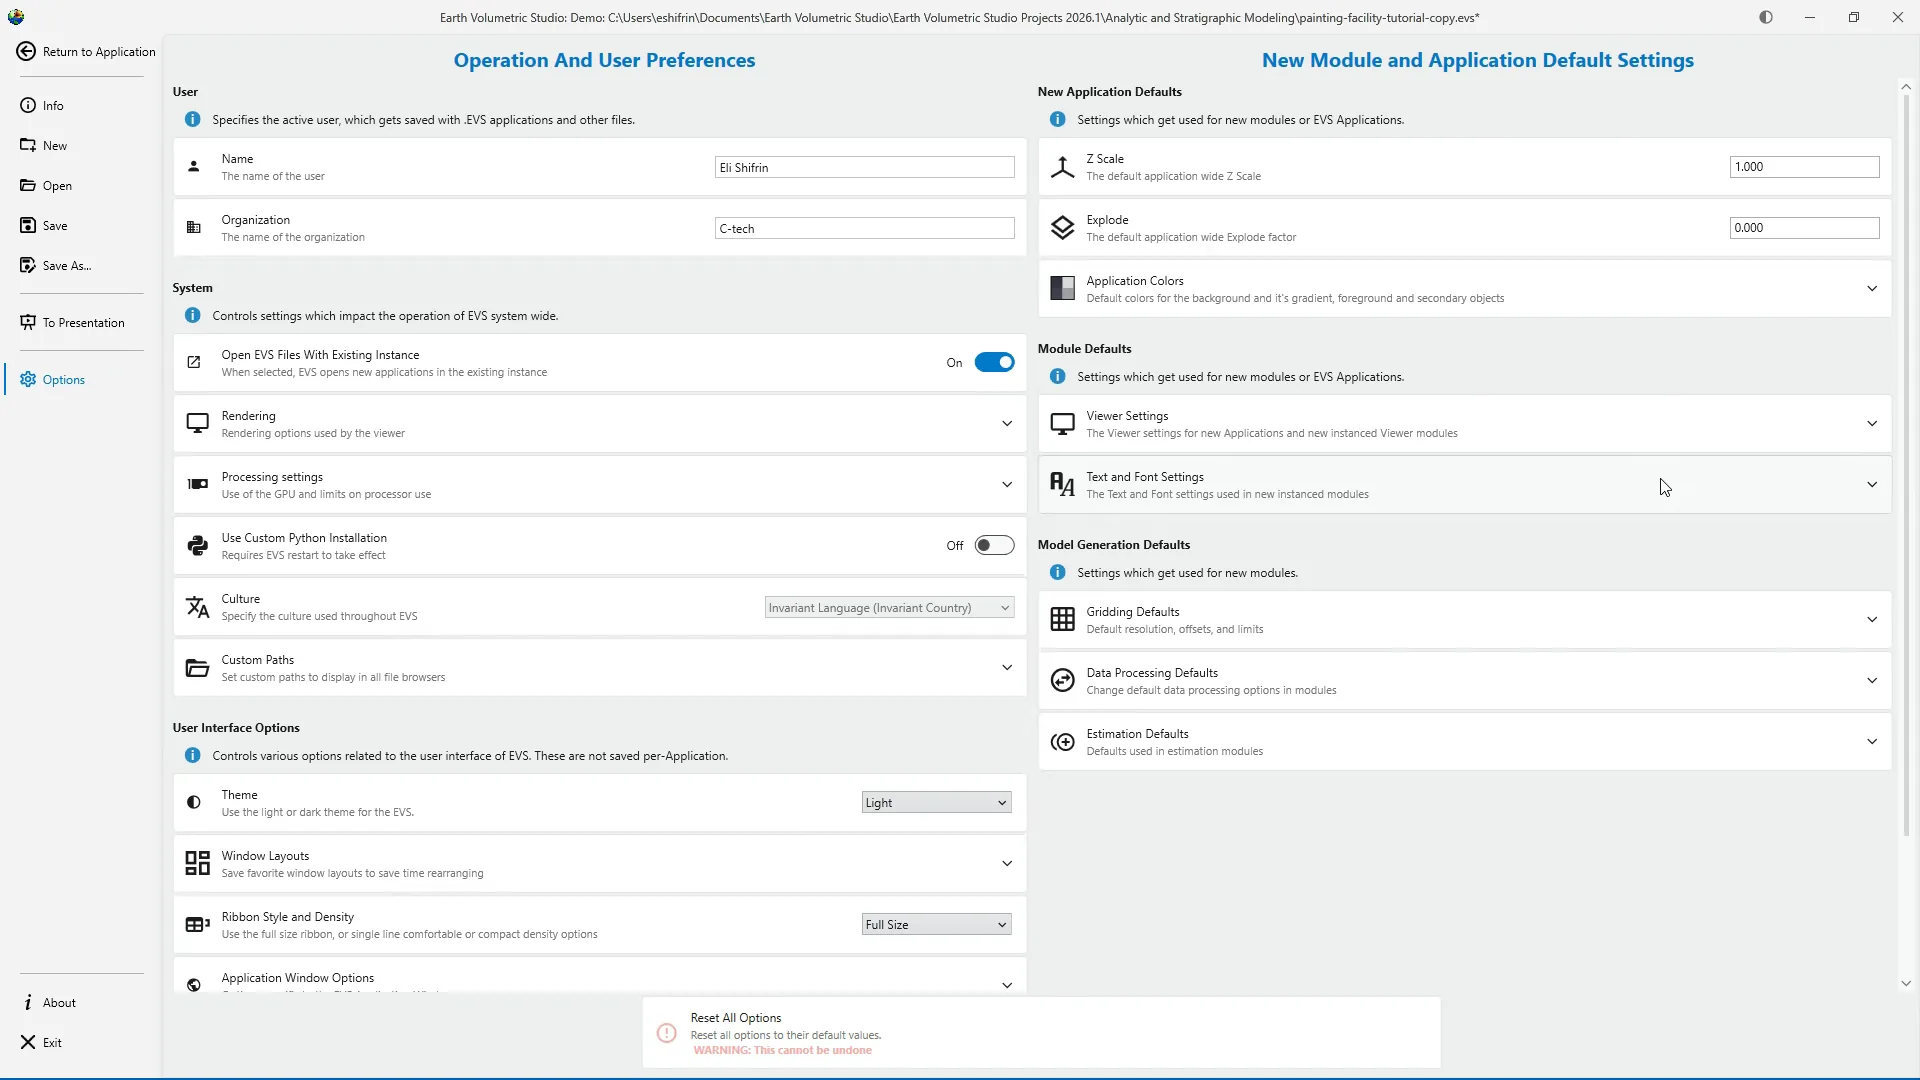
Model Generation Defaults contains technical starting values used by new modeling modules. Because these settings can affect future model generation, they should only be changed when your data, modeling standards, or workflow require different defaults.
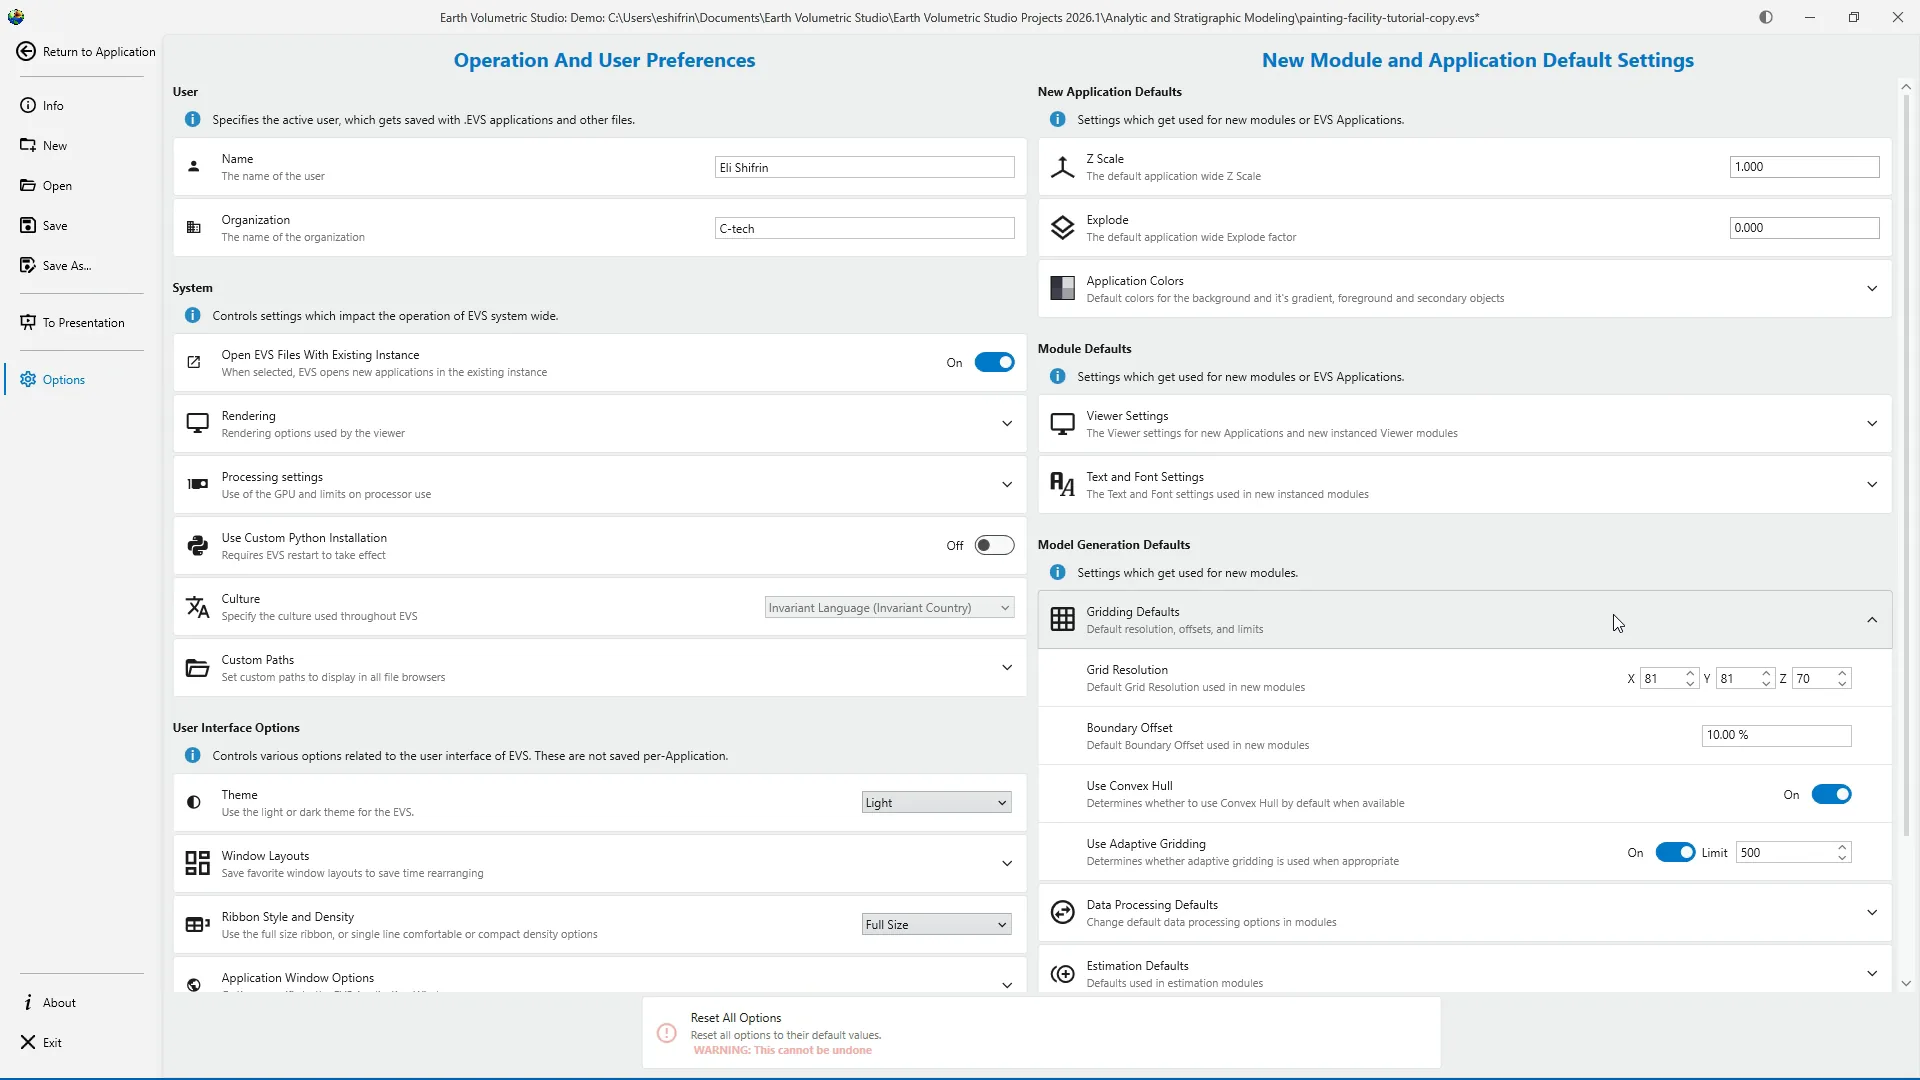
Gridding Defaults defines initial values such as grid resolution, boundary offsets, and adaptive-gridding behavior. These are starting values for new gridding modules. The appropriate settings will still depend on the scale, density, and purpose of each dataset.
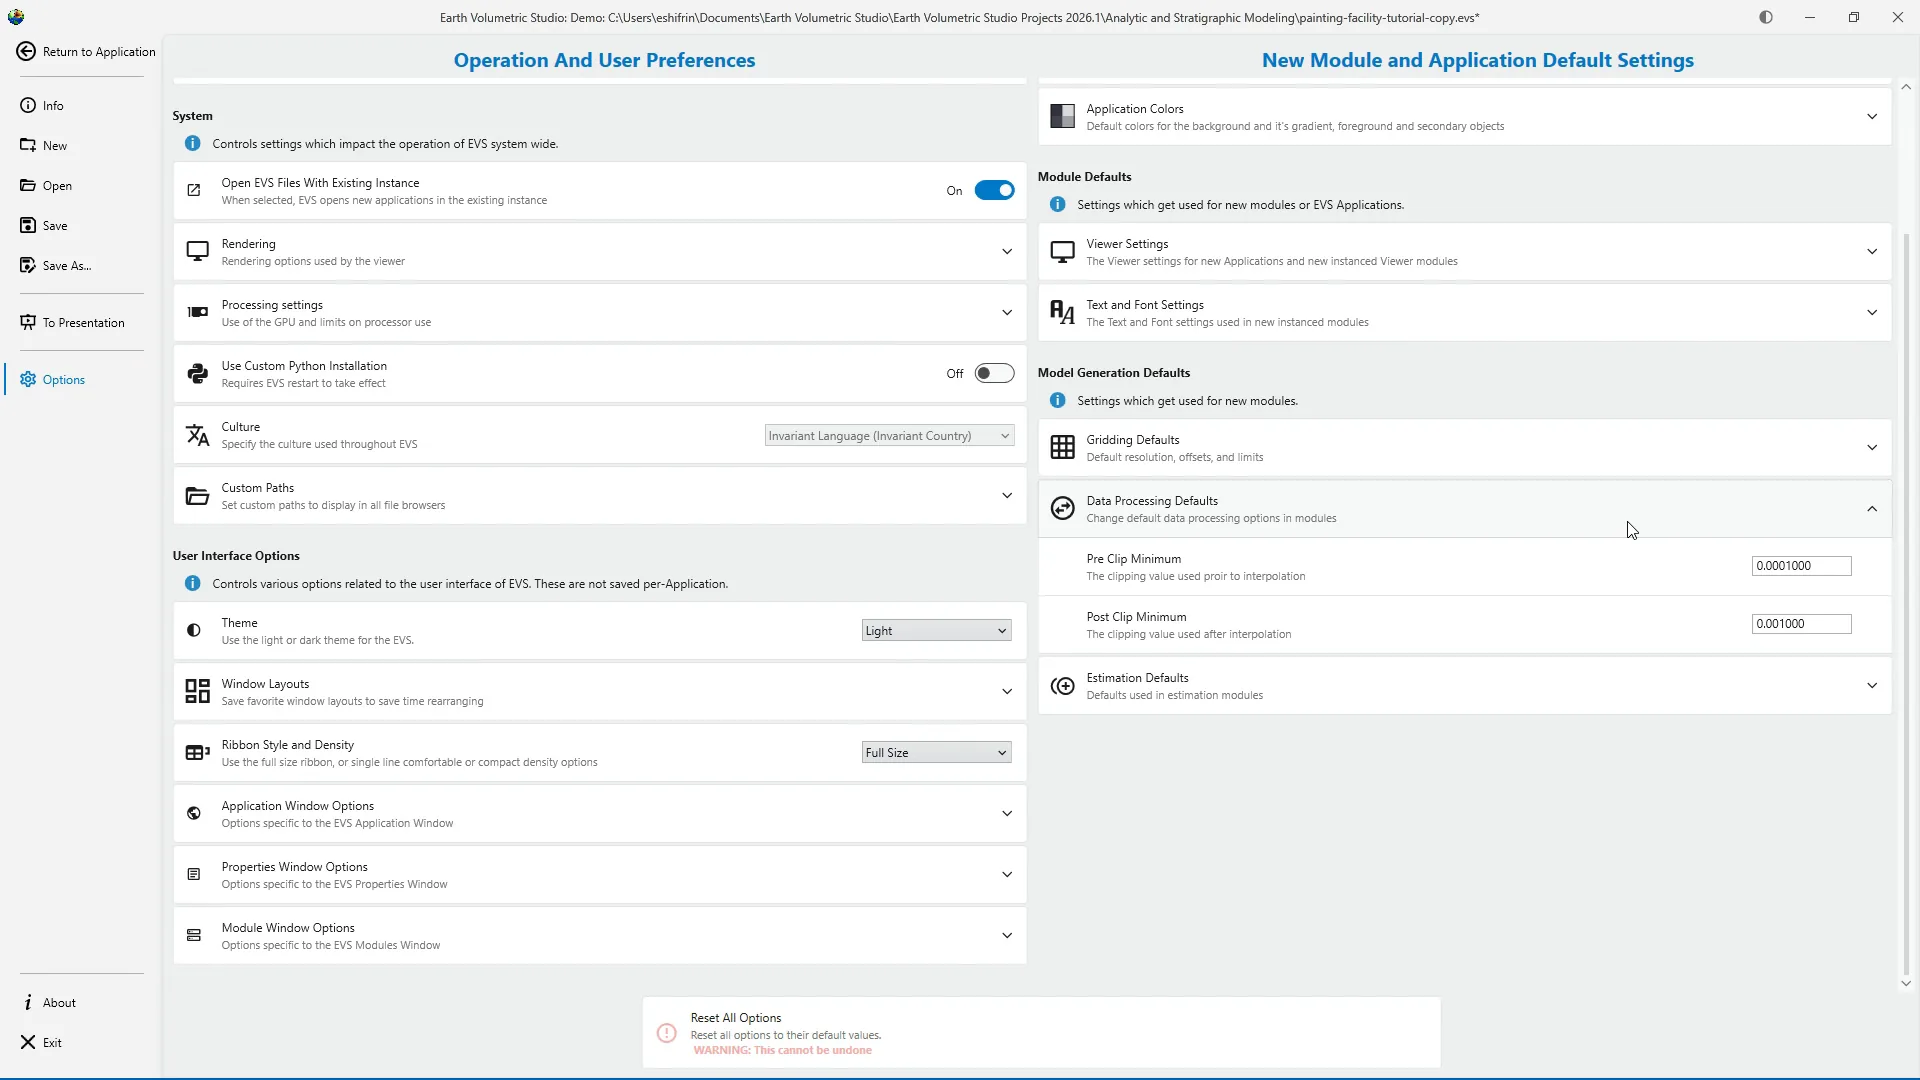
Data Processing Defaults contains initial processing and clipping values used by applicable modules. Clipping can limit which values are processed or retained, so these defaults should be reviewed carefully before changing them.
Estimation Defaults defines starting values for estimation modules. These can include anisotropy, the number of nearby samples used during estimation, and statistical-confidence settings. These are technical modeling parameters. Keep the established defaults unless your modeling requirements call for specific values.
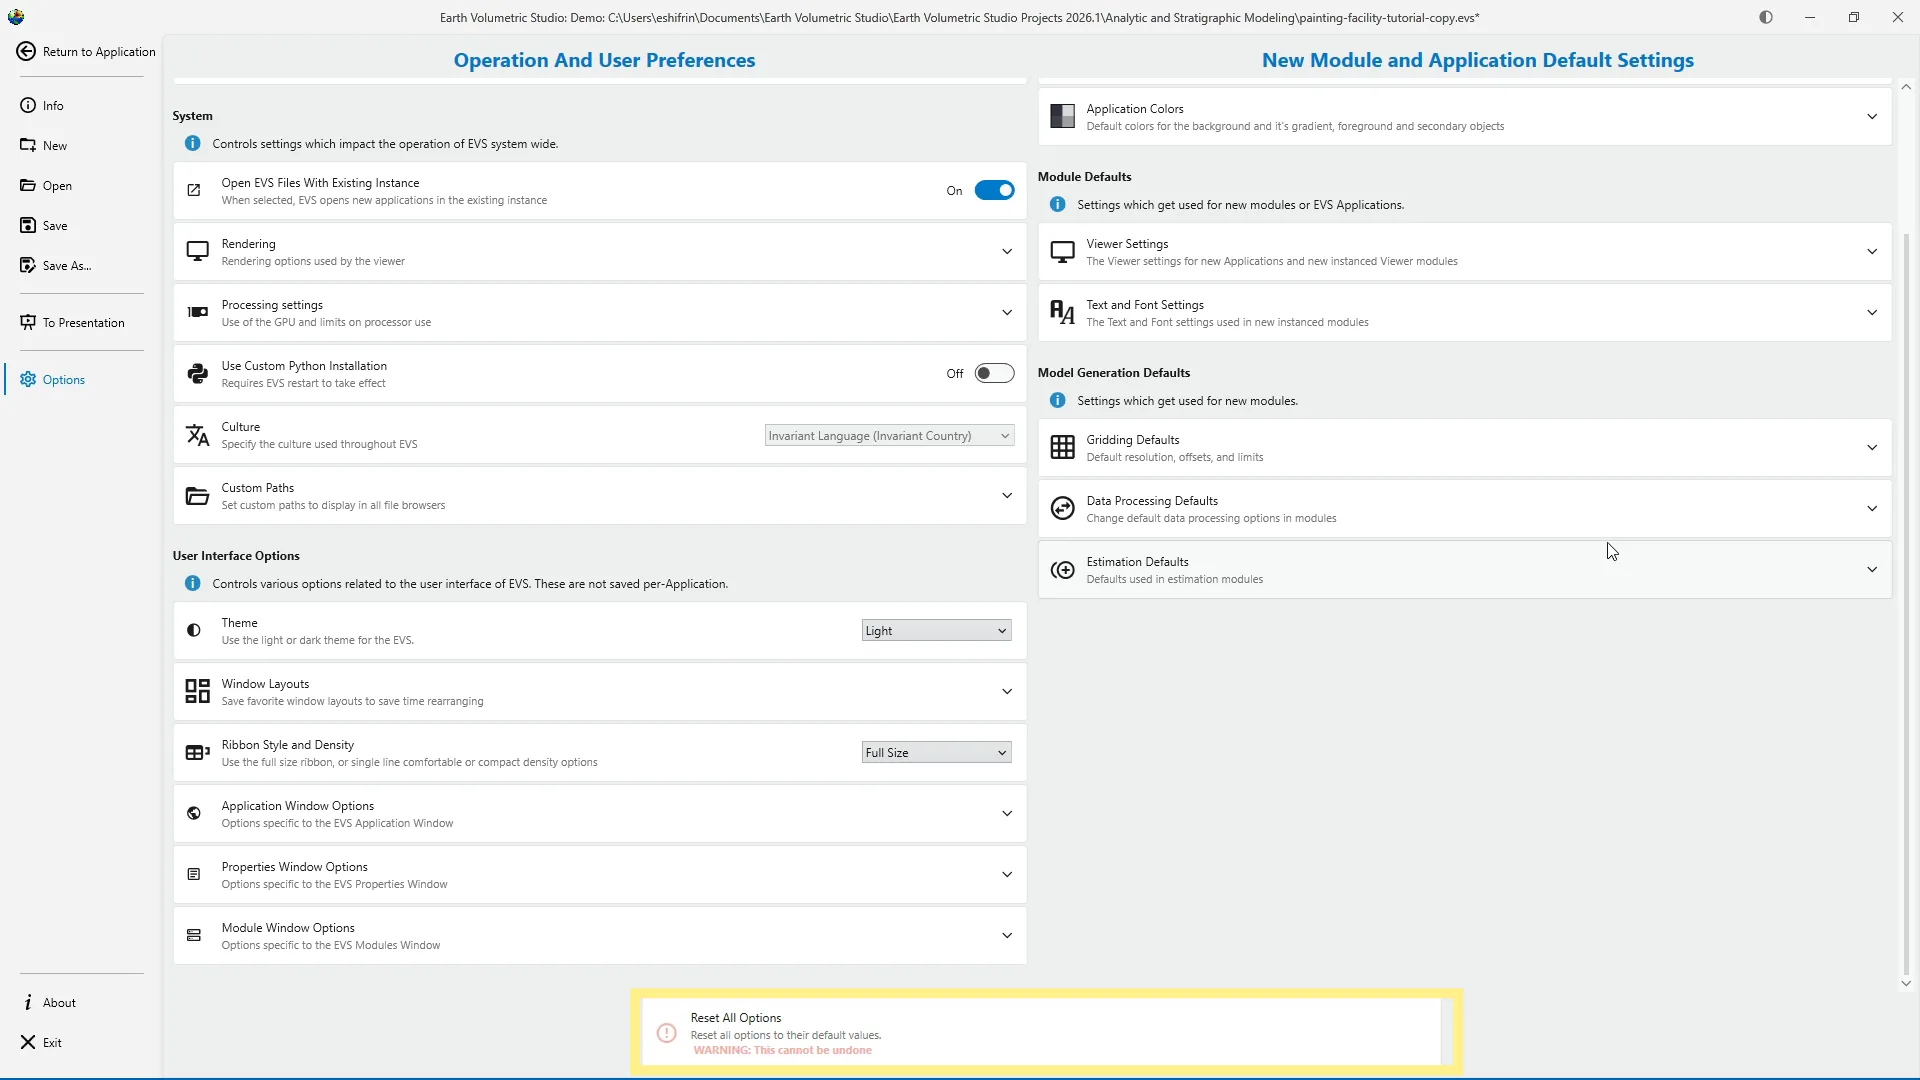
Reset All Options restores the original factory settings across the entire Options page. This action affects every section and cannot be undone, so use it only when you intend to reset all user preferences and default settings.
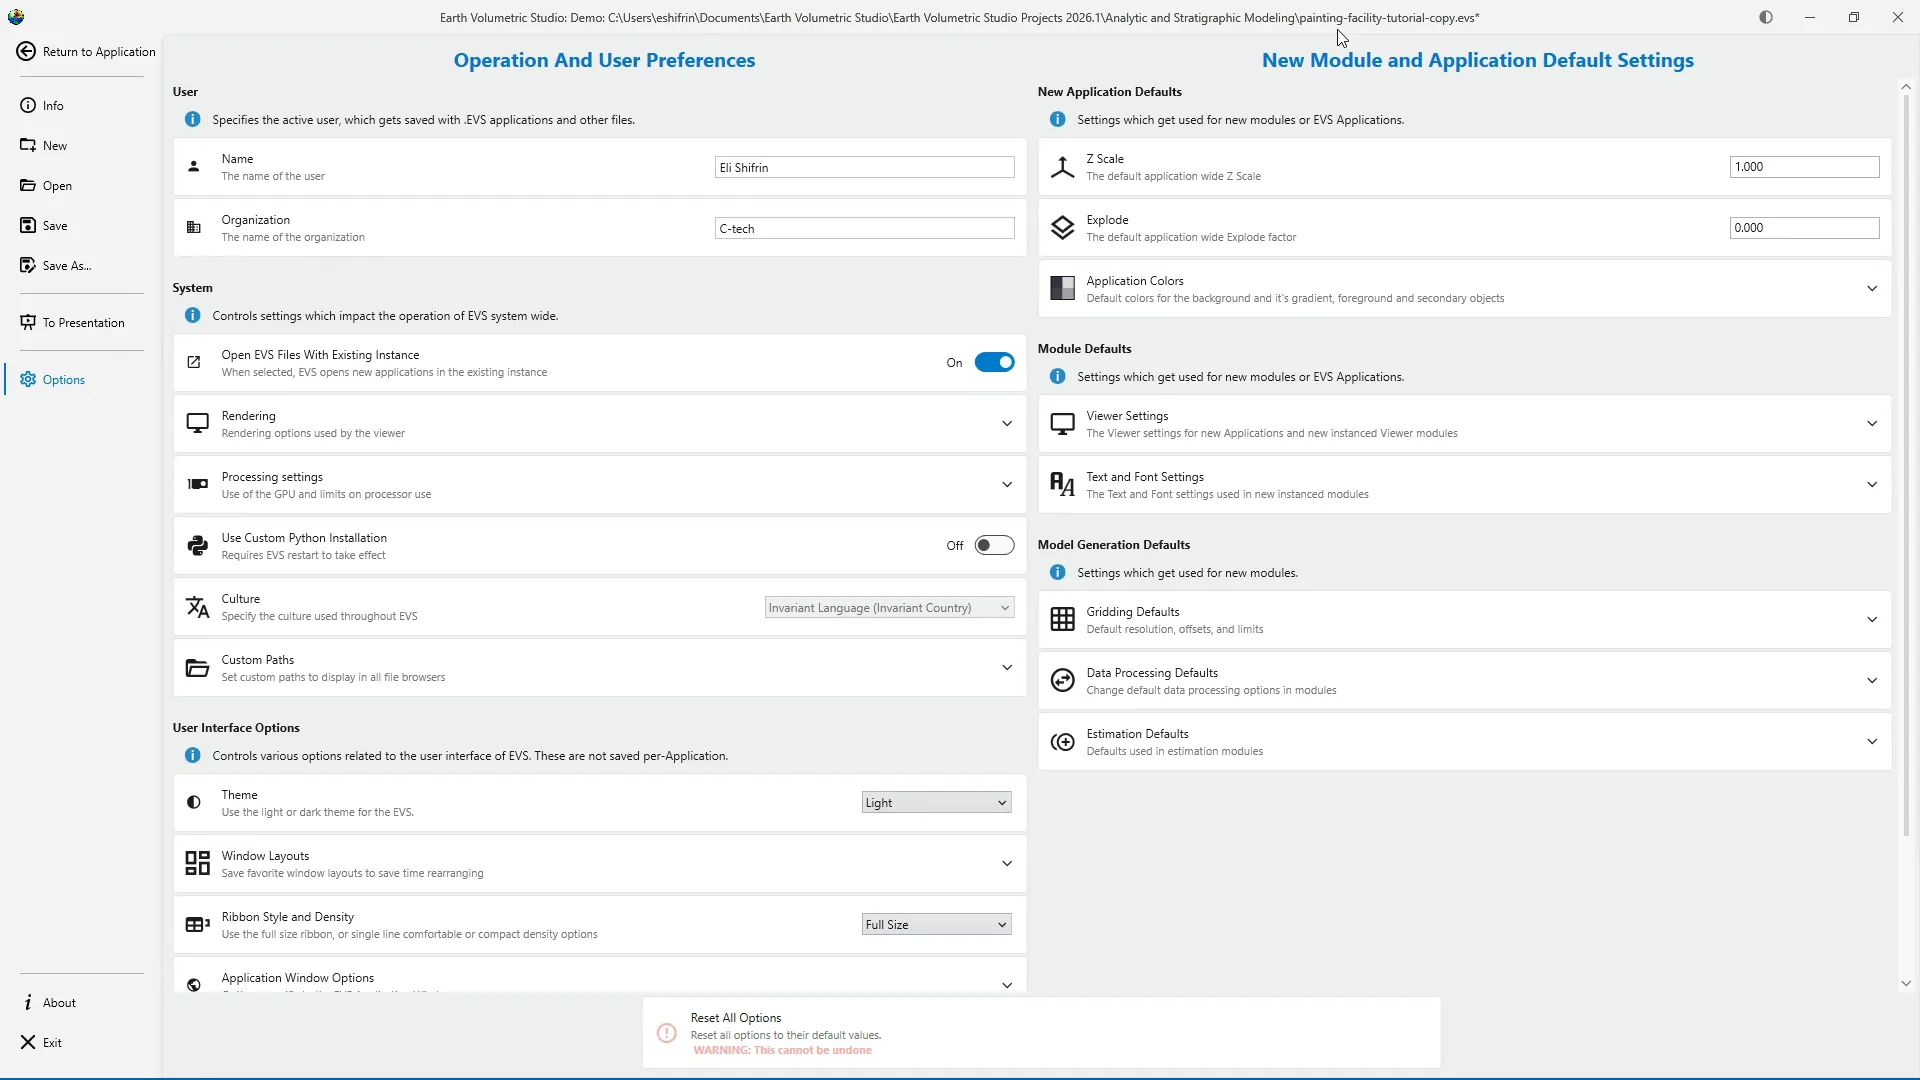
To recap, the left side of Options controls user information, system behavior, data formatting, and interface preferences. The right side defines the starting values for new applications, modules, and model-generation tool .
Thank you for watching.
Introduction
Welcome back to Earth Volumetric Studio. In this tutorial, we'll explore the Options page.
1Intro
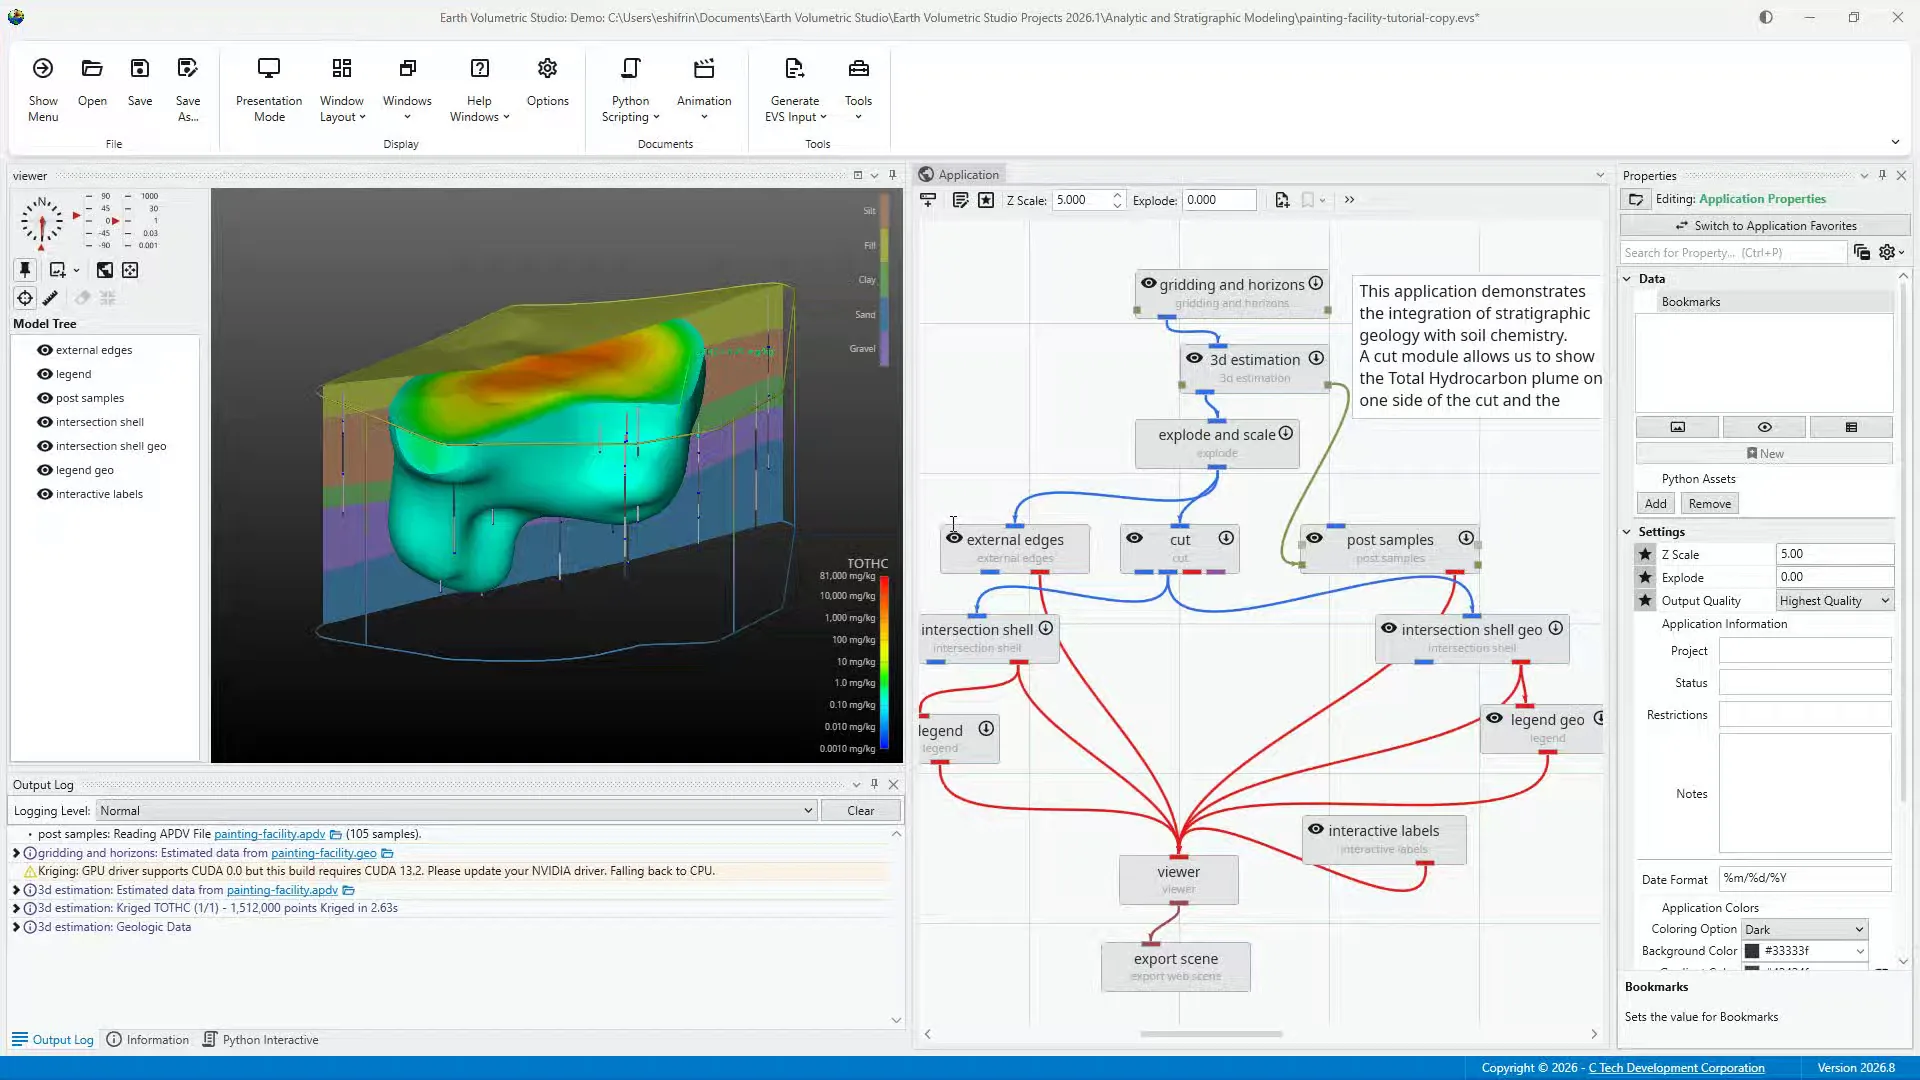
Options controls program-wide preferences, including system behavior, data formatting, interface appearance, and the default settings used for new applications and modules. We'll focus on the organization of this page and the settings most users should recognize. We won't modify the open Painting Facility project.
2Open Options Menu
To open the Options page, select Options from the Display section of the Main Toolbar.
3Options Page Overview
The Options page is divided into two main columns. Operation and User Preferences appears on the left, while New Module and Application Default Settings appears on the right. The settings on the left control how EVS operates for the current user. The settings on the right define the starting values used when new applications and modules are created.
4User Section
The User section identifies the active EVS user. Enter your name and organization in the fields provided. This information can be saved as metadata with EVS applications and other output files, helping identify the person and organization associated with the project.
5Open EVS Files with Existing Instance
The System section contains preferences that affect how EVS operates. Open EVS Files With Existing Instance determines what happens when an EVS file is opened from Windows File Explorer. When this setting is enabled, the project opens in the EVS session that is already running. When it's disabled, EVS opens a new program instance.
6Rendering Section
The Rendering section contains options used by the Viewer when displaying visualizations. These settings can affect graphical behavior and performance. Unless you have a specific display requirement or are troubleshooting a rendering problem, you can normally leave them at their established values.
7Processing Settings
You can reserve one or more logical processors for Windows and other programs. This can help the computer remain responsive while EVS performs demanding calculations. EVS can also use a supported graphics processor to accelerate certain calculations. The GPU setting is intended for advanced troubleshooting and can significantly reduce performance, so it should normally remain unchanged unless recommended by technical support.
8Custom Python Installation
Use Custom Python Installation allows advanced users to connect EVS to a compatible Python installation instead of the version provided with EVS. Changing this setting requires EVS to restart. If you don't have a specific scripting requirement, leave the custom Python option turned off.
9Culture setting
The Culture setting controls the language and regional formatting used throughout EVS. This includes how numbers, dates, and times are displayed. For this tutorial series, set Culture to Invariant Language, Invariant Country. This provides a consistent, country-independent format for values. It helps prevent confusion when data moves between users or systems that may use different conventions for decimal points, commas, dates, or number grouping. Using the invariant option helps ensure that the values shown in EVS are interpreted consistently throughout these tutorials. If your organization requires a specific regional standard, follow that standard instead.
10Custom Paths
Custom Paths lets you create shortcuts to folders you use frequently. Once a custom path is added, it can appear in the EVS Open menu and other file browsers. This can make project and data folders easier to access without browsing to the same location each time.
11System
The next group contains preferences for the appearance and behavior of the EVS user interface. These are user preferences and are not saved separately with each application.
12Theme
Theme switches the EVS interface between light and dark appearances. This is the same interface preference controlled by the half-moon toggle in the upper-right corner of EVS. Changing the theme affects the appearance of the workspace, but it doesn't change the colors of the project visualization.
13Window Layouts
Window Layouts is used to save, apply, update, and remove customized arrangements of the EVS windows. We'll cover this section in the dedicated Window Layout tutorial, so we'll leave it unchanged for now.
14Ribbon Style and Density
Ribbon Style and Density changes the size and appearance of the Main Toolbar. Full Size displays large icons with text labels. Comfortable uses smaller icons while retaining the labels. Compact saves the most space by displaying icons without text. These controls can also be opened from the arrow at the right end of the Main Toolbar.
15Application Window Options
Application Window Options controls how modules, ports, and connections appear in the Application window. These settings can hide Viewer connections, display minor ports, change connection lines between curved and straight styles, and control how EVS highlights potential connections. These options affect the appearance and behavior of the Application window. They don't change the underlying project data.
16Properties Window Options
Properties Window Options controls how information appears in the Properties window. Display expert Properties reveals advanced parameters. Always Show Critical Properties keeps important settings visible, and Automatically Collapse Categories collapses property groups when another module is selected. If you're new to EVS, leave Expert Properties hidden until a workflow requires access to those additional settings.
17Module Window Options
Module Window Options controls what appears in the Modules window. Automatically Collapse Module Categories controls whether module groups begin in a collapsed state.
18New Application Defaults
The right side of the page contains the default settings for new applications and modules. These values provide starting points for future work. Changing them doesn't automatically replace settings already saved in the Painting Facility application.
19Z Scale and Explode
Under New Application Defaults, Z Scale sets the initial vertical exaggeration for new applications. Explode sets the initial explode factor.
20Application Colors
Application Colors defines the initial Viewer background, gradient, foreground, and secondary colors for new applications.
21Viewer Settings
Viewer Settings controls the initial behavior of new Viewer modules. This includes when the scene automatically fits the available view, the default background style, and whether line smoothing is enabled.
22Text and Font Settings
Text and Font Settings defines the initial font options for new modules that display text. This section also includes controls for TrueType fonts and additional language-specific character sets.
23Model Generation Defaults
Model Generation Defaults contains technical starting values used by new modeling modules. Because these settings can affect future model generation, they should only be changed when your data, modeling standards, or workflow require different defaults.
24Gridding Defaults
Gridding Defaults defines initial values such as grid resolution, boundary offsets, and adaptive-gridding behavior. These are starting values for new gridding modules. The appropriate settings will still depend on the scale, density, and purpose of each dataset.
25Data Processing Defaults
Data Processing Defaults contains initial processing and clipping values used by applicable modules. Clipping can limit which values are processed or retained, so these defaults should be reviewed carefully before changing them.
26Estimation Defaults
Estimation Defaults defines starting values for estimation modules. These can include anisotropy, the number of nearby samples used during estimation, and statistical-confidence settings. These are technical modeling parameters. Keep the established defaults unless your modeling requirements call for specific values.
27Reset All Options
Reset All Options restores the original factory settings across the entire Options page. This action affects every section and cannot be undone, so use it only when you intend to reset all user preferences and default settings.
28Recap
To recap, the left side of Options controls user information, system behavior, data formatting, and interface preferences. The right side defines the starting values for new applications, modules, and model-generation tool .
Summary
Thank you for watching.