
Step 1 of 27 Getting Oriented in Earth Volumetric Studio Application
Welcome to Earth Volumetric Studio, or EVS. In this tutorial we'll open a sample project and take a tour of the workspace. We'll also move a window so you can see how to arrange EVS for the way you like to work. For the Demo version of EVS to work best, make sure you have the sample projects downloaded from ctech.com.
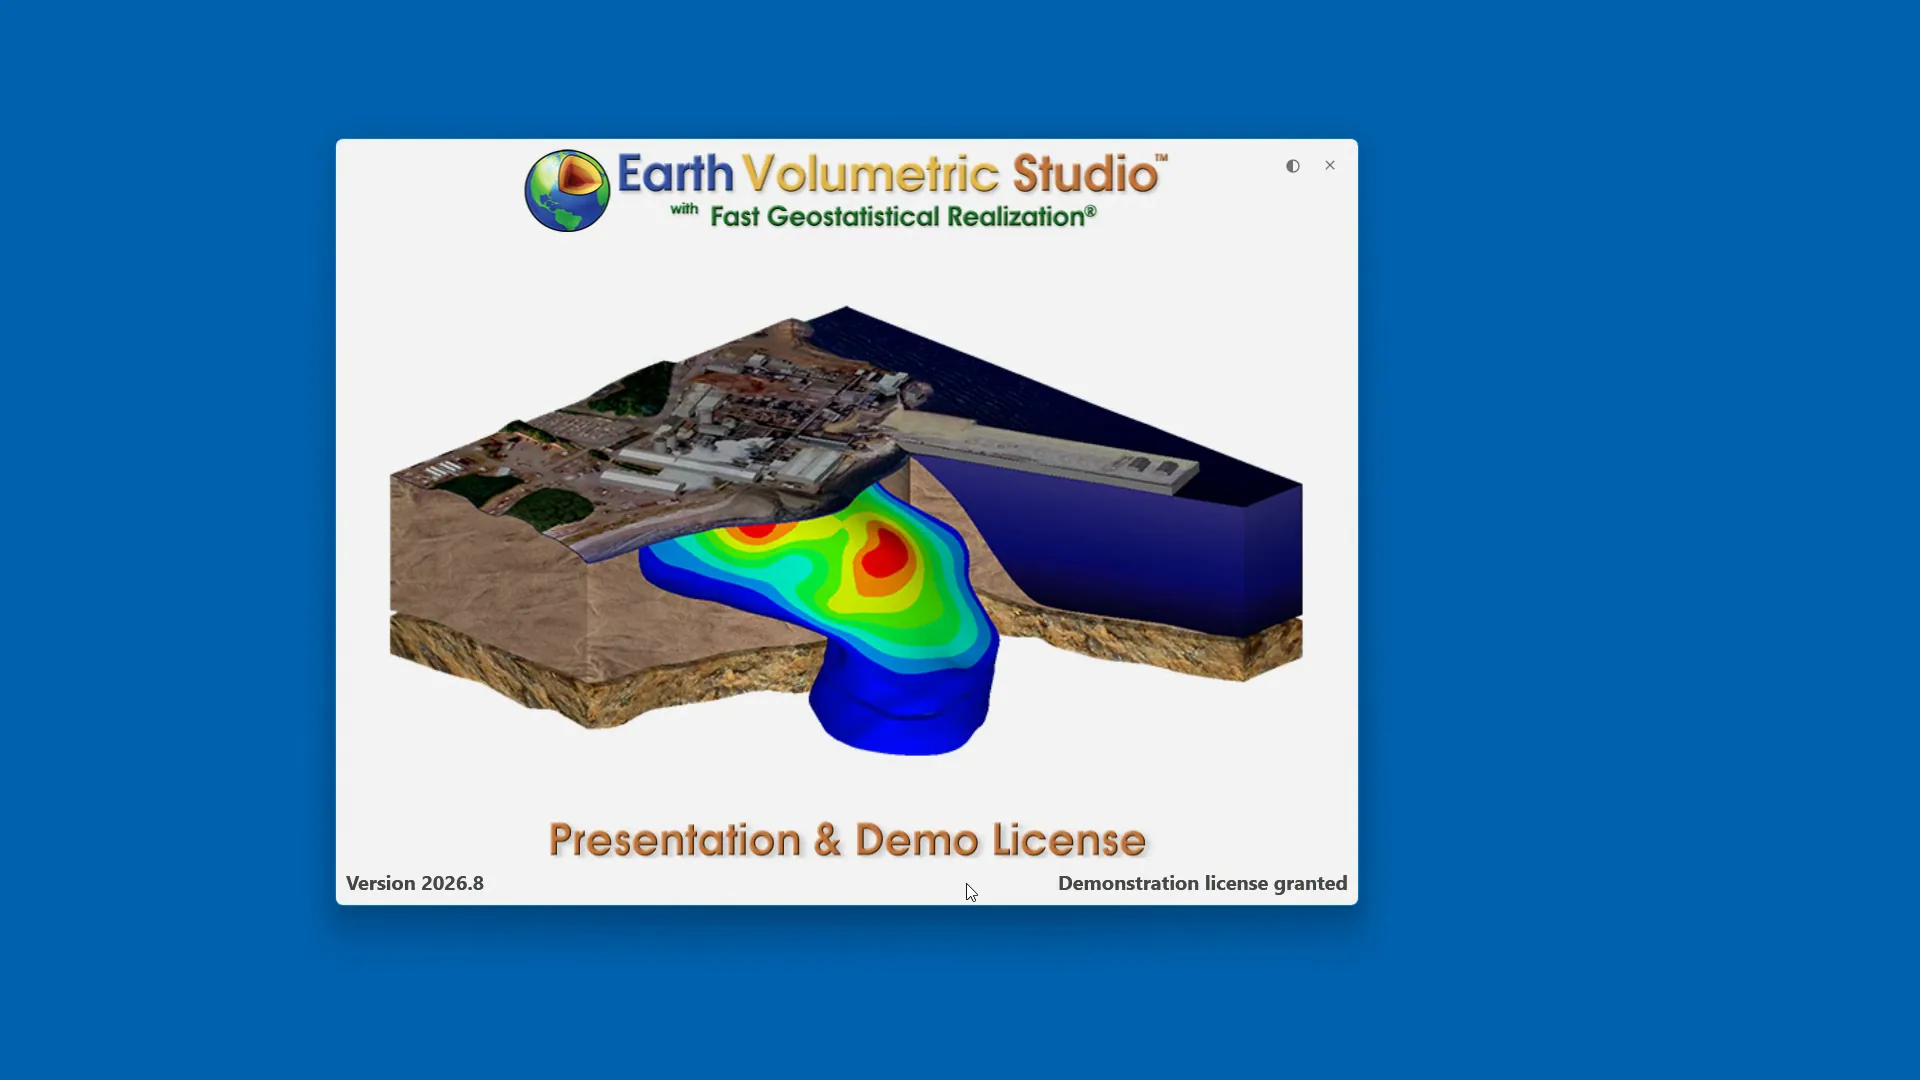
When EVS starts the first thing we see is the startup window and It gives us a few ways to begin.
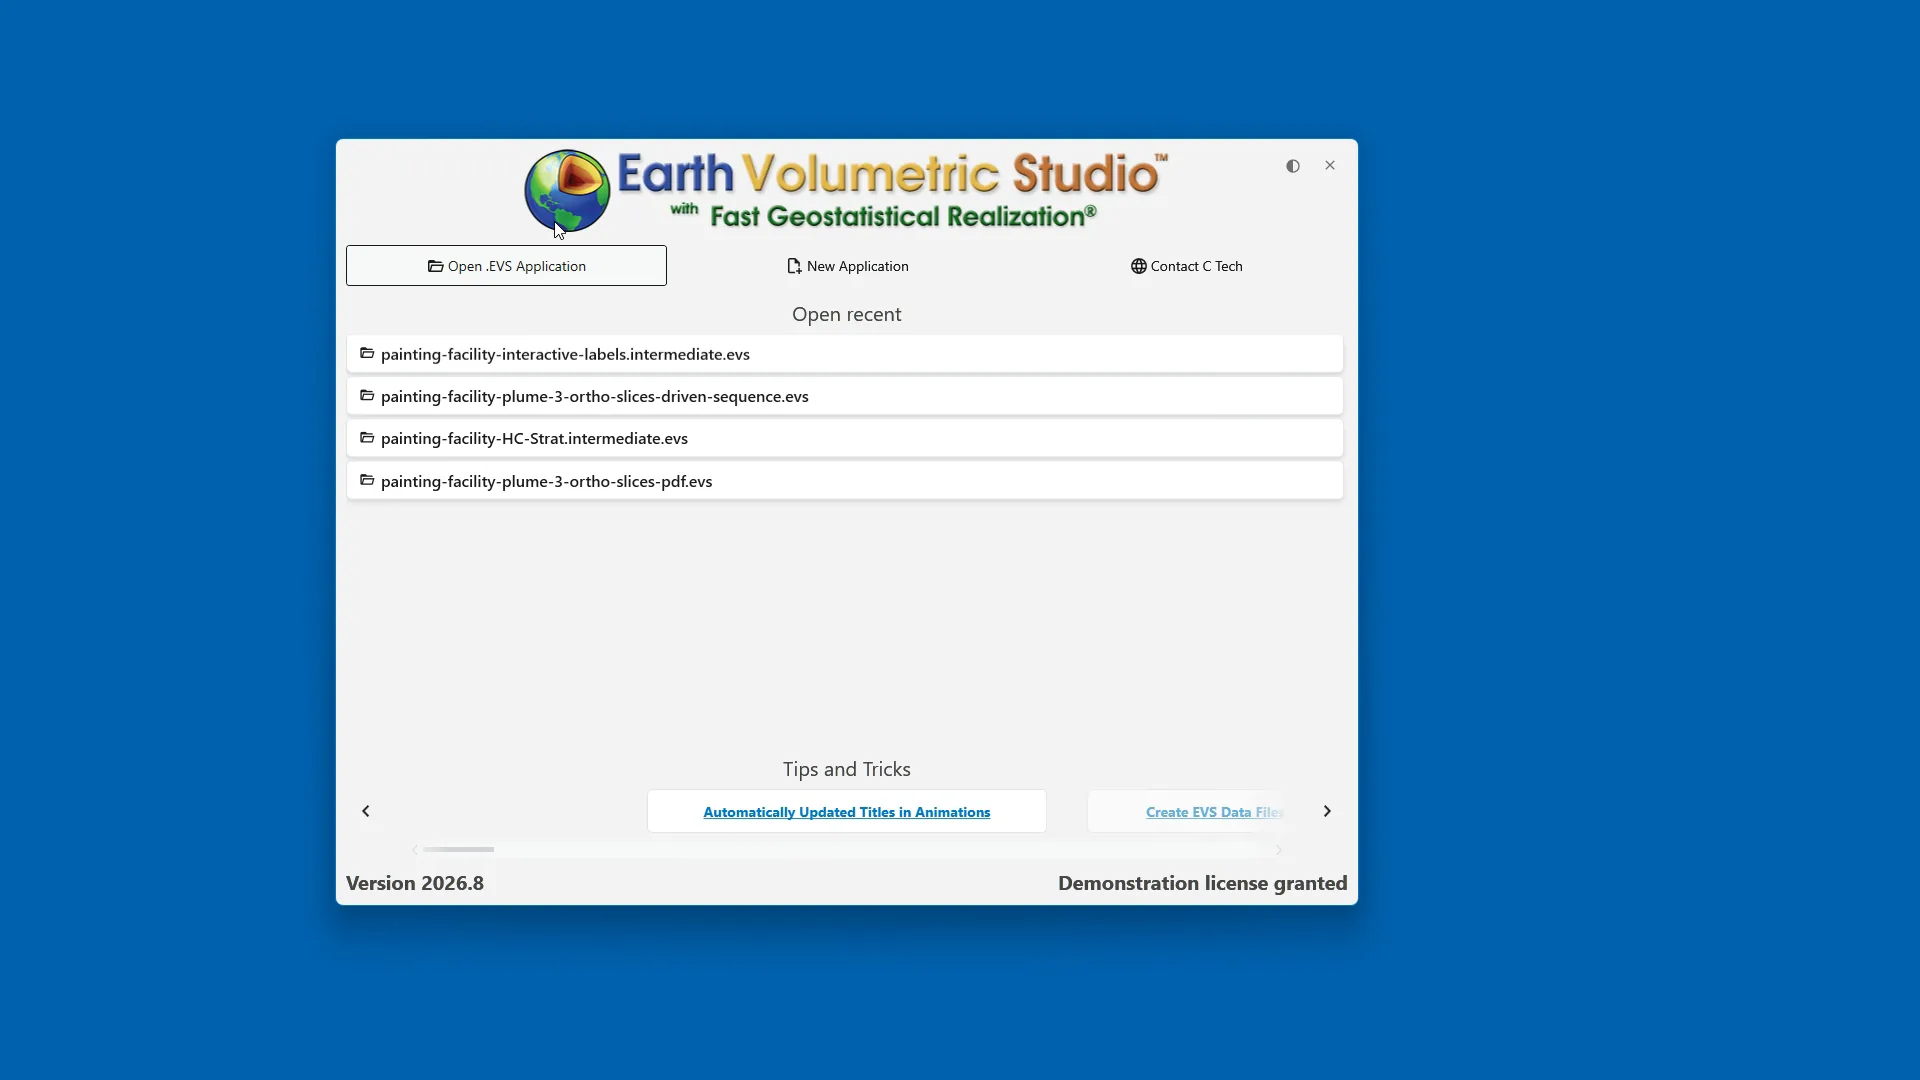
Open EVS Application allows you to browse your computer or network and open an existing EVS project file.
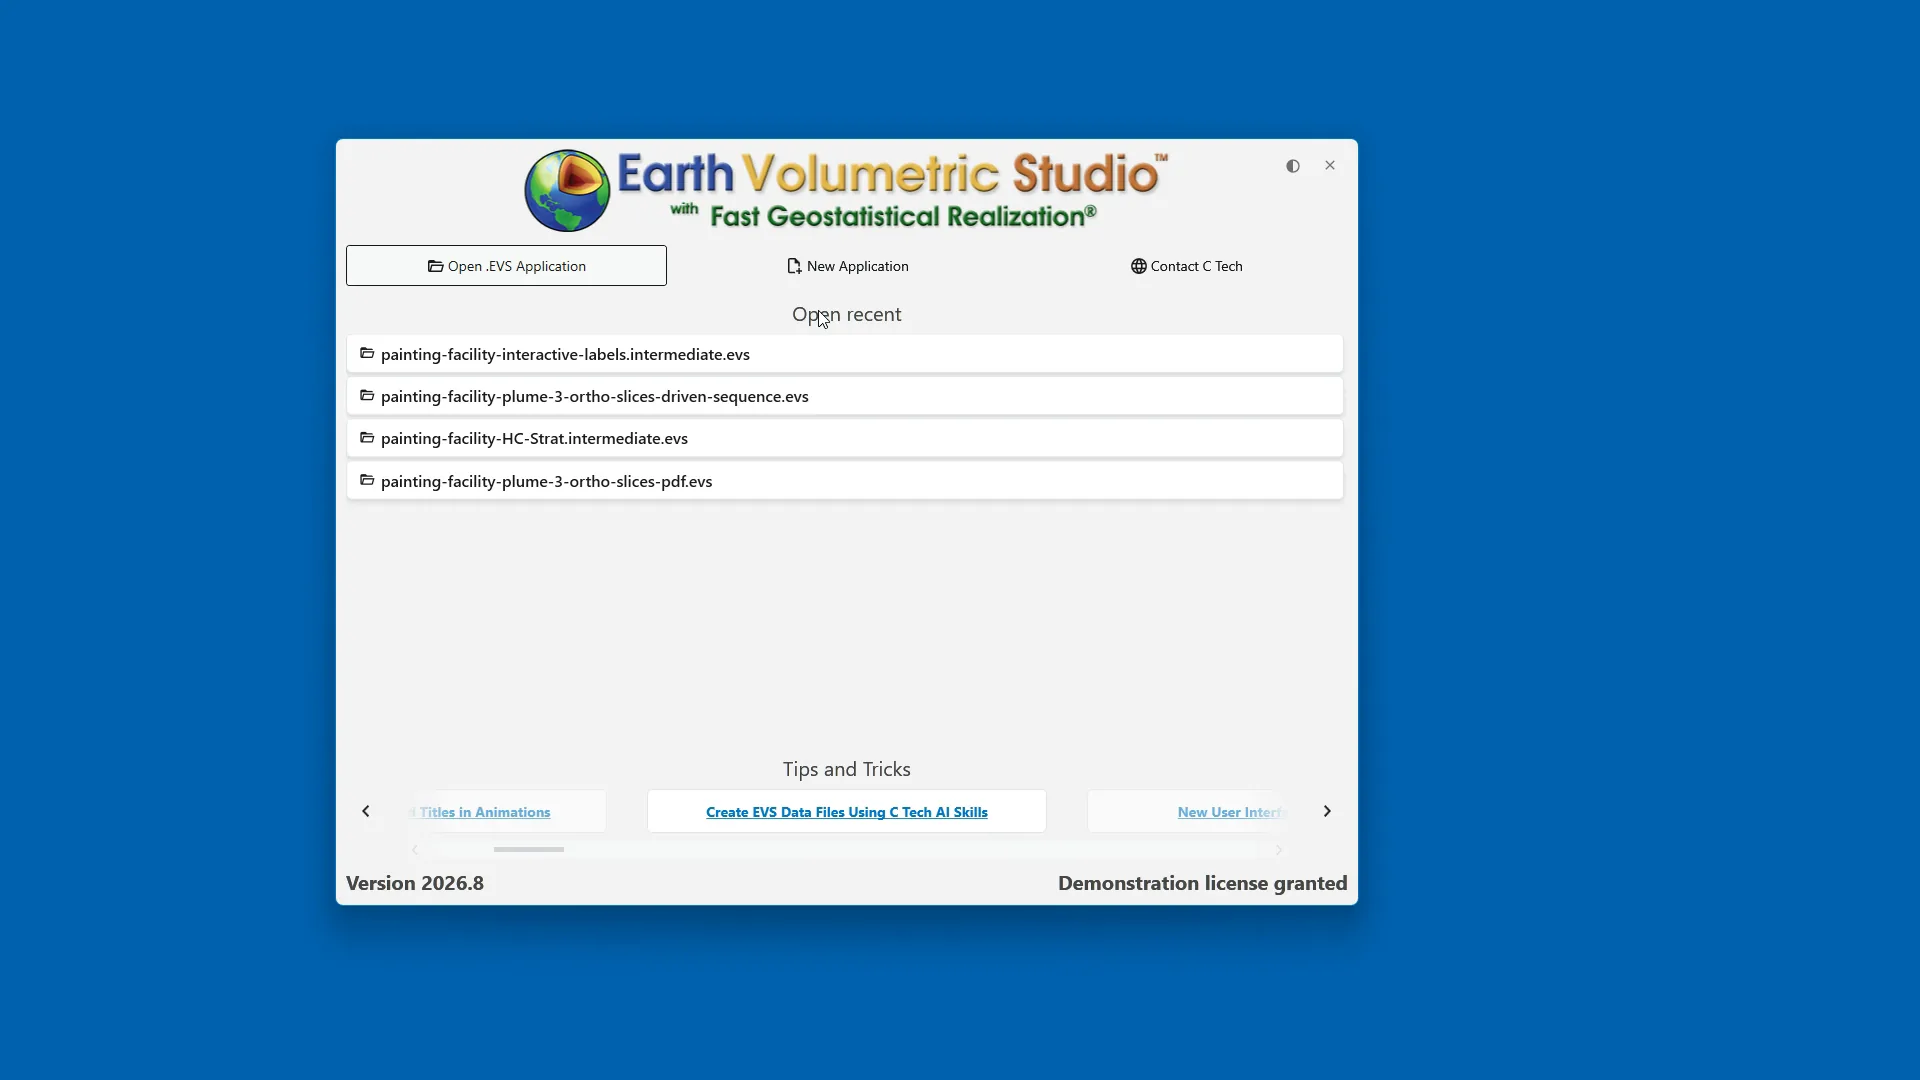
Open recent displays a list of projects you've opened recently, providing a quick way to return to your previous work without needing to browse for the file again.
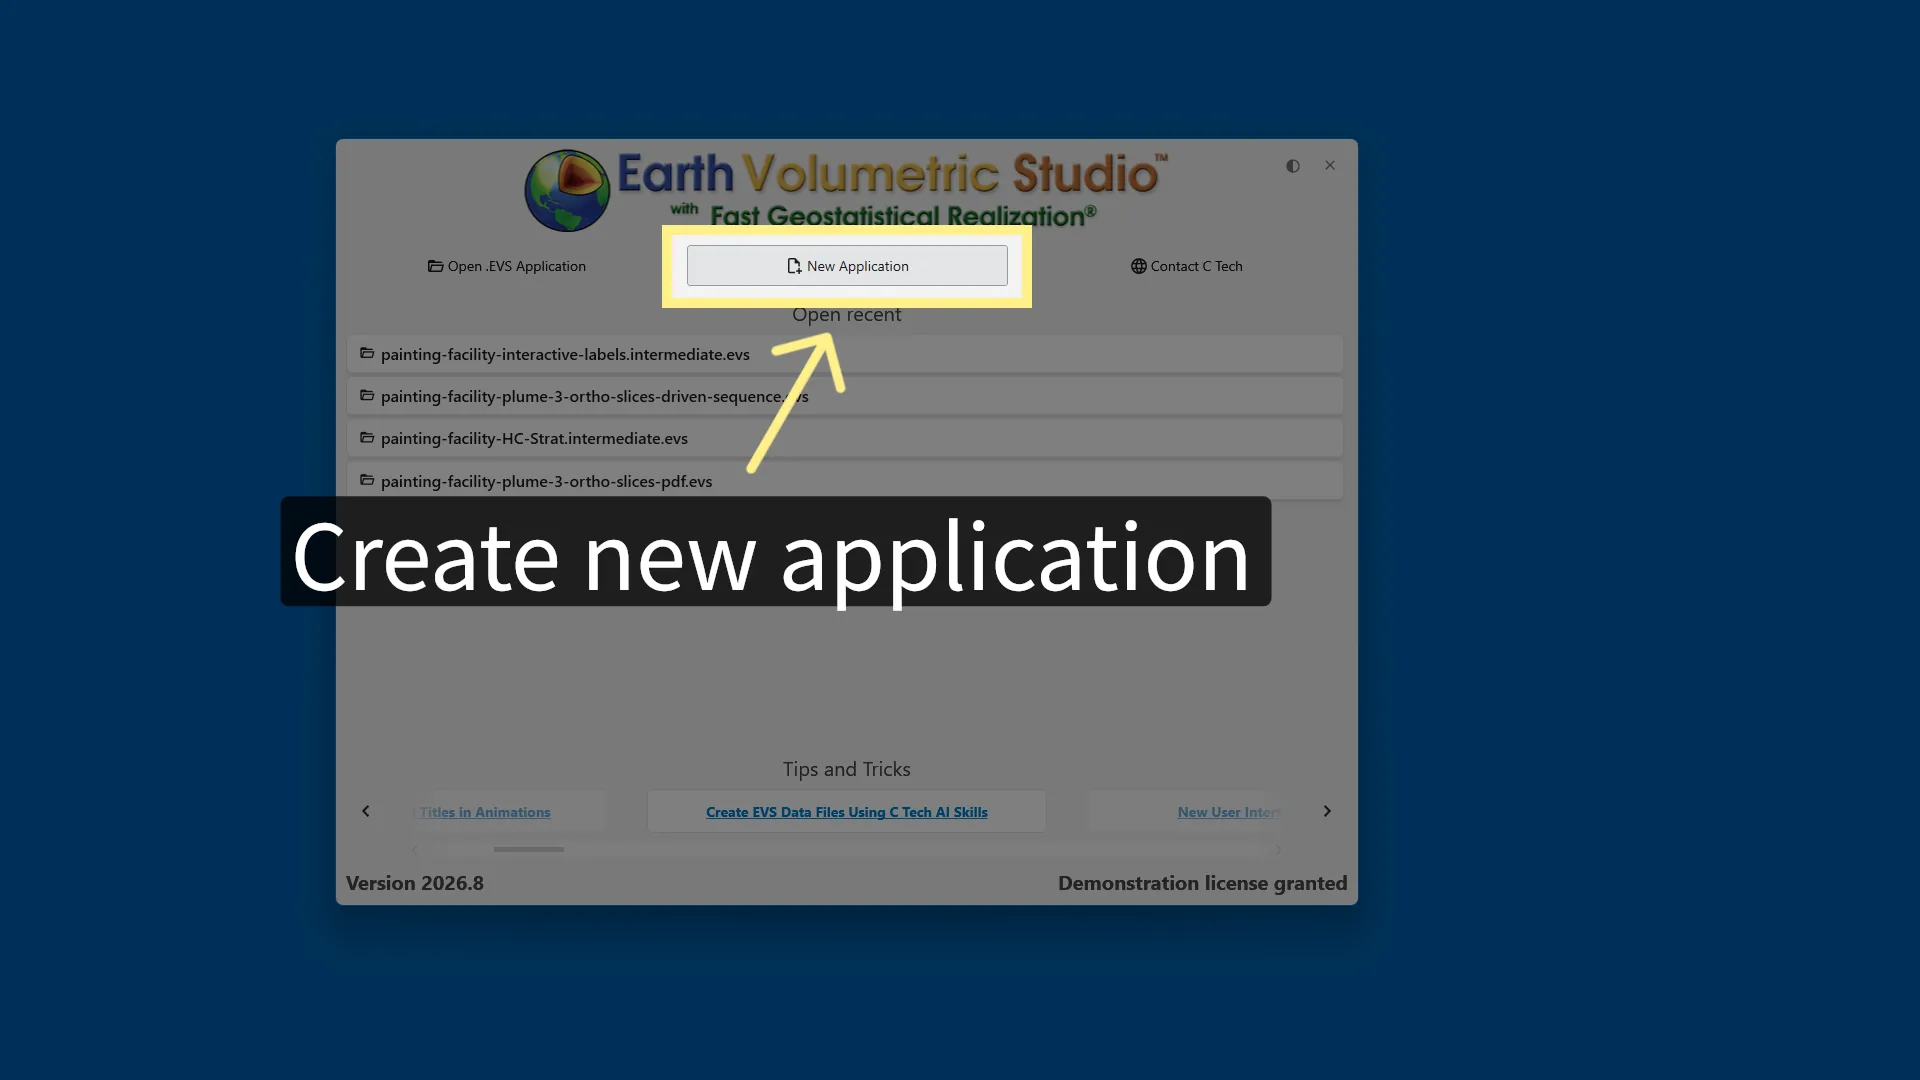
For this tutorial we want a clean workspace so I'll choose New Application. That closes the startup window and opens EVS with a blank Application Network. This is a new application, ready for us to build in; we haven't added any modules or data yet.
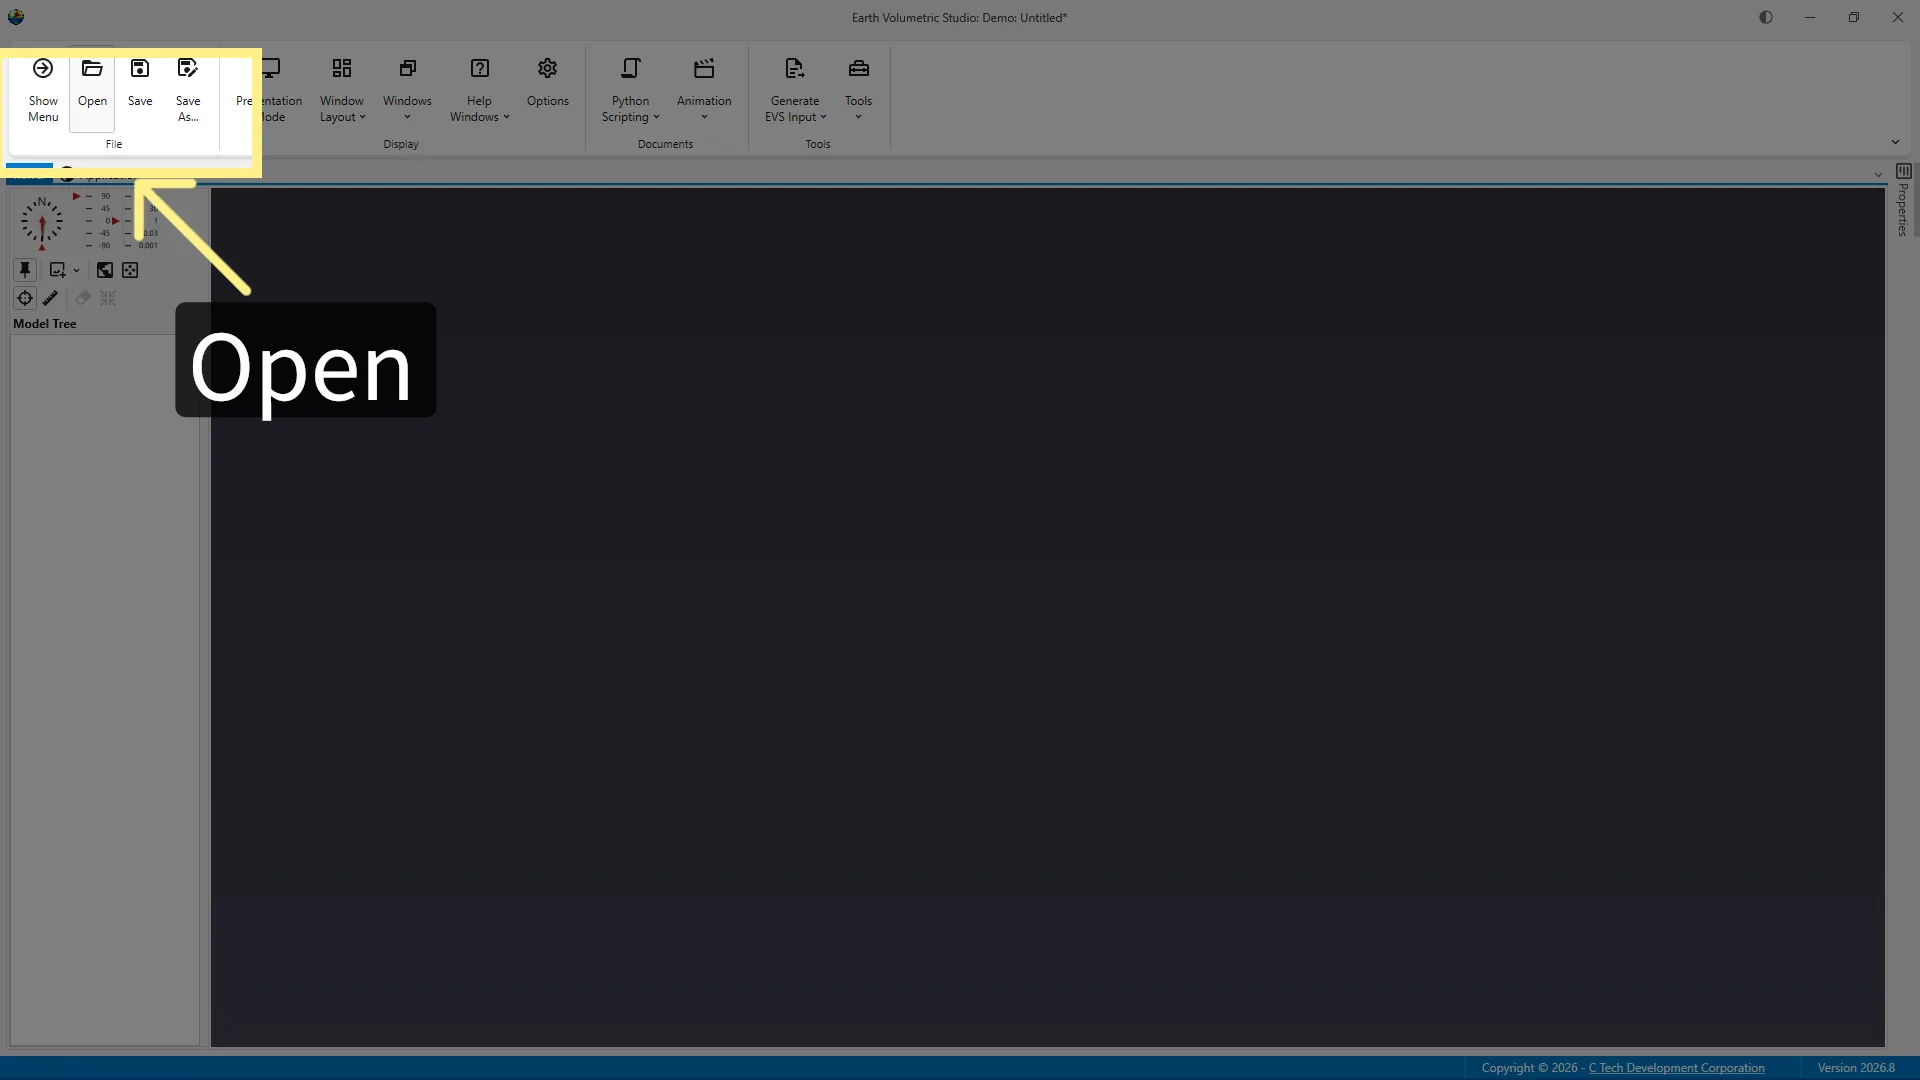
First we're going to open a sample project to explore EVS with a real application. Click the open in the top left corner of the main toolbar.
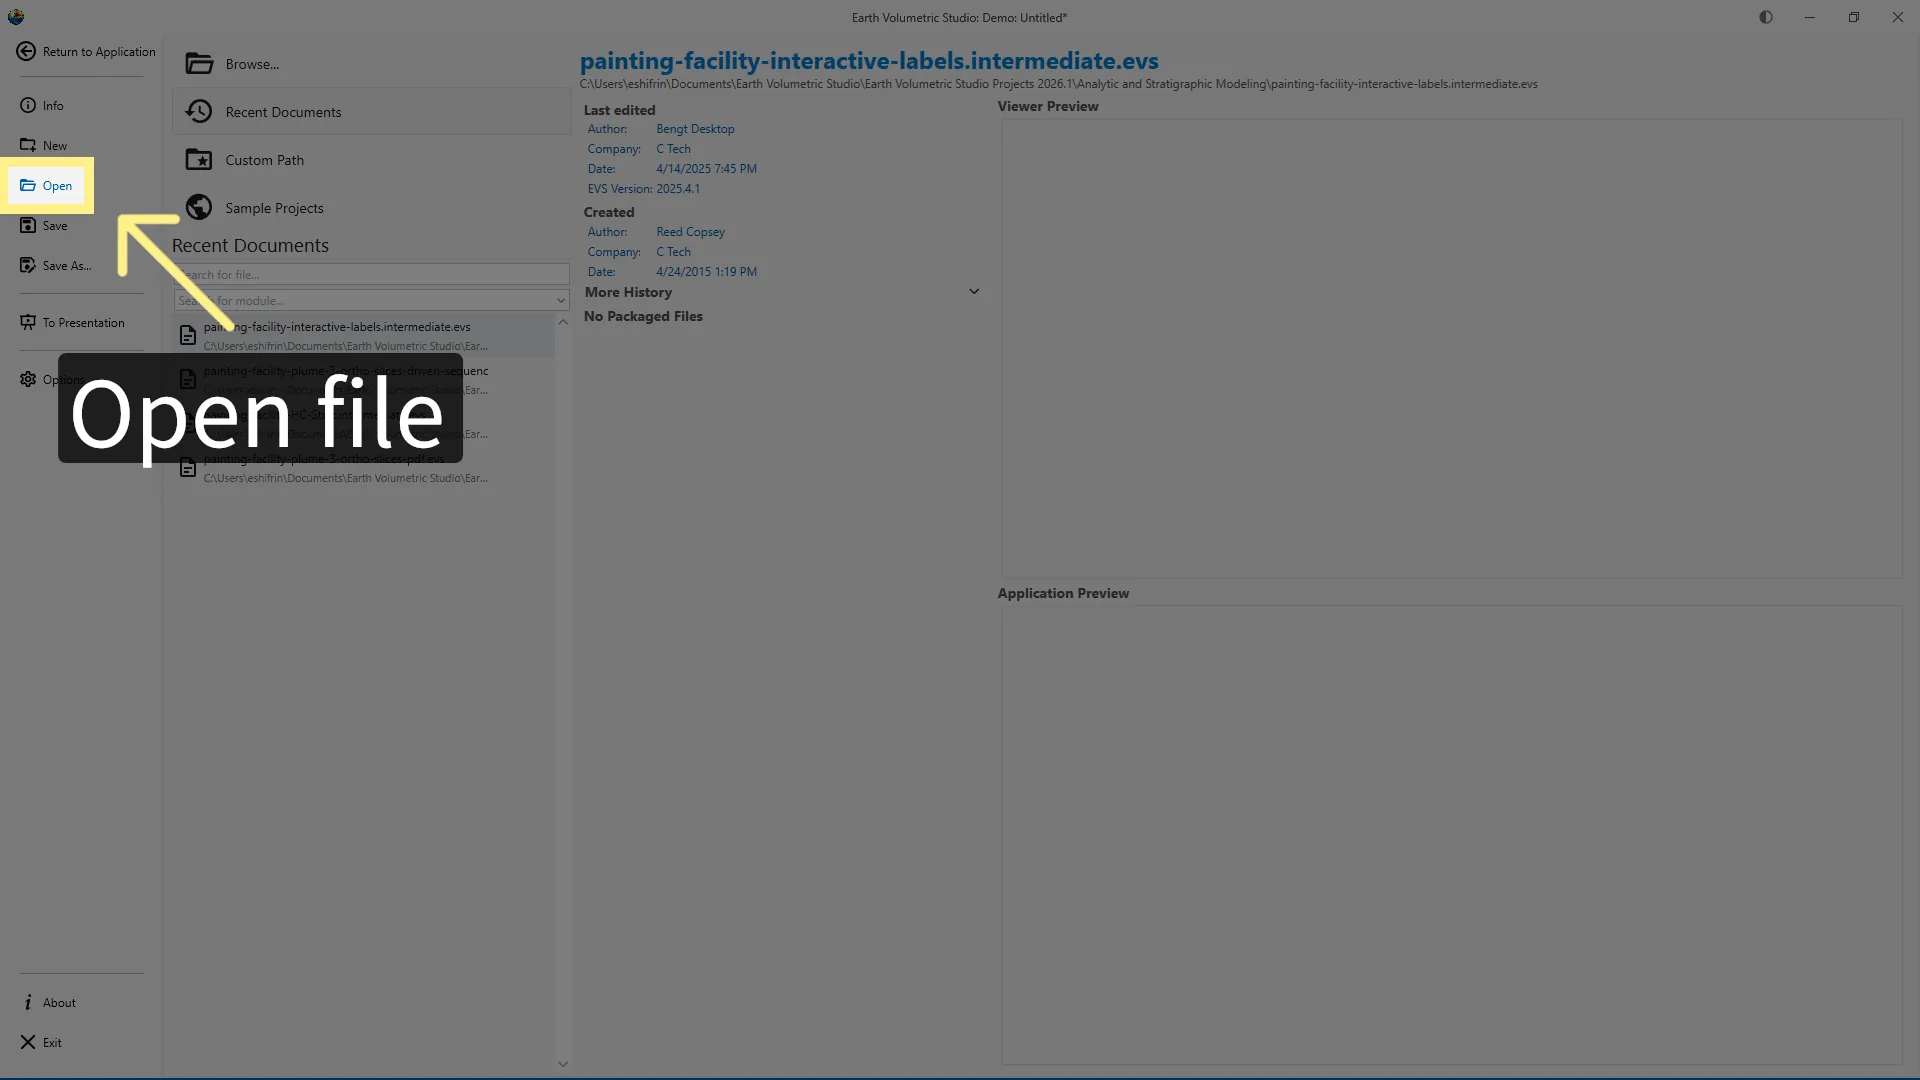
From the Home page, click open in the toolbar.
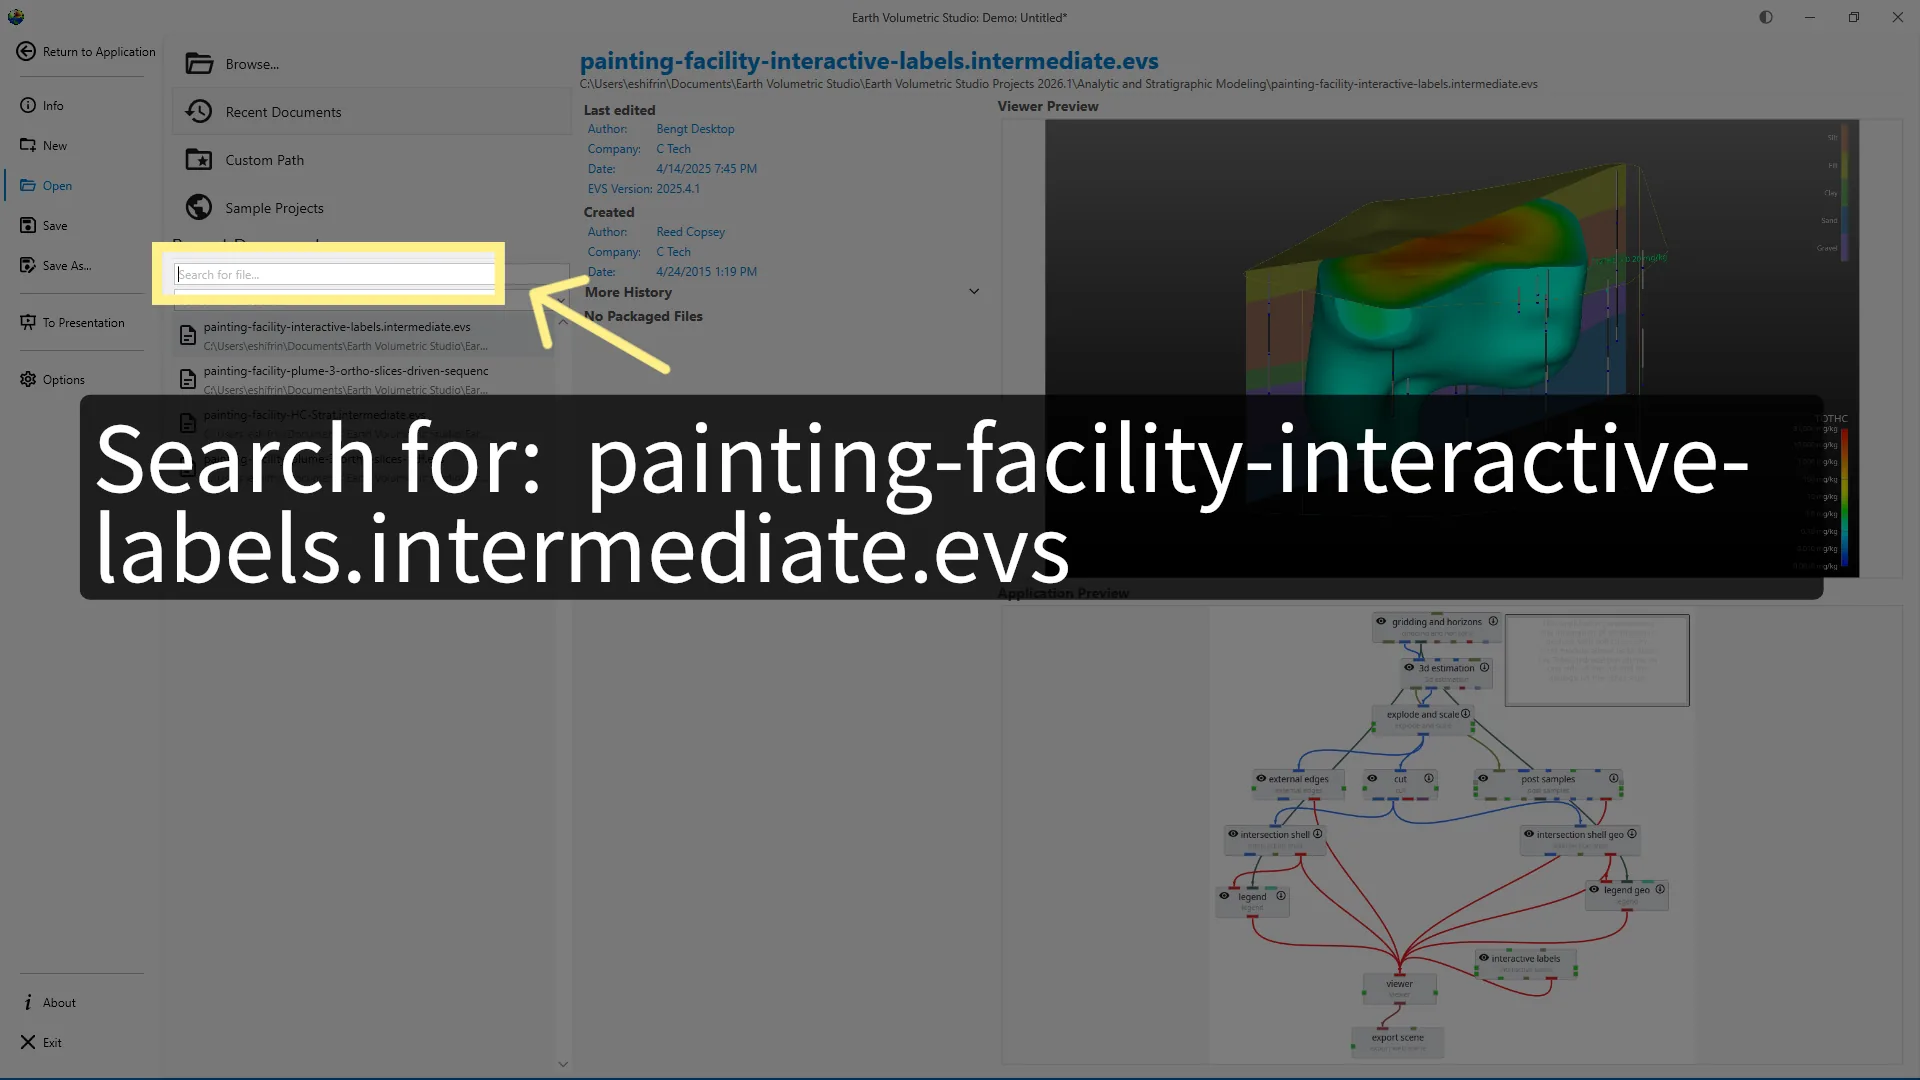
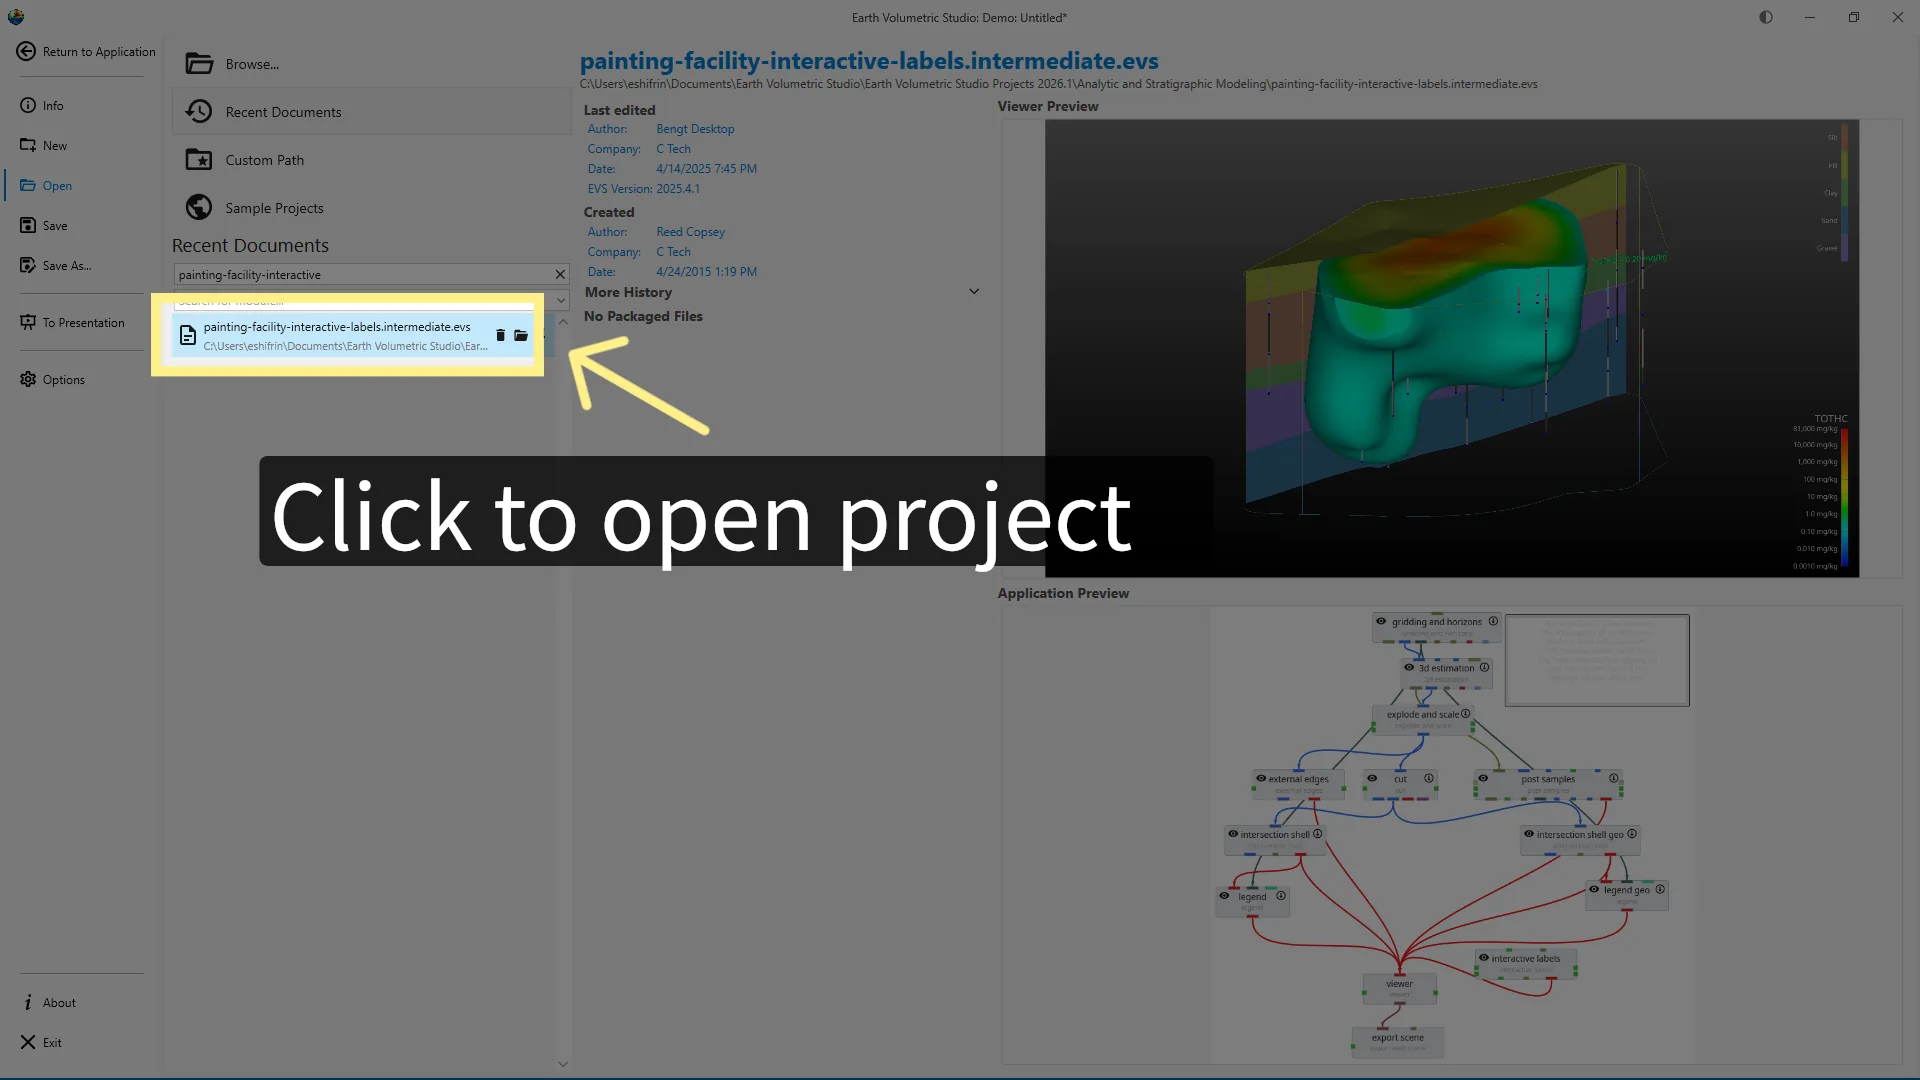
Click Search for File to locate the sample project used in this tutorial. The sample file we are using is painting facility-interactive-labels.intermediate.evs
Click the sample project from the searchable library to open it in EVS.
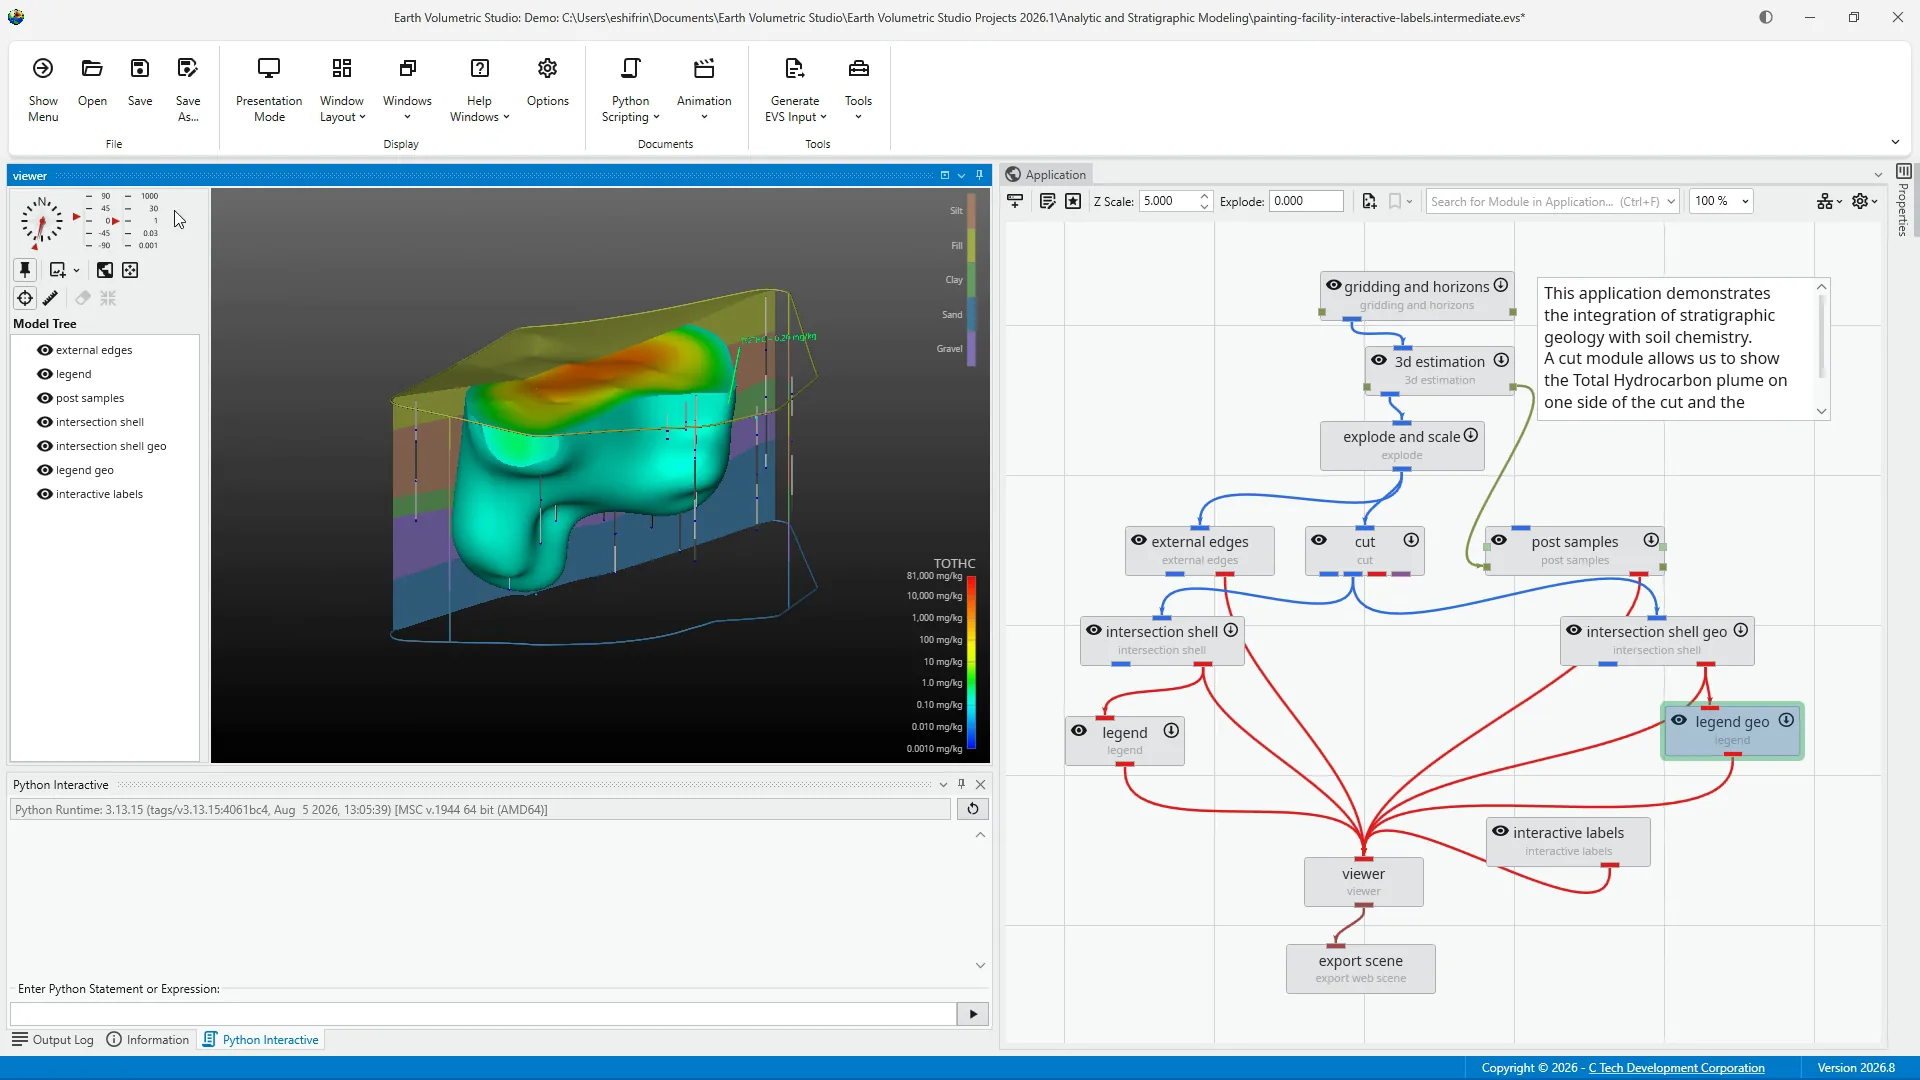
Once the sample project has loaded, the EVS workspace appears. Across the top is the Main Toolbar, which provides quick access to common commands, including tools for working with applications and controlling which windows are visible. Next, we'll explore how to rearrange these windows and use Window Layouts to save or restore a preferred workspace.
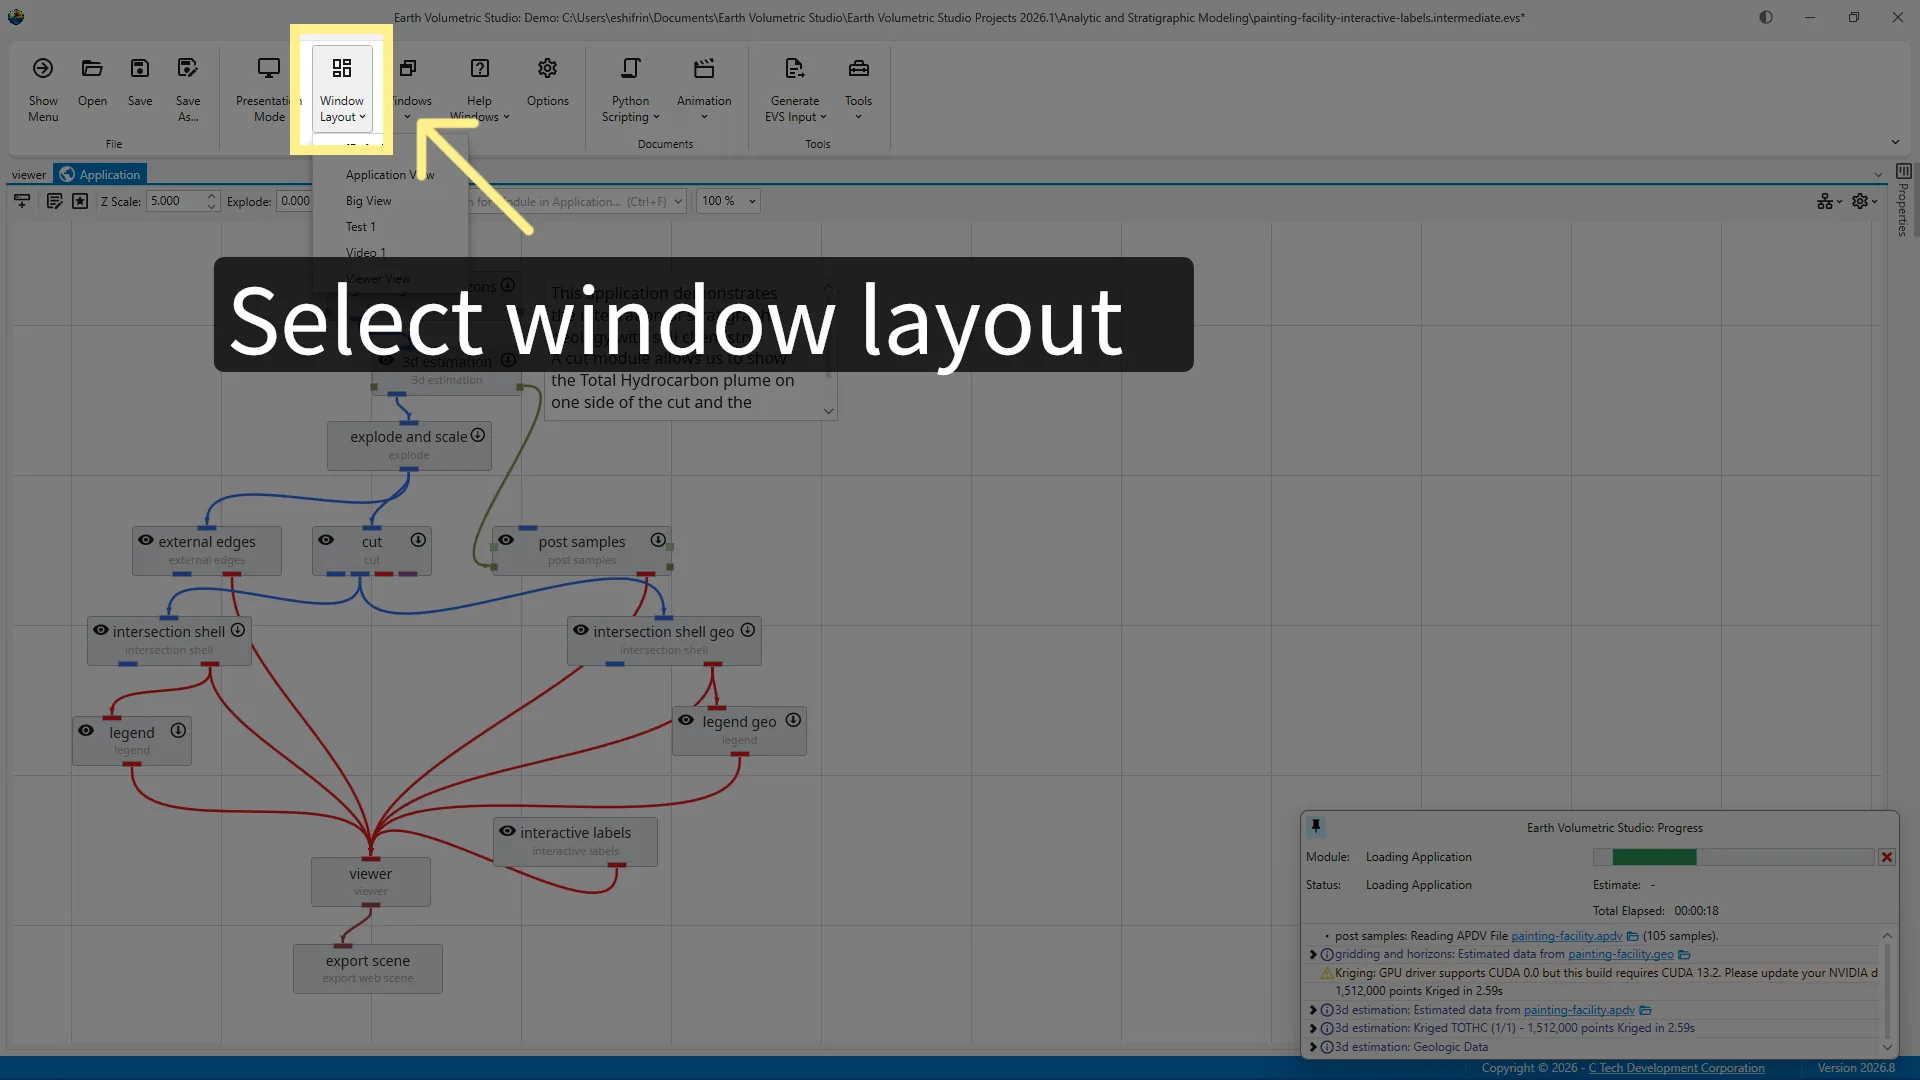
If your window layout isn't set to the default, select Window Layout from the top toolbar then choose Default from the drop-down menu.
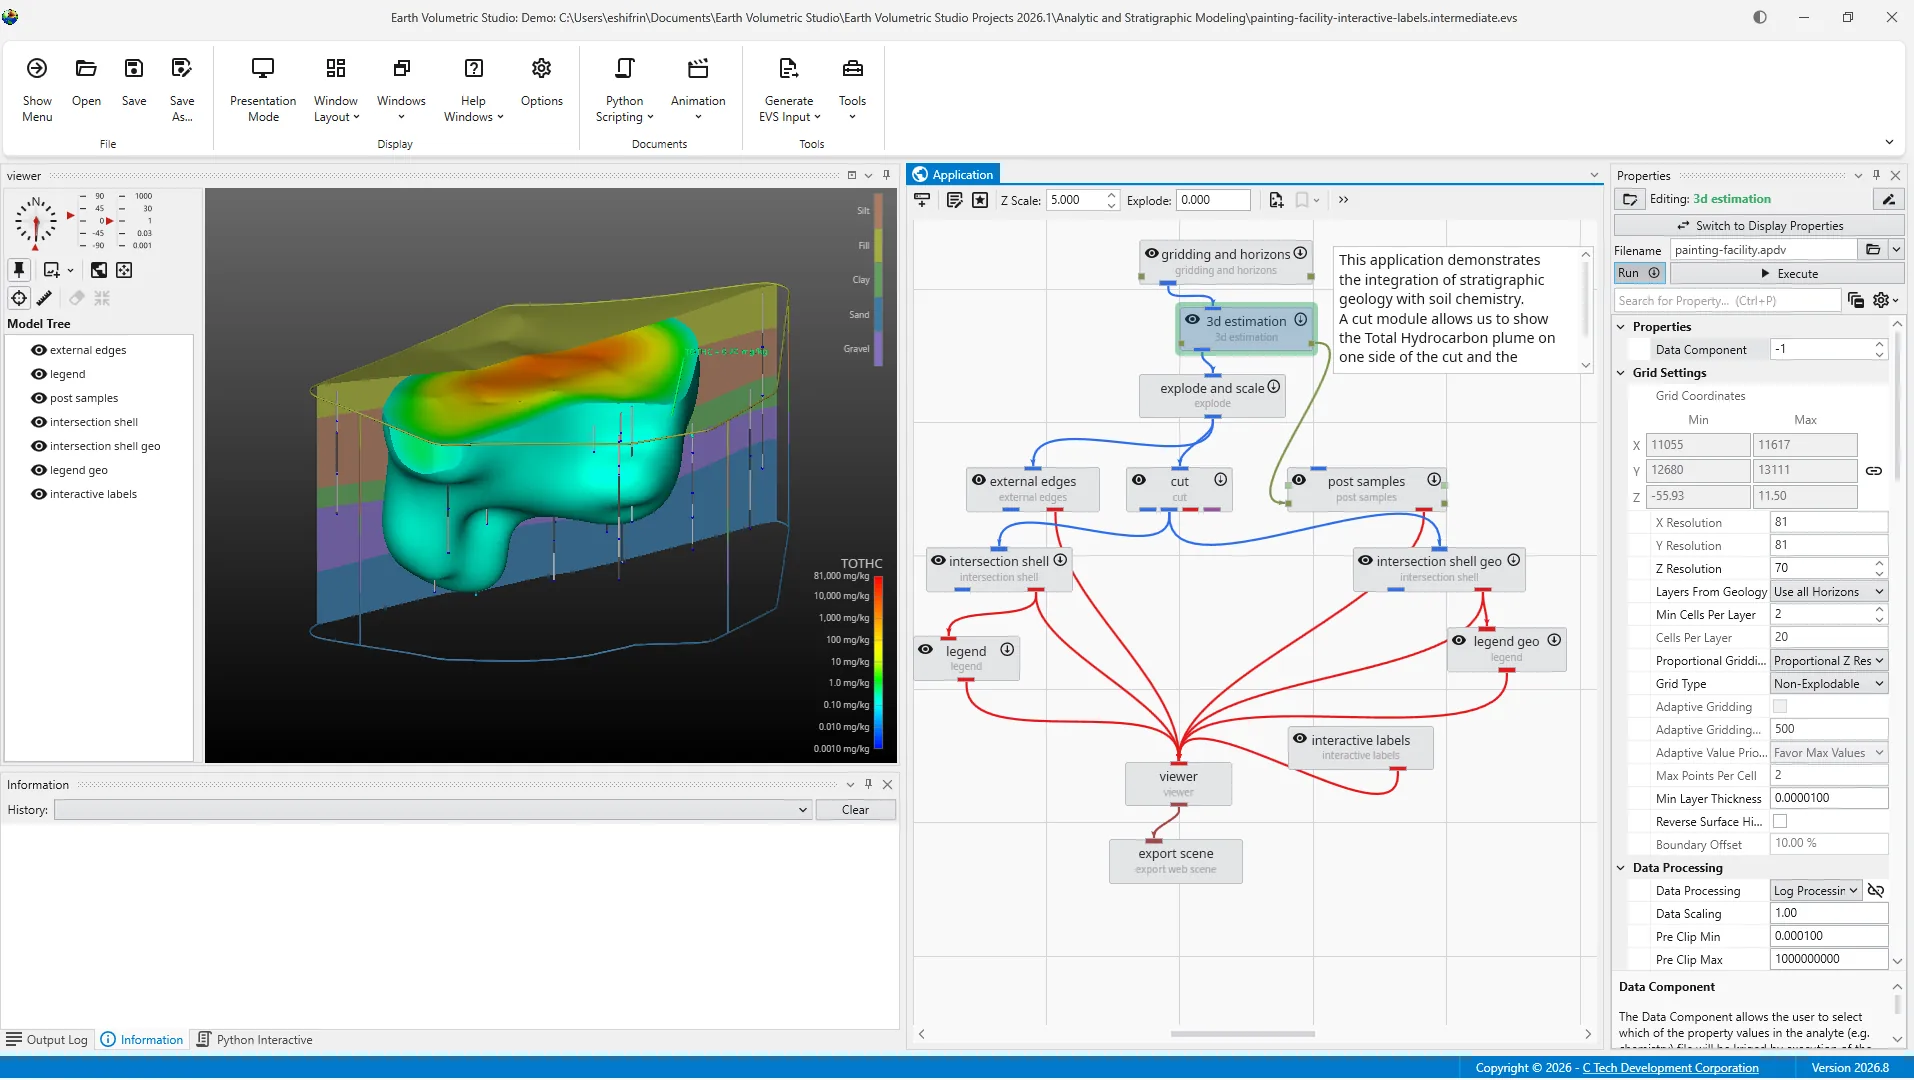
At first there's a lot on the EVS screen. The helpful way to think about EVS is not as one crowded window but as a collection of windows each with a different job. One is where we build an application. Another shows its visual result. Others give us settings tools and feedback. These windows don't have to stay in the positions you see here. We can move them group them into tabs or temporarily tuck them out of the way. First let's try that with a window we can easily recognize.
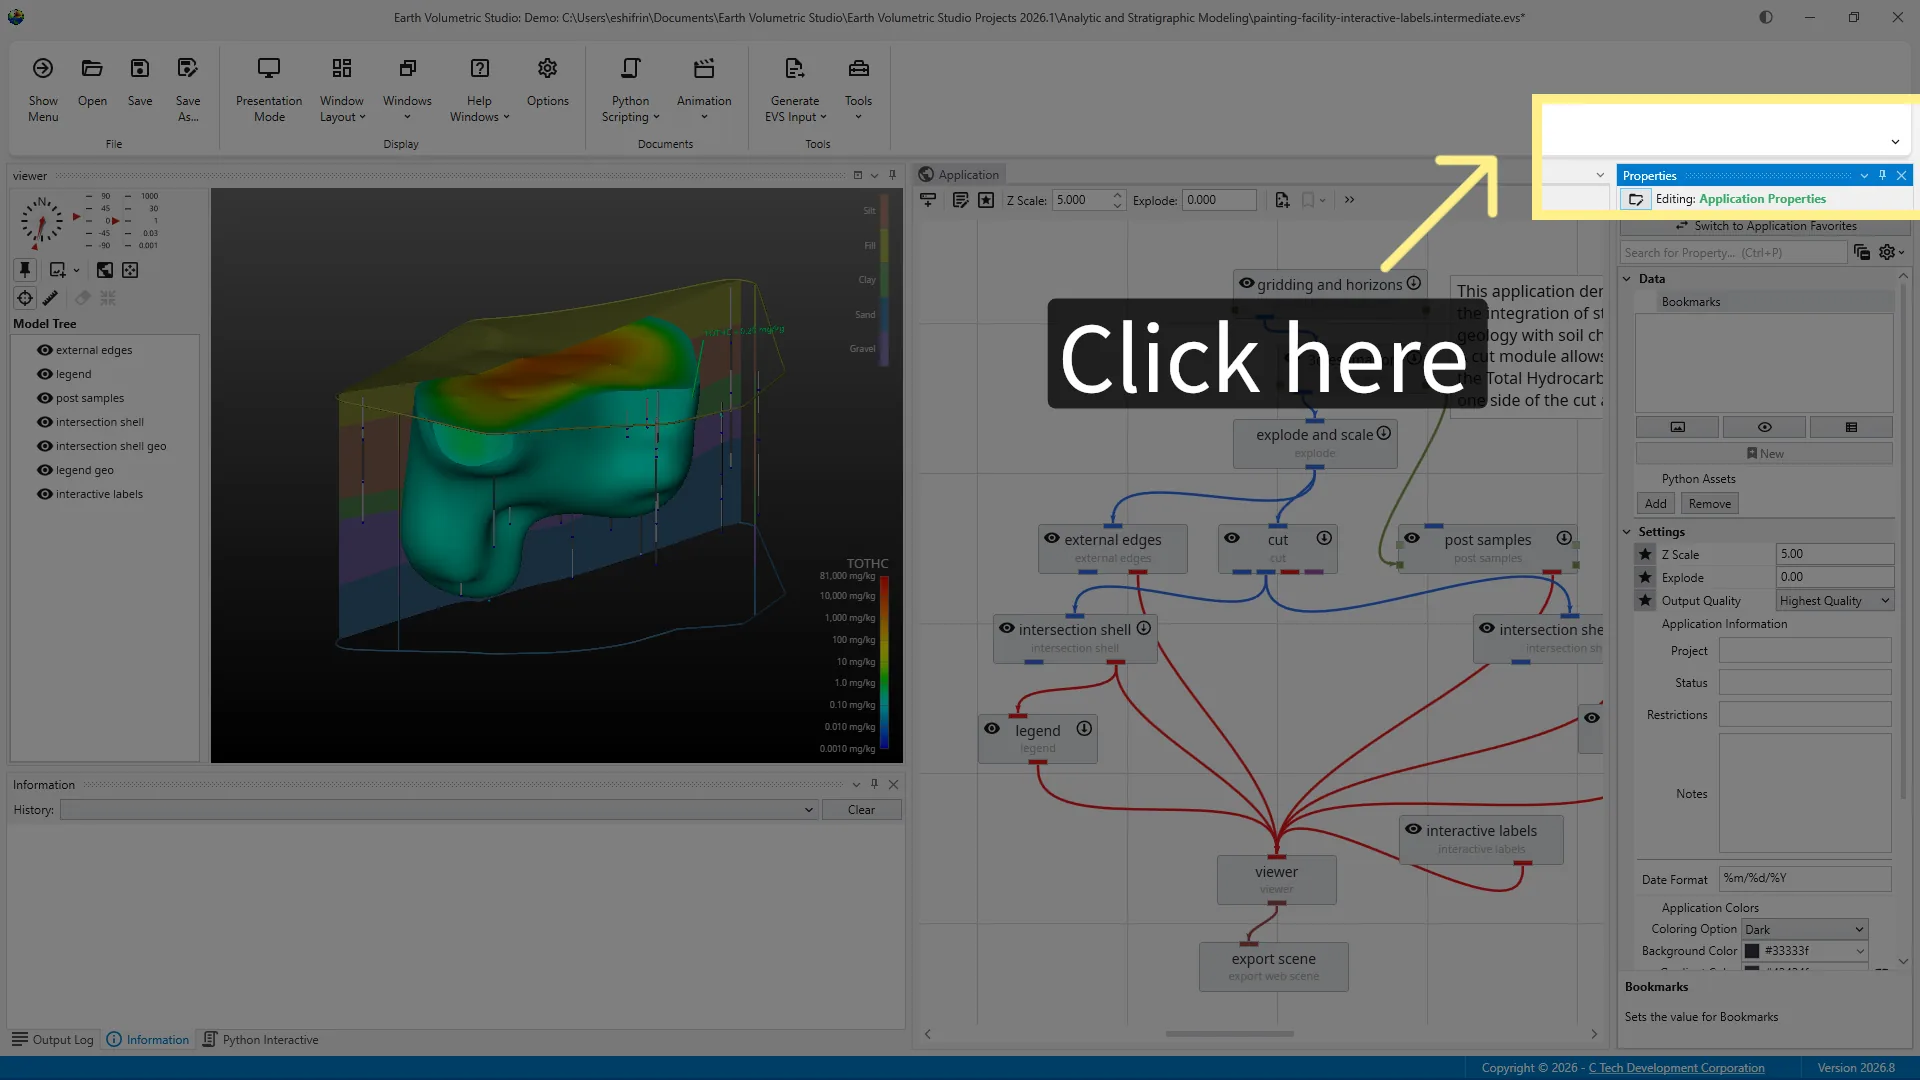
The windows in EVS can be rearranged. To move a window, click and hold its title bar, then drag it to a new location.
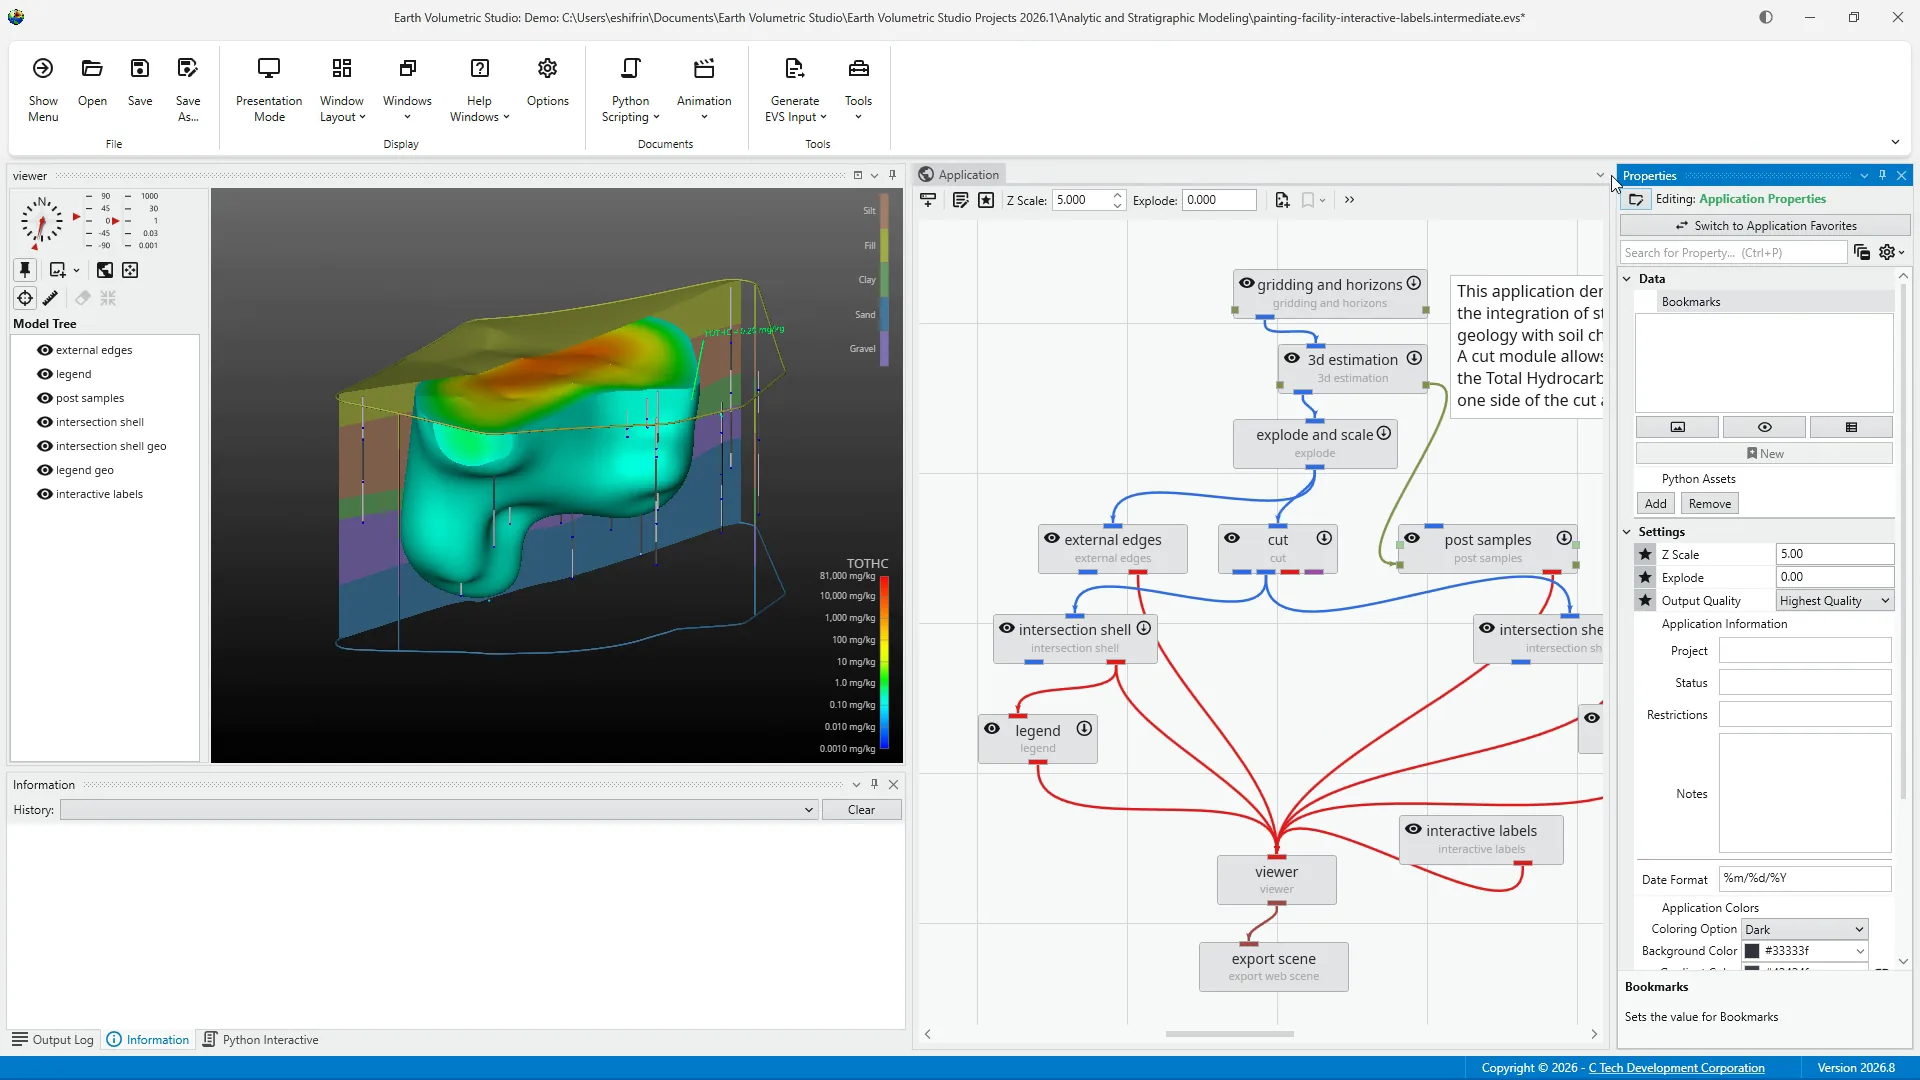
As I drag the Properties window away from the workspace it becomes a floating window. It remains open but it is no longer attached to the main layout. A floating window can be moved freely around the screen. This can be useful when working with multiple monitors or when you need more room in a specific part of the interface.
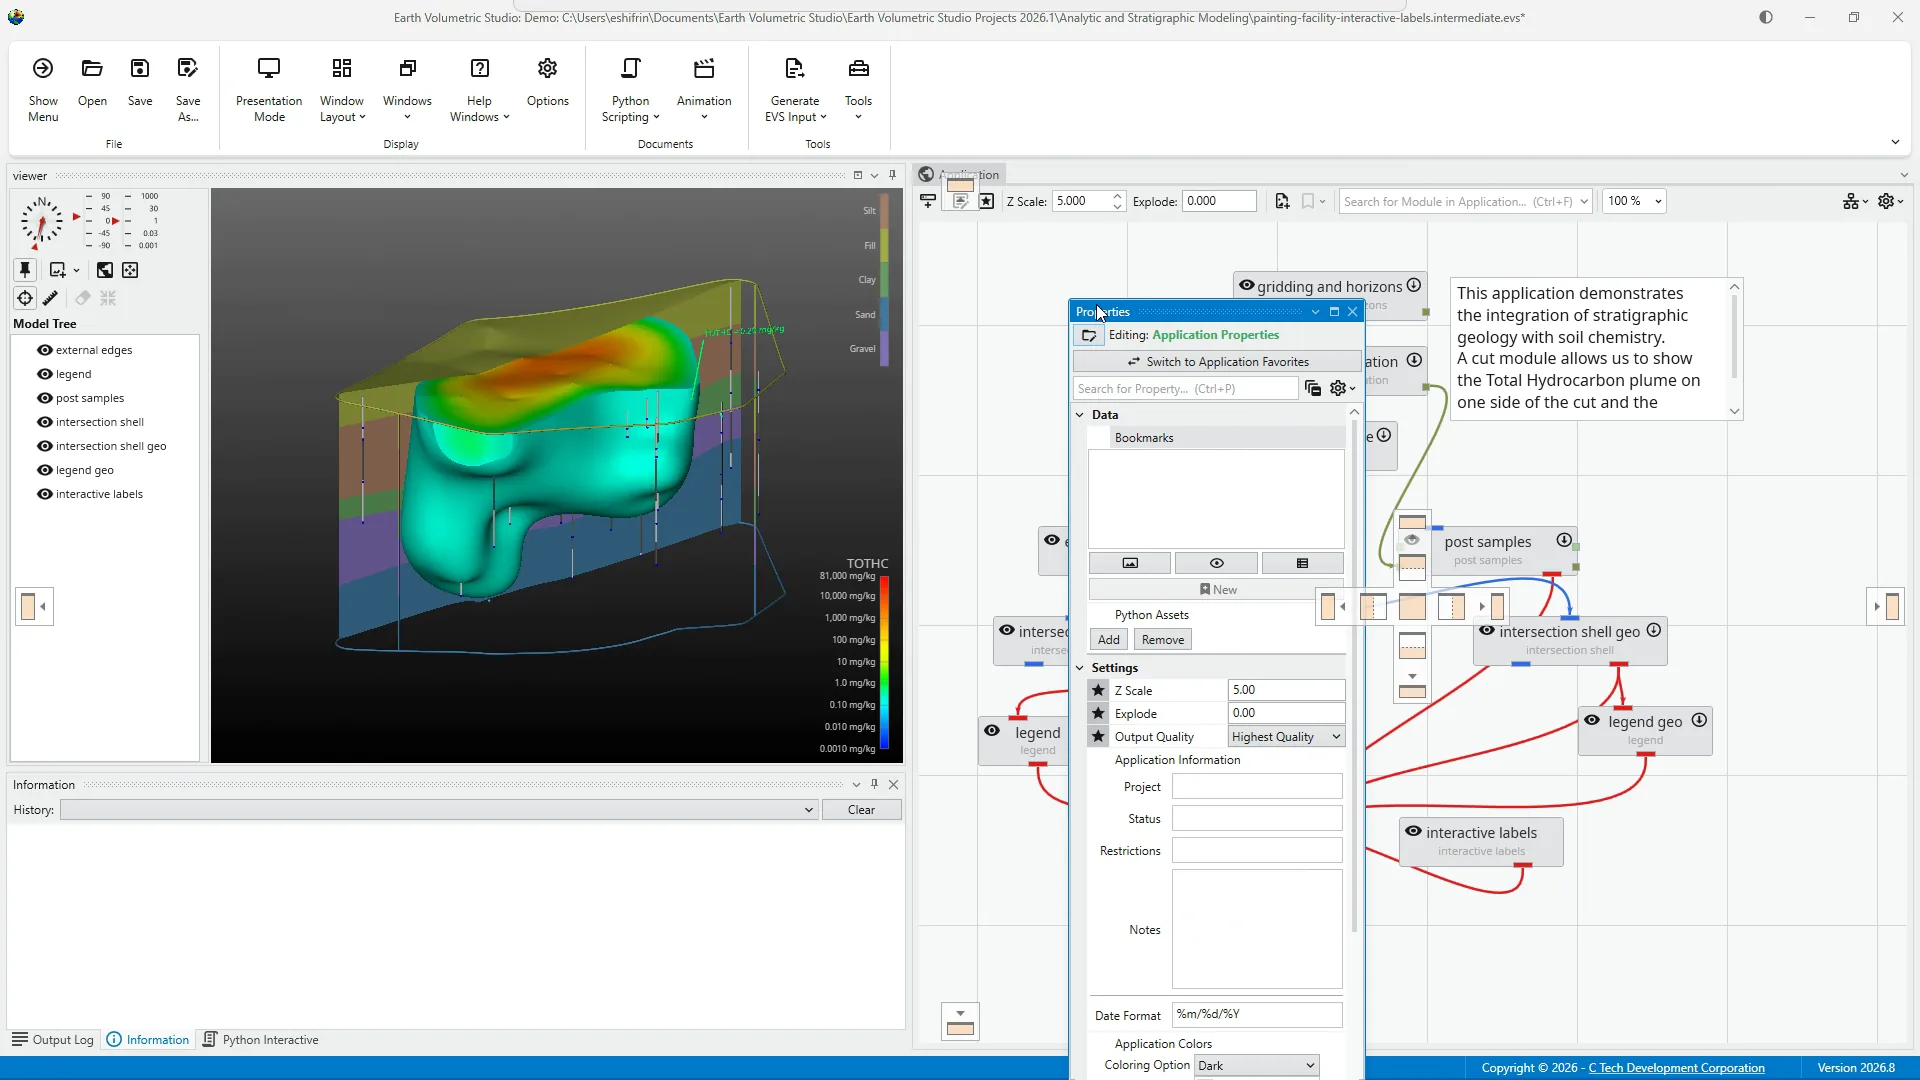
To return the window to the main workspace, drag it back over EVS.
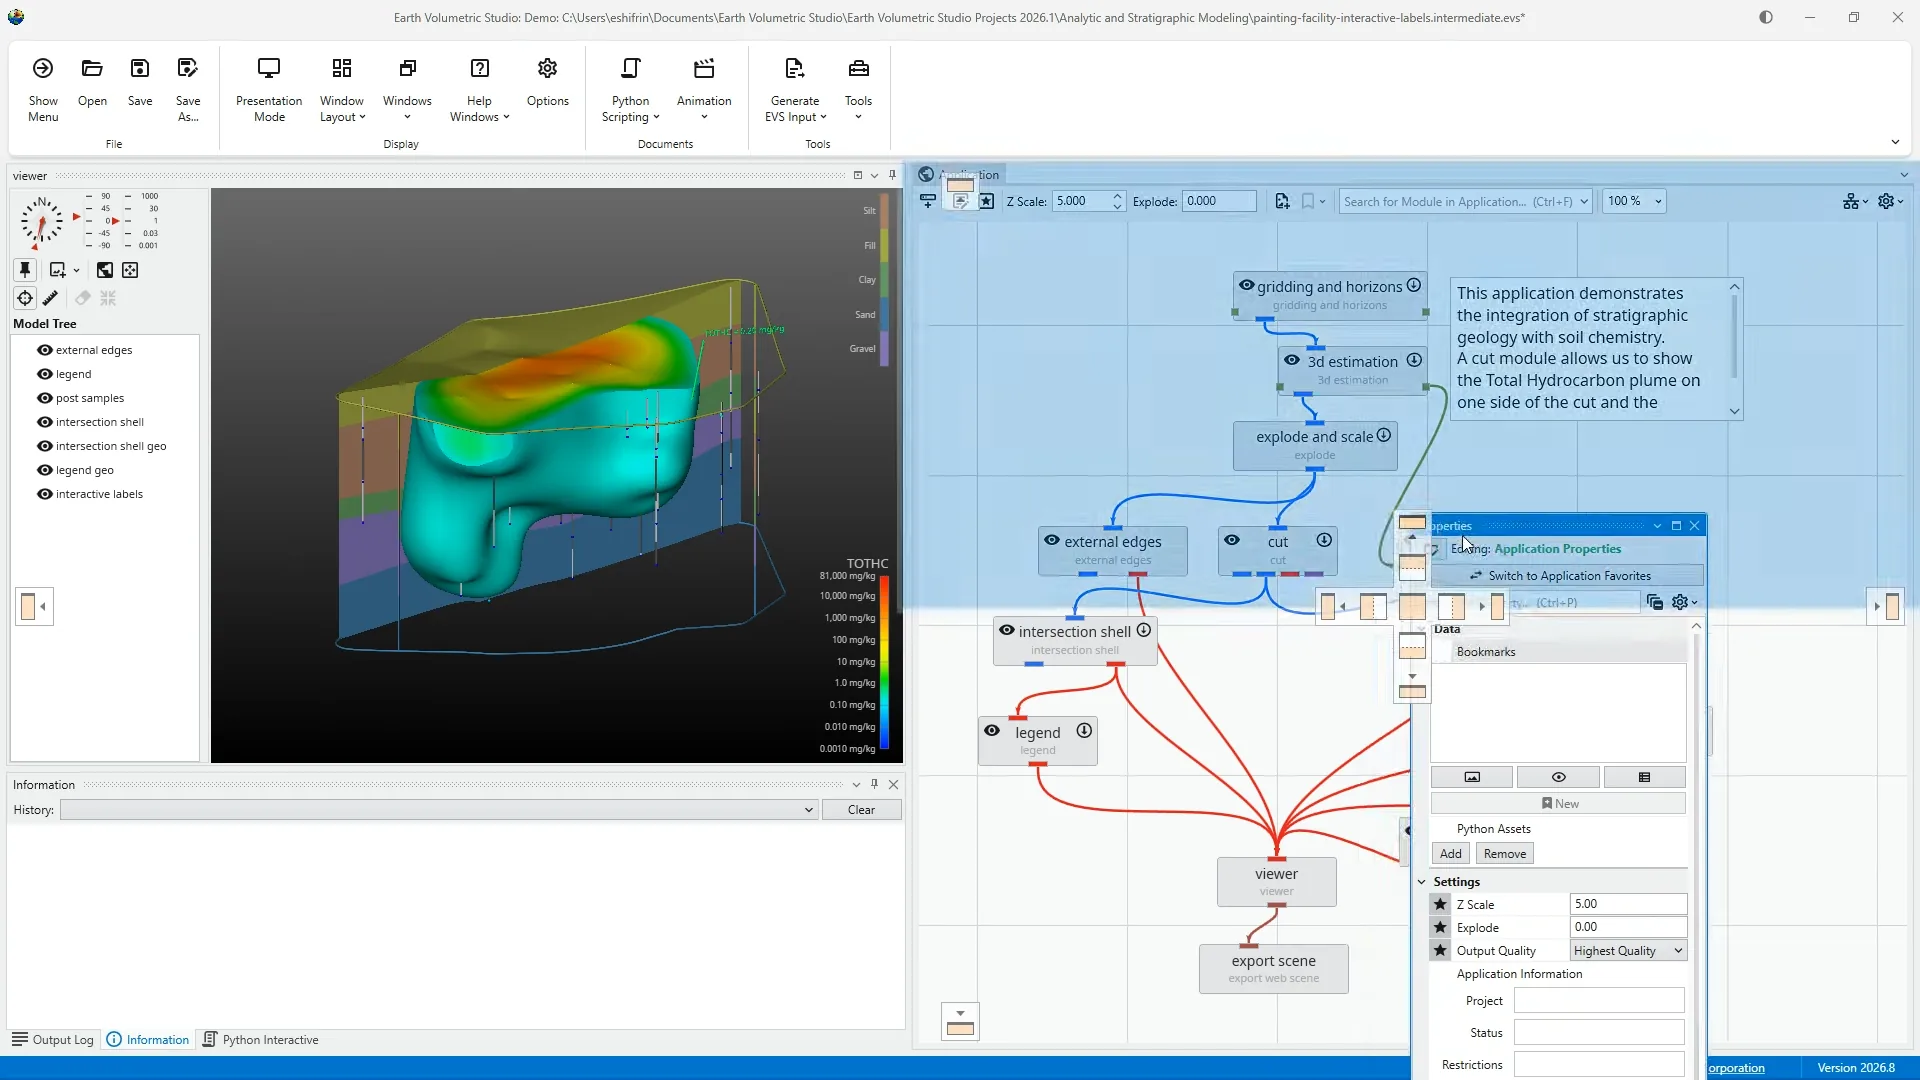
As the window moves over the workspace, docking guides appear. These guides show the available positions where the window can be placed. Release the mouse over a docking guide to dock the window in that position. The Properties window is now attached to the EVS workspace again.
A docked window can be either pinned open or automatically hidden. The pin icon controls this behavior. When I unpin the window it collapses into a tab along the edge of the workspace. This is known as Auto Hide.
I don't want the Properties window positioned above the Application window, so I'll move it to the side. I'll use the docking guide to redock it, then select the pin to hide it as a tab next to the Application window. This keeps it accessible without taking up extra workspace.
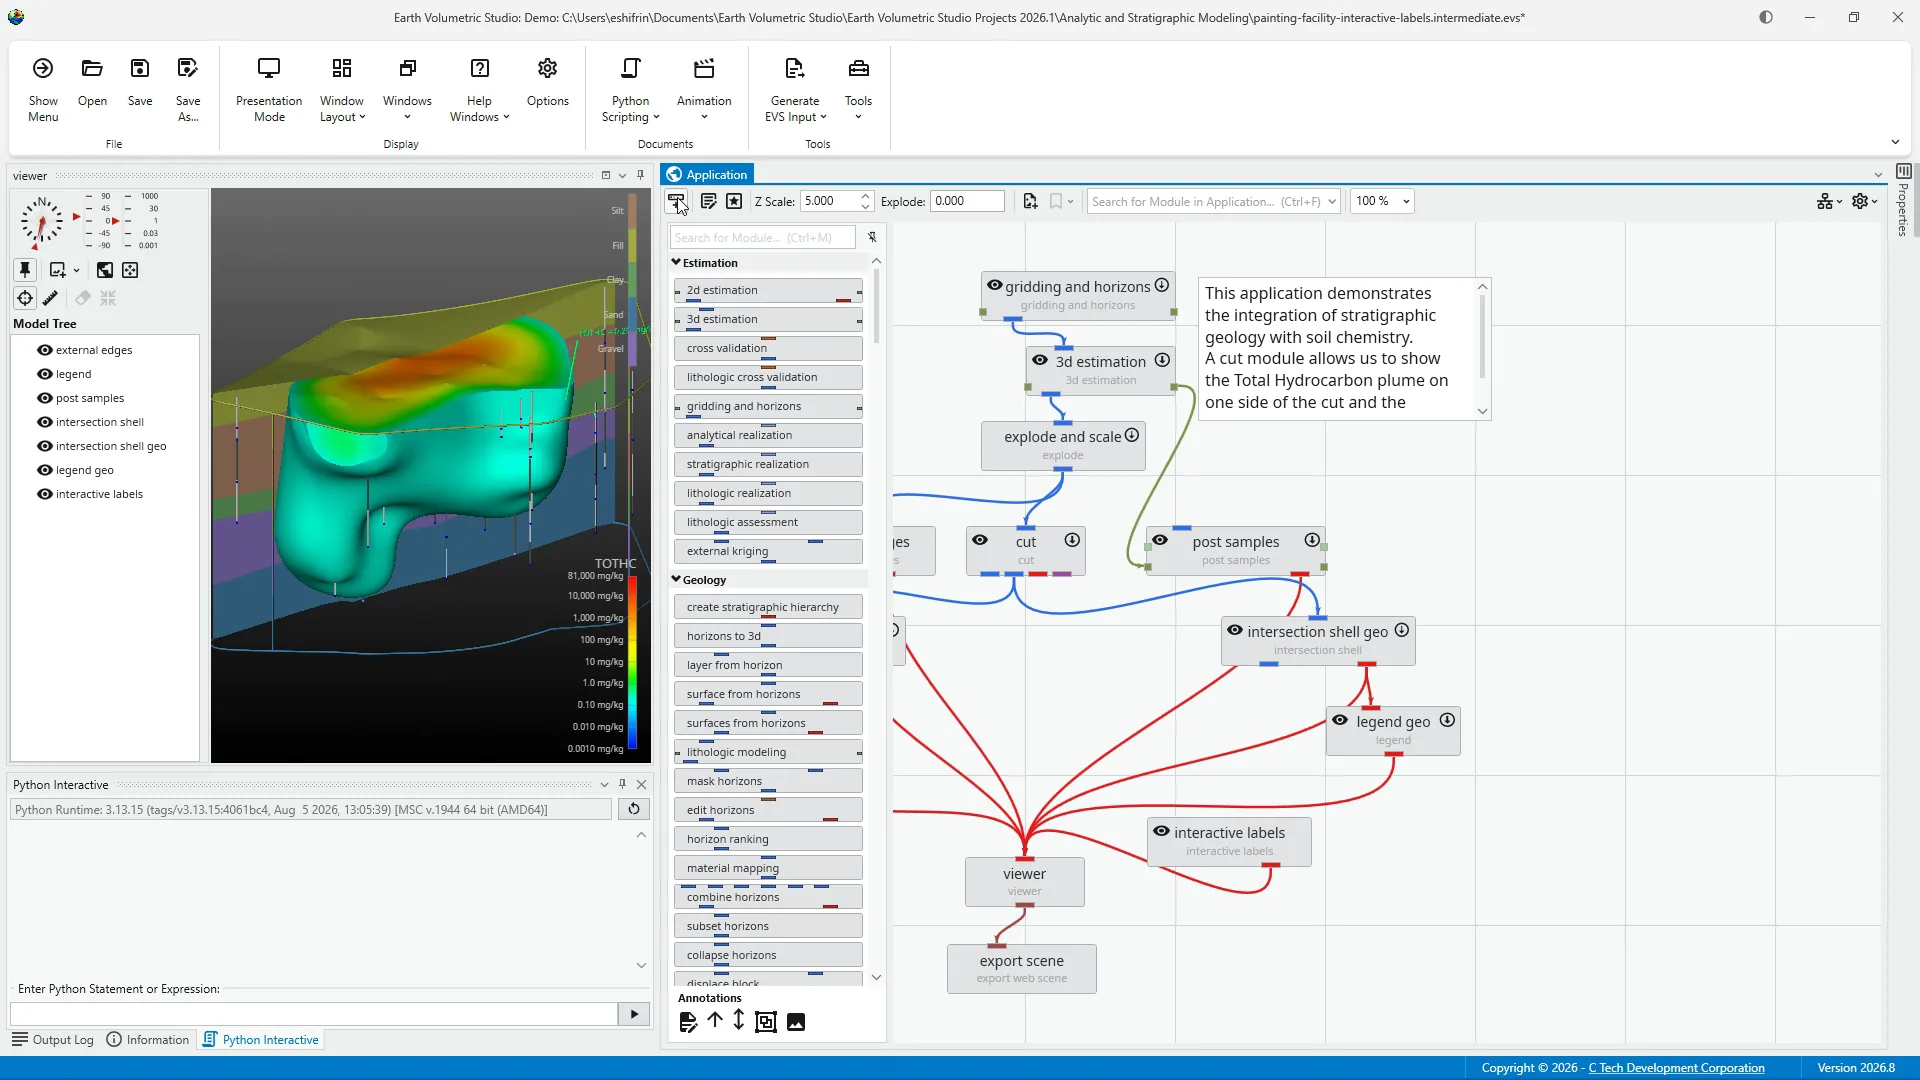
The Modules window is a searchable library of the building blocks used to create an EVS application. Modules are organized into groups based on their purpose. When building an application, we select modules from this window and add them to the Application window.
The modules library can also be pinned out of the way.
This is the Application window. It shows the modules and connections that make up the current application. In this sample project, the connected modules work together to produce the visualization of the model.
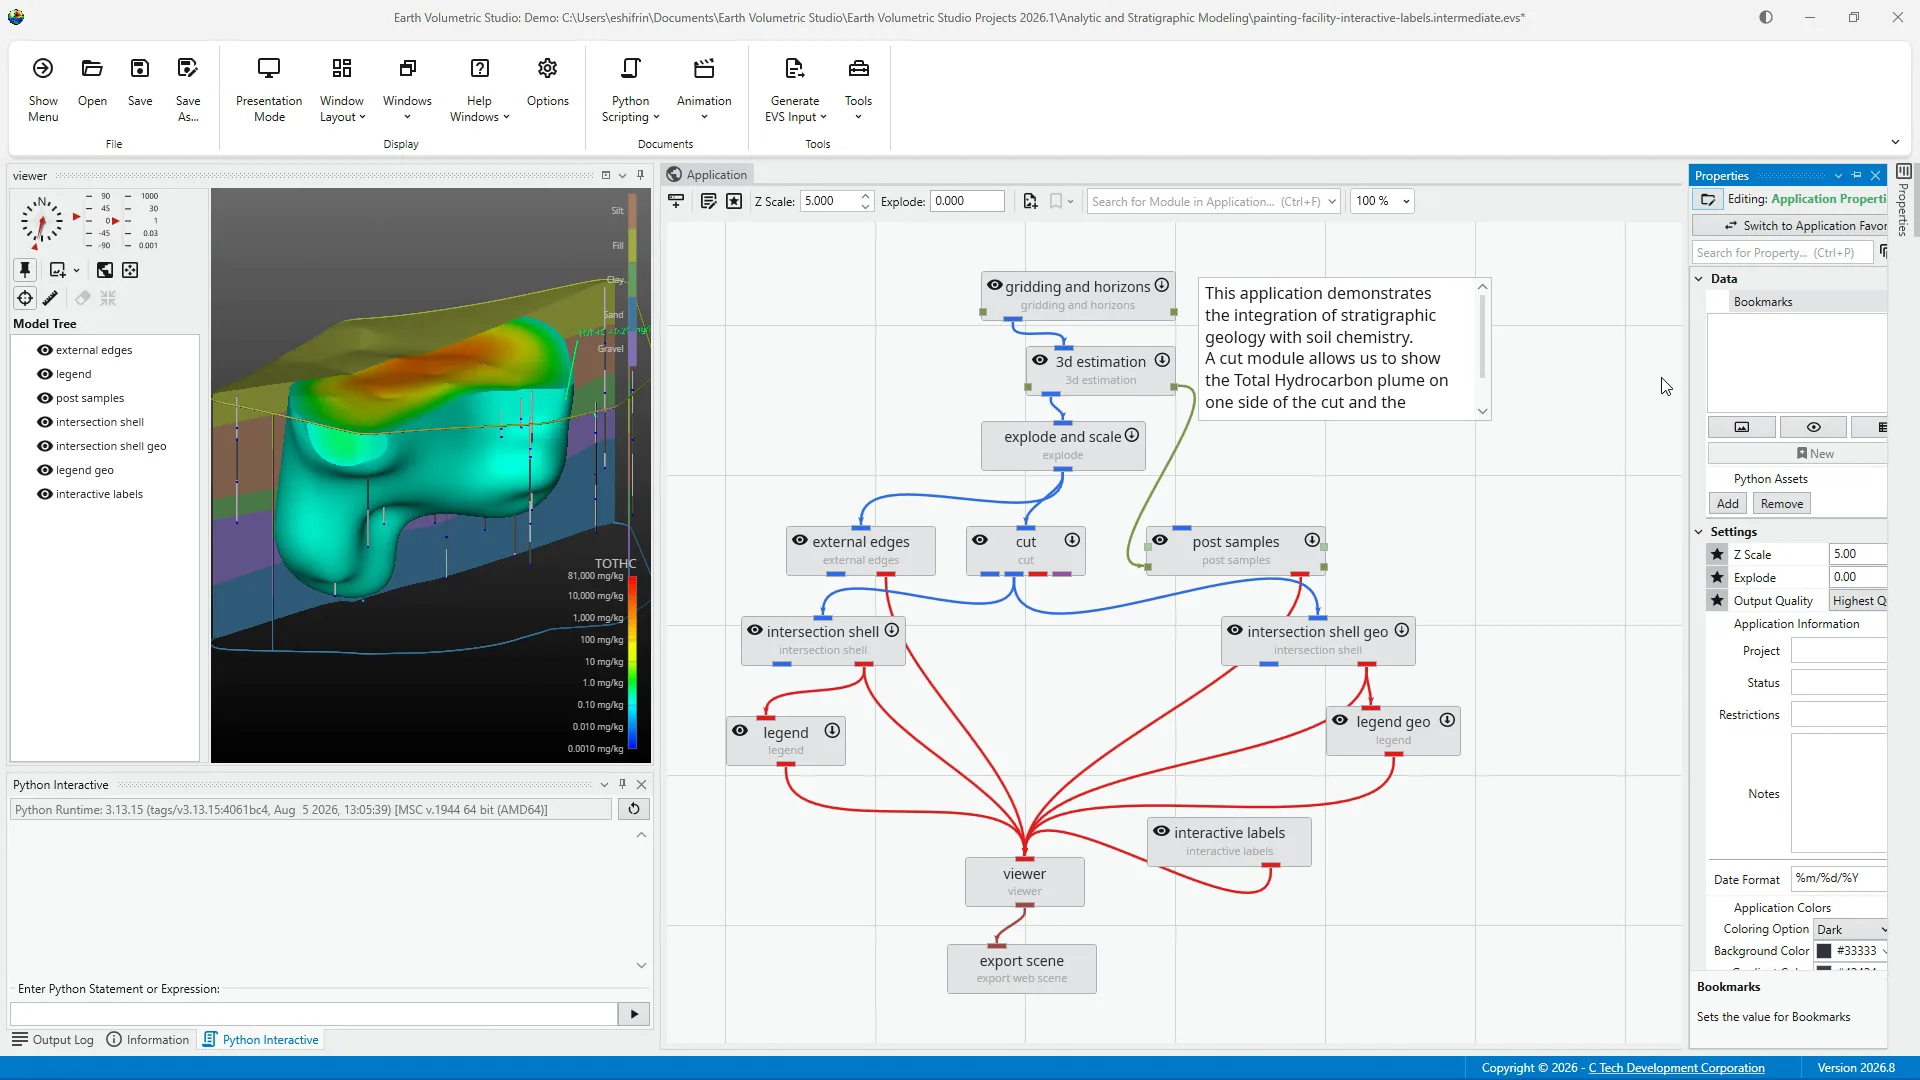
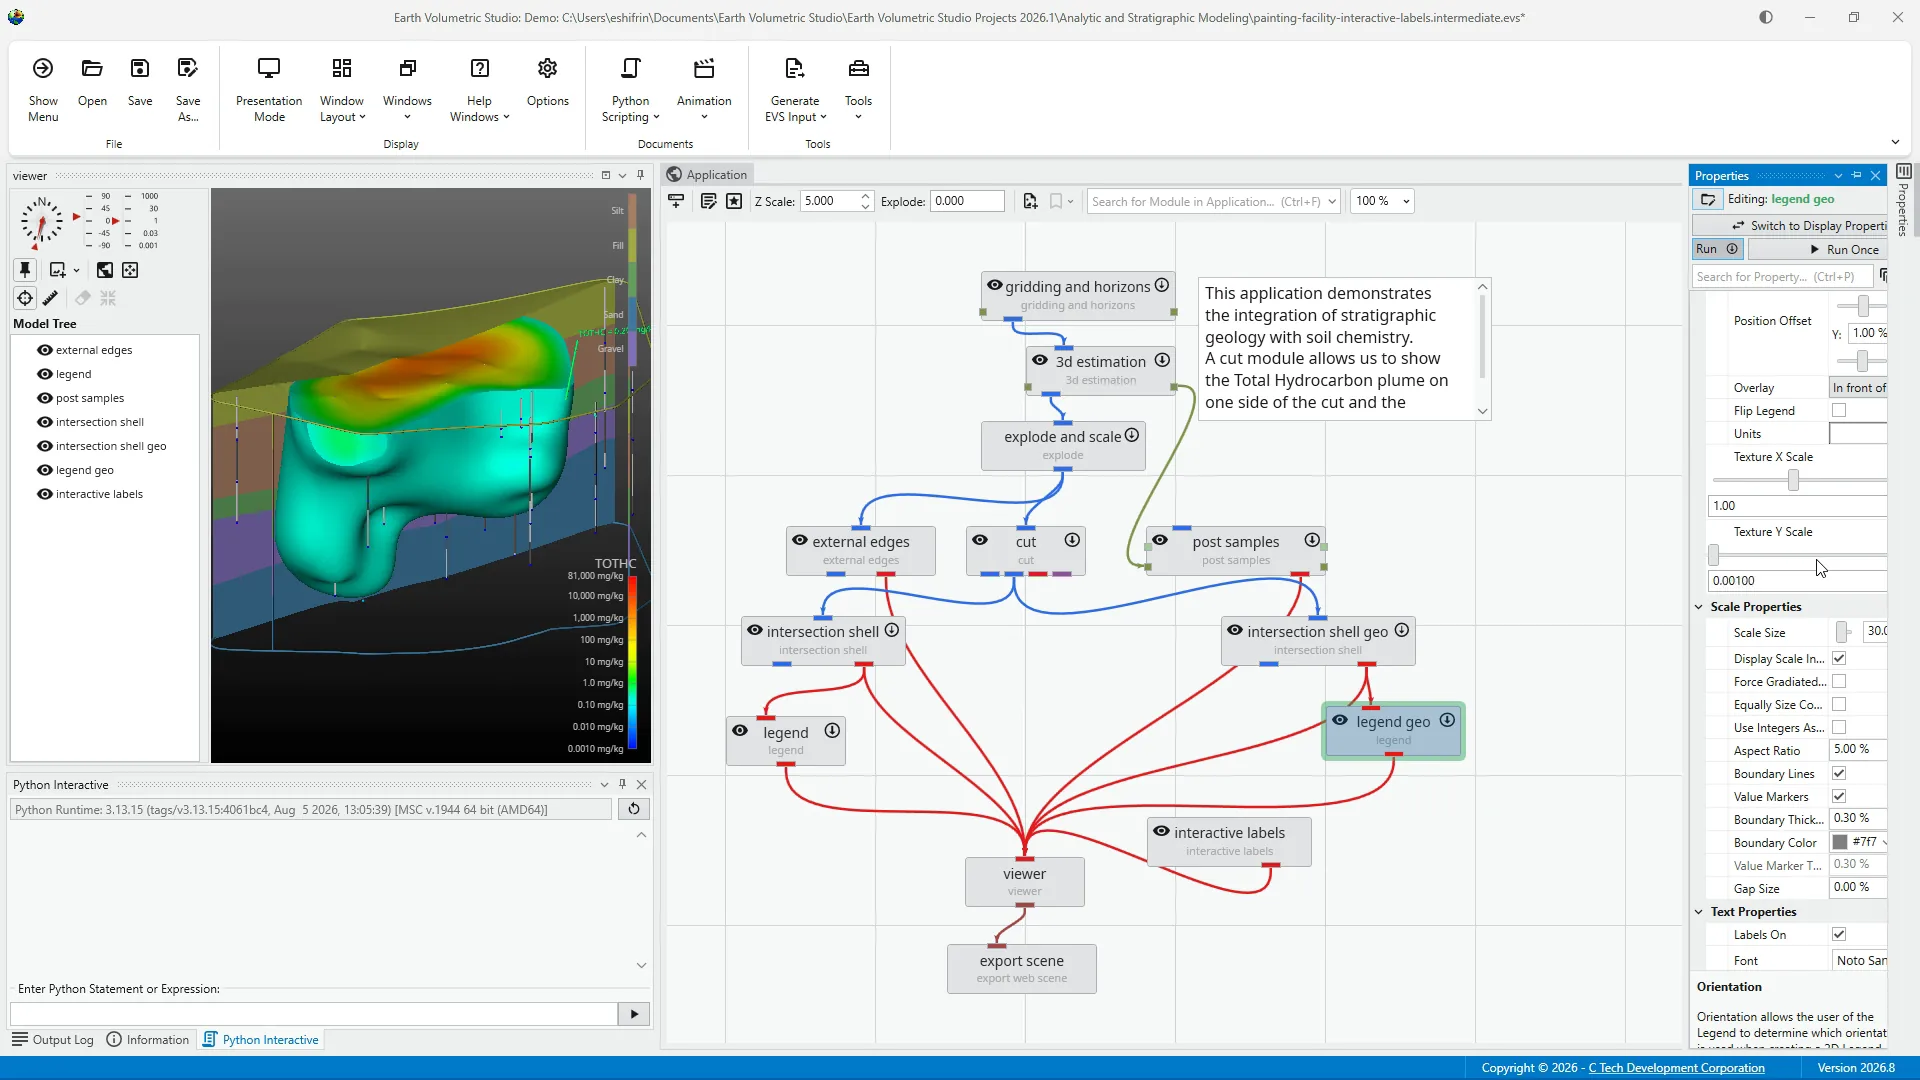
The Properties window displays the available settings for the item currently selected in the Application window. When I select a module, its properties appear here, so the contents change based on the selected item. For now, we'll leave the sample project's settings unchanged.
The viewer displays the visual output created by the application. In the Painting Facility sample, it shows the result produced by the workflow in the Application window. We'll cover how to navigate and interact with the Viewer in a later tutorial.
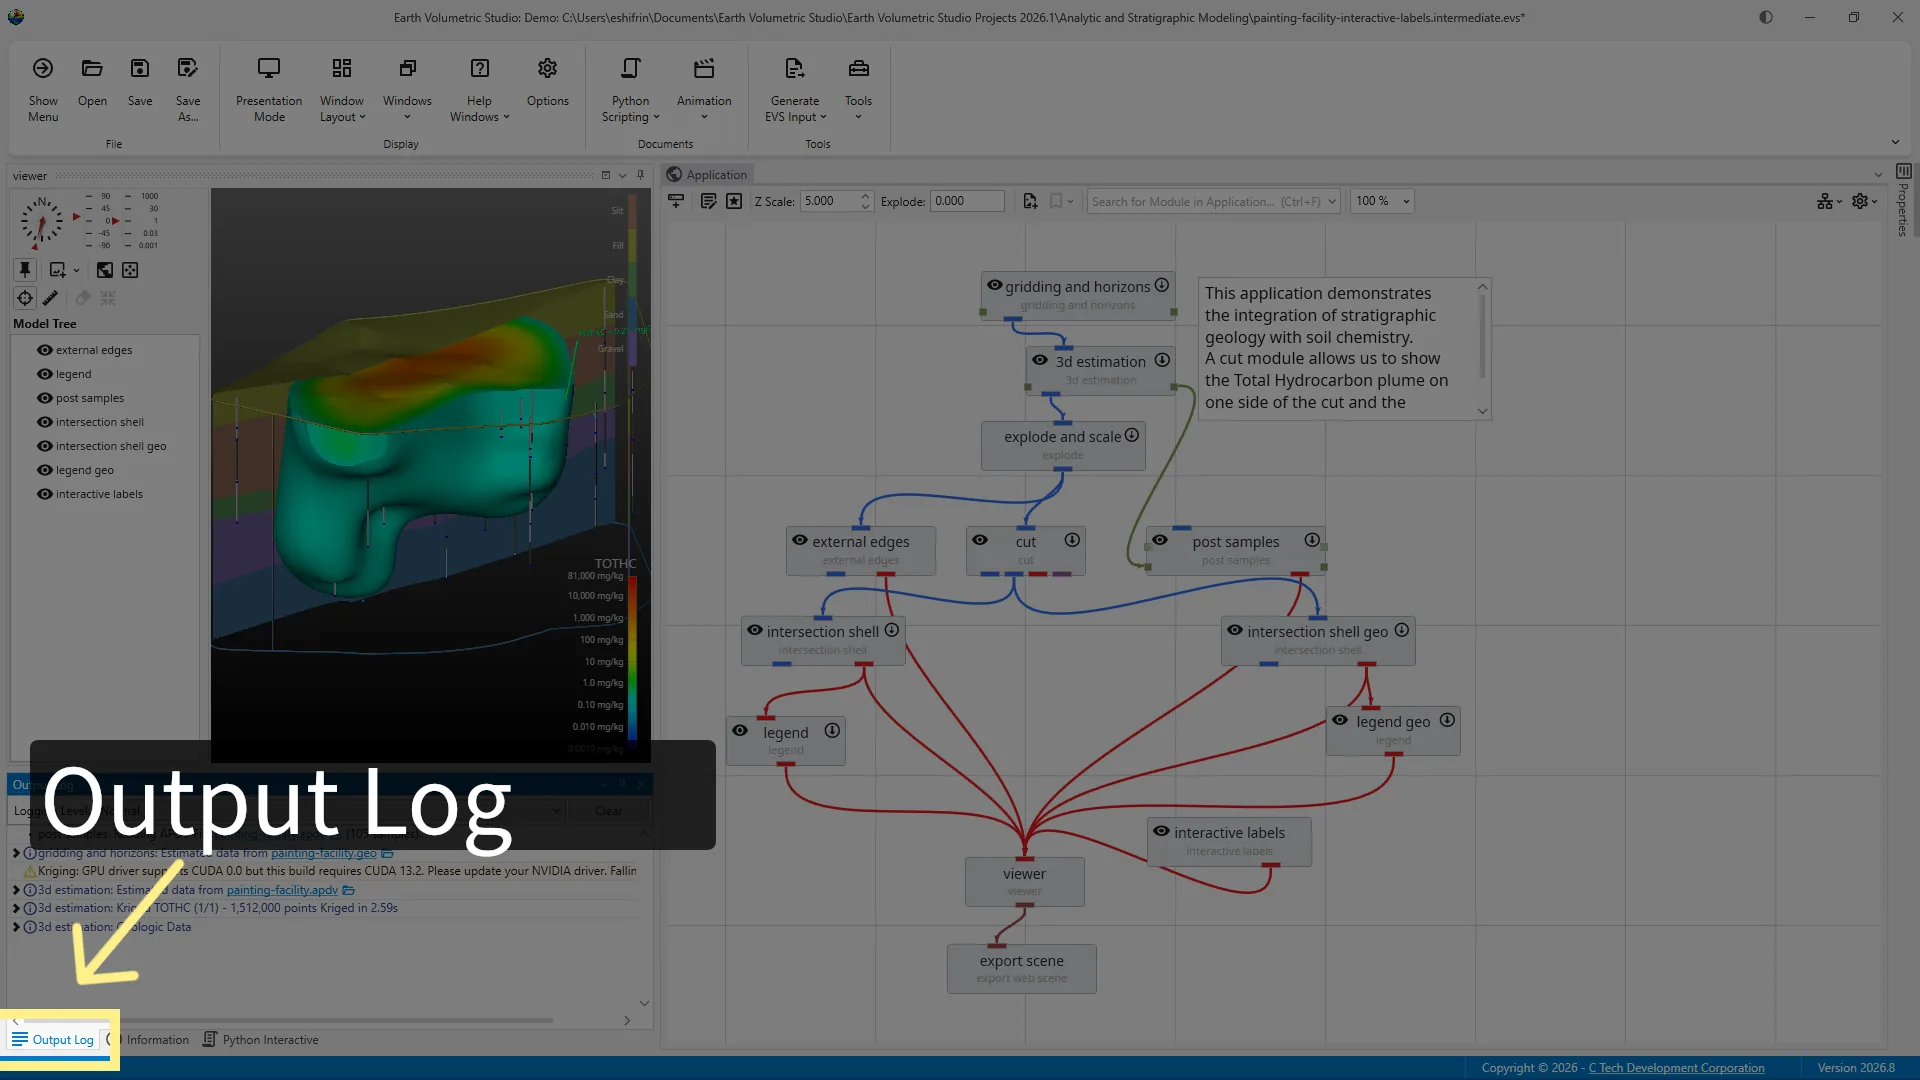
Finally, this tab opens the Output Log, which displays messages generated while an EVS application is opened or run. This includes important feedback from the model, such as warnings and errors. Keeping the Output Log as a tab makes it readily available without dedicating permanent screen space to the EVS application.
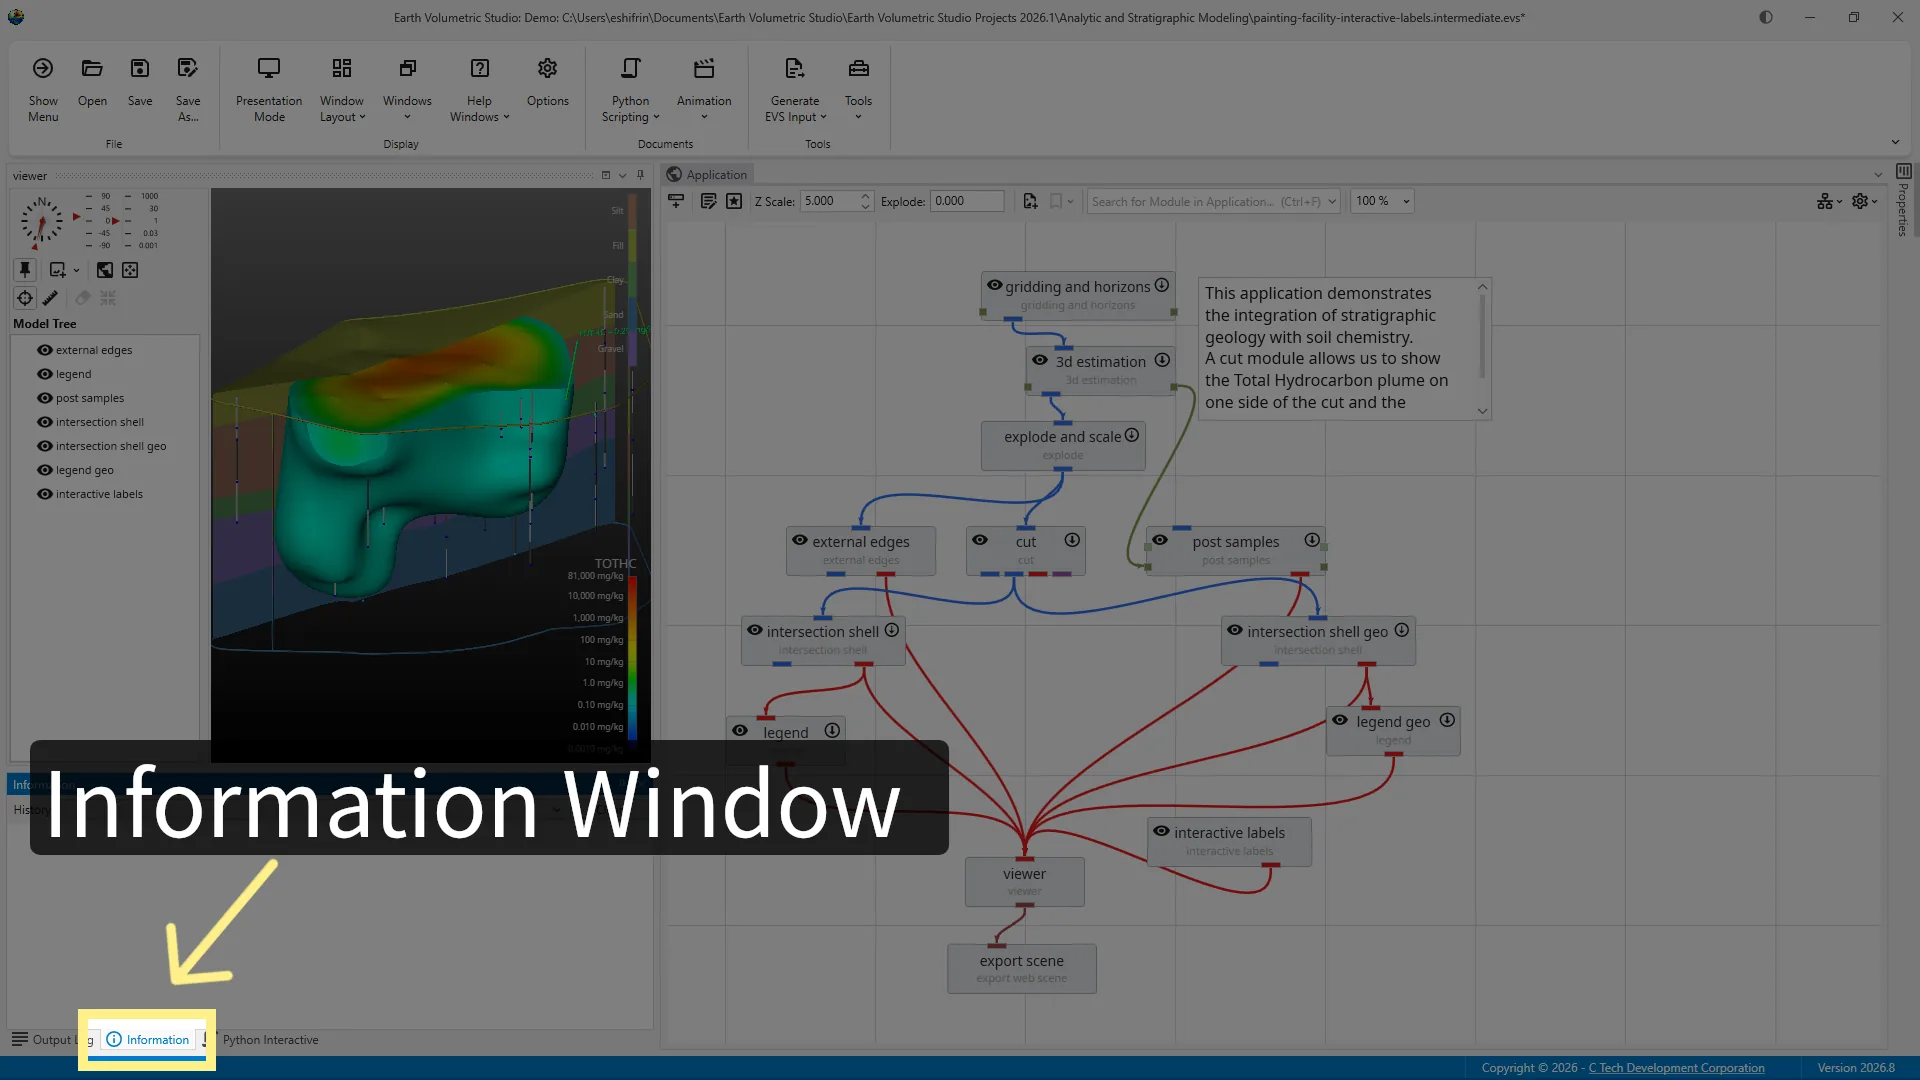
Information gives us details from tools such as probes and measurements and is stored as a tab next to the output log.
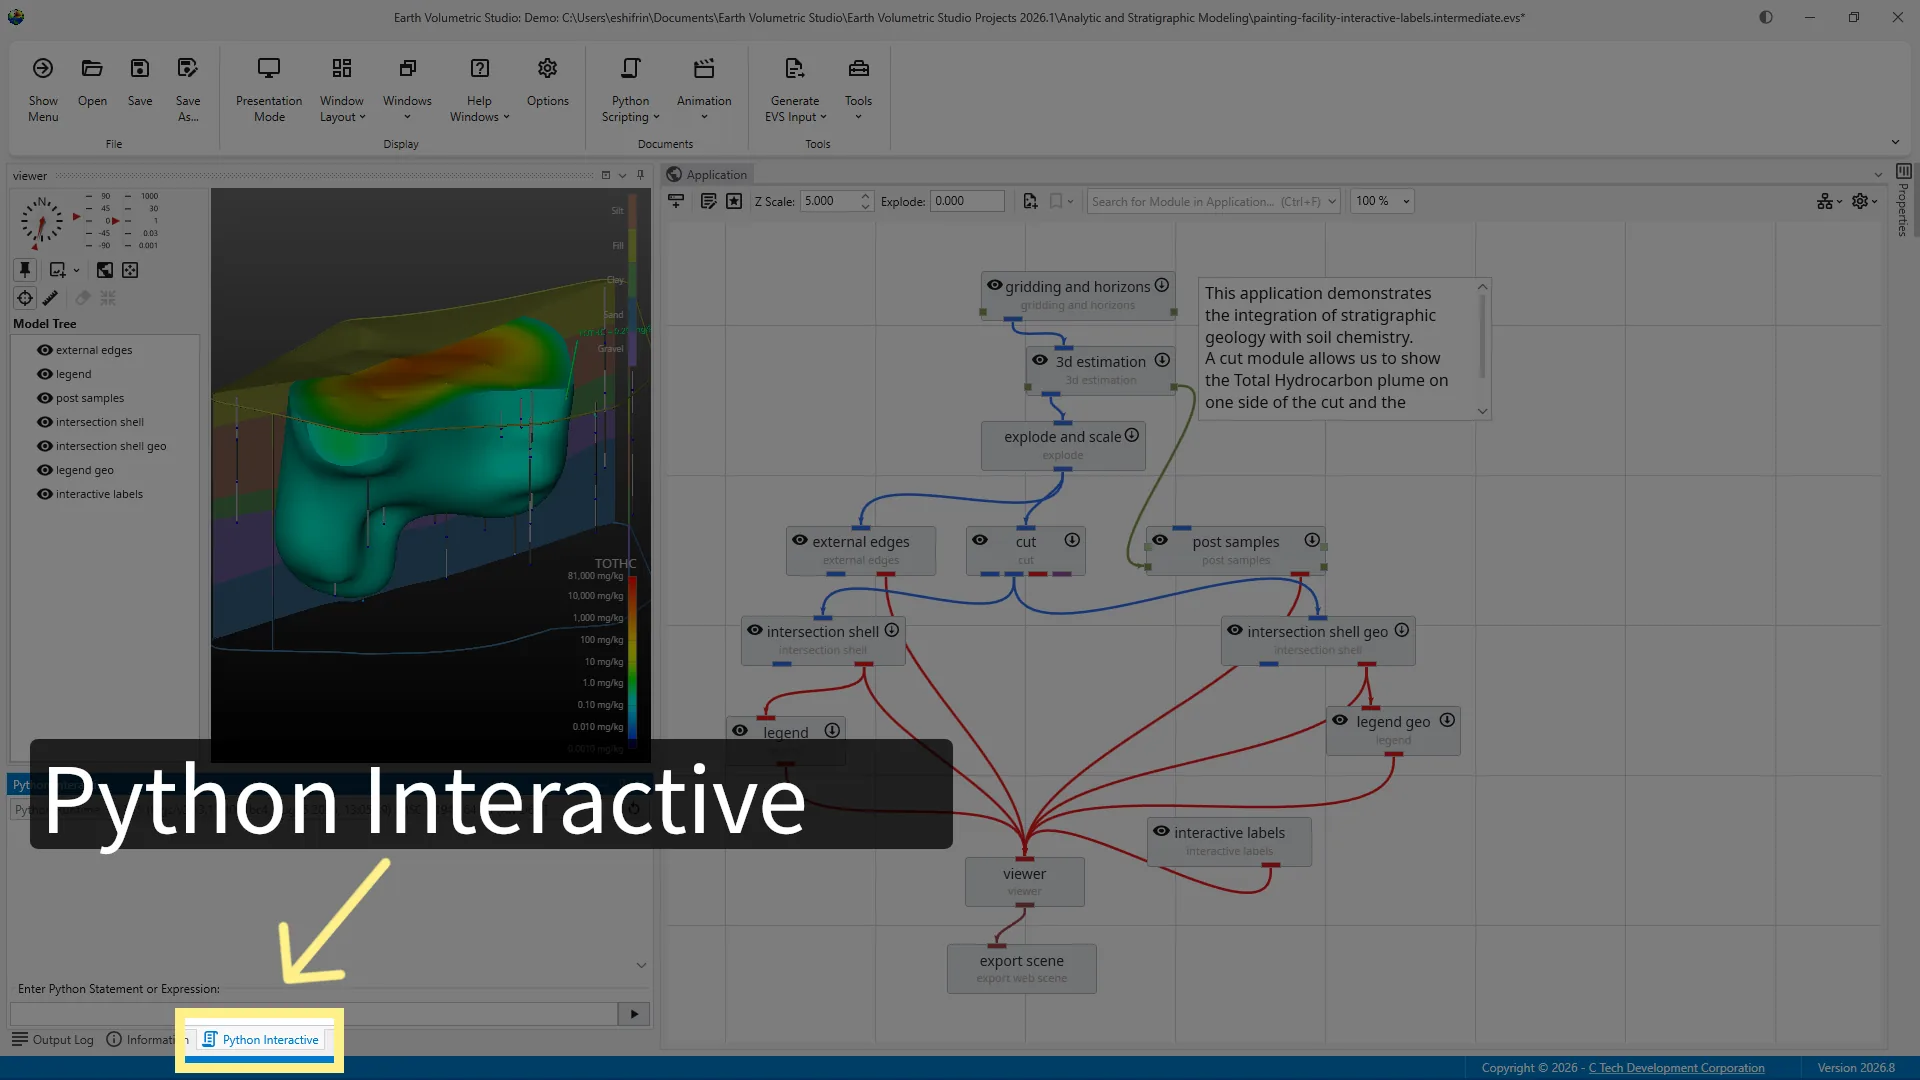
Python Interactive is a live scripting console. It allows advanced users to enter and run Python commands test short sections of code perform calculations inspect data and control or automate parts of EVS.
The EVS interface can be switched between light and dark themes. To change the theme, click the half-moon toggle in the upper-right corner. This changes the appearance of the interface without affecting the application or its visualization .
To recap: Modules provides the building blocks Application connects them Properties displays their settings Viewer shows the results and Output Log provides feedback. We also learned how to arrange the workspace. Next, we'll explore the Toolbar File Menu and Sample Projects .
1Getting Oriented in Earth Volumetric Studio Application
Welcome to Earth Volumetric Studio, or EVS. In this tutorial we'll open a sample project and take a tour of the workspace. We'll also move a window so you can see how to arrange EVS for the way you like to work. For the Demo version of EVS to work best, make sure you have the sample projects downloaded from ctech.com.
2Startup Window
When EVS starts the first thing we see is the startup window and It gives us a few ways to begin.
3Open .EVS Application
Open EVS Application allows you to browse your computer or network and open an existing EVS project file.
4Open recent
Open recent displays a list of projects you've opened recently, providing a quick way to return to your previous work without needing to browse for the file again.
5Create New Application
For this tutorial we want a clean workspace so I'll choose New Application. That closes the startup window and opens EVS with a blank Application Network. This is a new application, ready for us to build in; we haven't added any modules or data yet.
6Open Save Menu
First we're going to open a sample project to explore EVS with a real application. Click the open in the top left corner of the main toolbar.
7Open File Dialog
From the Home page, click open in the toolbar.
8Search for File
Click Search for File to locate the sample project used in this tutorial. The sample file we are using is painting facility-interactive-labels.intermediate.evs
9Confirm Project Folder
Click the sample project from the searchable library to open it in EVS.
10Main Toolbar
Once the sample project has loaded, the EVS workspace appears. Across the top is the Main Toolbar, which provides quick access to common commands, including tools for working with applications and controlling which windows are visible. Next, we'll explore how to rearrange these windows and use Window Layouts to save or restore a preferred workspace.
11Change Window Layout
If your window layout isn't set to the default, select Window Layout from the top toolbar then choose Default from the drop-down menu.
12Intro to Windows
At first there's a lot on the EVS screen. The helpful way to think about EVS is not as one crowded window but as a collection of windows each with a different job. One is where we build an application. Another shows its visual result. Others give us settings tools and feedback. These windows don't have to stay in the positions you see here. We can move them group them into tabs or temporarily tuck them out of the way. First let's try that with a window we can easily recognize.
13Select a window
The windows in EVS can be rearranged. To move a window, click and hold its title bar, then drag it to a new location.
14Undocking a Window
As I drag the Properties window away from the workspace it becomes a floating window. It remains open but it is no longer attached to the main layout. A floating window can be moved freely around the screen. This can be useful when working with multiple monitors or when you need more room in a specific part of the interface.
15Docking Guides 1
To return the window to the main workspace, drag it back over EVS.
16Docking Guides 2
As the window moves over the workspace, docking guides appear. These guides show the available positions where the window can be placed. Release the mouse over a docking guide to dock the window in that position. The Properties window is now attached to the EVS workspace again.
17PinAuto Hide
A docked window can be either pinned open or automatically hidden. The pin icon controls this behavior. When I unpin the window it collapses into a tab along the edge of the workspace. This is known as Auto Hide.
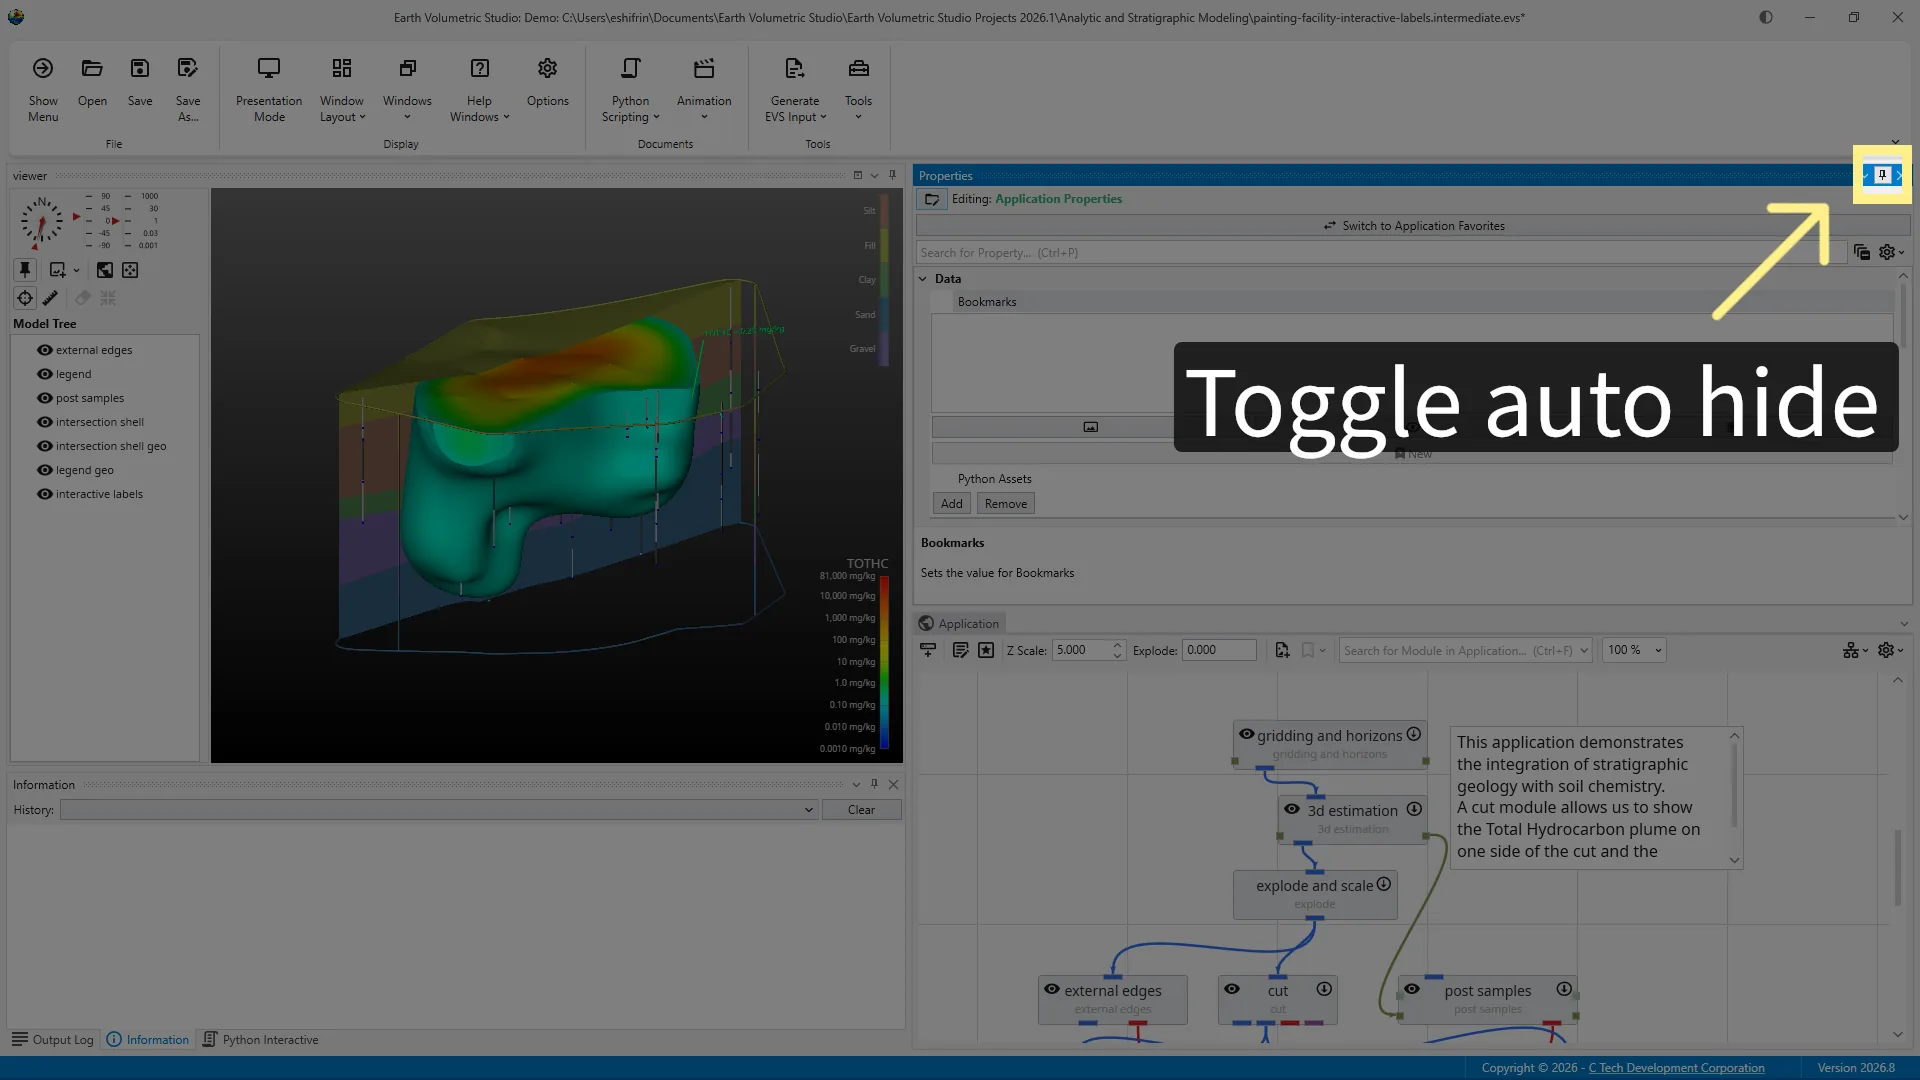
18Overview
I don't want the Properties window positioned above the Application window, so I'll move it to the side. I'll use the docking guide to redock it, then select the pin to hide it as a tab next to the Application window. This keeps it accessible without taking up extra workspace.
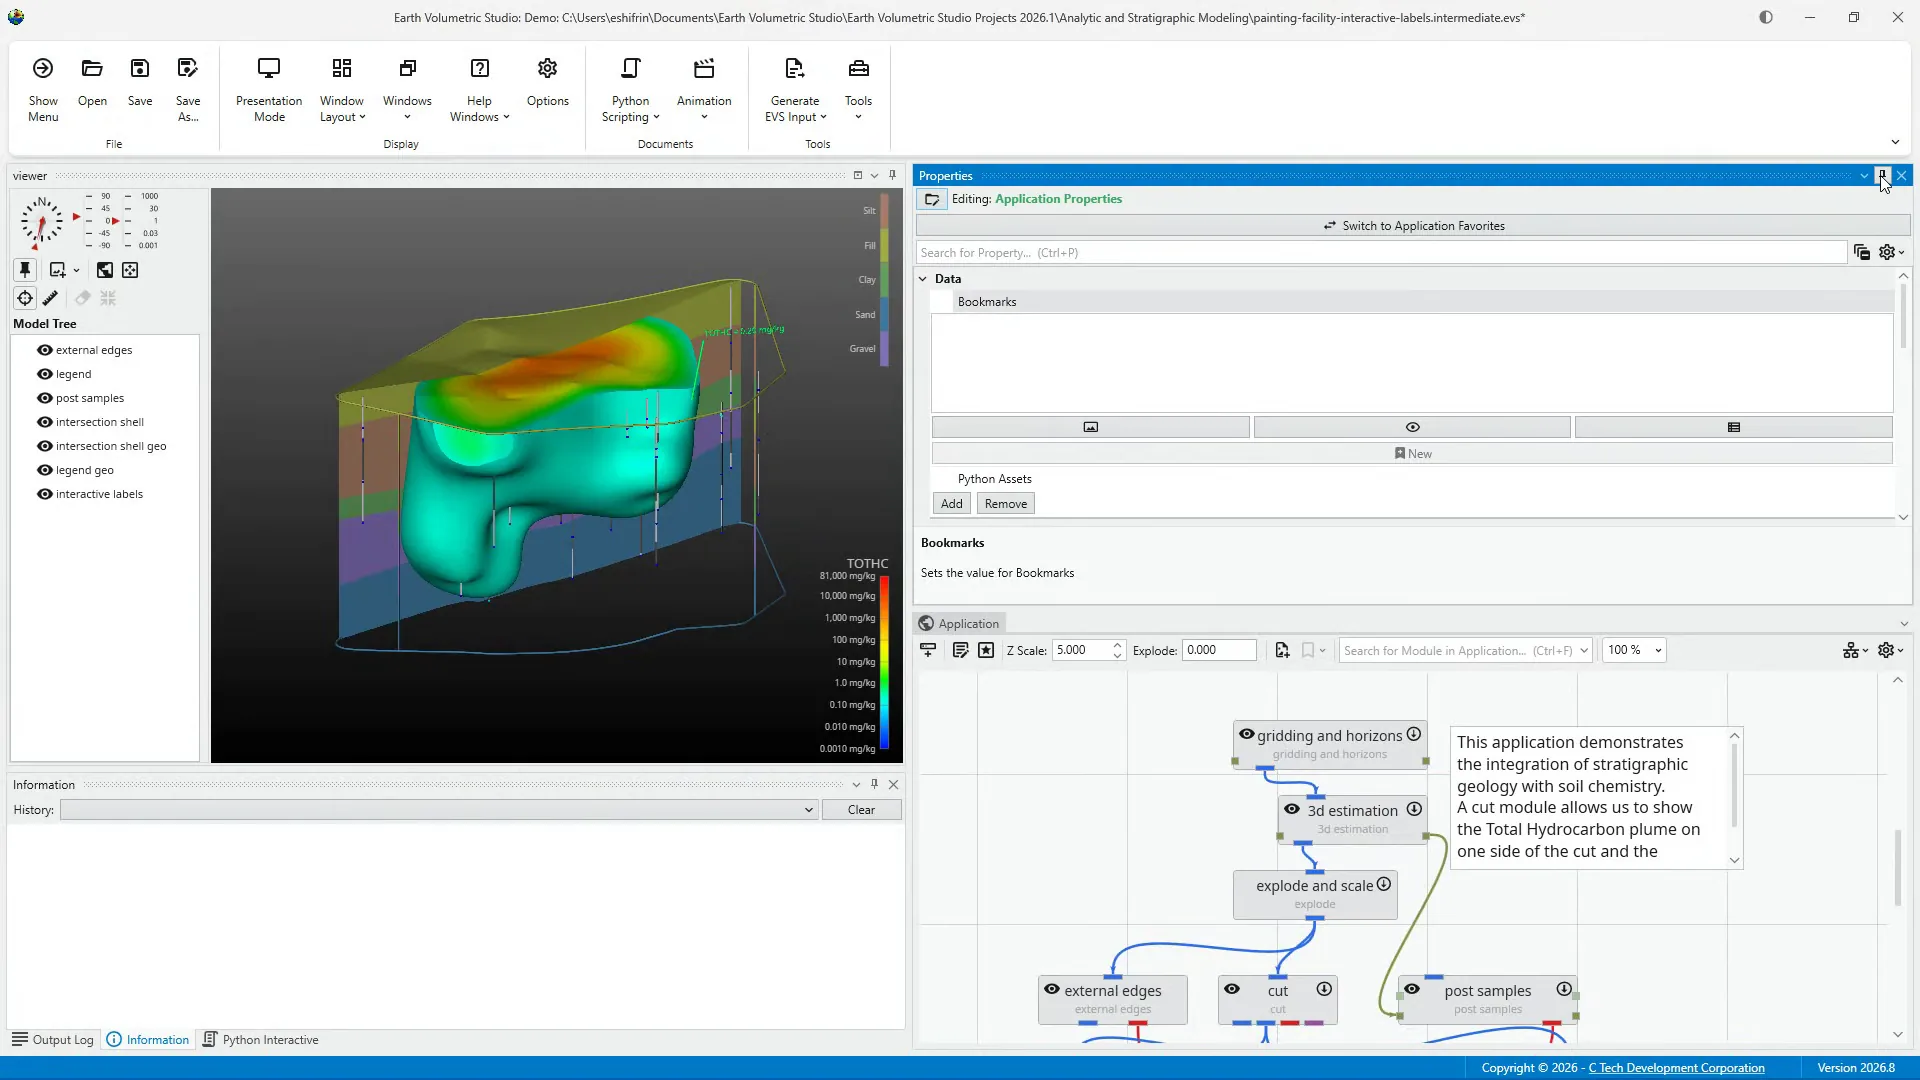
19Modules Window
The Modules window is a searchable library of the building blocks used to create an EVS application. Modules are organized into groups based on their purpose. When building an application, we select modules from this window and add them to the Application window.
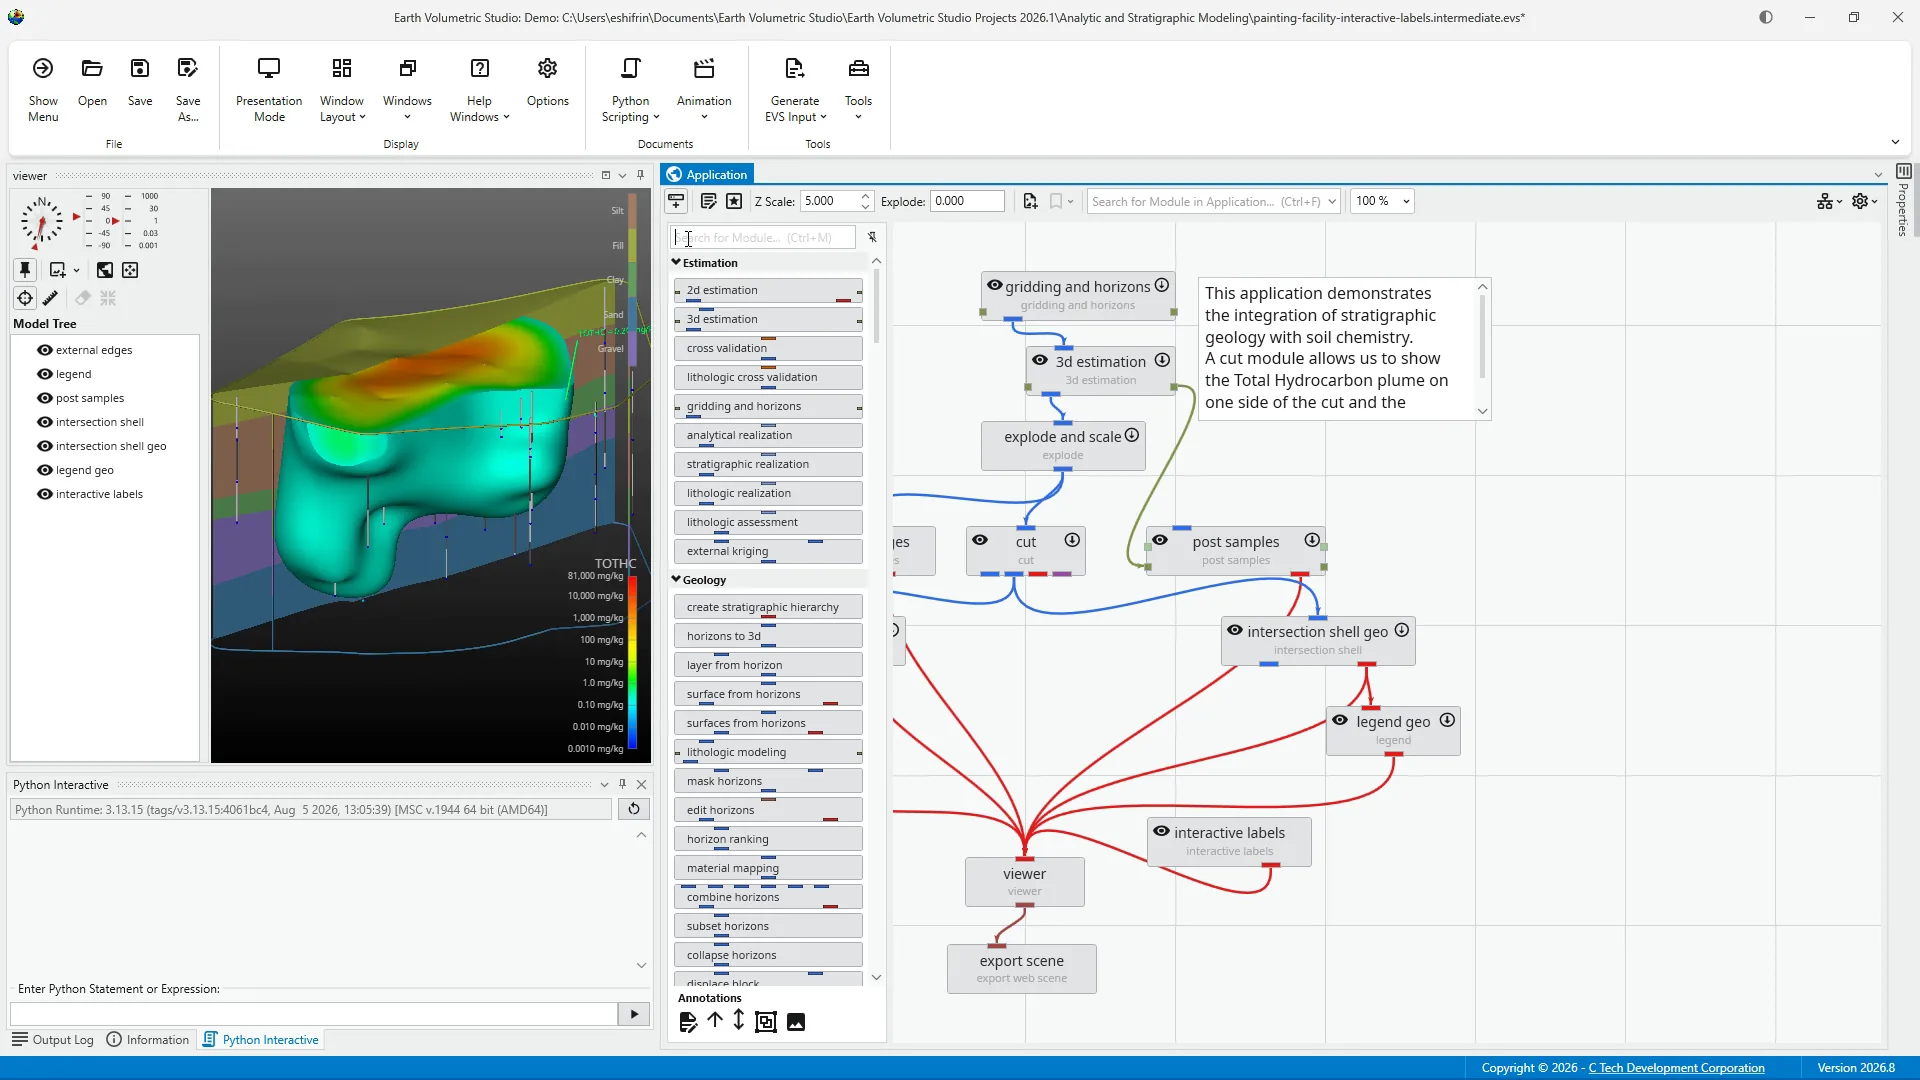
20Pin Module Library
The modules library can also be pinned out of the way.
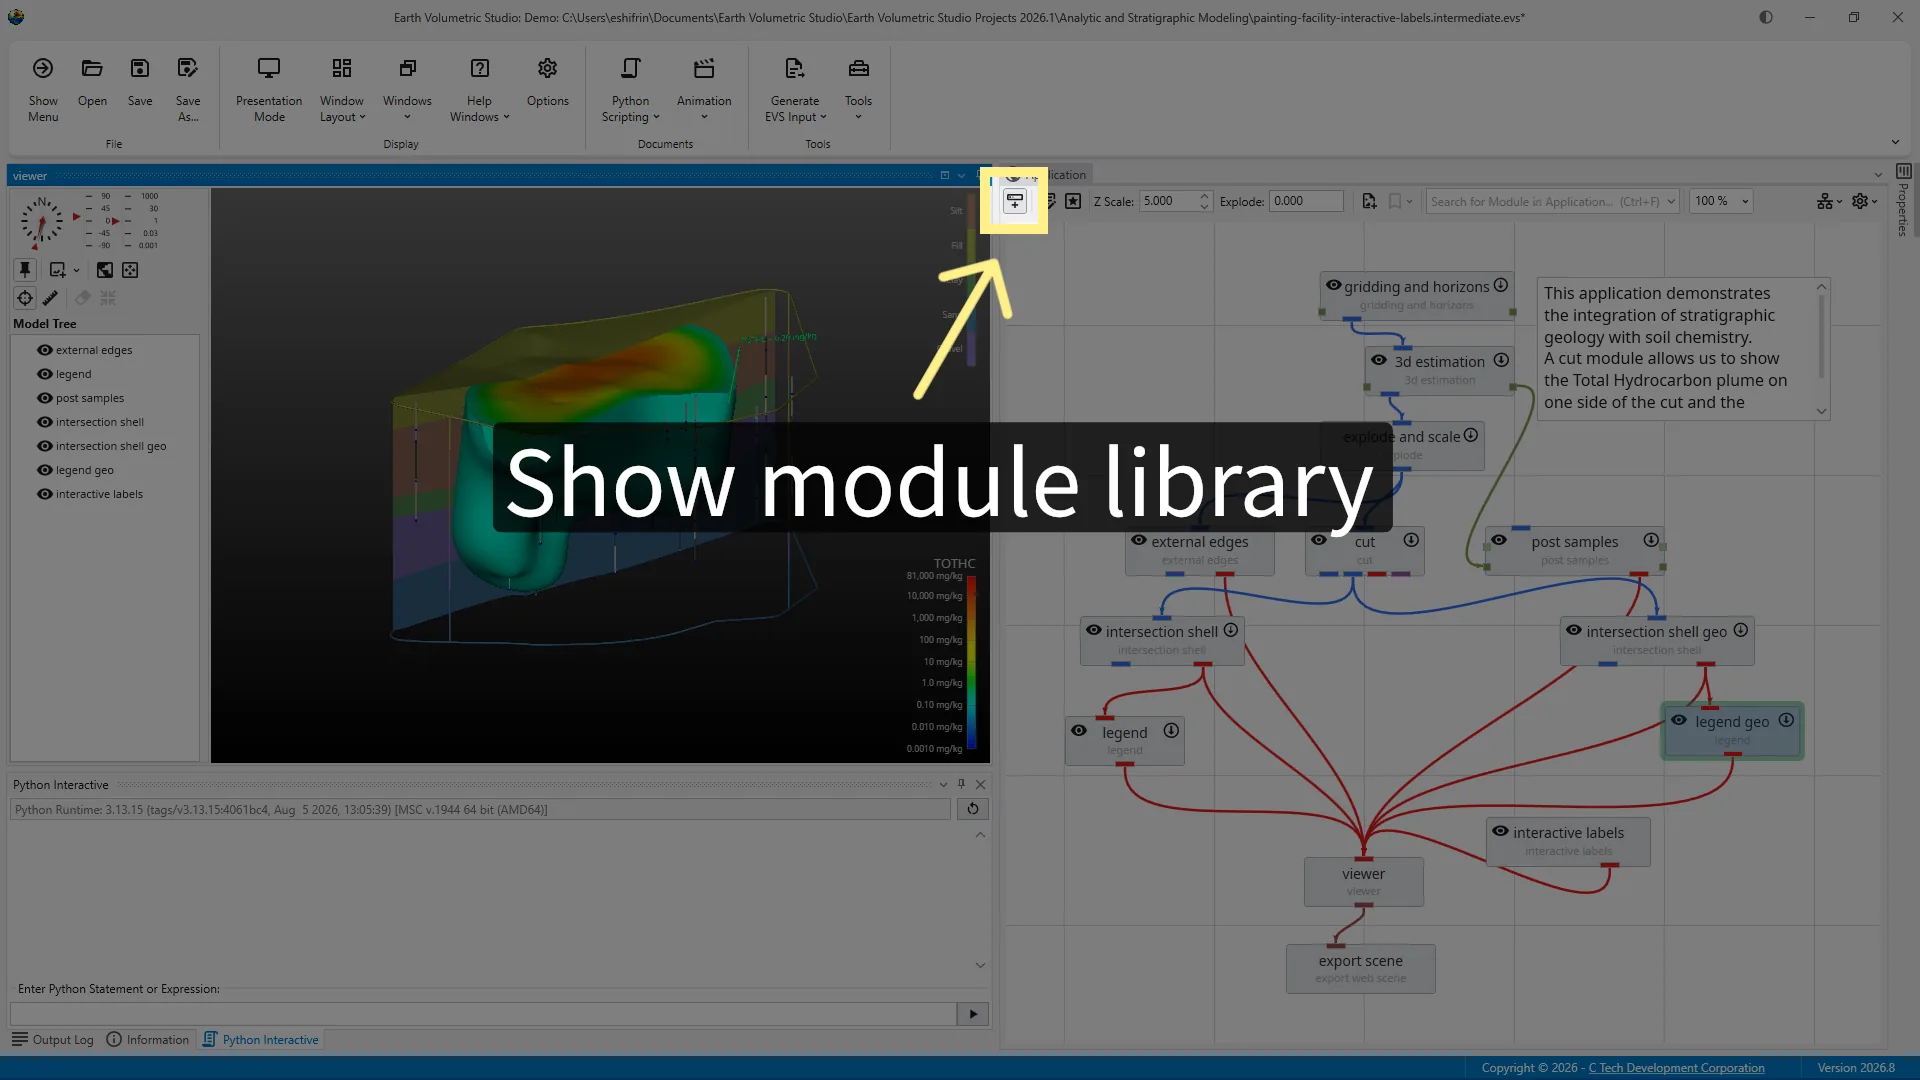
21Application Window
This is the Application window. It shows the modules and connections that make up the current application. In this sample project, the connected modules work together to produce the visualization of the model.
22Properties Window
The Properties window displays the available settings for the item currently selected in the Application window. When I select a module, its properties appear here, so the contents change based on the selected item. For now, we'll leave the sample project's settings unchanged.
23Viewer Window
The viewer displays the visual output created by the application. In the Painting Facility sample, it shows the result produced by the workflow in the Application window. We'll cover how to navigate and interact with the Viewer in a later tutorial.
24Output Log
Finally, this tab opens the Output Log, which displays messages generated while an EVS application is opened or run. This includes important feedback from the model, such as warnings and errors. Keeping the Output Log as a tab makes it readily available without dedicating permanent screen space to the EVS application.
25Information Window
Information gives us details from tools such as probes and measurements and is stored as a tab next to the output log.
26Python Interactive Window
Python Interactive is a live scripting console. It allows advanced users to enter and run Python commands test short sections of code perform calculations inspect data and control or automate parts of EVS.
27Light Dark Theme
The EVS interface can be switched between light and dark themes. To change the theme, click the half-moon toggle in the upper-right corner. This changes the appearance of the interface without affecting the application or its visualization .
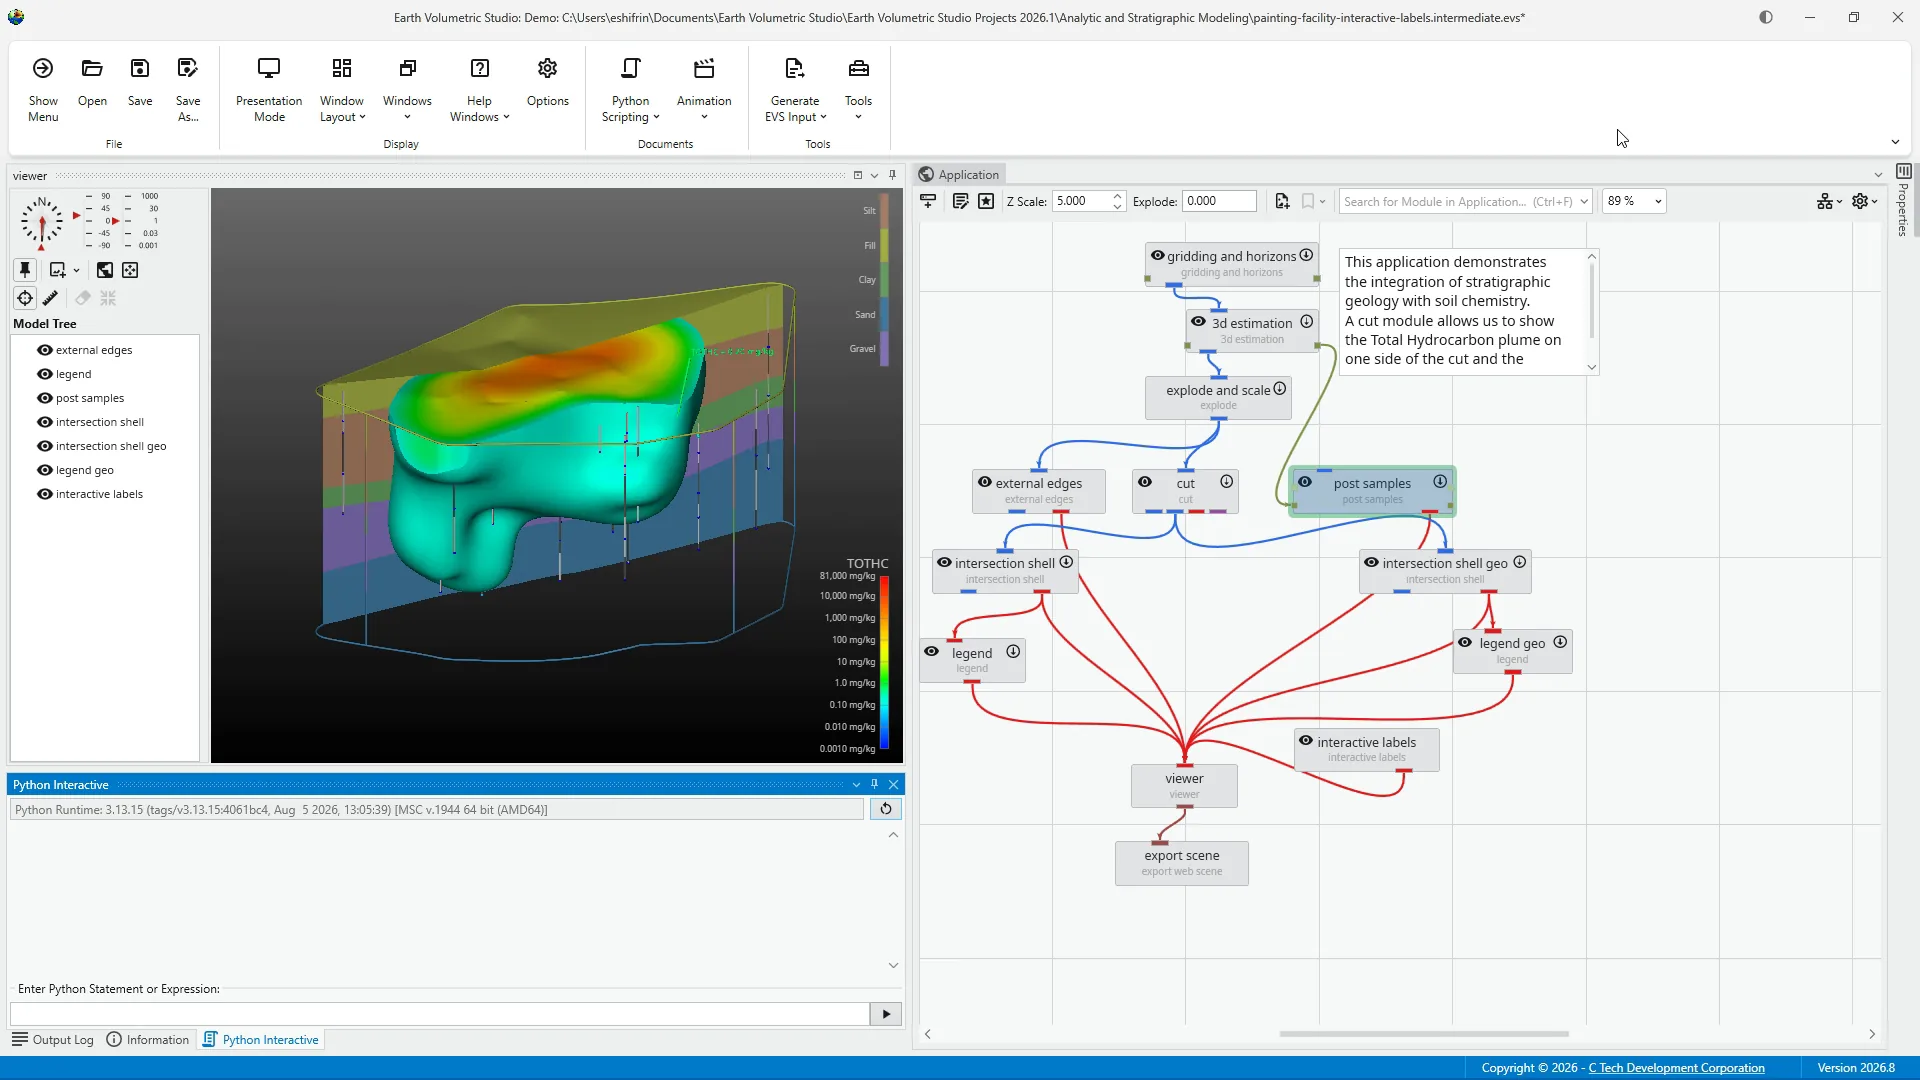
Summary
To recap: Modules provides the building blocks Application connects them Properties displays their settings Viewer shows the results and Output Log provides feedback. We also learned how to arrange the workspace. Next, we'll explore the Toolbar File Menu and Sample Projects .