
Introduction
Earth Volumetric Studio 2026.1 introduces a streamlined user interface designed to boost your productivity and simplify workflows. This update focuses on reducing clutter and optimizing usability for all users. Version 2026.1 contains a major user interface update focused on simplification across the board. The user interface has reorganized to focus on key functionality, enhancing productivity and optimizing screen real estate on laptops and multiple monitors.
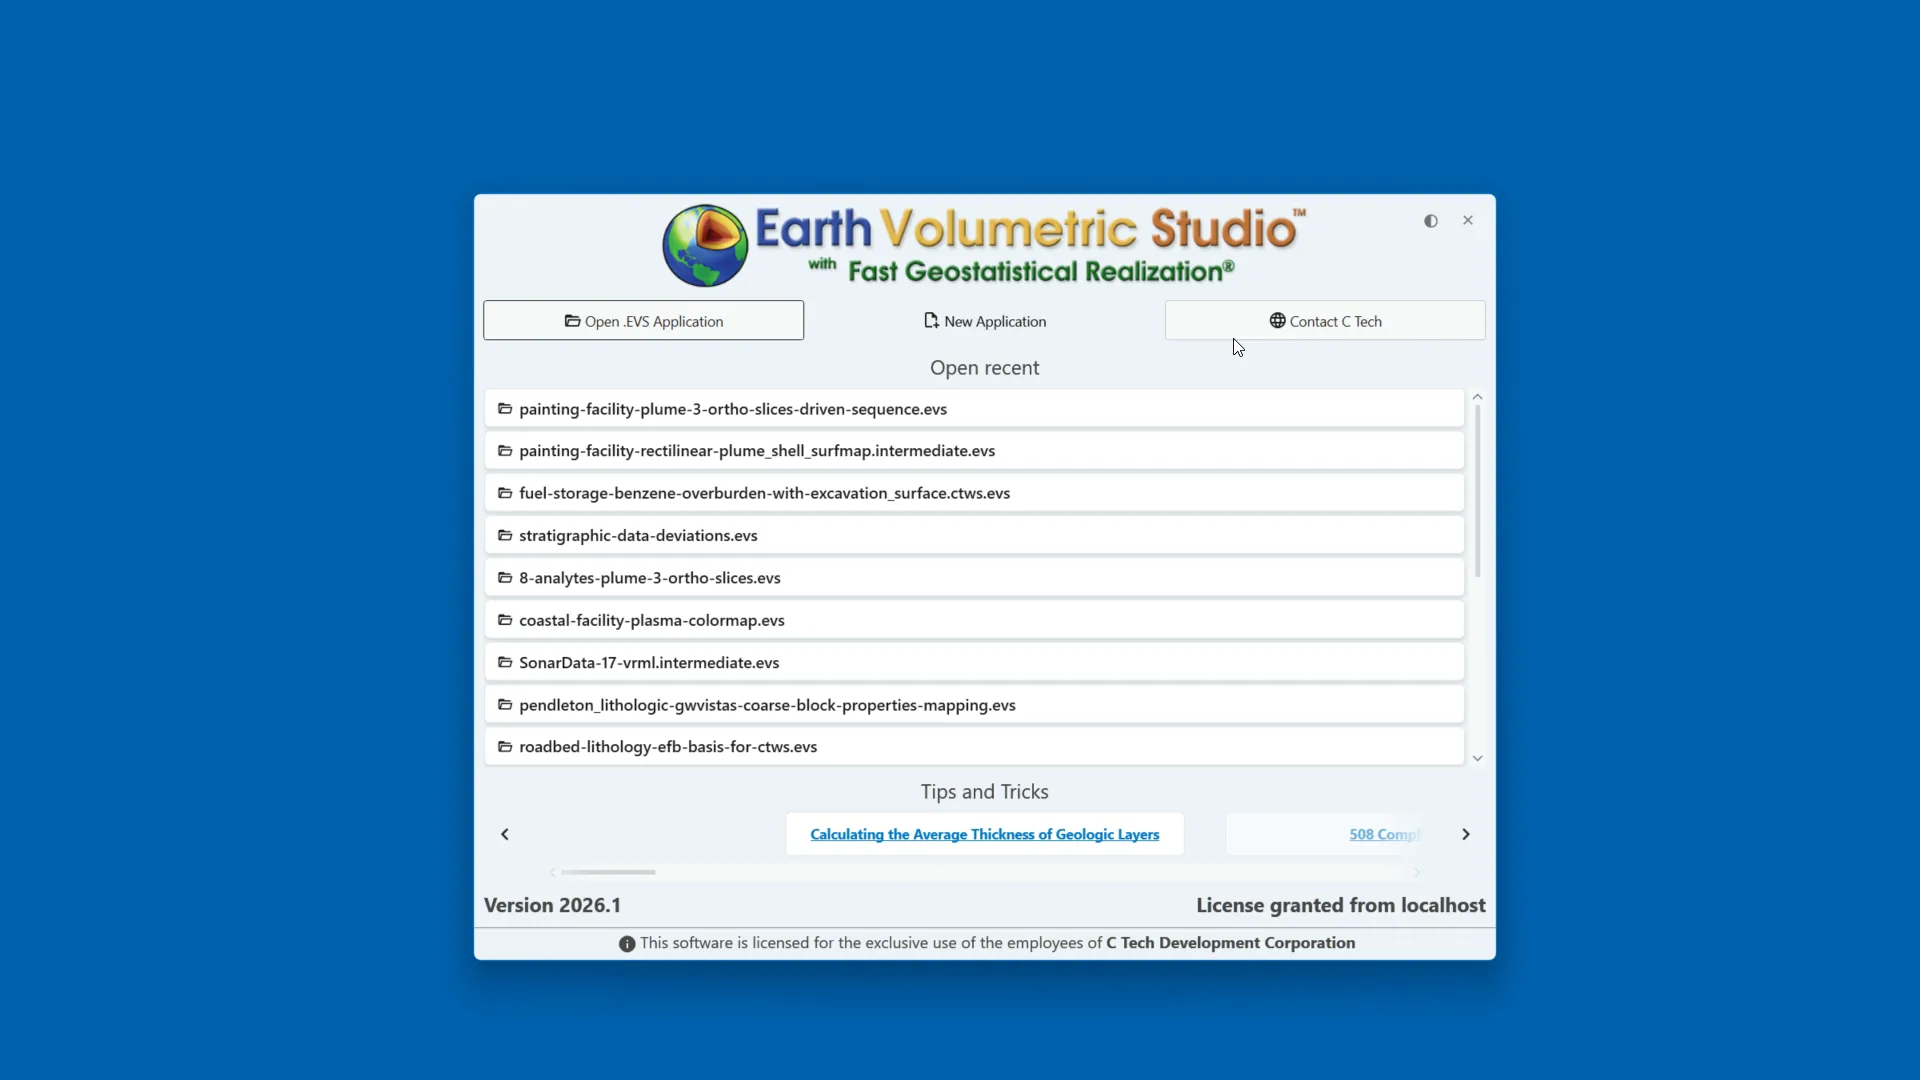
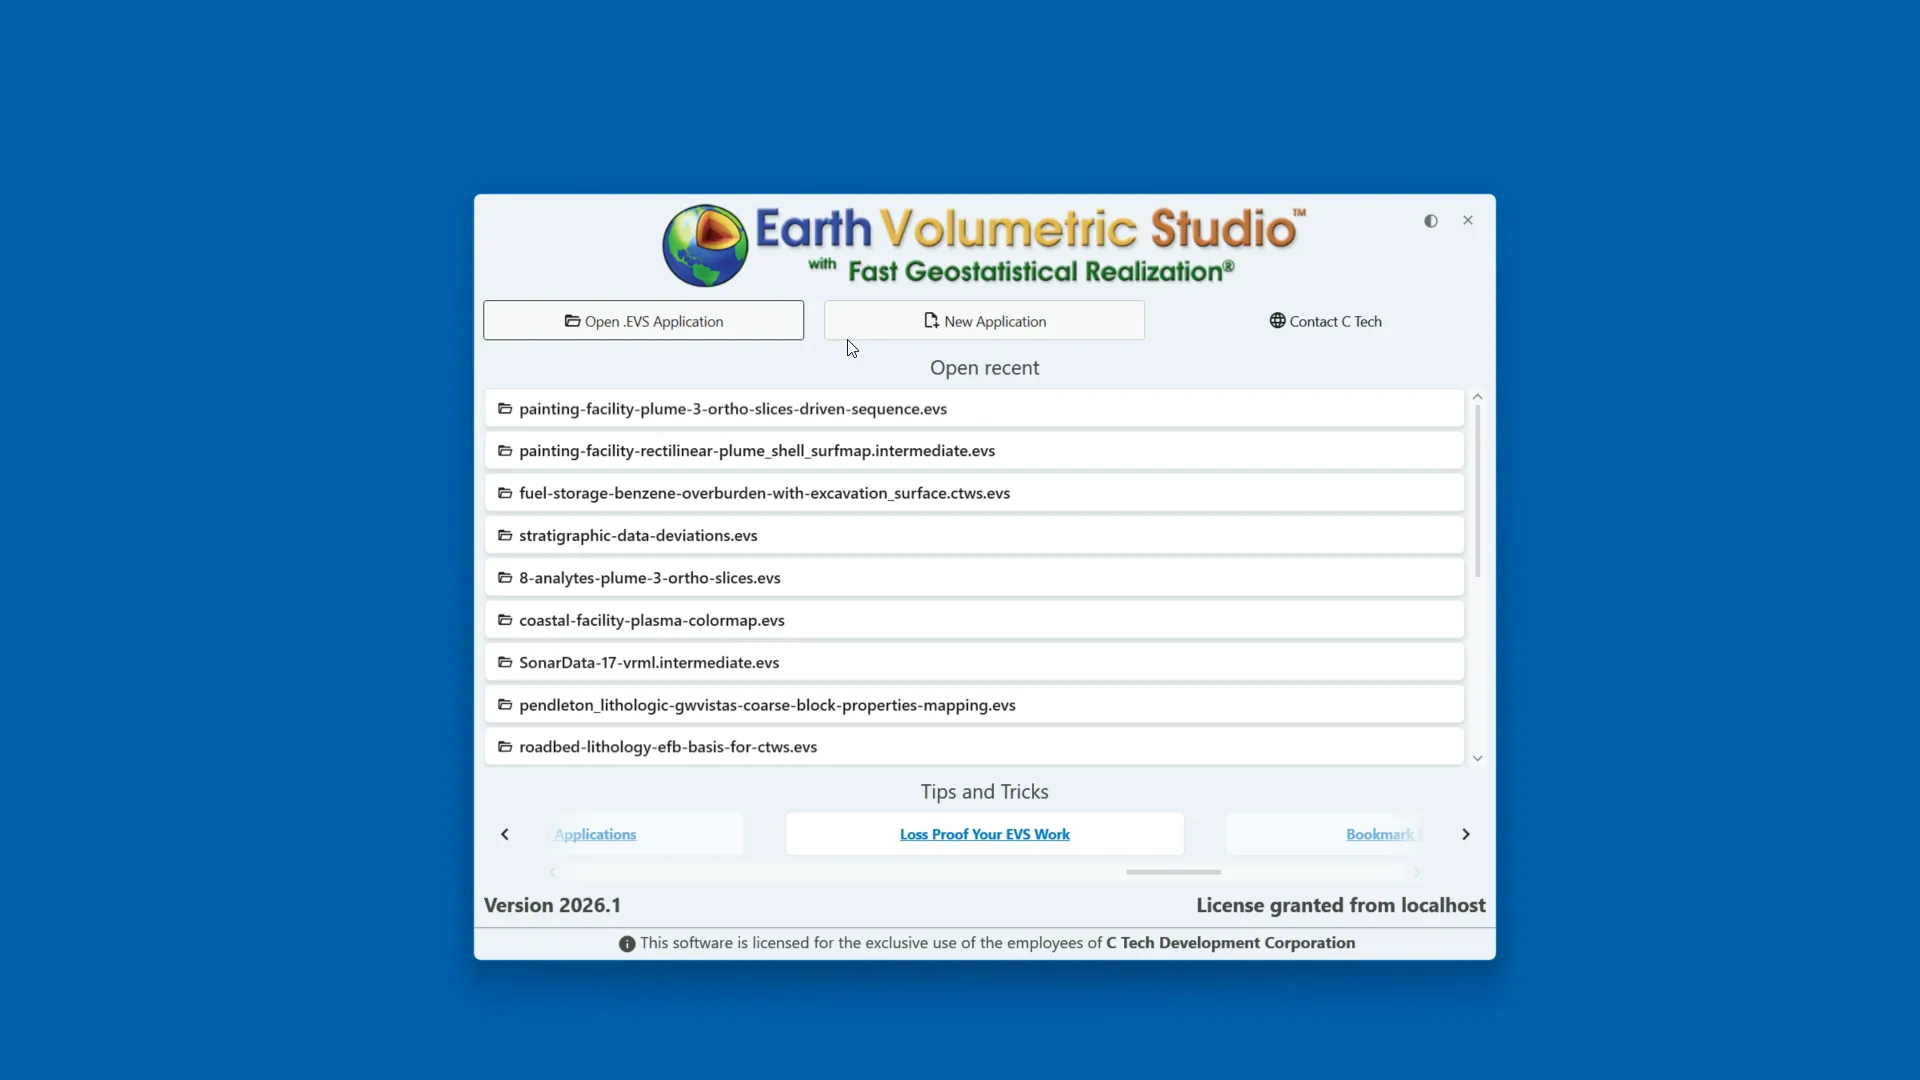
Let's start with the changes beginning right at startup with a brand new startup screen. Notice the new, simpler screen.
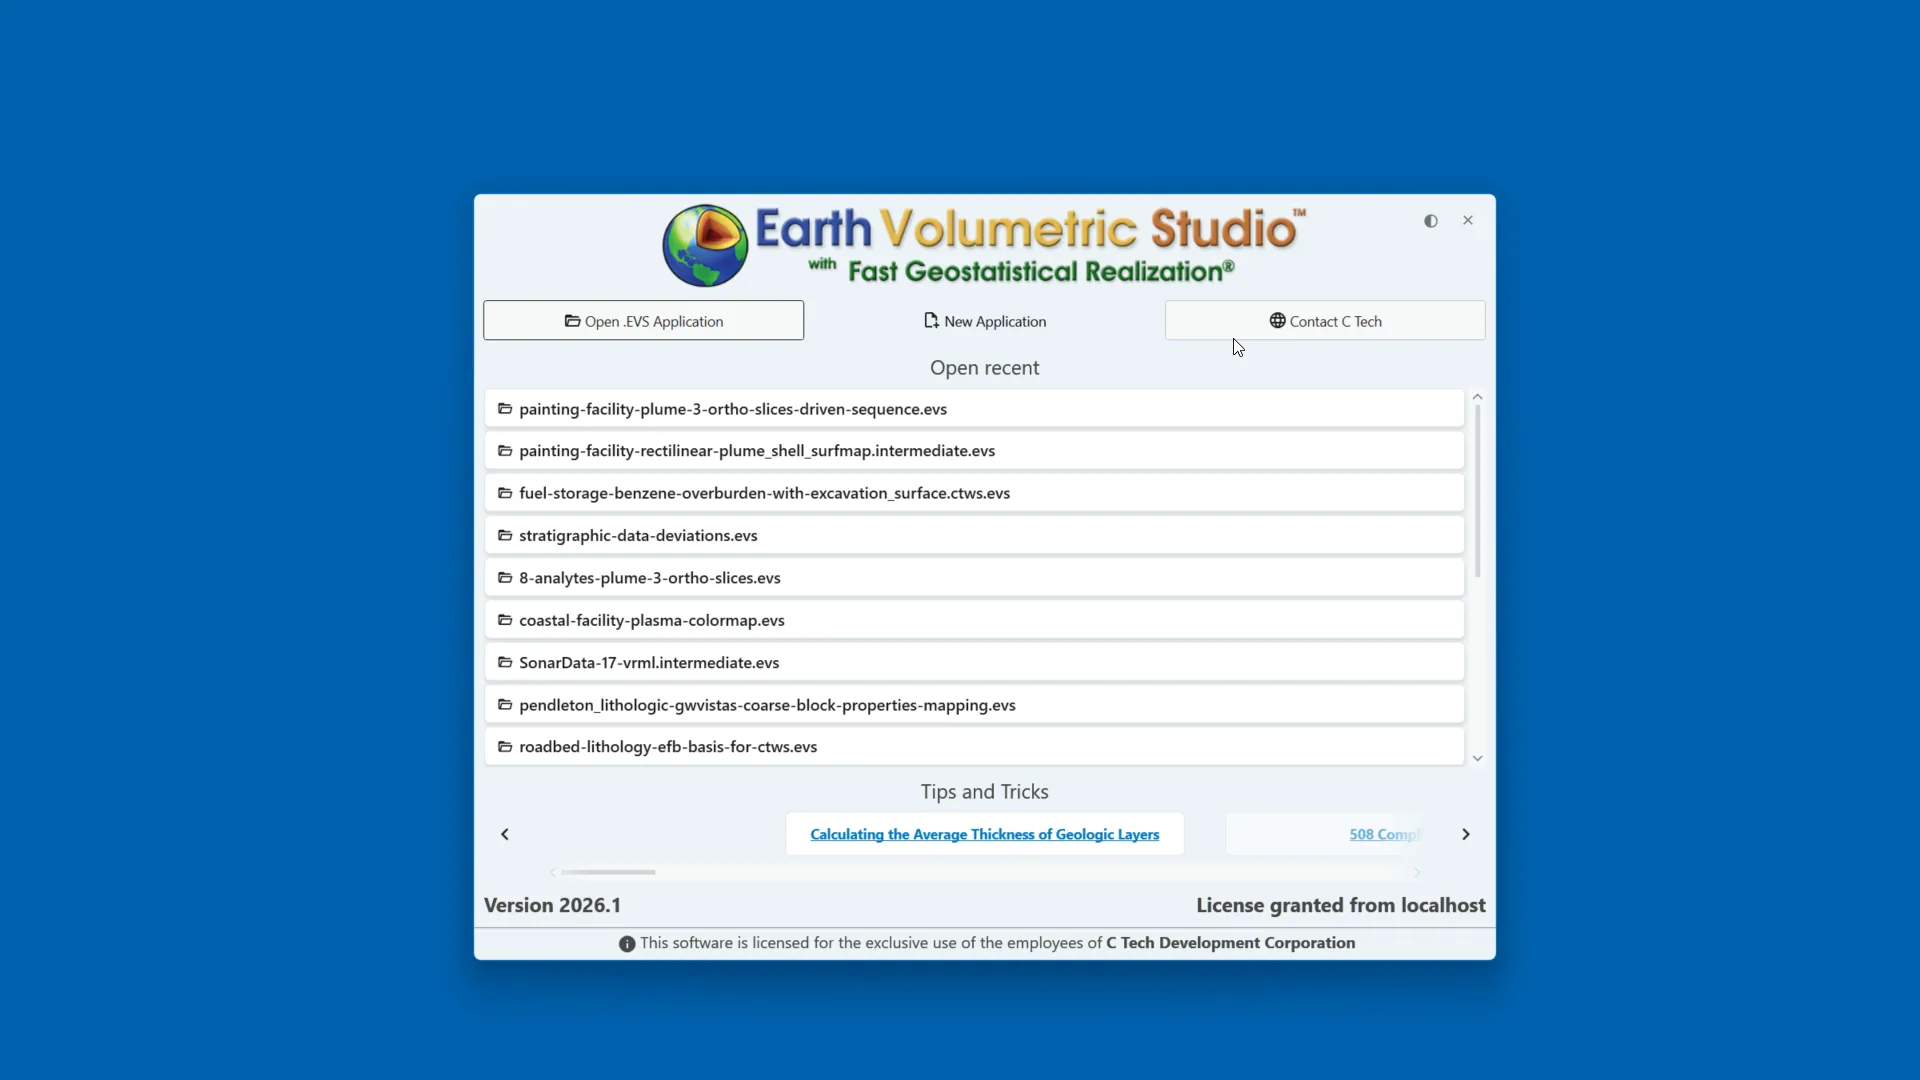
Along the top are buttons to open an existing or create a new application.
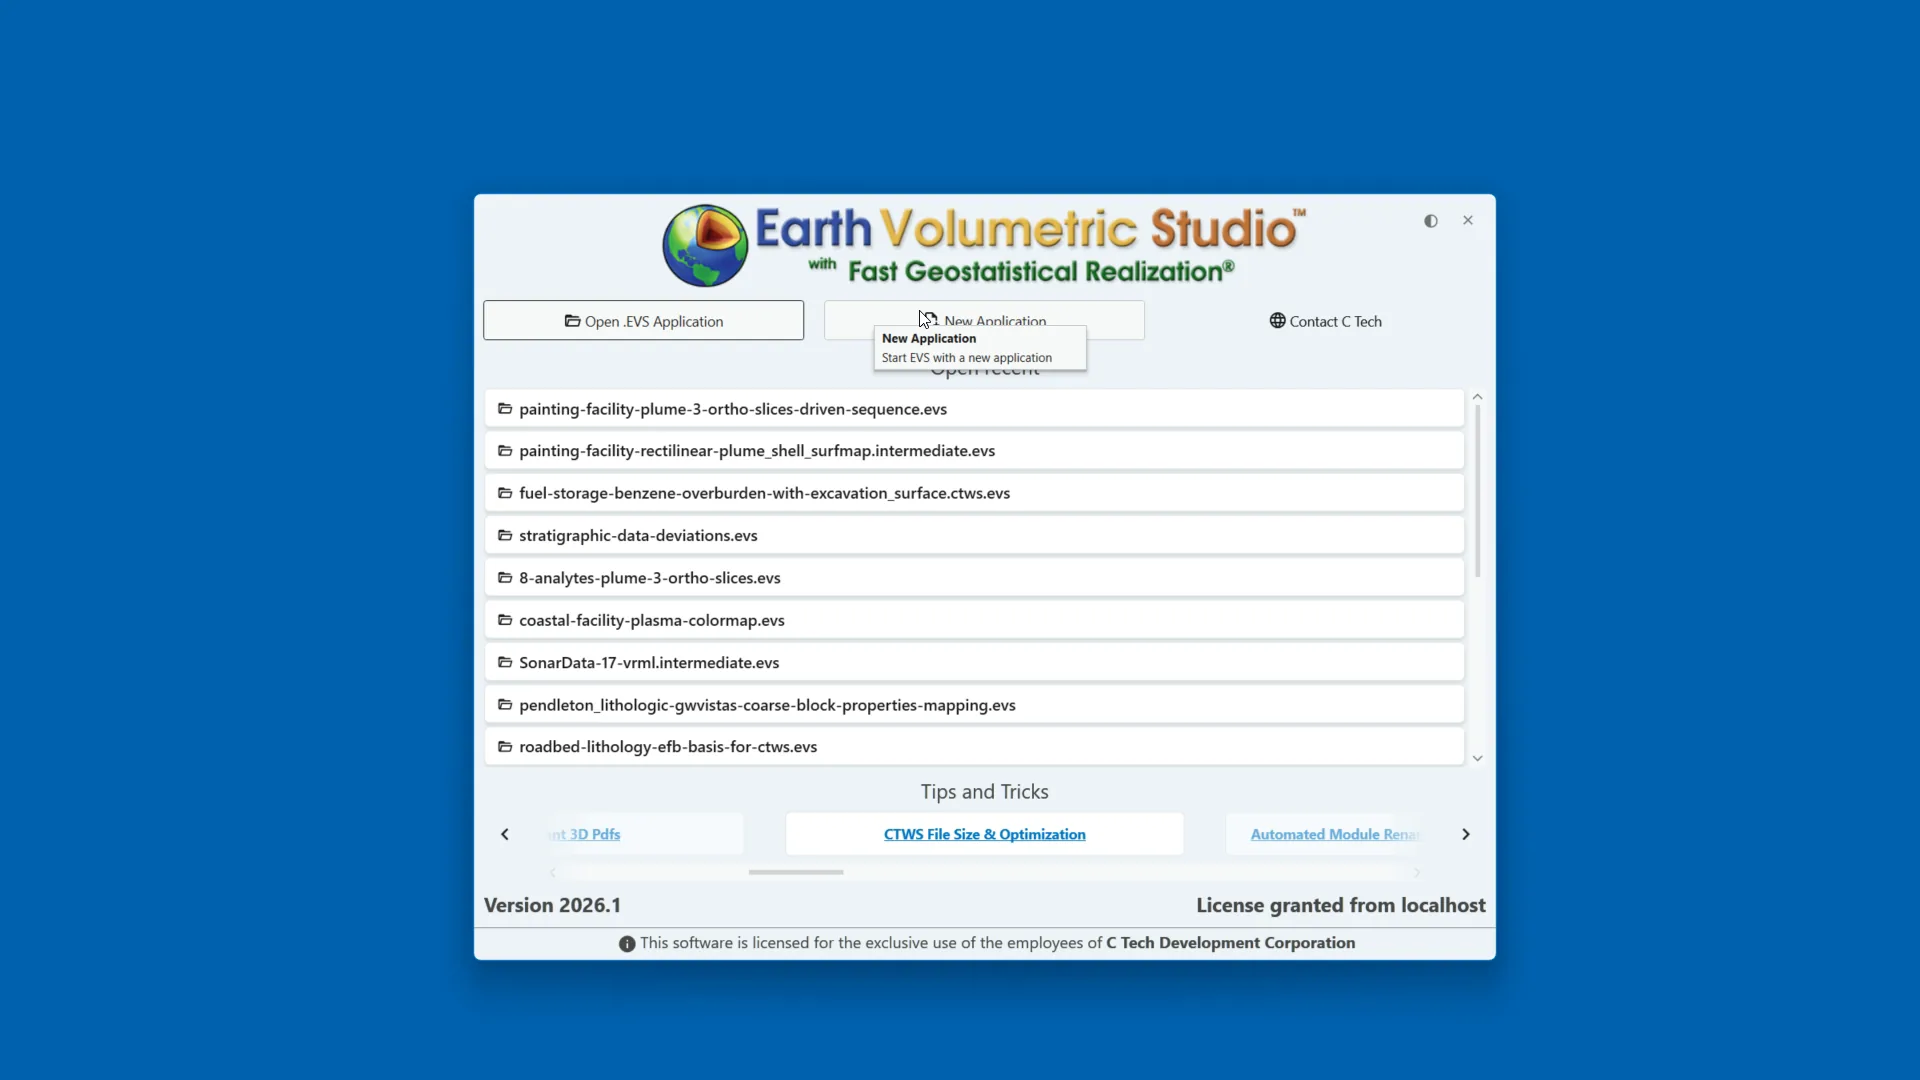
You can also see your recent files, which now include preview screens so you can see what each application contained.
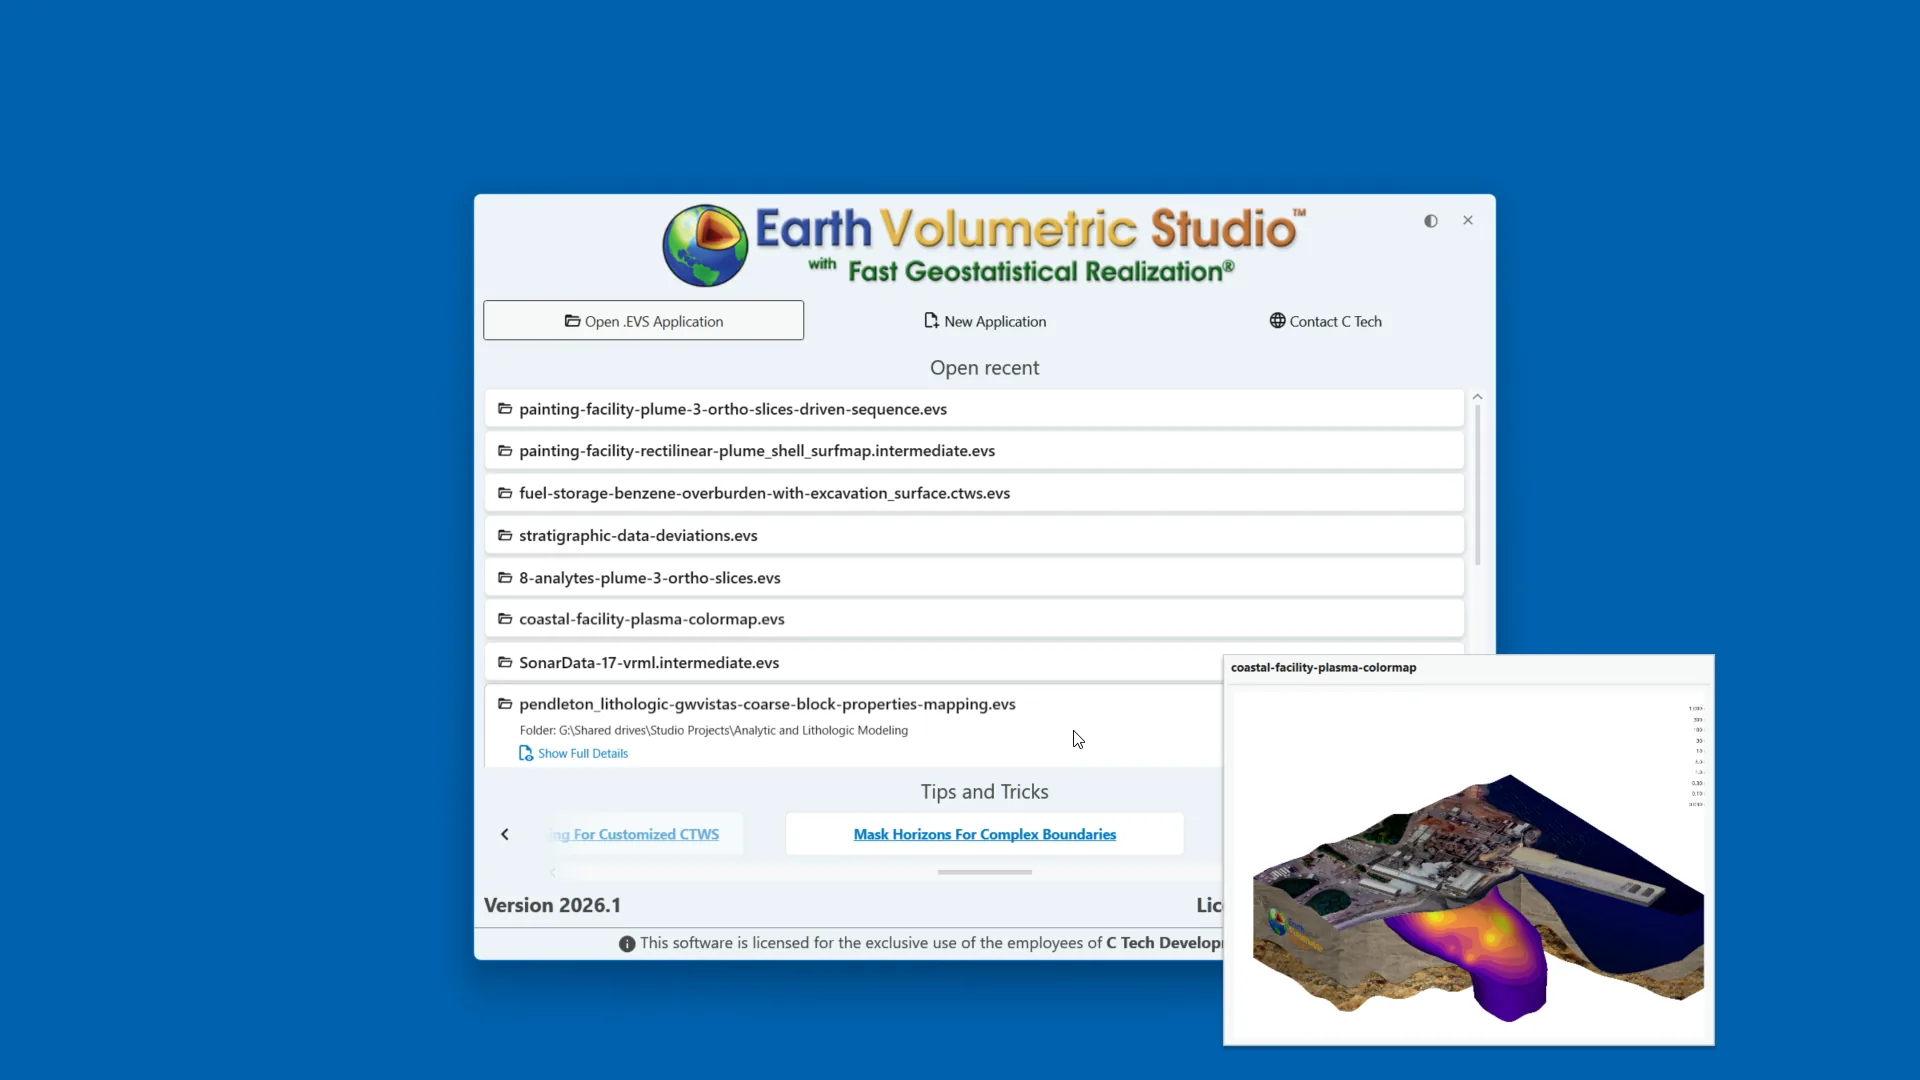
At the bottom of the window, there are links to recent tips and tricks to help you get the most out of the software. Clicking any of these links will open the tips and tricks page in your web browser for easy access.
Let's go ahead and open an application so we can explore the new interface in action.
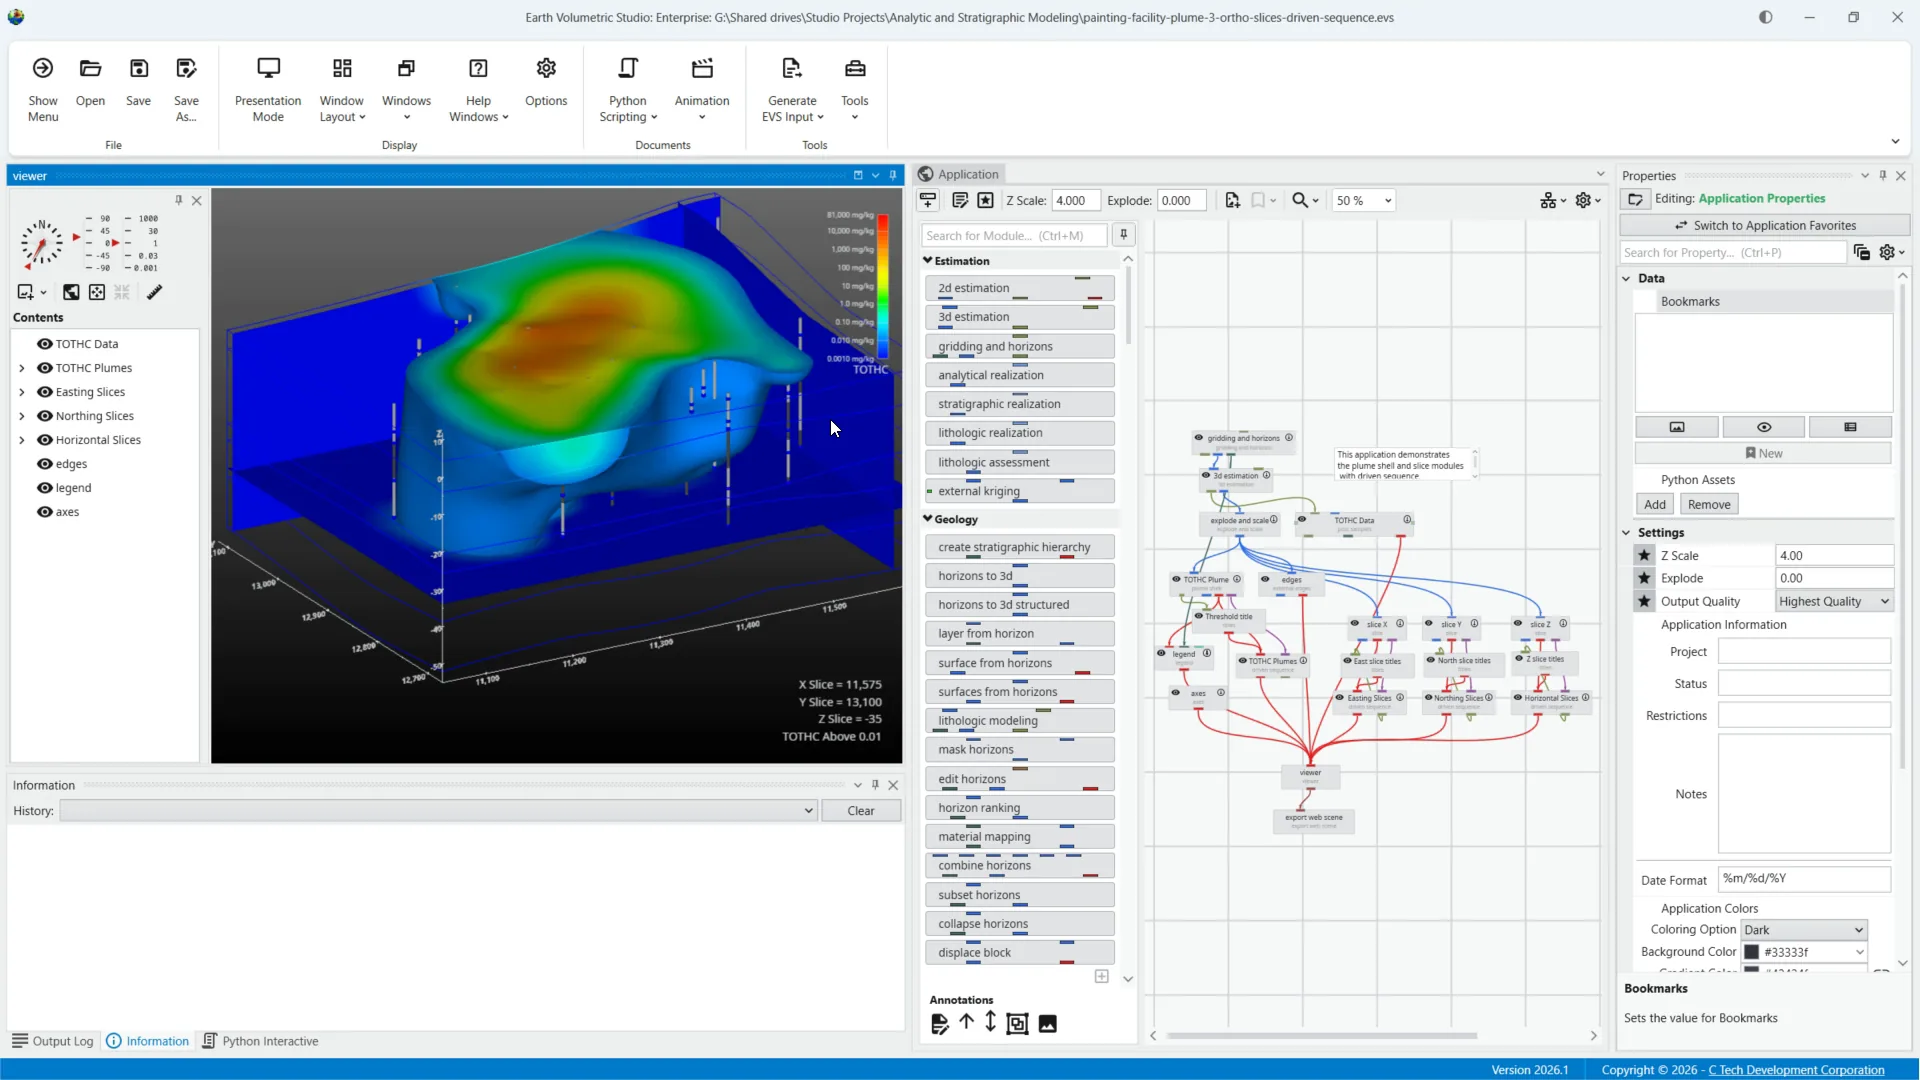
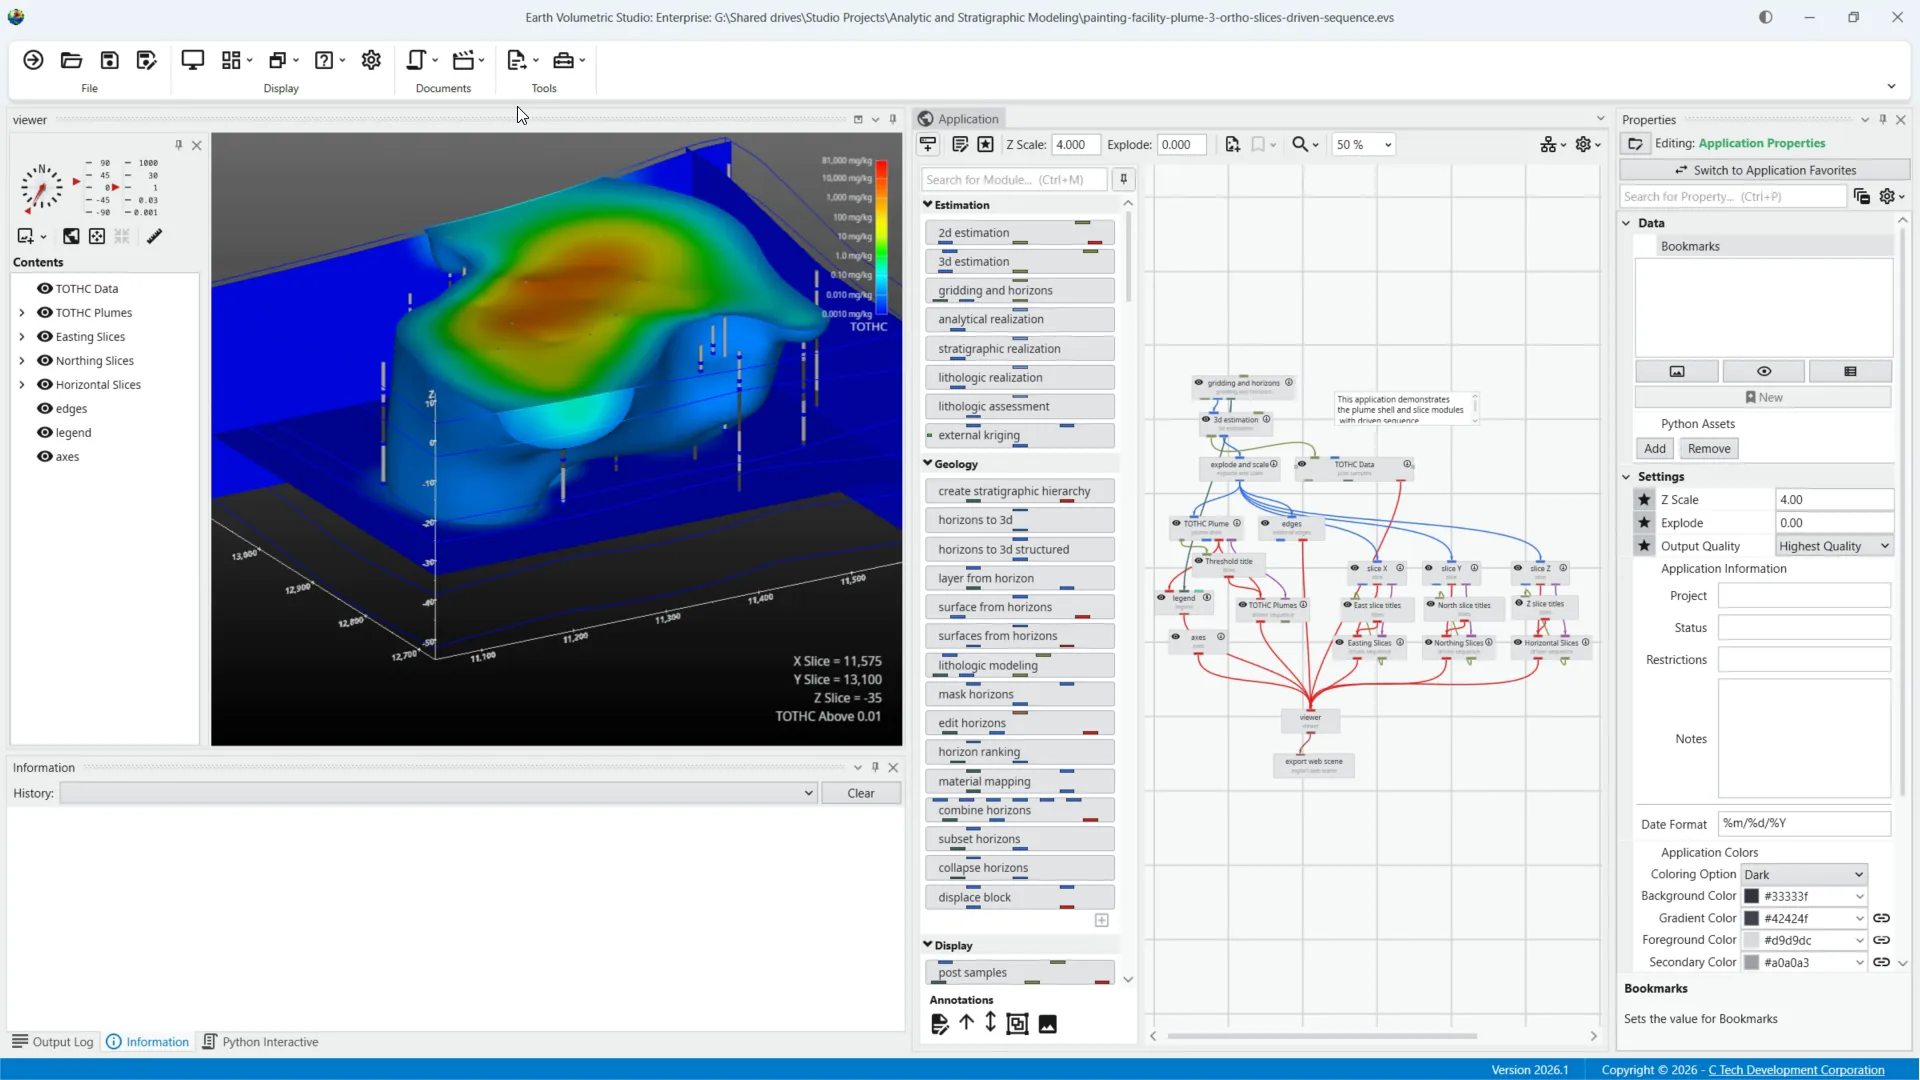
The first key change is a brand new, much simpler toolbar with detailed tooltips on all buttons. There are far fewer options on the toolbar now, streamlining your workspace.
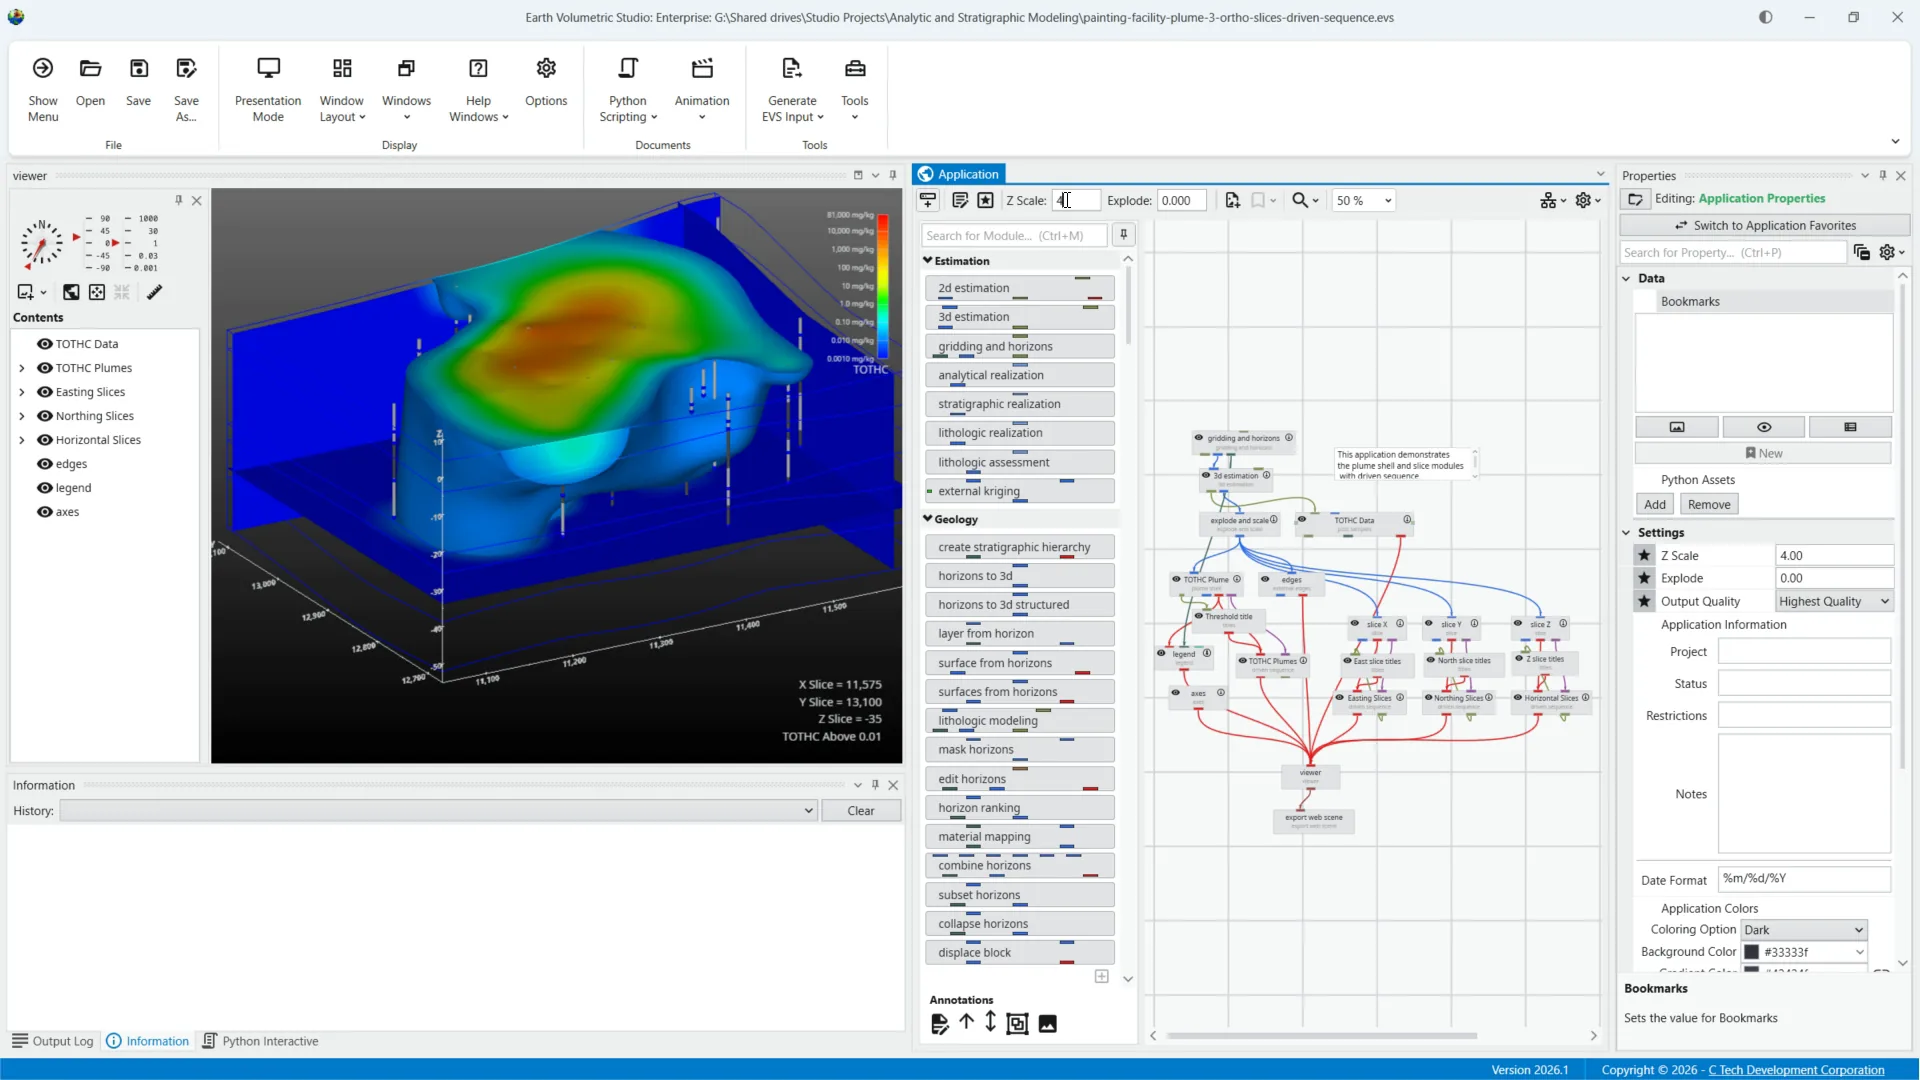
Most missing options have been moved to more logical places, such as application properties like Z Scale and Explode now accessible directly in the application window.
The toolbar supports different views to optimize screen space, from full size to compact, ideal for laptops or experienced users.
On the far right of the screen, a small menu provides access to all of the density options
The compact setting uses small icons with tooltips to maximize screen real estate while maintaining usability.
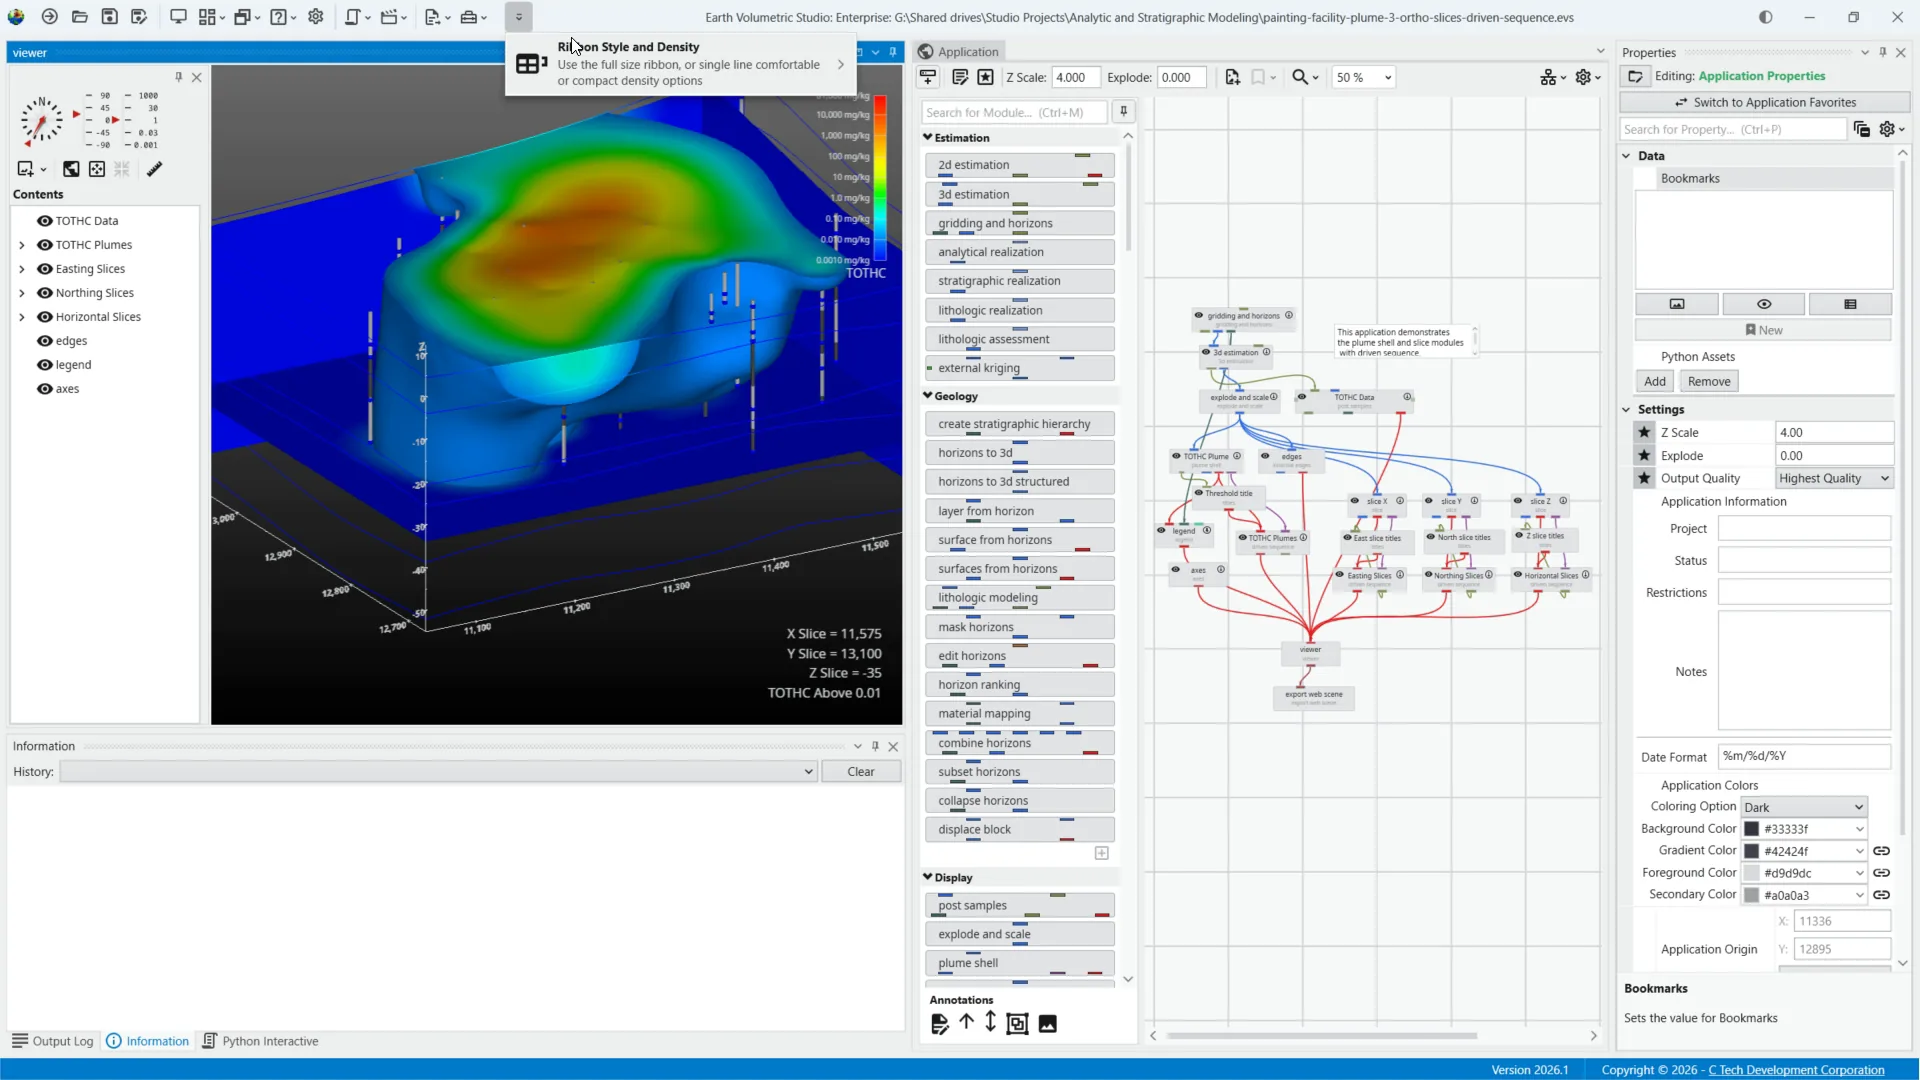
On laptops, or if you want to maximize screen real estate, you can even move the toolbar all the way up to the application title bar to provide the most screen space.
Here I choose the comfortable toolbar setting for a balanced mix of space and usability.
In previous versions, tools were in ribbon tabs; now all tools have been moved into detailed submenus for better organization.
Each tool now includes detailed tooltips to help you understand their functions and select the right one.
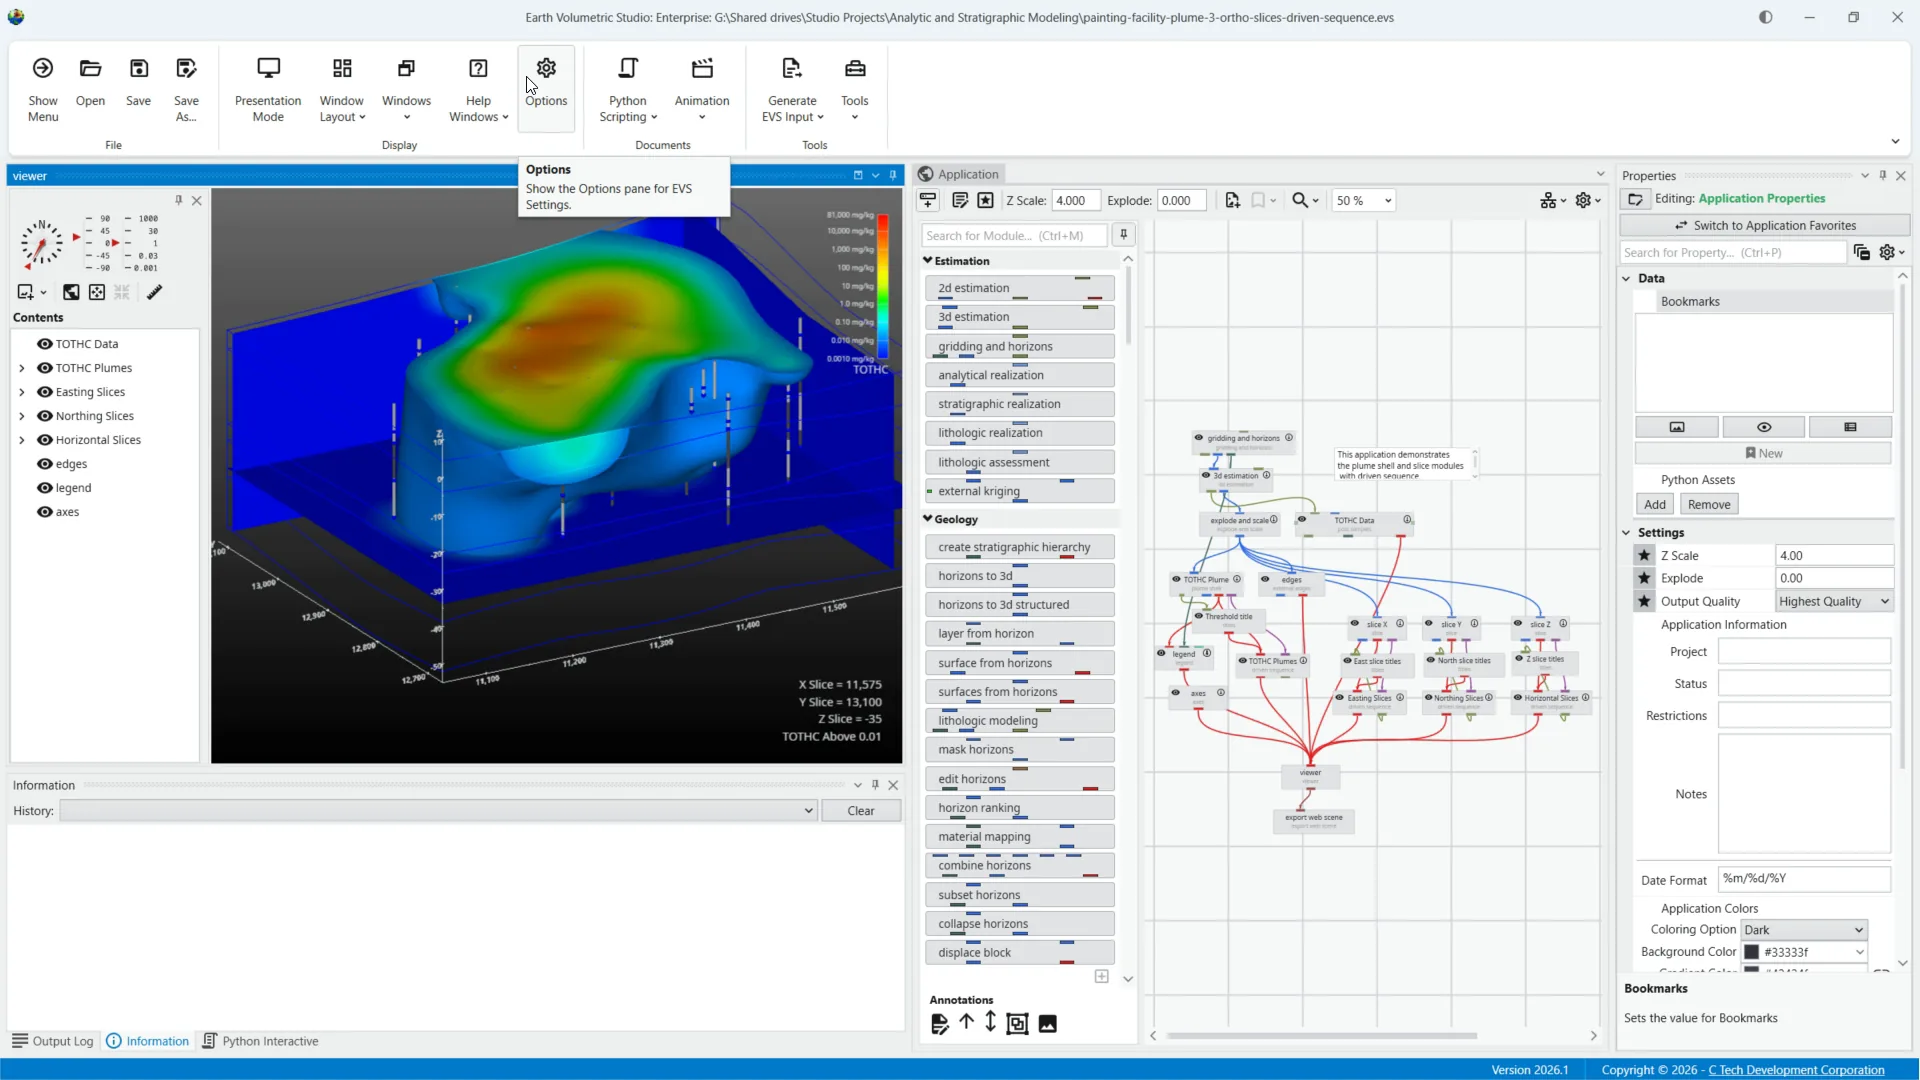
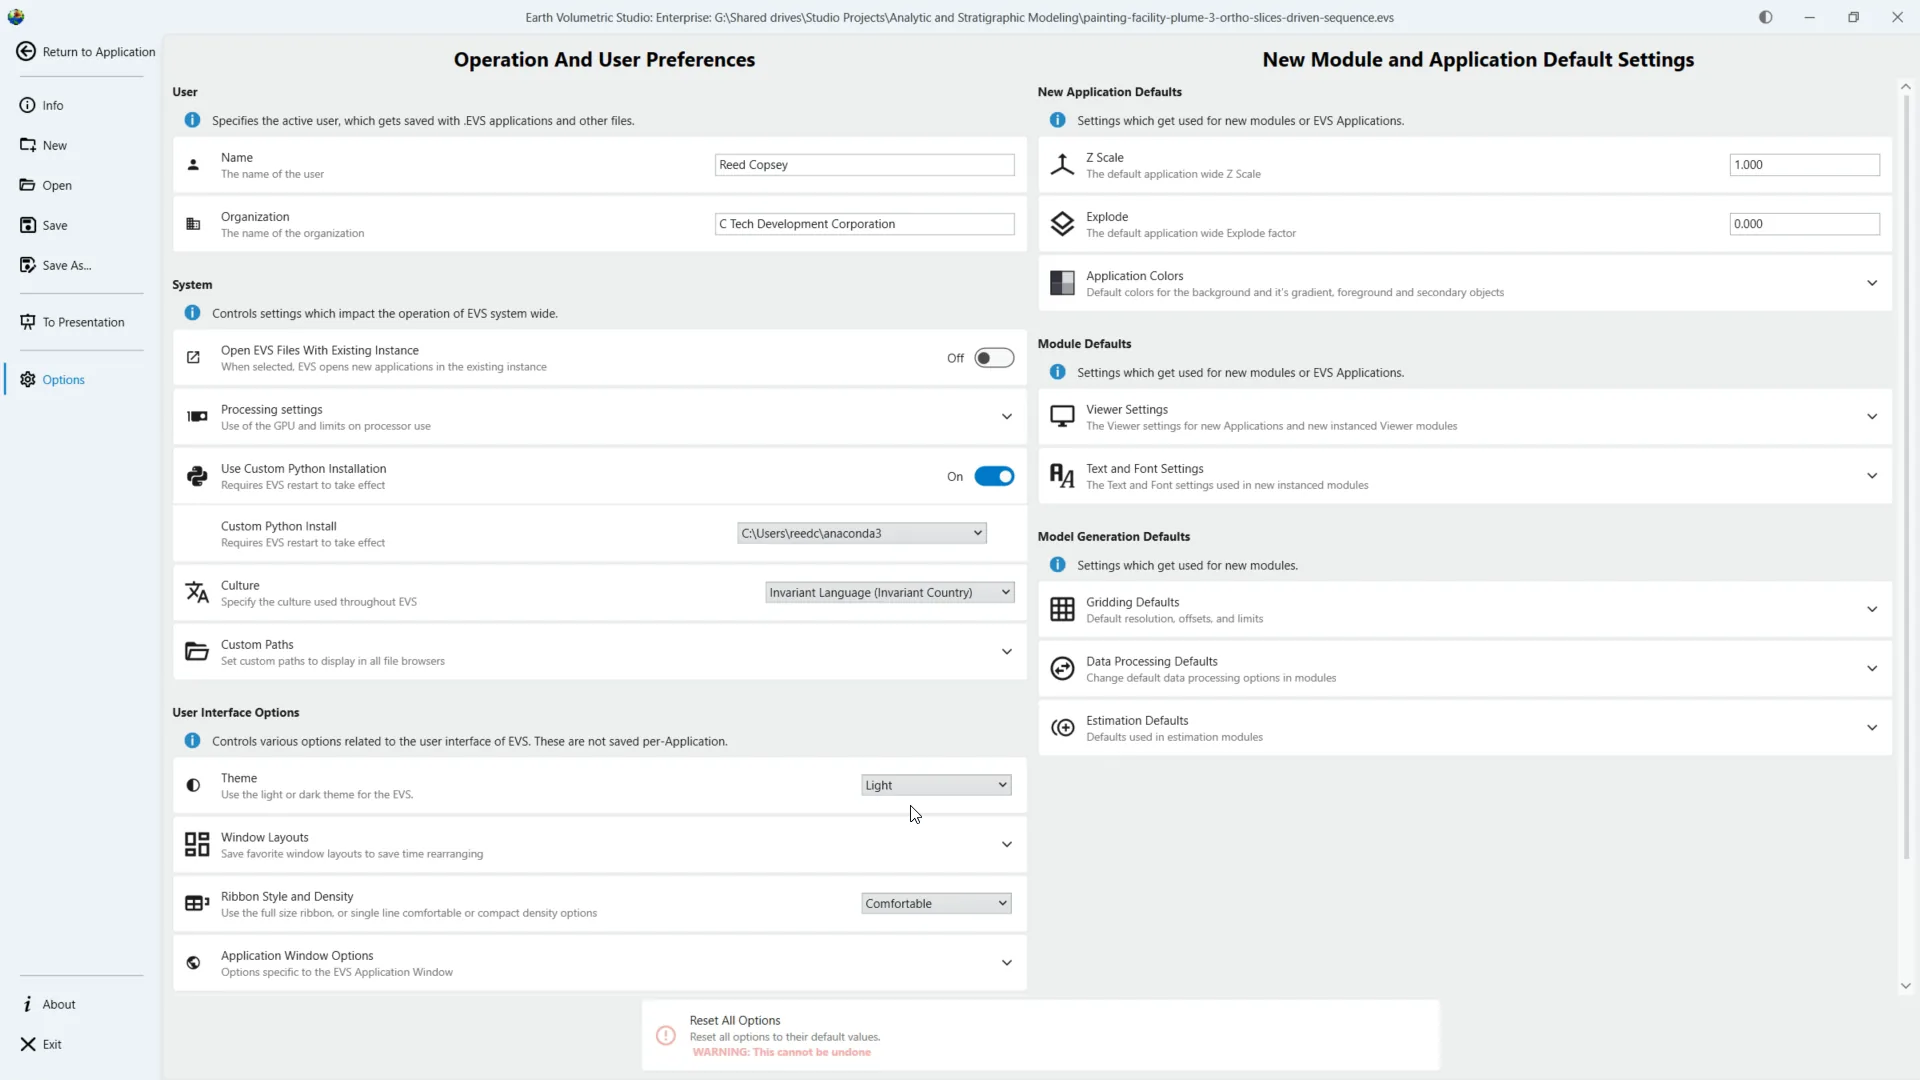
Options have been moved from the ribbon to a reorganized options screen.
The Options screen is now organized into two sections. User preferences on the left include options which affect the current user, such as switching between light and dark themes. The left panel options do not alter your data or applications.
The settings on the right side of the options window let you change defaults for instancing modules or creating new applications.
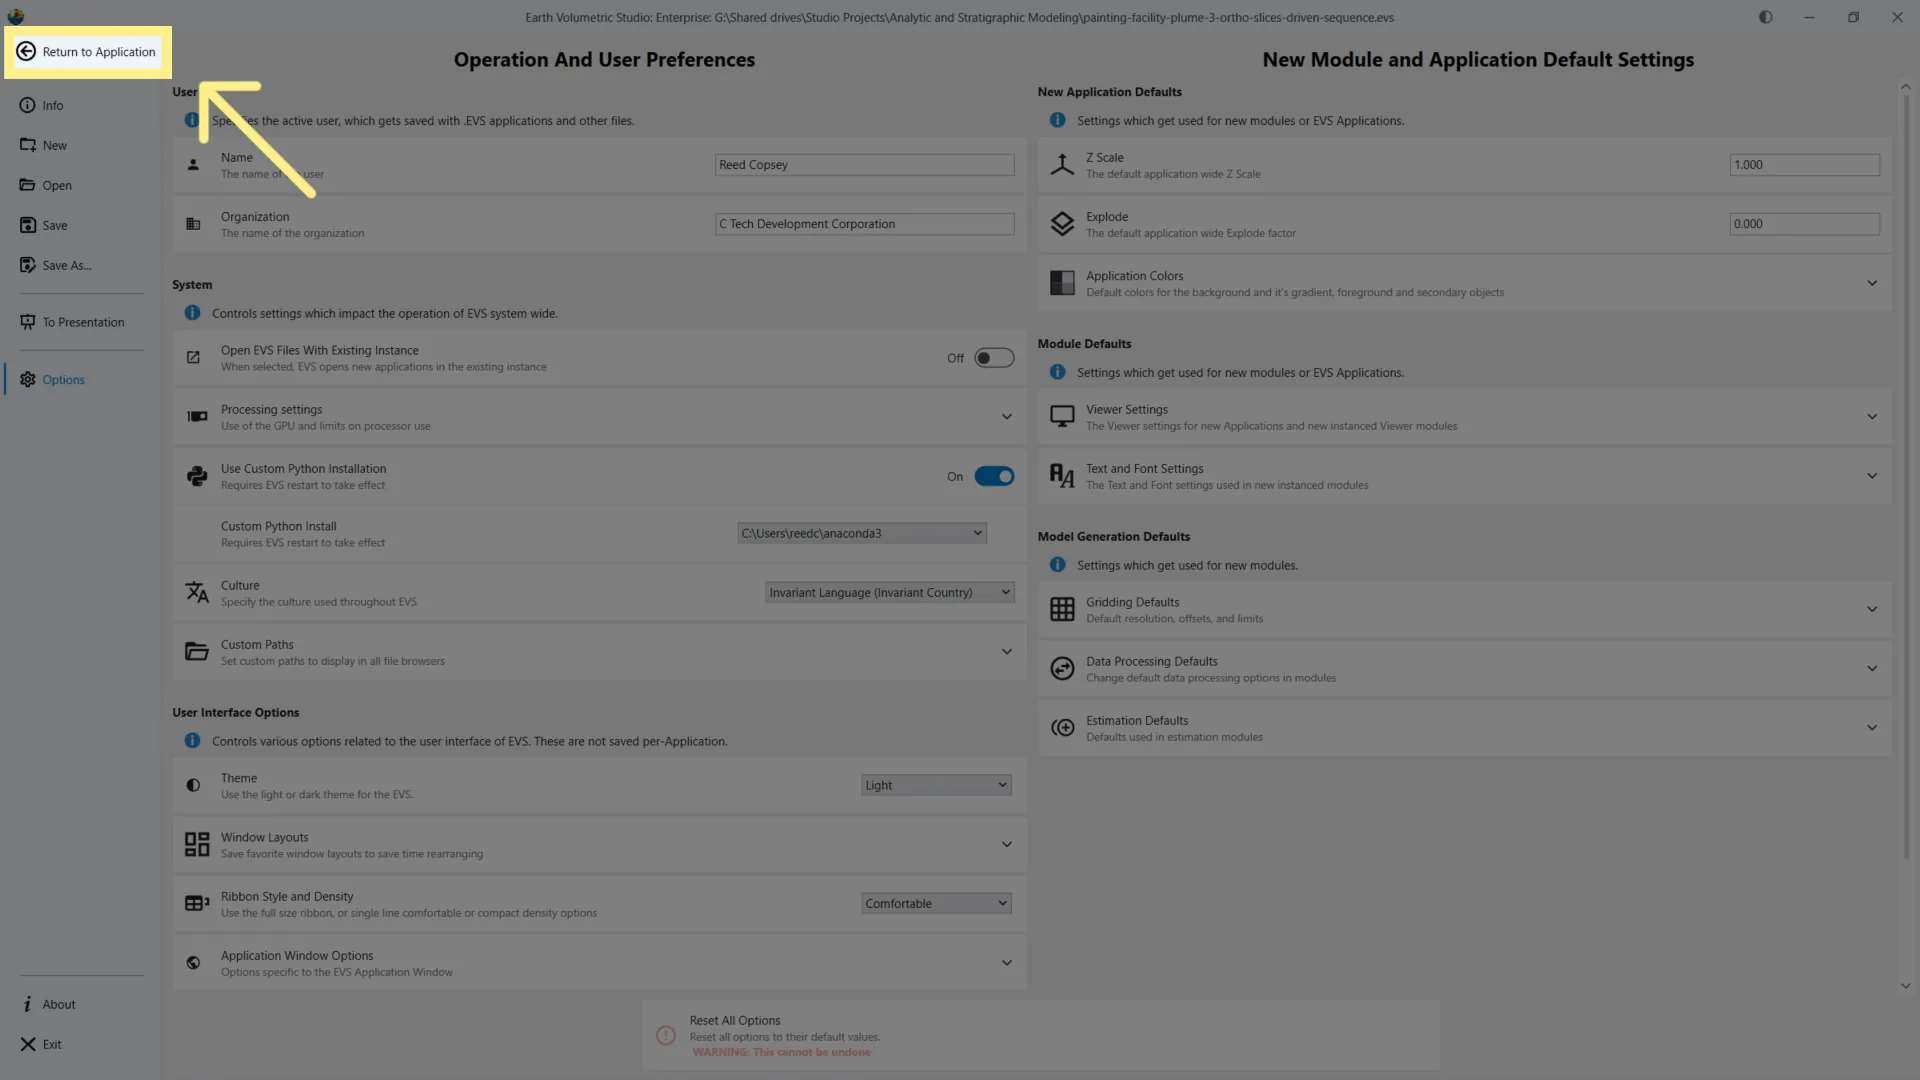
Close the options window to return to the main Application interface.
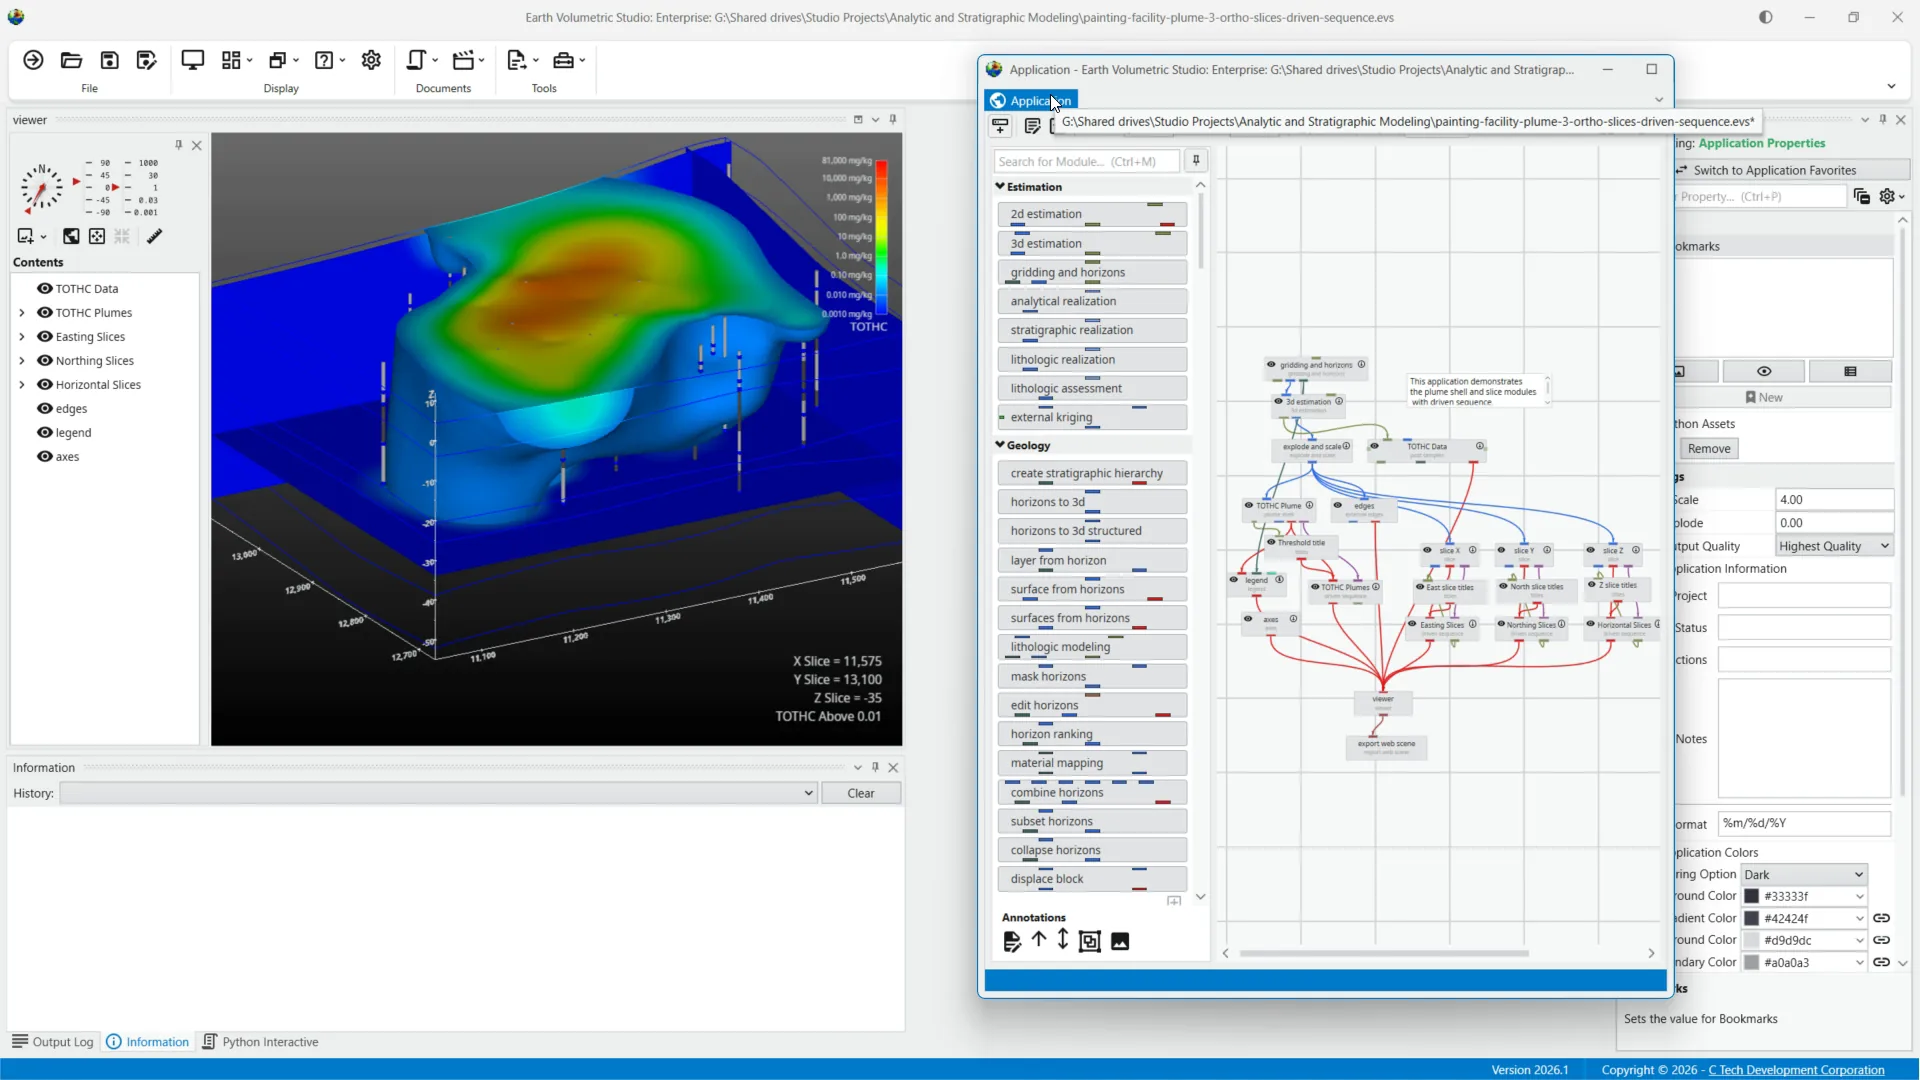
Now we will focus on improvements to the Application Window. The Application Window can now be dragged out and moved to a second monitor for improved multi-screen workflows.
Modules and the application overview are no longer their own Windows, and are now part of the main application window for better cohesion.
Modules are kept within the application window since they are only usable within your application context.
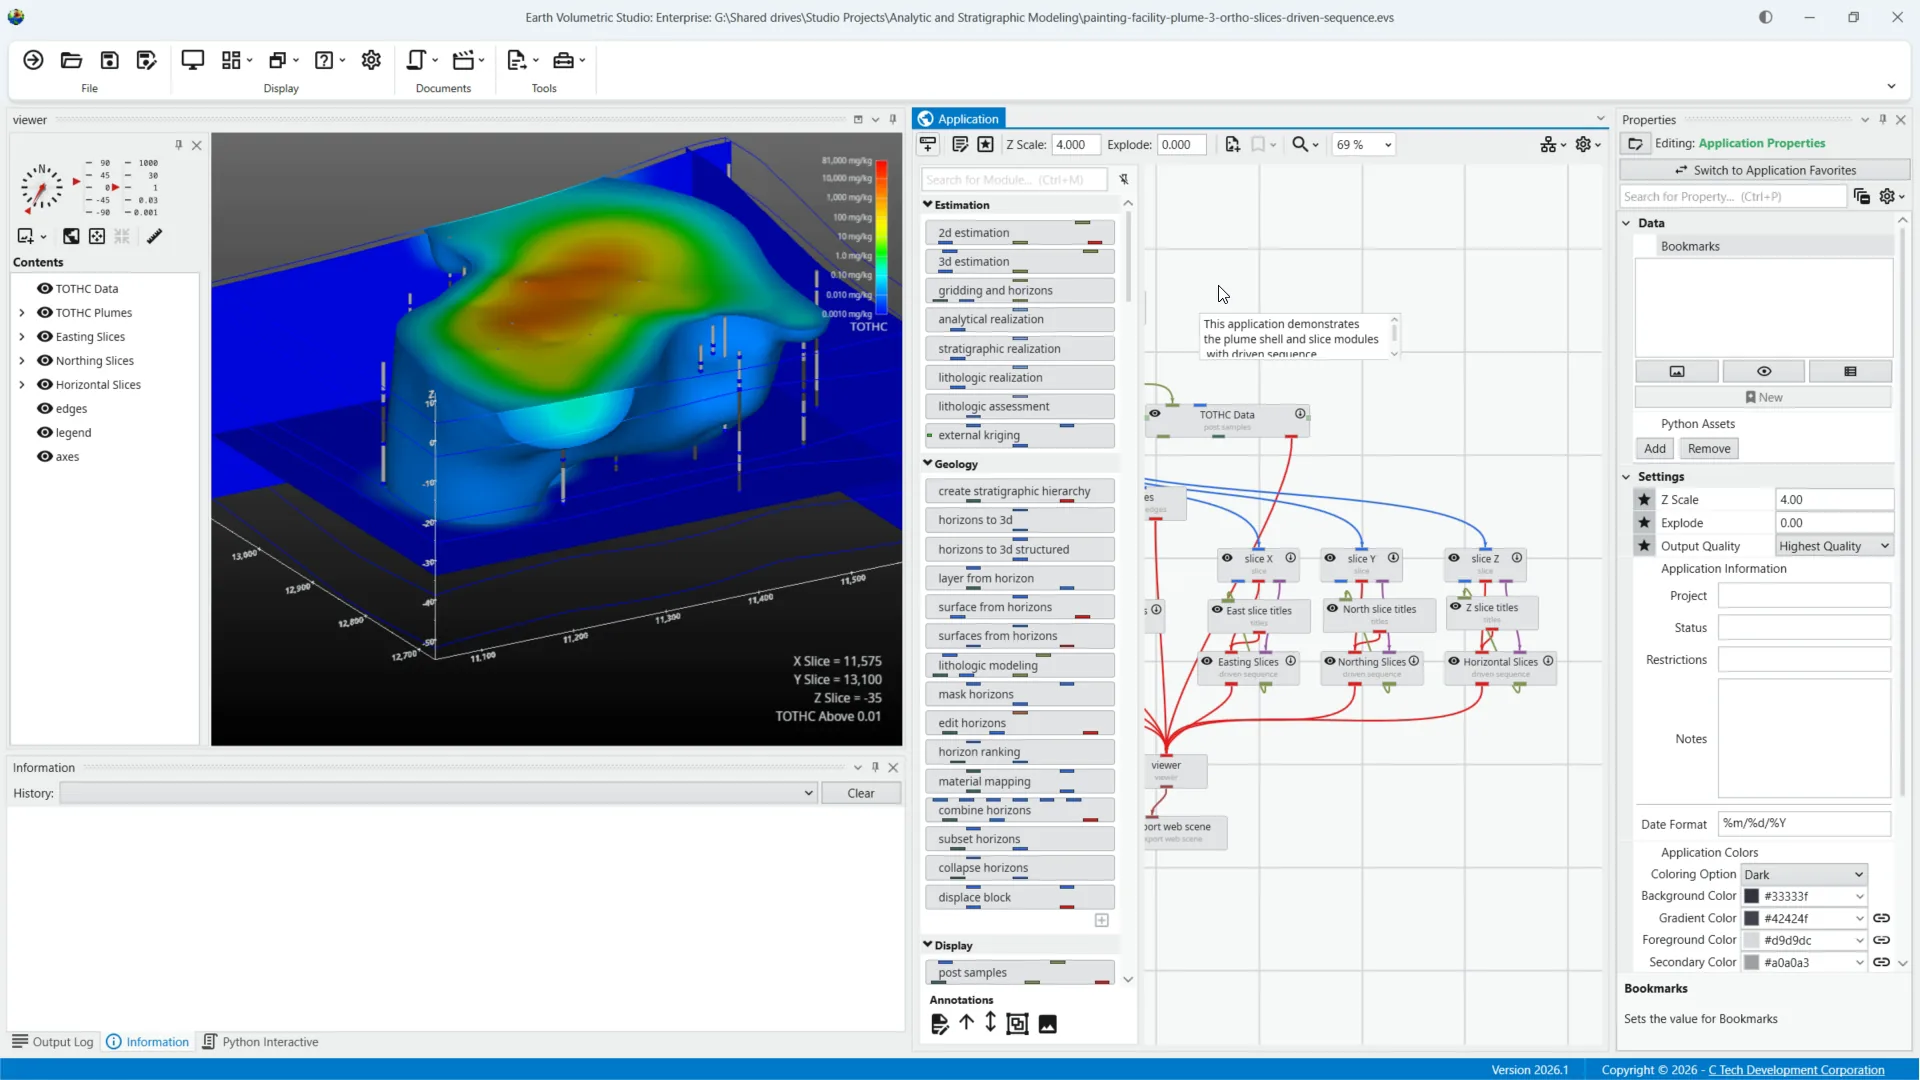
The modules window can be pinned or unpinned to auto-hide, which is useful on smaller screens or laptops.
Auto-hiding the modules pane helps maximize workspace on smaller screens or laptops.
Use the Modules Button in the Application toolbar, or press Control plus M to open the modules pane when needed.
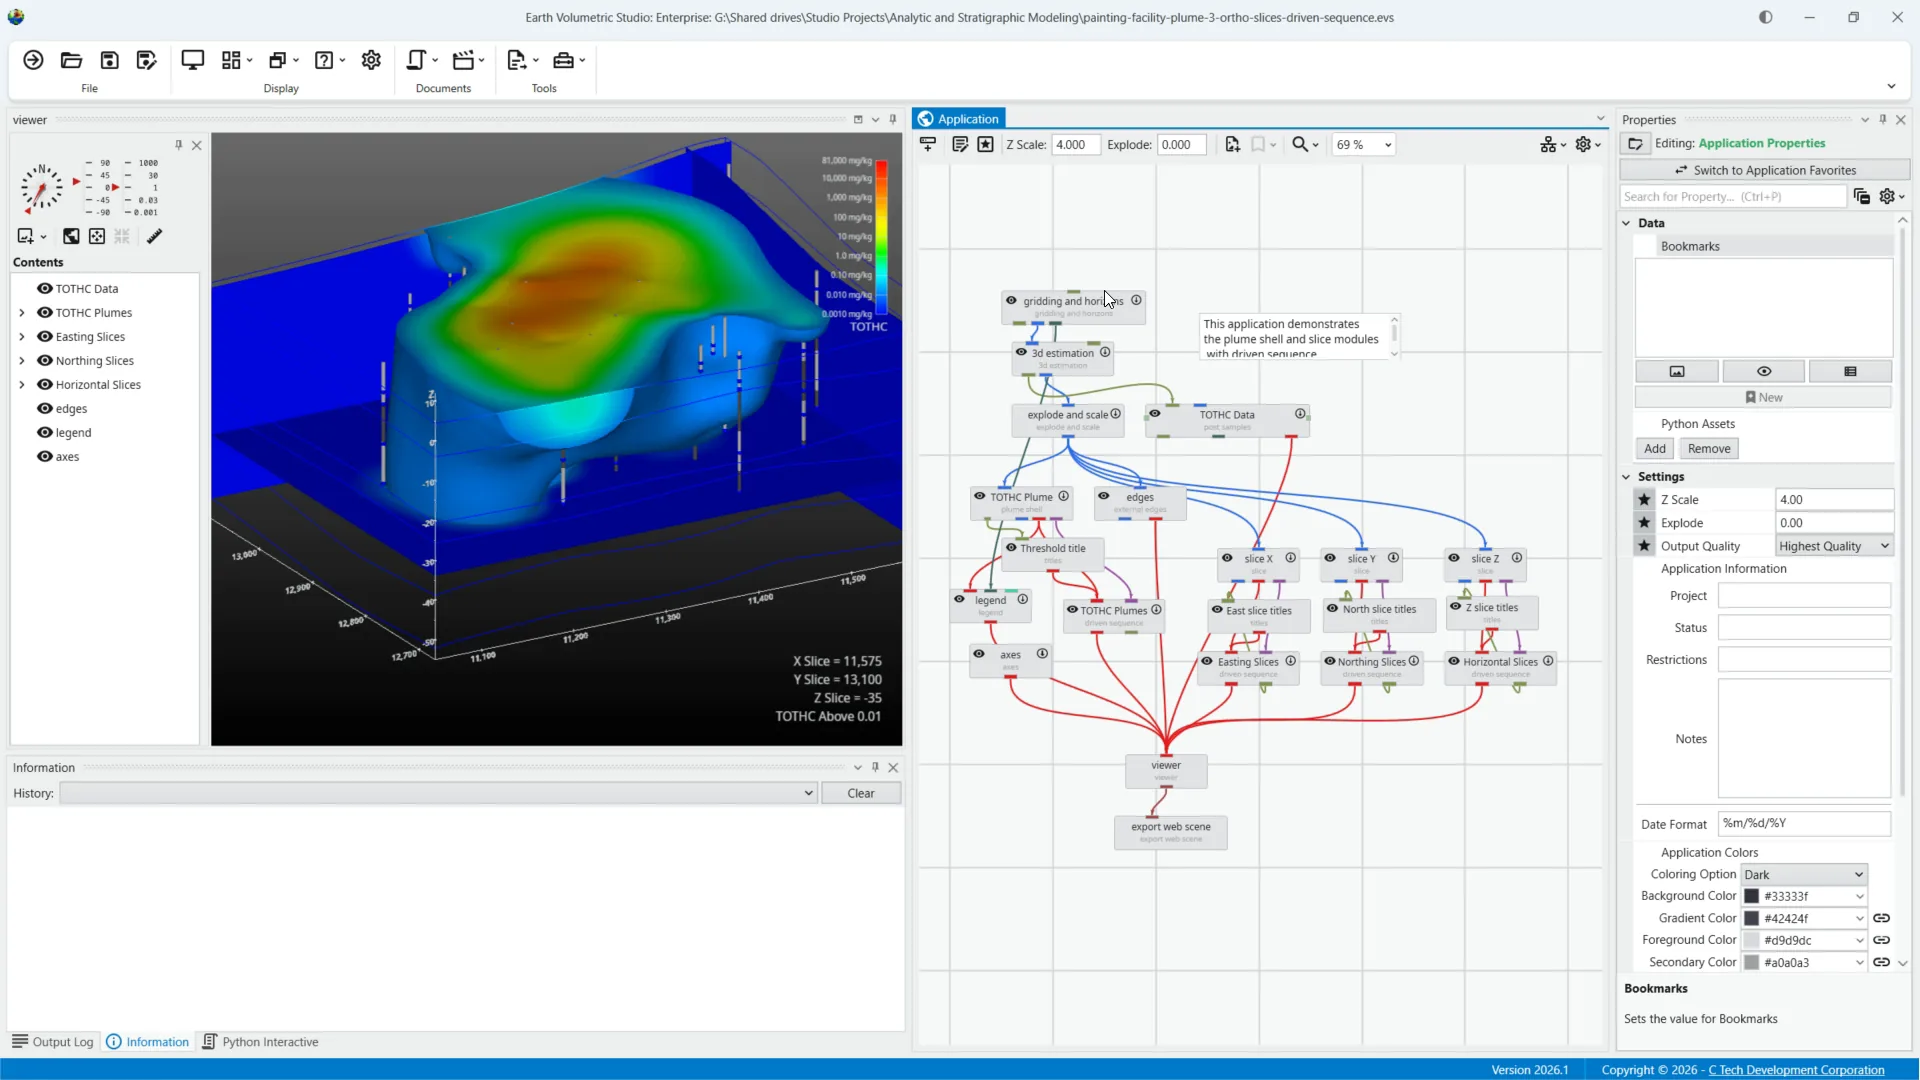
A search bar at the top helps you quickly find modules by name or type within your application.
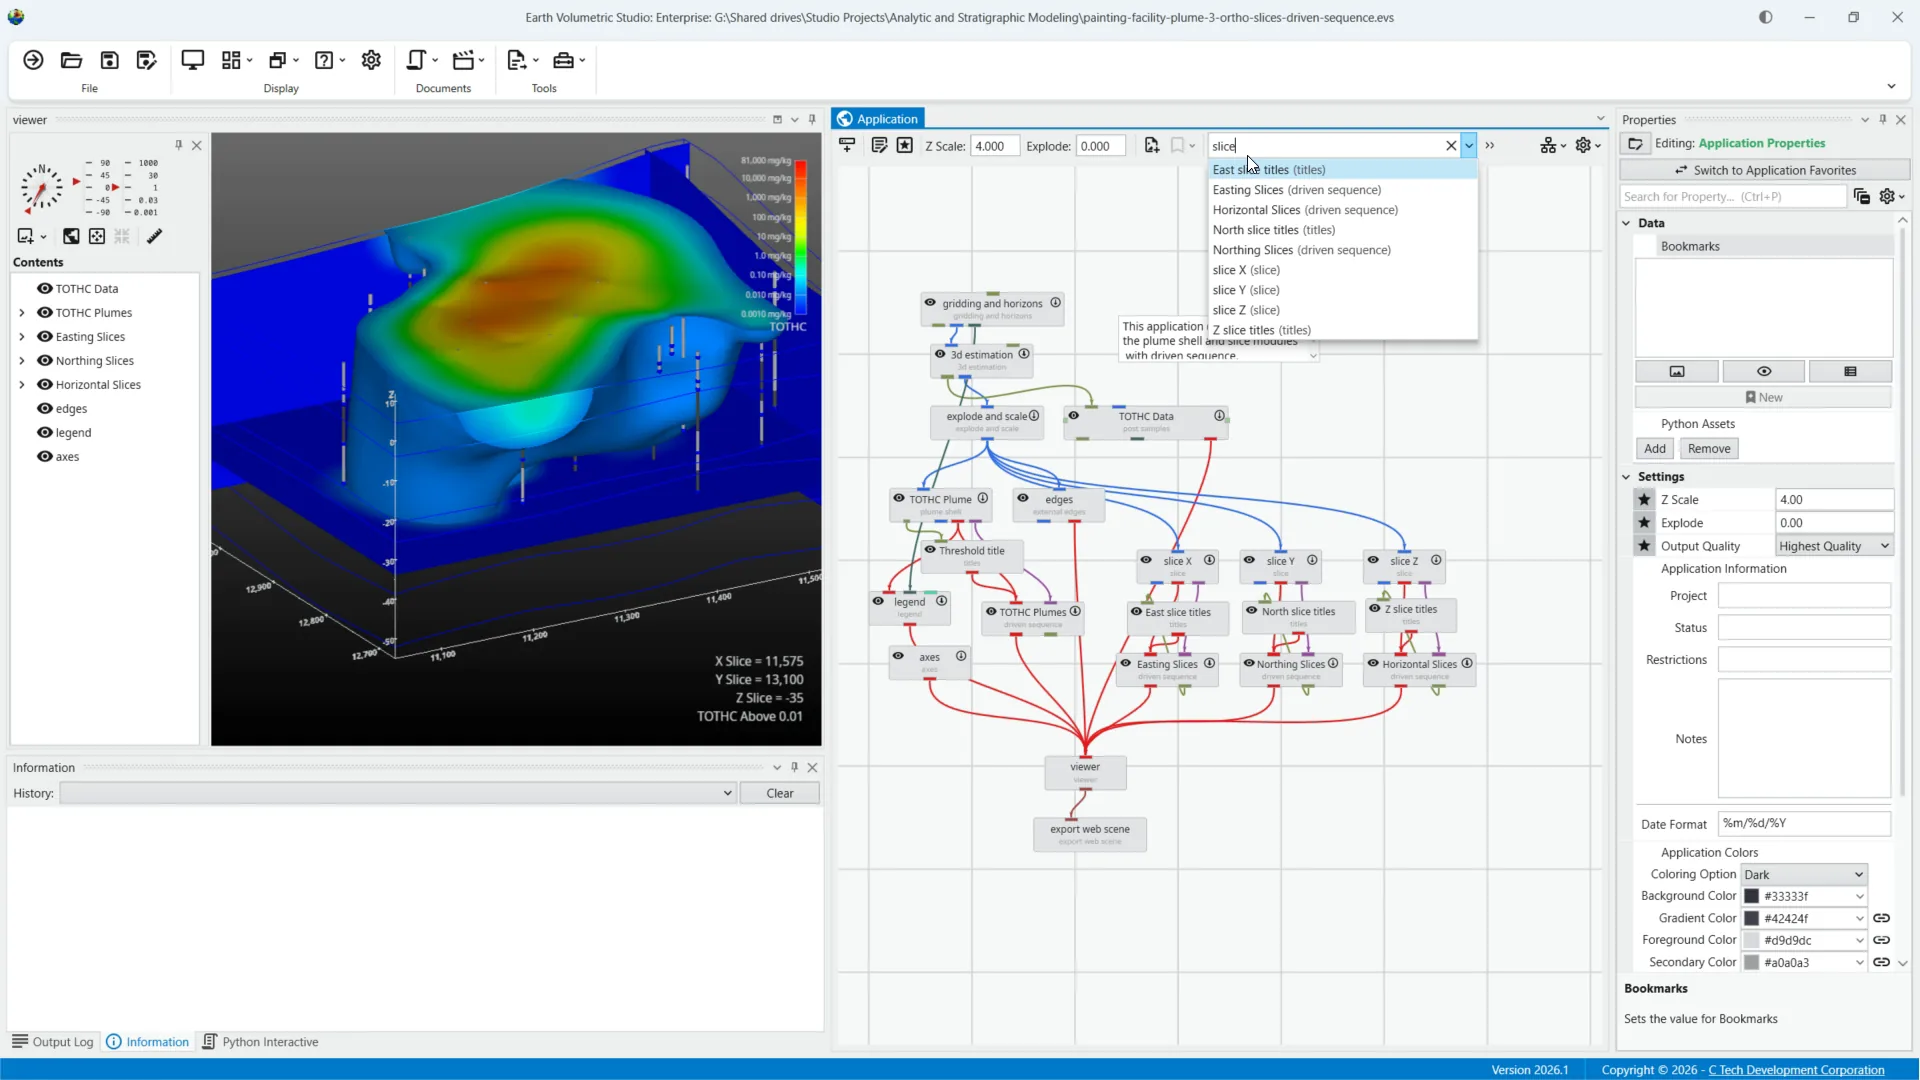
Typing keywords like 'slice' shows all modules matching that name or type for easy access.
Clicking a module centers it in your application and activates its properties for editing.
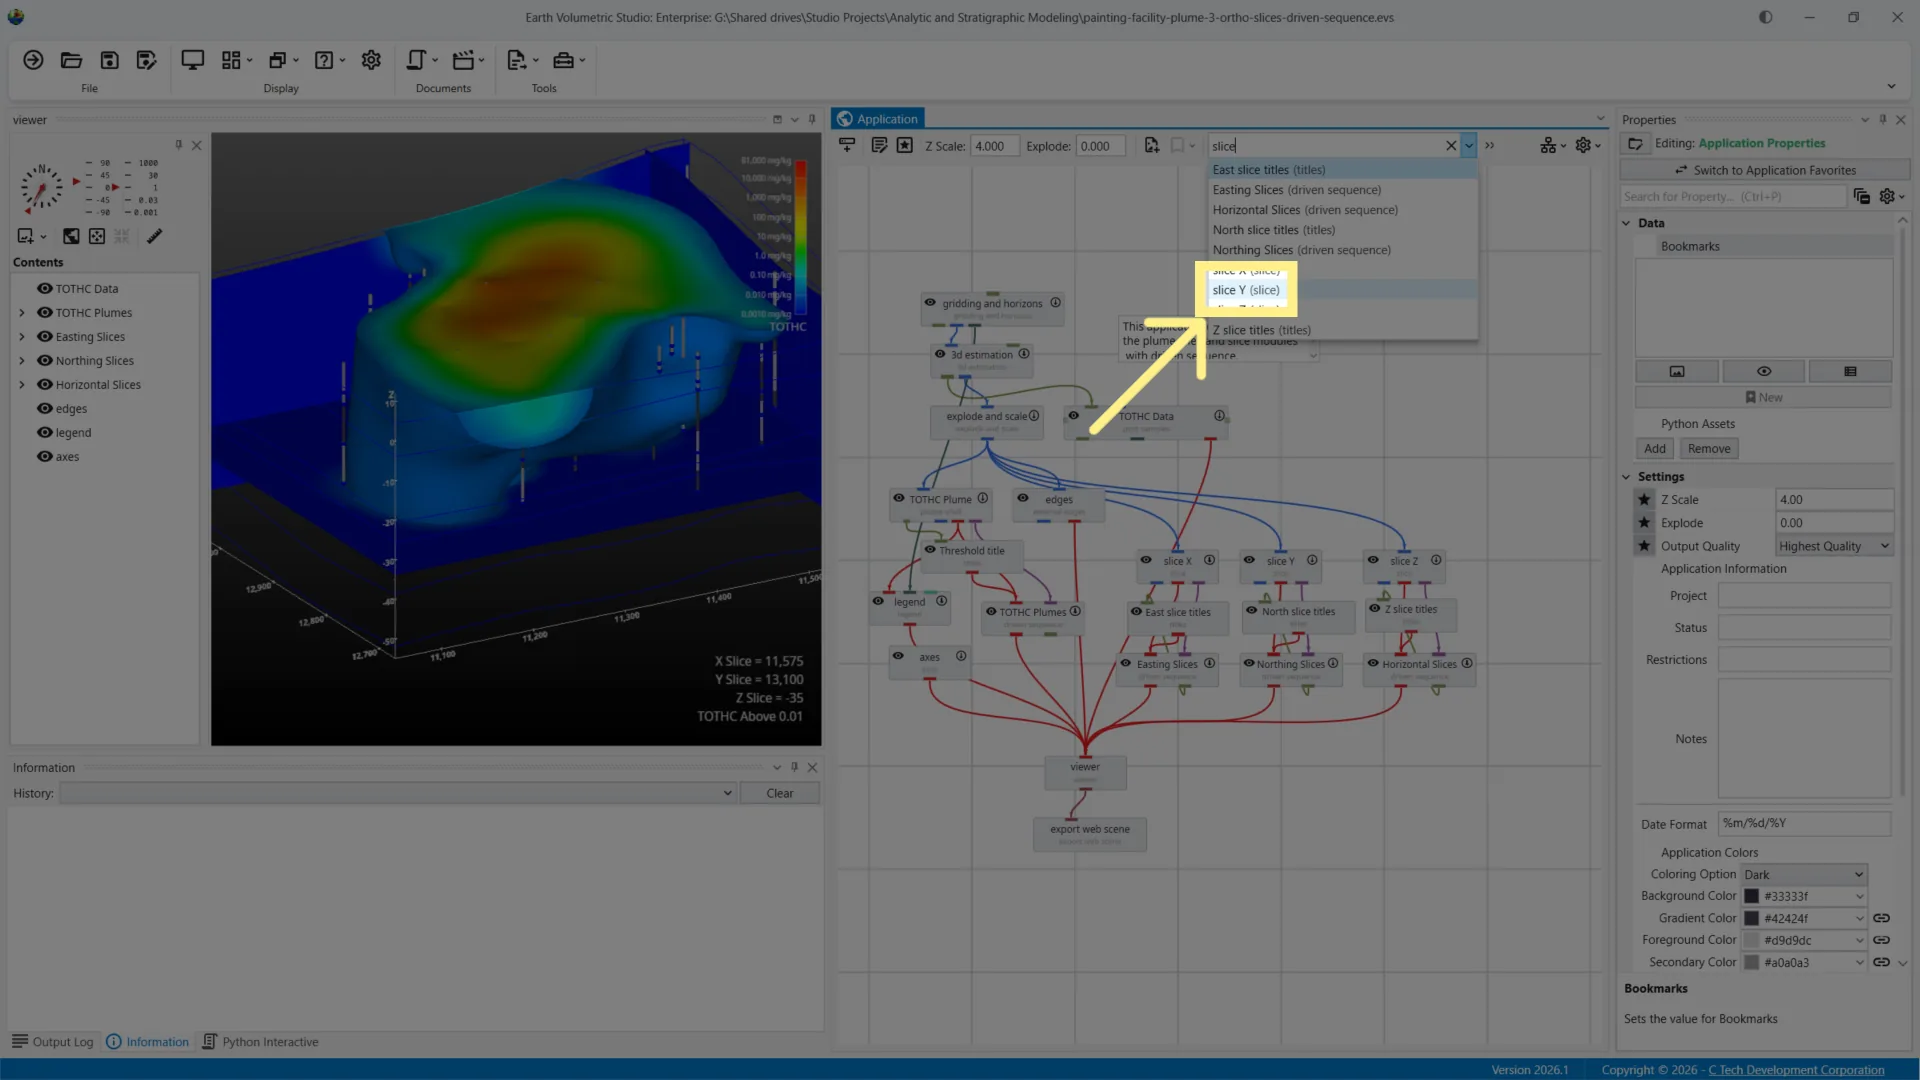
Select a module from the search results to work with its properties.
Notice that Slice Y is now centered in our Application, as well as having it's properties selected for editing in the Properties Window.
Application wide options have been reworked significantly for this release.
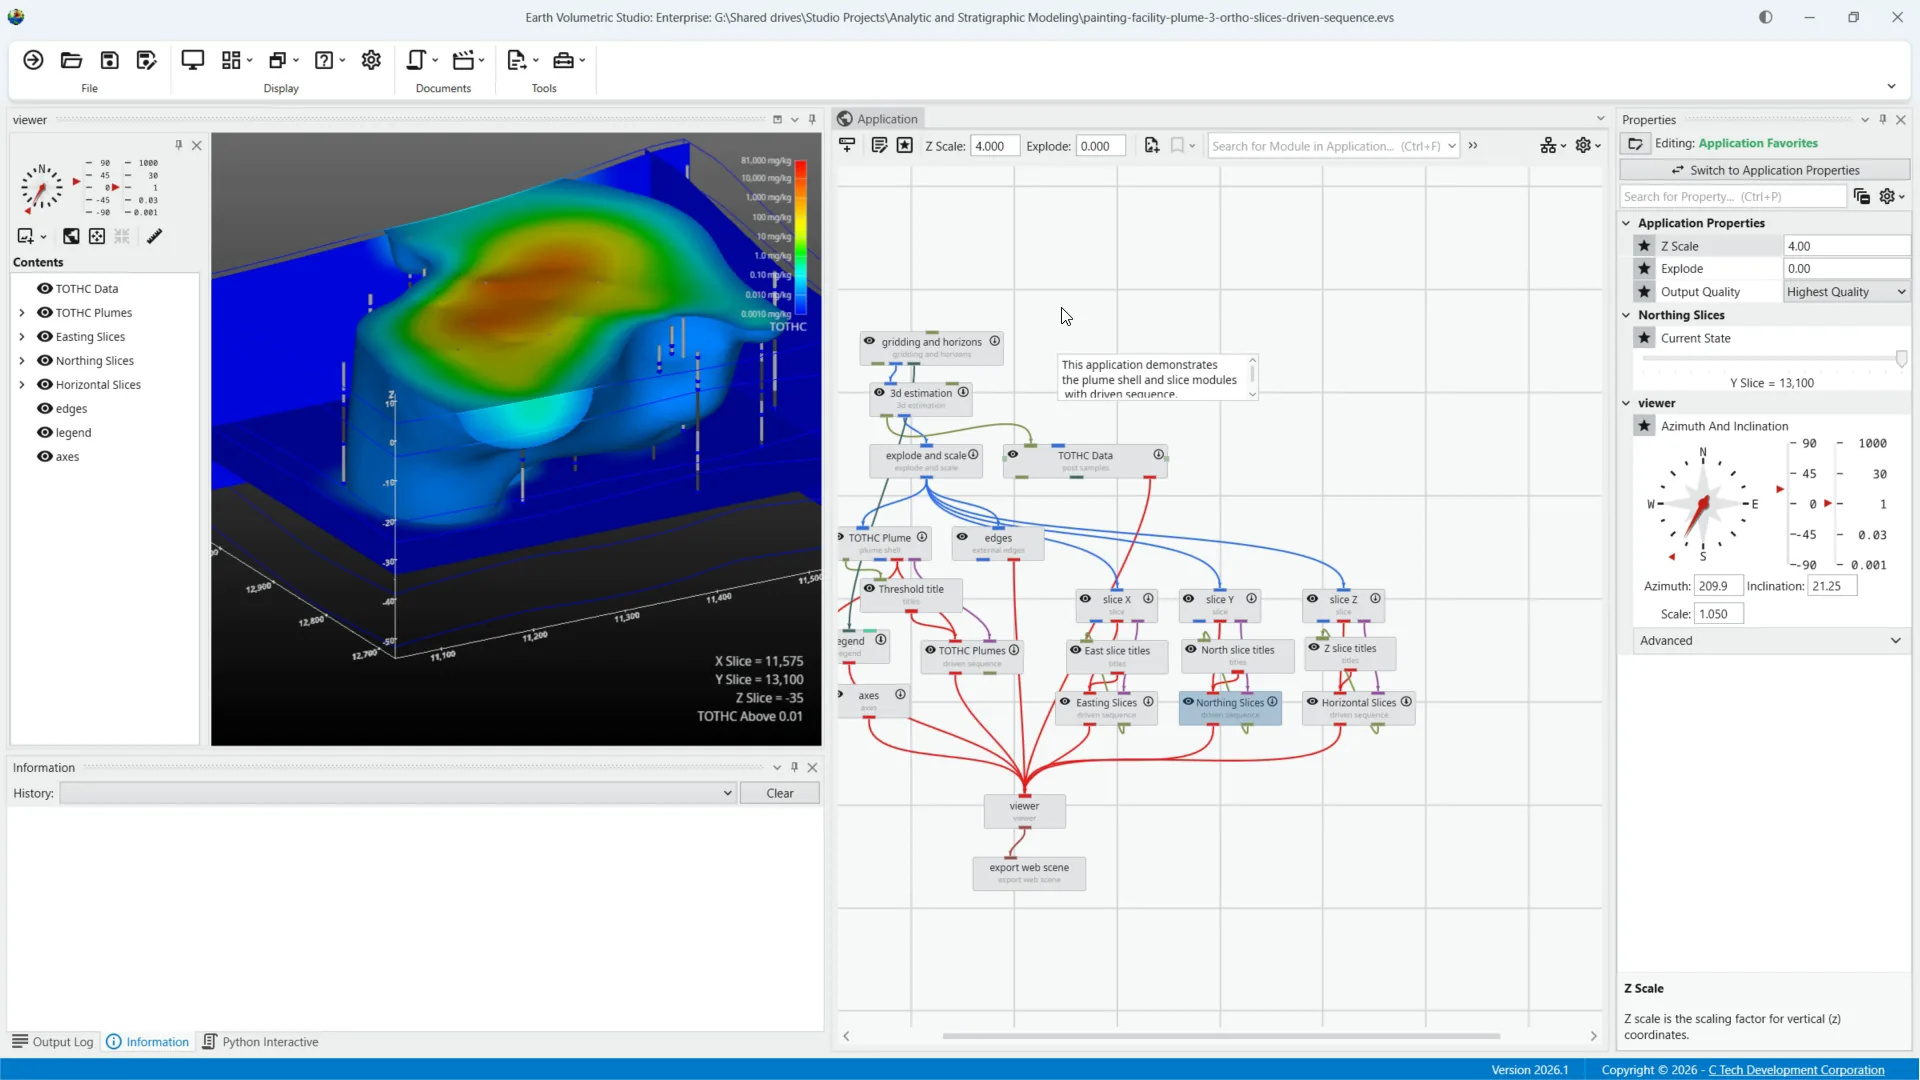
What used to be called application properties is now renamed to application favorites.
Editing application favorites lets you manage properties from any modules you've marked as favorites.
You can add any property of a module, such as the current state of a sequence, to your application favorites for quick access.
Select a module to include its property in your application favorites.
Clicking to the left of a property adds it to the Application Favorites. In this case, the current state will now appear in your application favorites.
The Application Favorites will also be available when creating an EVS Presentation Application.
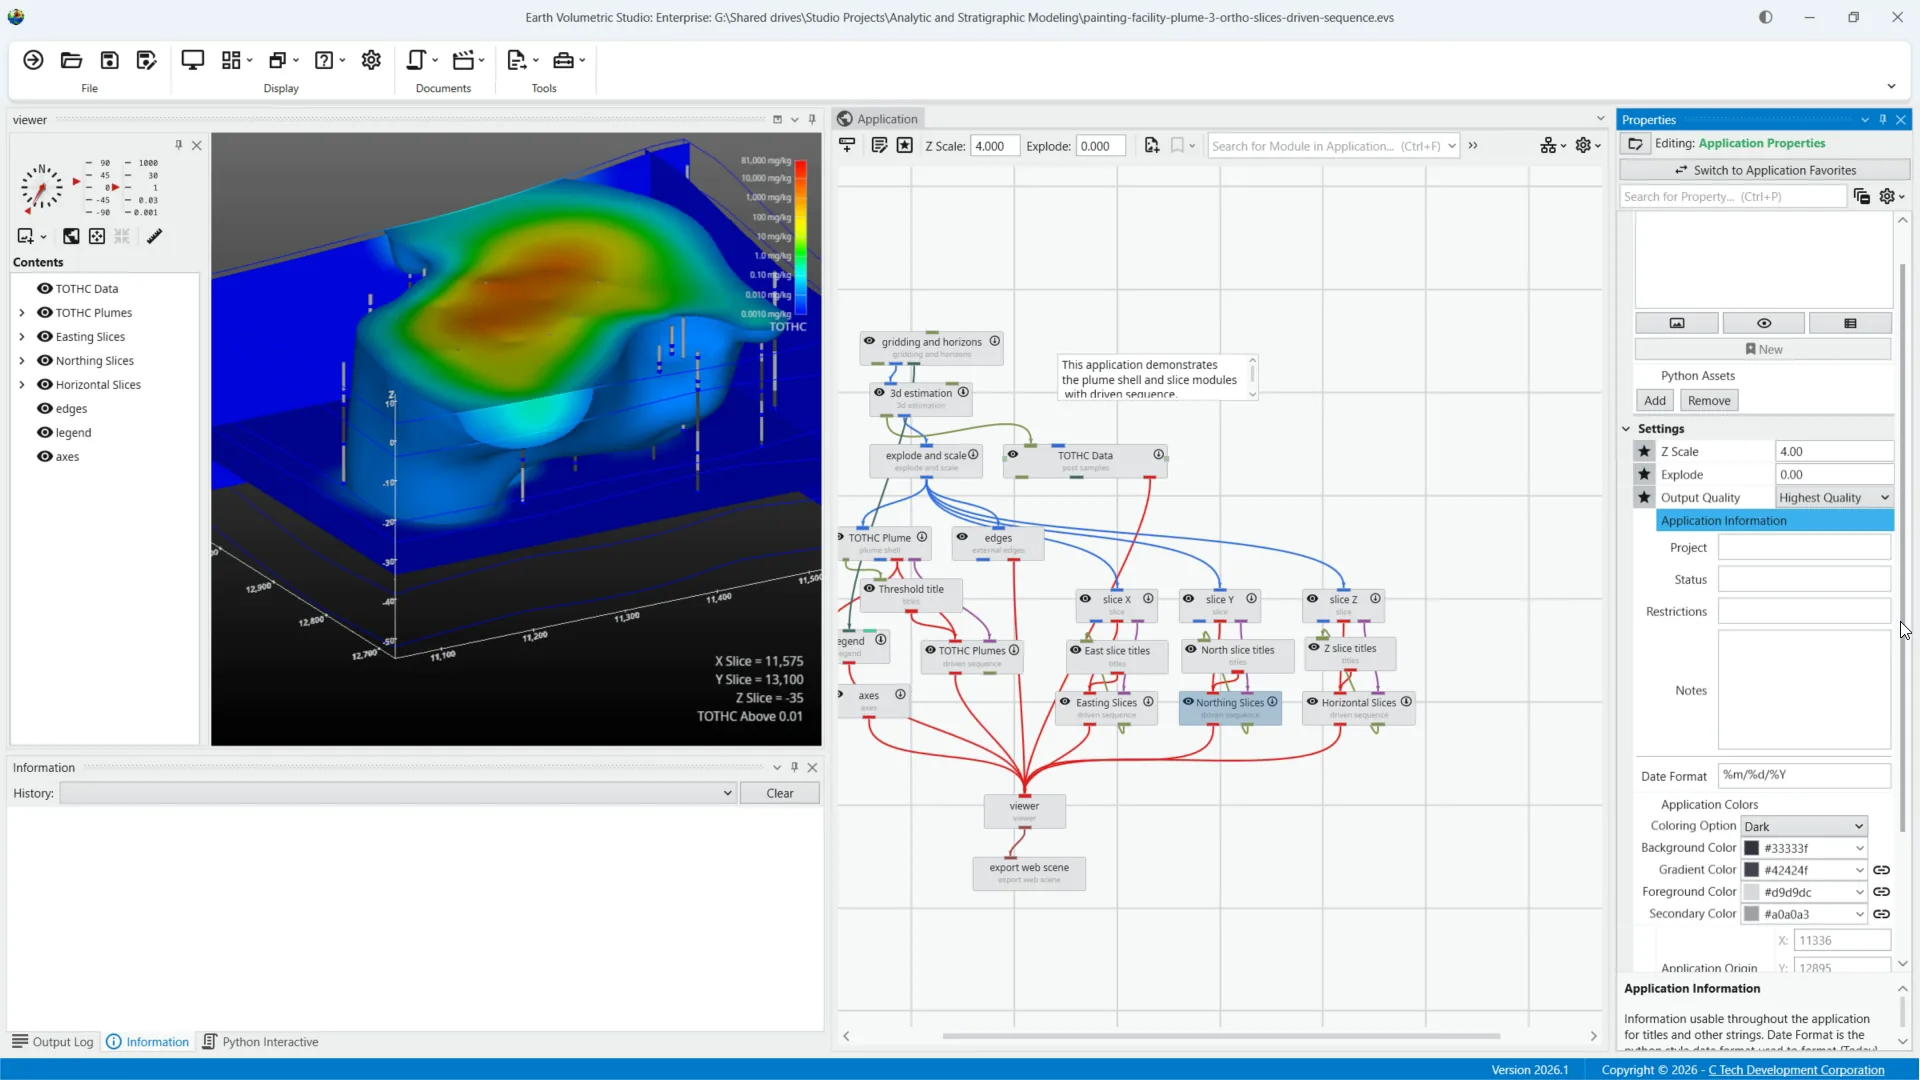
A new application properties window contains application-wide settings like Z Scale and Explode. Features previously in the ribbon, such as project and status information, are now included in the application properties window along with coloring options.
The application properties window also includes new features like Python assets and bookmarks.
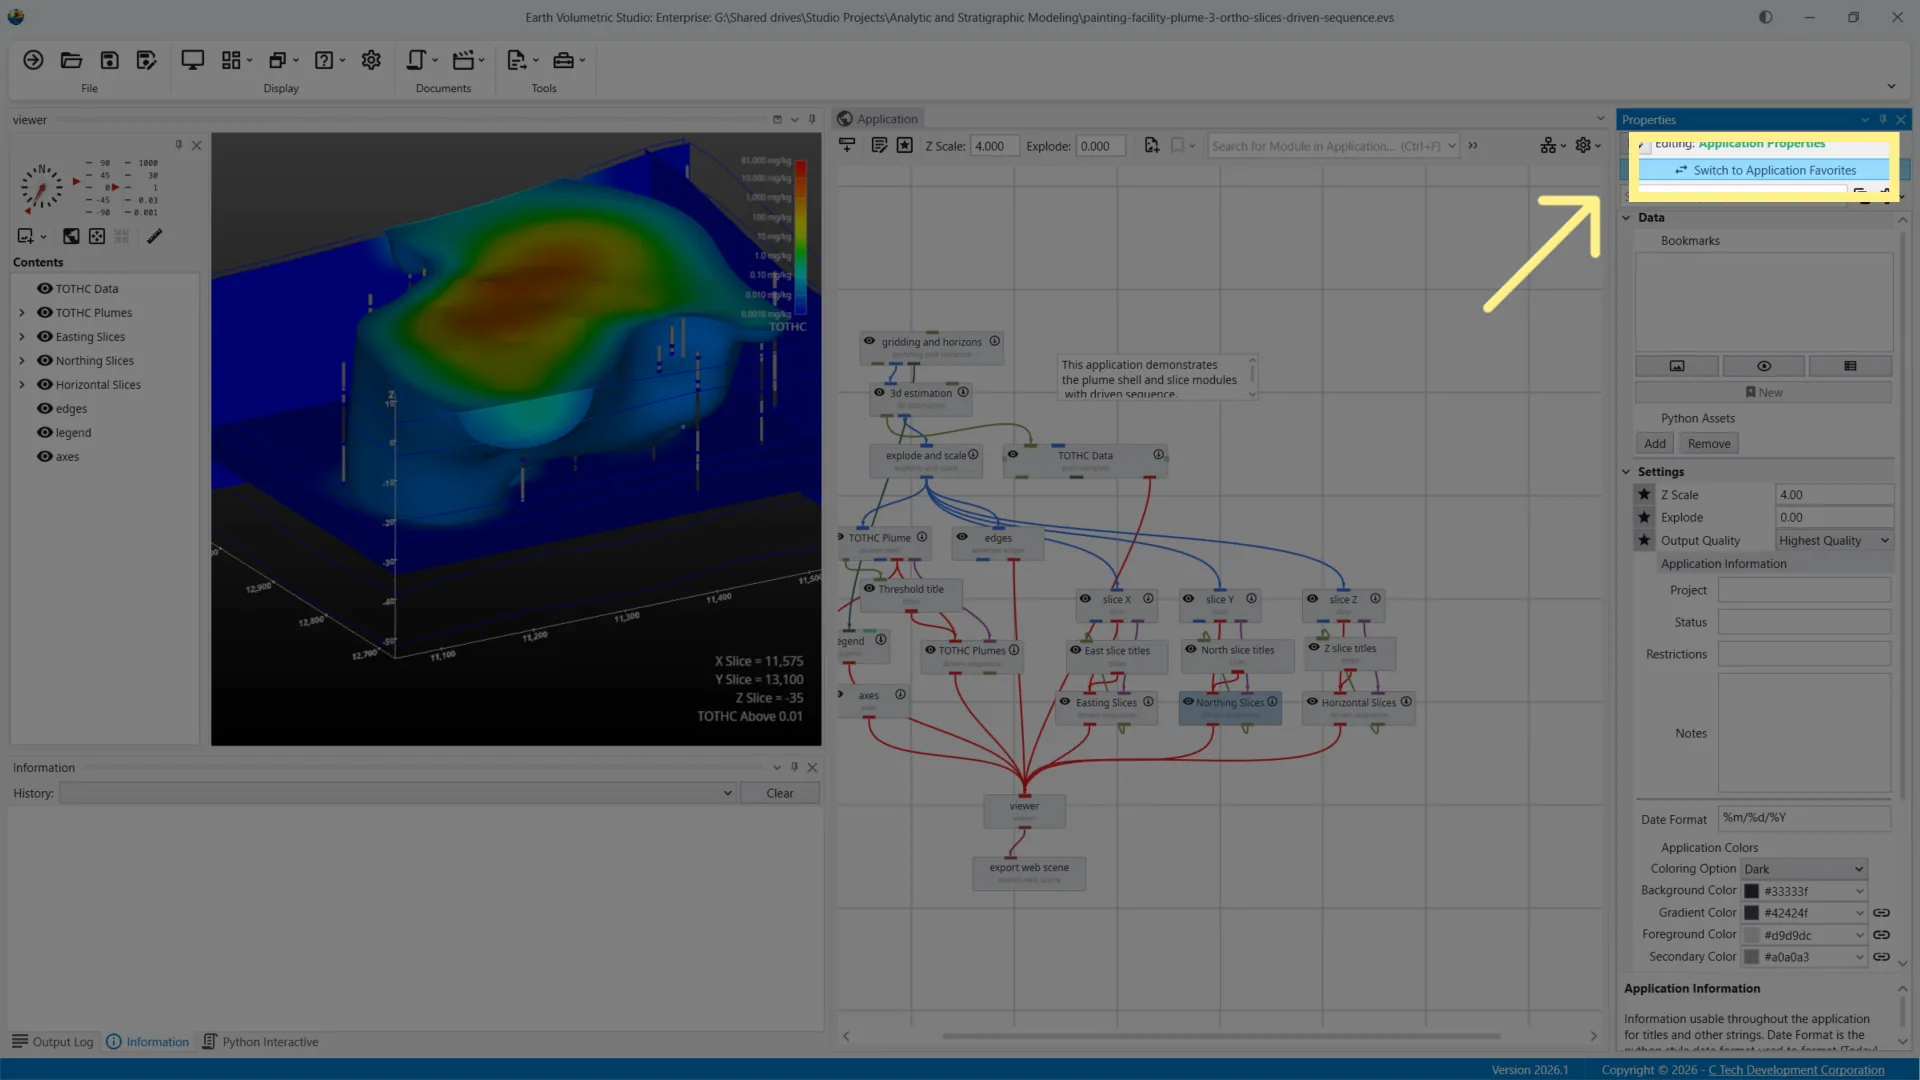
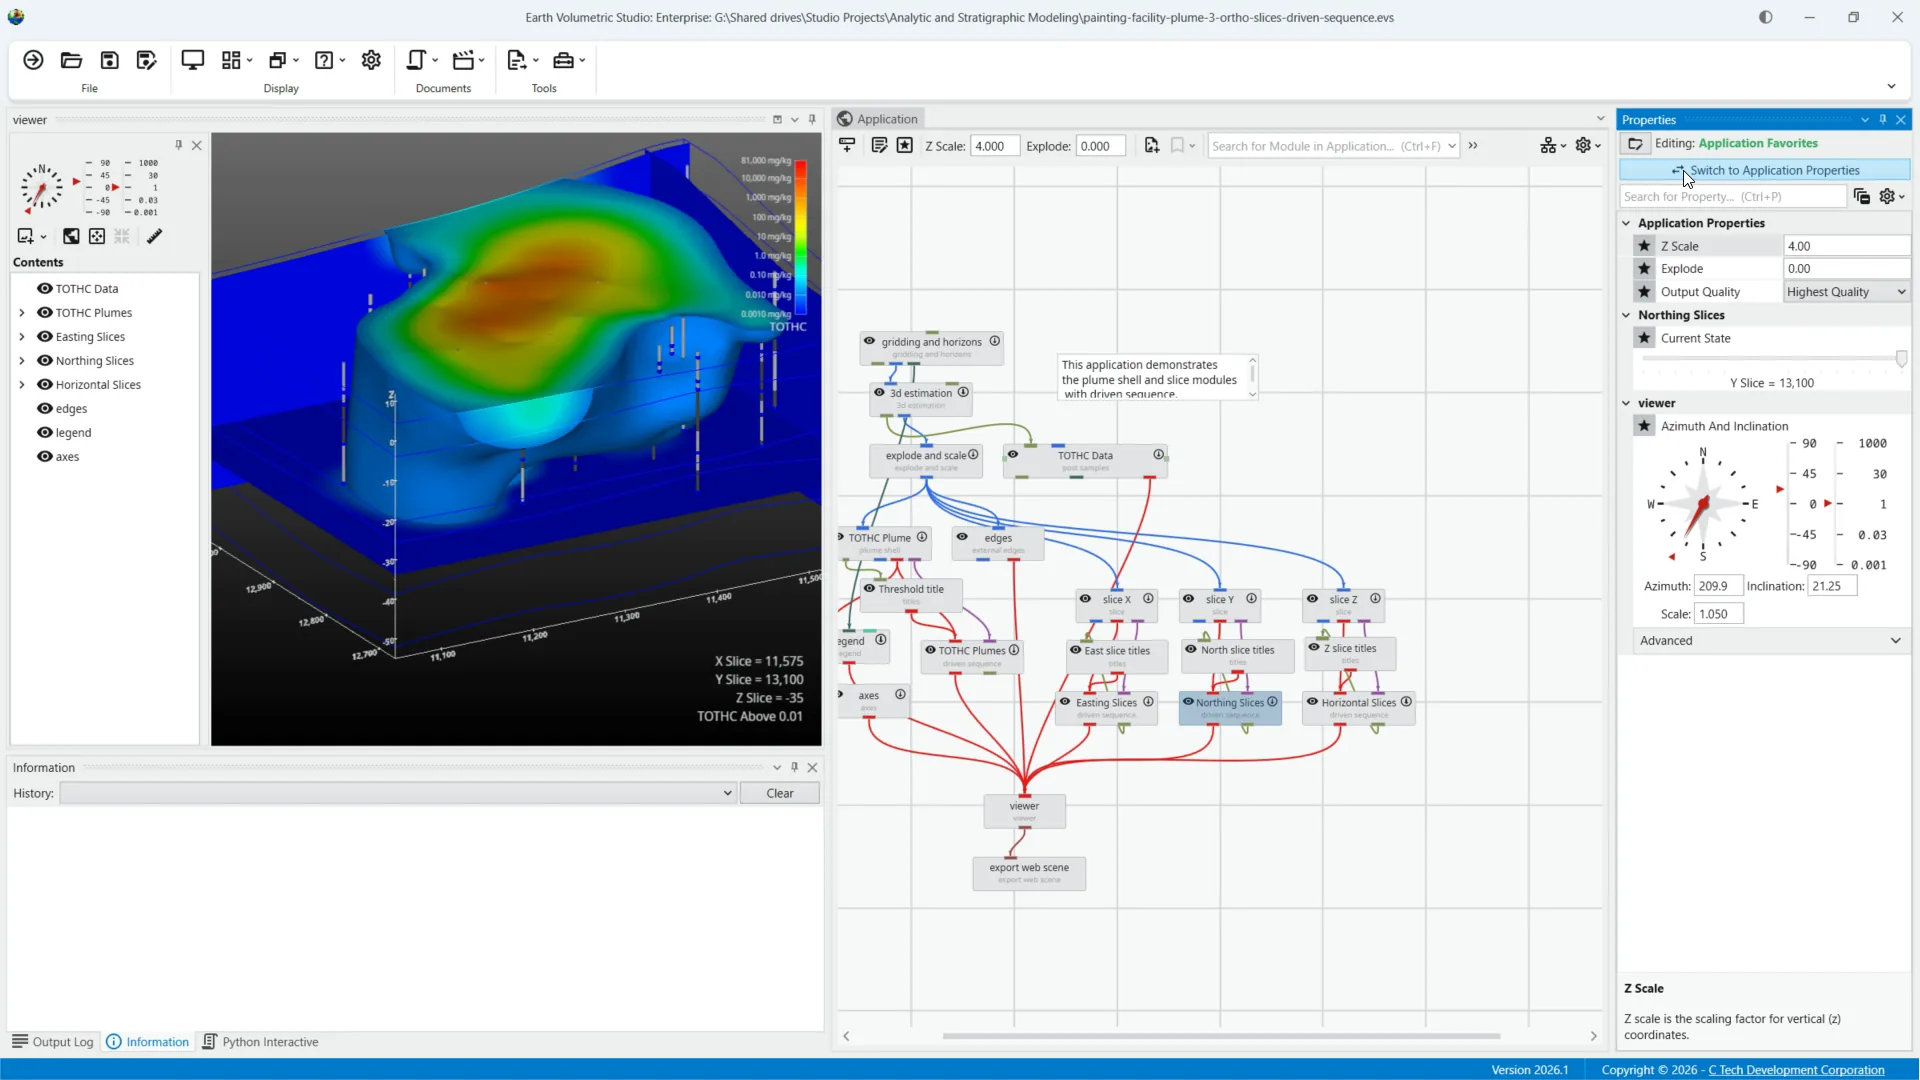
Application favorites and application properties are separate, but switching between them is easy.
A button at the top will switch back and forth between Application Favorites and Application Properties
Thank you. If you have any questions, always feel free to contact support. And I hope you enjoy the new release.
Get started immediately by exploring the simplified interface and new features in Earth Volumetric Studio 2026.1. For additional help, visit our support resources or contact support anytime to ensure a smooth transition.
Introduction
Earth Volumetric Studio 2026.1 introduces a streamlined user interface designed to boost your productivity and simplify workflows. This update focuses on reducing clutter and optimizing usability for all users. Version 2026.1 contains a major user interface update focused on simplification across the board. The user interface has reorganized to focus on key functionality, enhancing productivity and optimizing screen real estate on laptops and multiple monitors.
1Simplified Startup Options
Let's start with the changes beginning right at startup with a brand new startup screen. Notice the new, simpler screen.
2Open or Create Application
Along the top are buttons to open an existing or create a new application.
3Display Recent Files With Previews
You can also see your recent files, which now include preview screens so you can see what each application contained.
4Access Tips and Tricks Links
At the bottom of the window, there are links to recent tips and tricks to help you get the most out of the software. Clicking any of these links will open the tips and tricks page in your web browser for easy access.
5Open Application to Explore UI
Let's go ahead and open an application so we can explore the new interface in action.
6Notice Simplified Toolbar Design
The first key change is a brand new, much simpler toolbar with detailed tooltips on all buttons. There are far fewer options on the toolbar now, streamlining your workspace.
7Relocated Application Properties
Most missing options have been moved to more logical places, such as application properties like Z Scale and Explode now accessible directly in the application window.
8Adjusting Toolbar Density
The toolbar supports different views to optimize screen space, from full size to compact, ideal for laptops or experienced users.
9Choose option from Menu on Right
On the far right of the screen, a small menu provides access to all of the density options
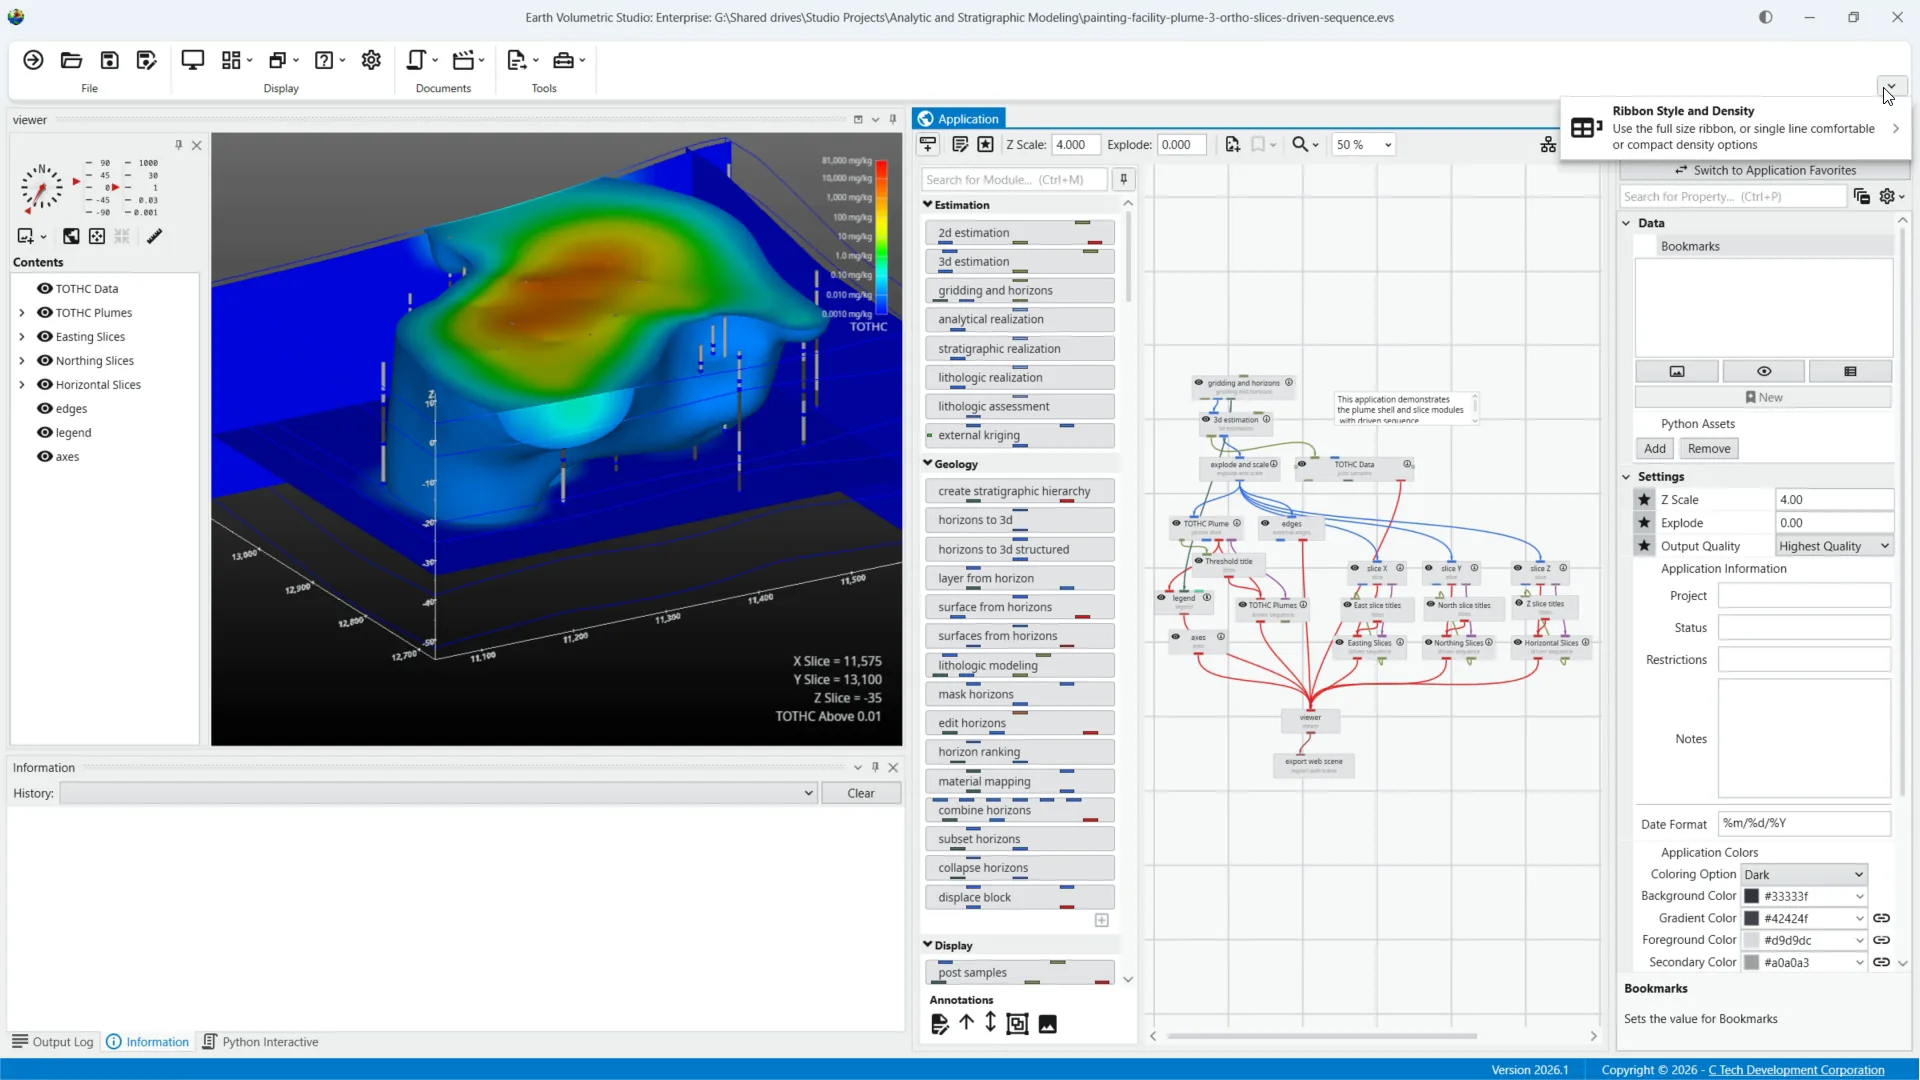
10Use Compact Toolbar with Tooltips
The compact setting uses small icons with tooltips to maximize screen real estate while maintaining usability.
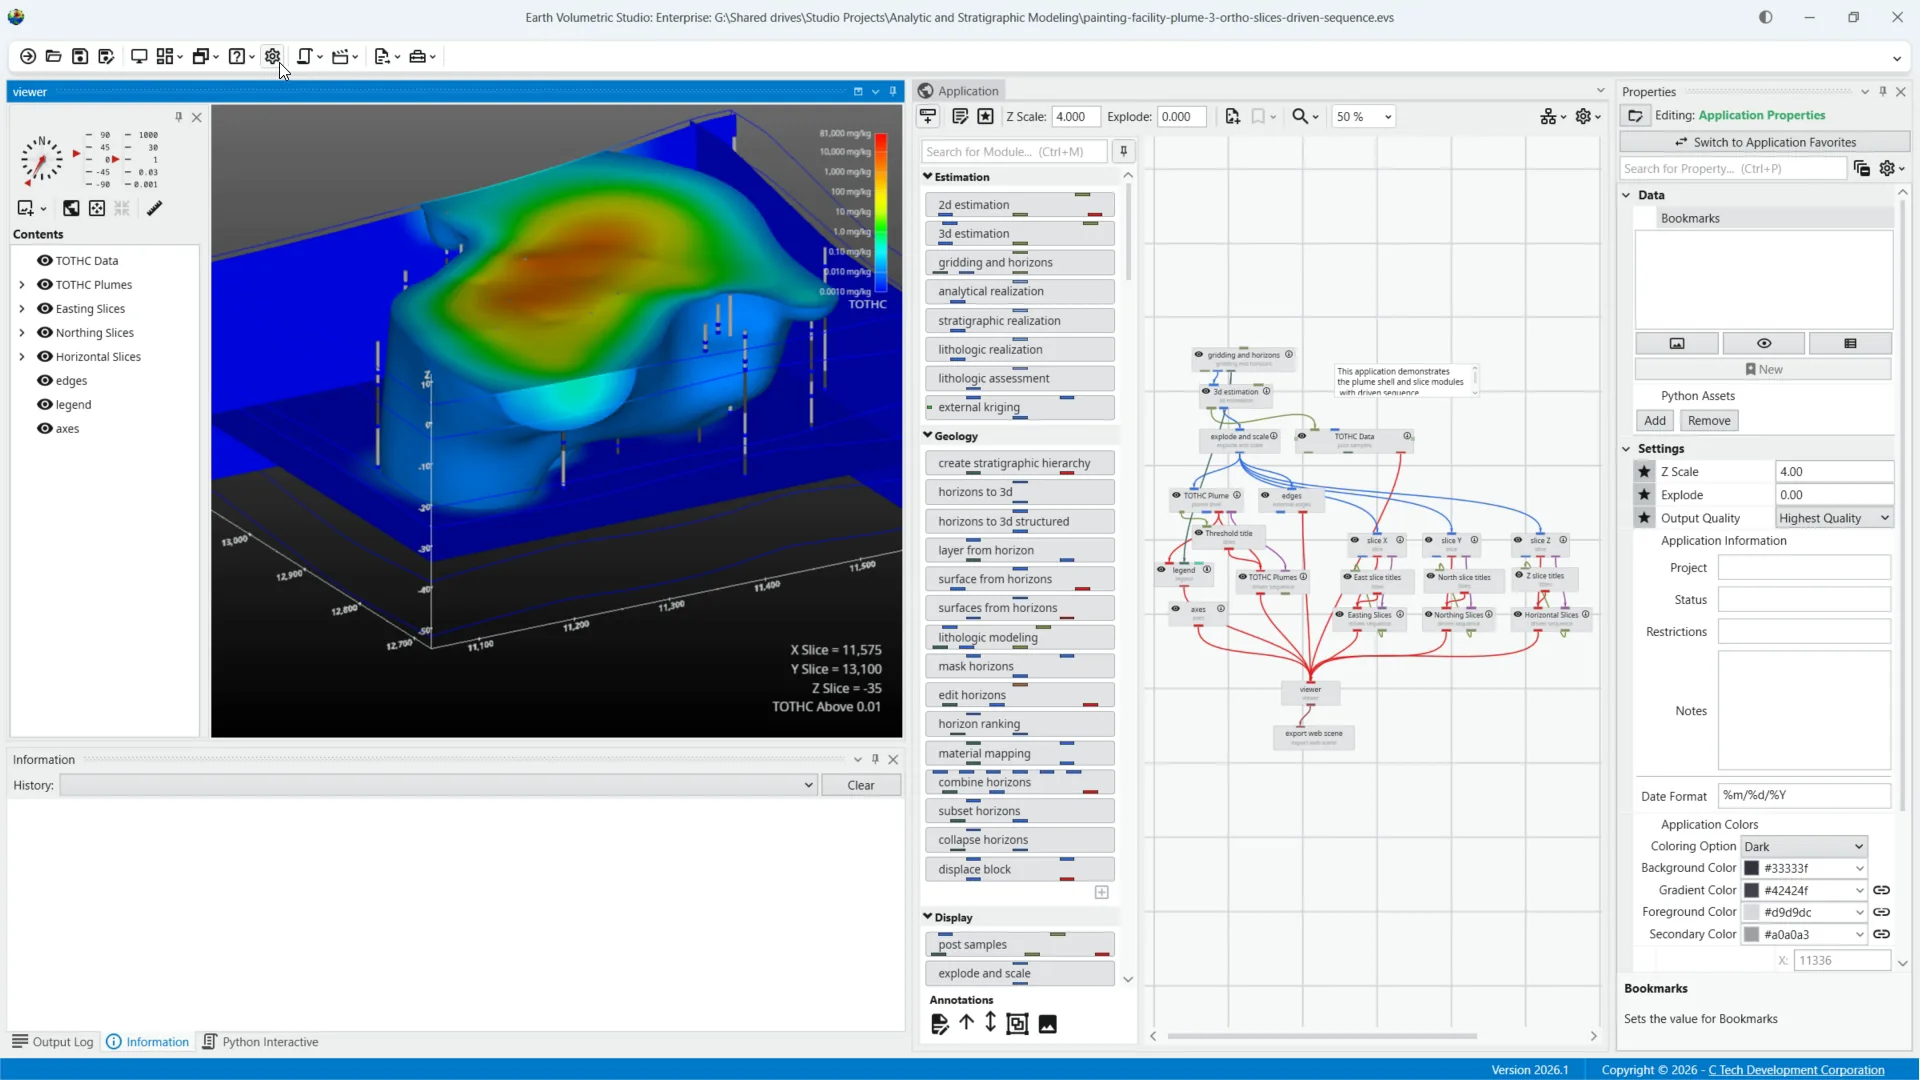
11Maximize Screen Space on Laptops
On laptops, or if you want to maximize screen real estate, you can even move the toolbar all the way up to the application title bar to provide the most screen space.
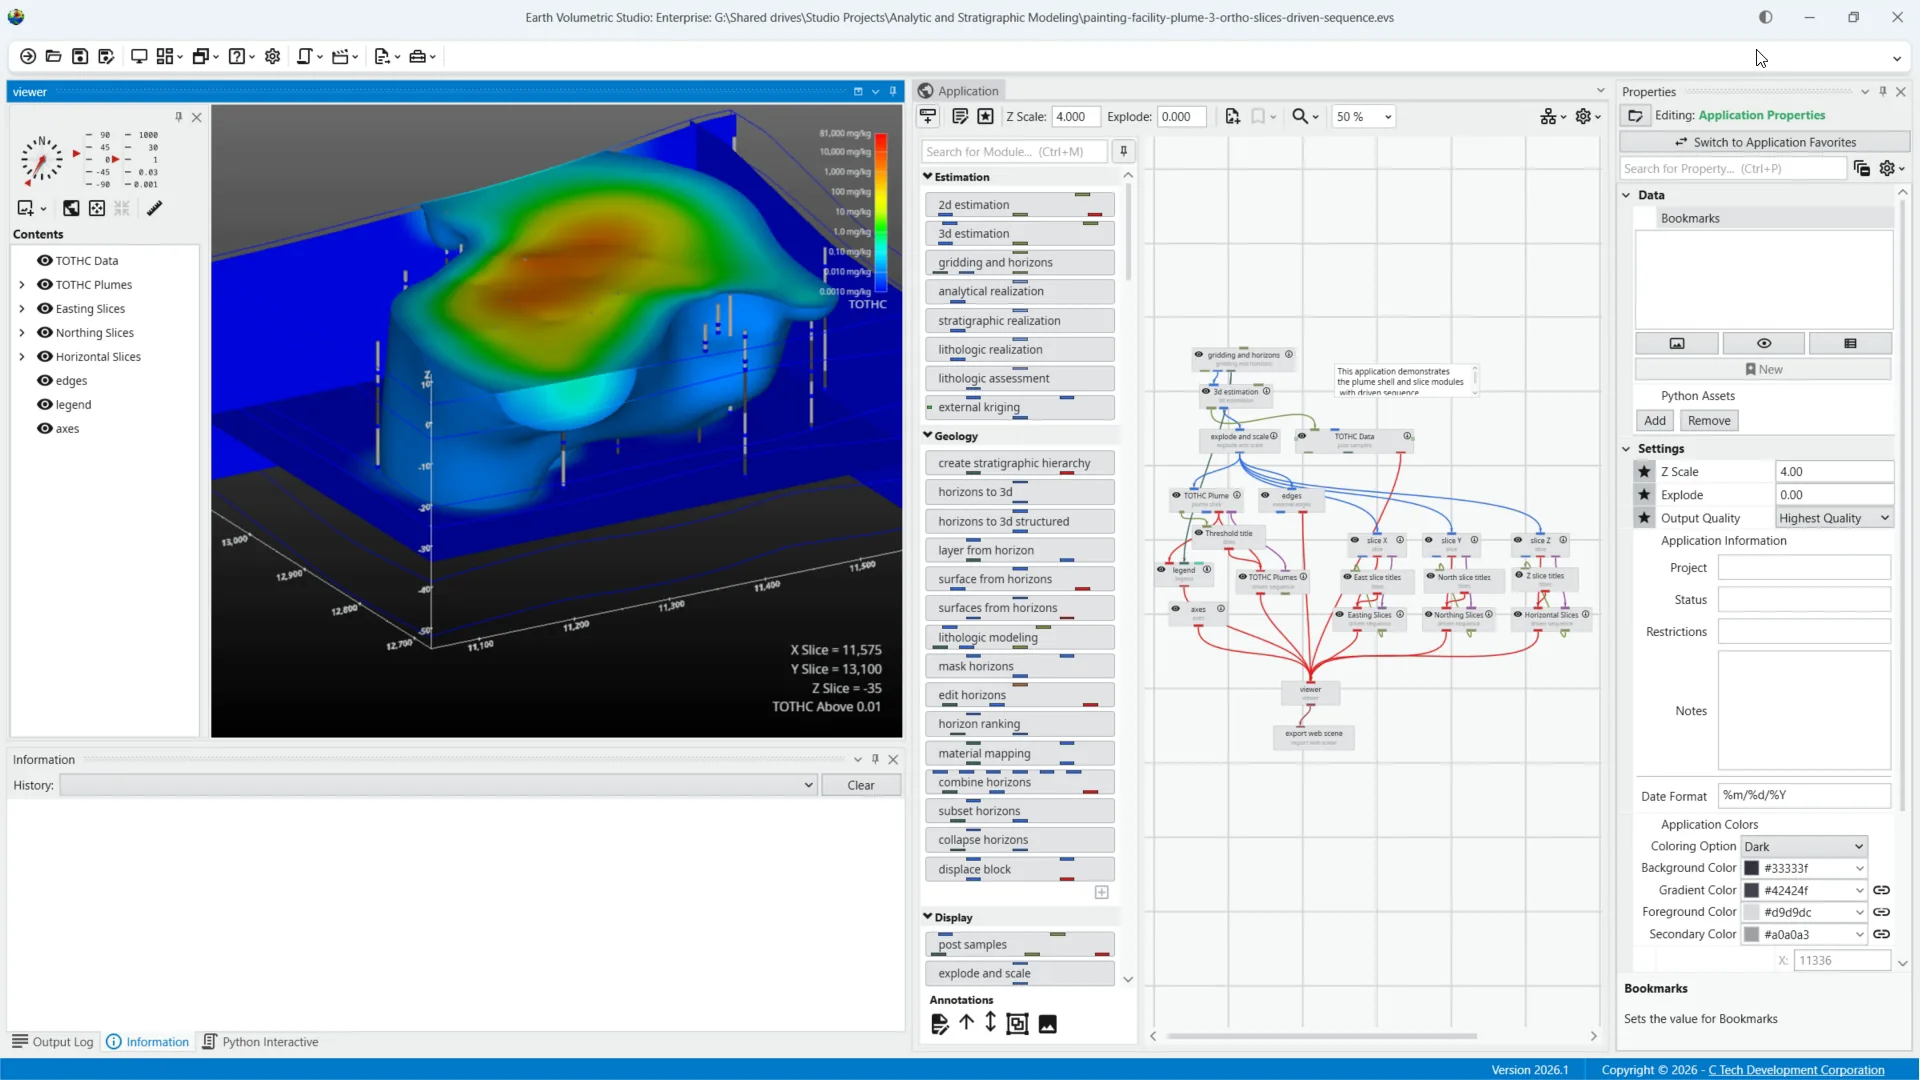
12Comfortable Toolbar Setting
Here I choose the comfortable toolbar setting for a balanced mix of space and usability.
13Relocate Tools from Ribbon to Menus
In previous versions, tools were in ribbon tabs; now all tools have been moved into detailed submenus for better organization.
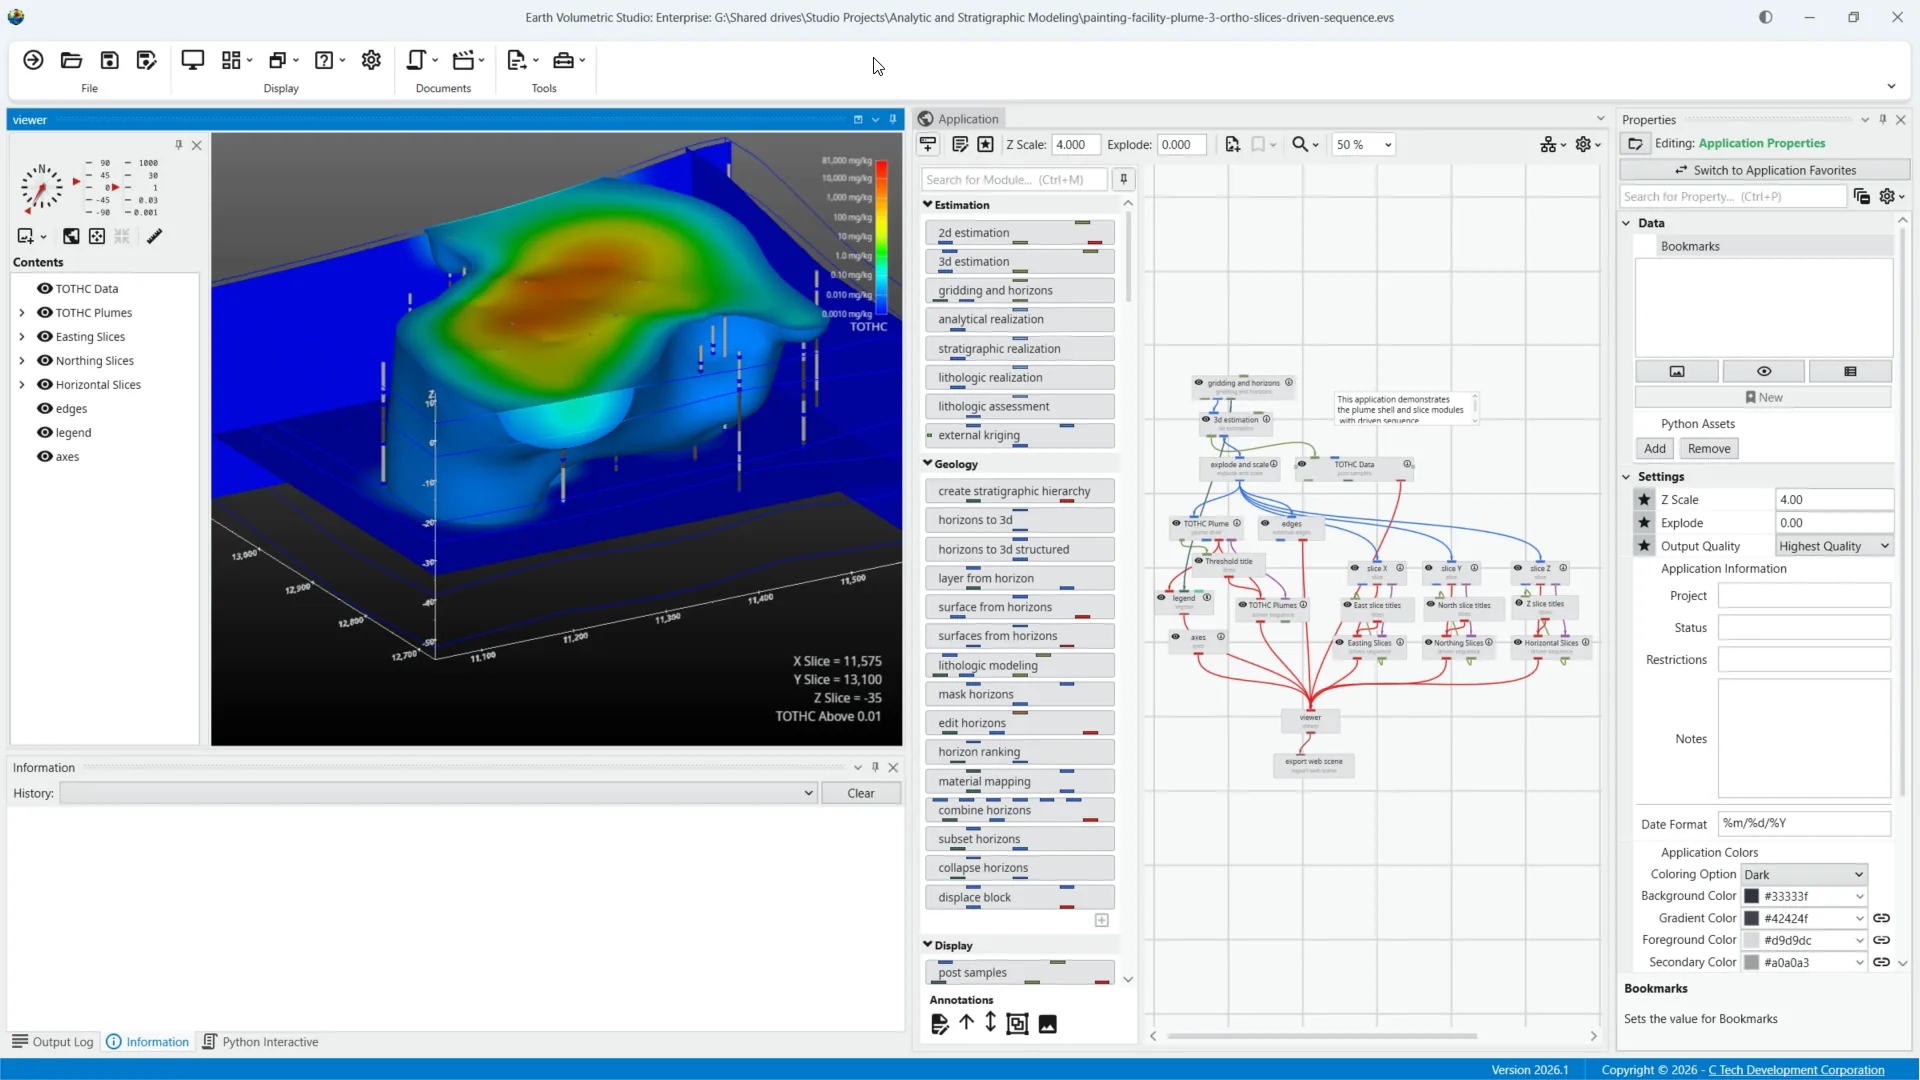
14Explore Detailed Tooltips for Tools
Each tool now includes detailed tooltips to help you understand their functions and select the right one.
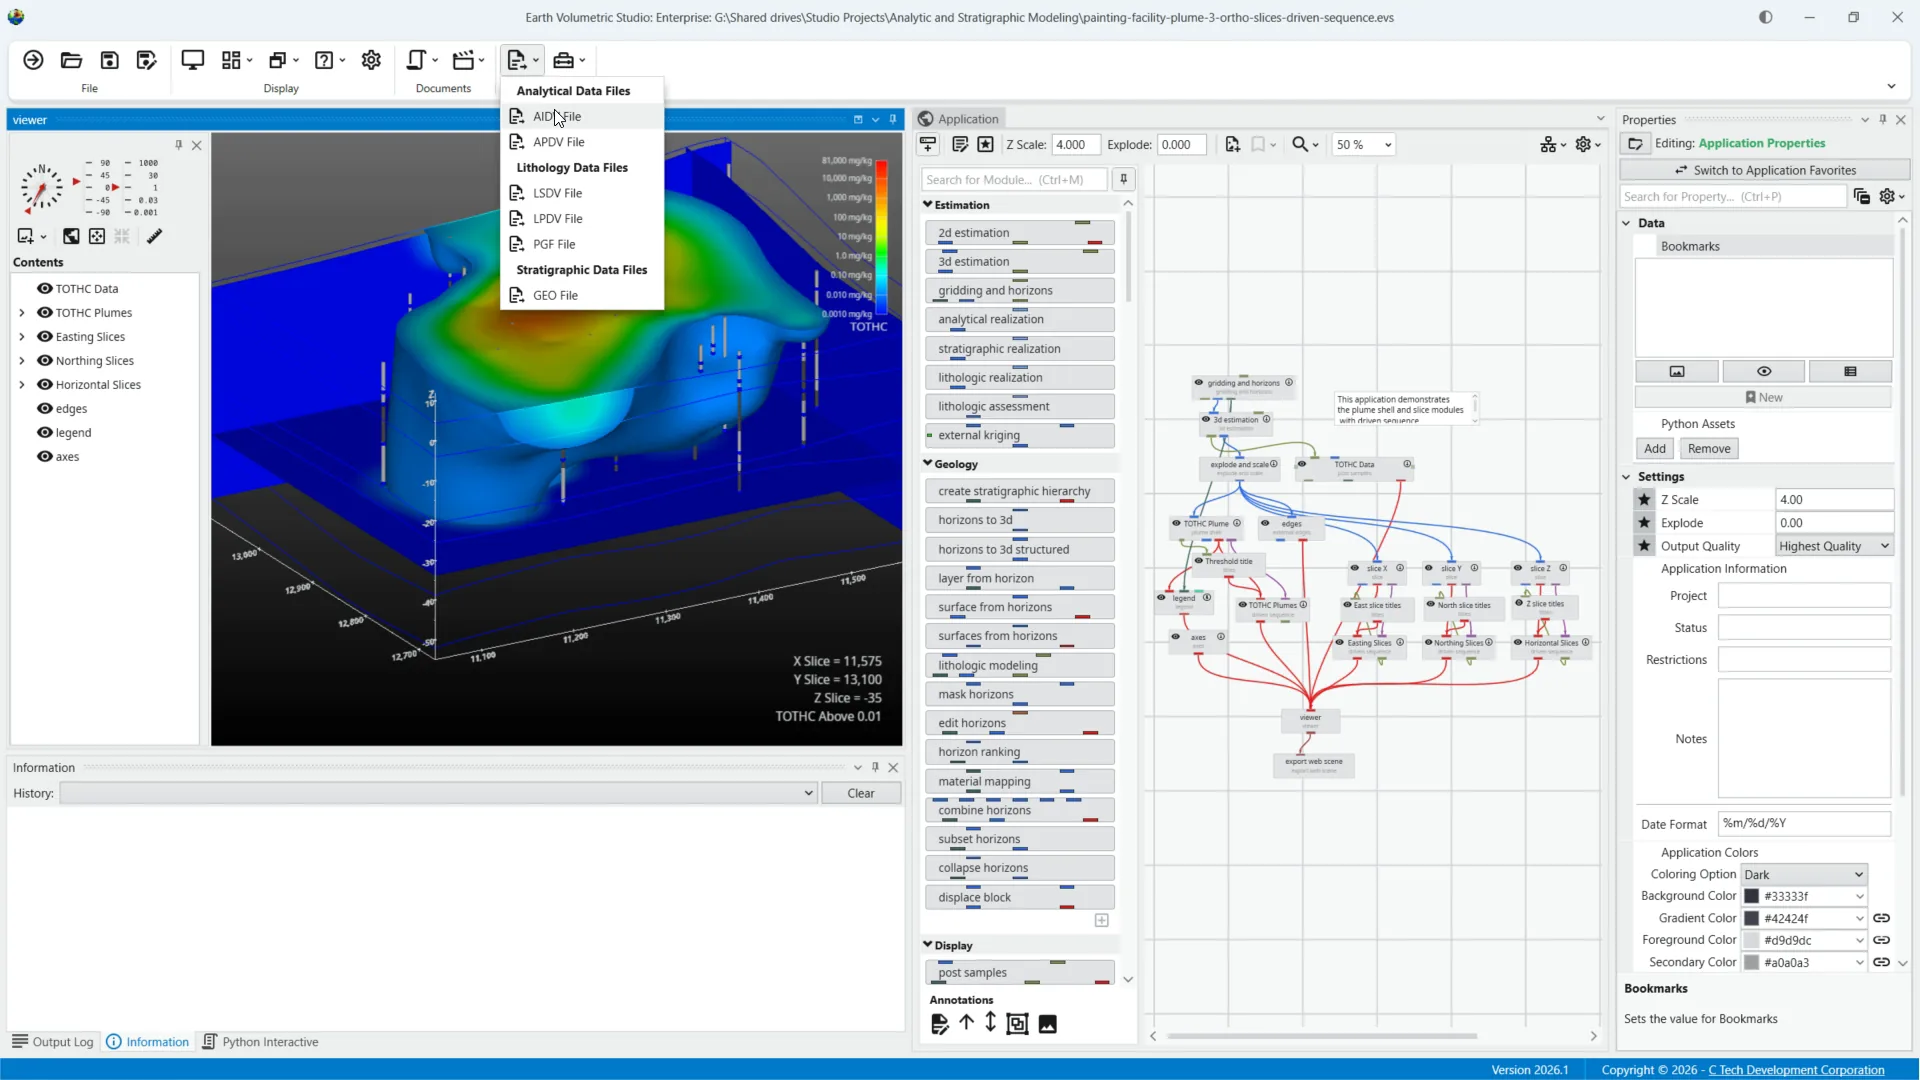
15Opening Options Screen
Options have been moved from the ribbon to a reorganized options screen.
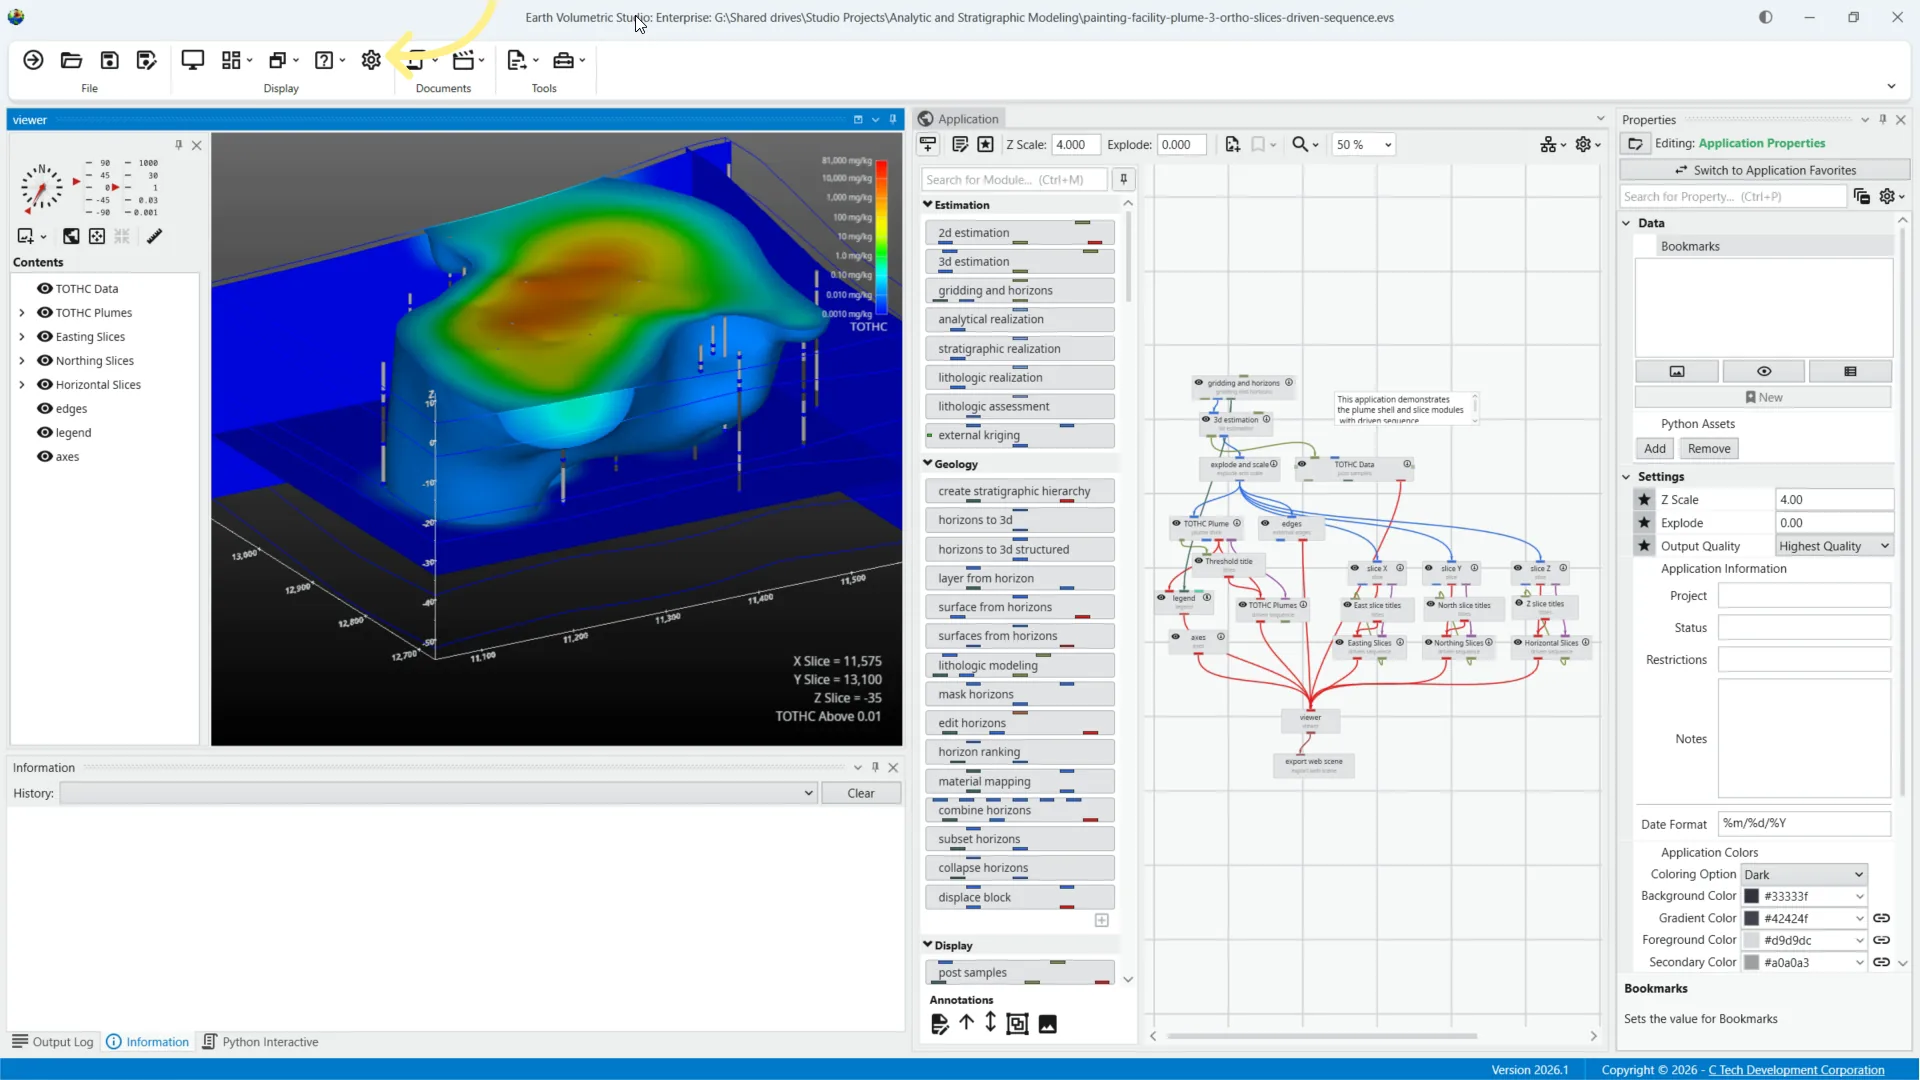
16Organization of Options
The Options screen is now organized into two sections. User preferences on the left include options which affect the current user, such as switching between light and dark themes. The left panel options do not alter your data or applications.
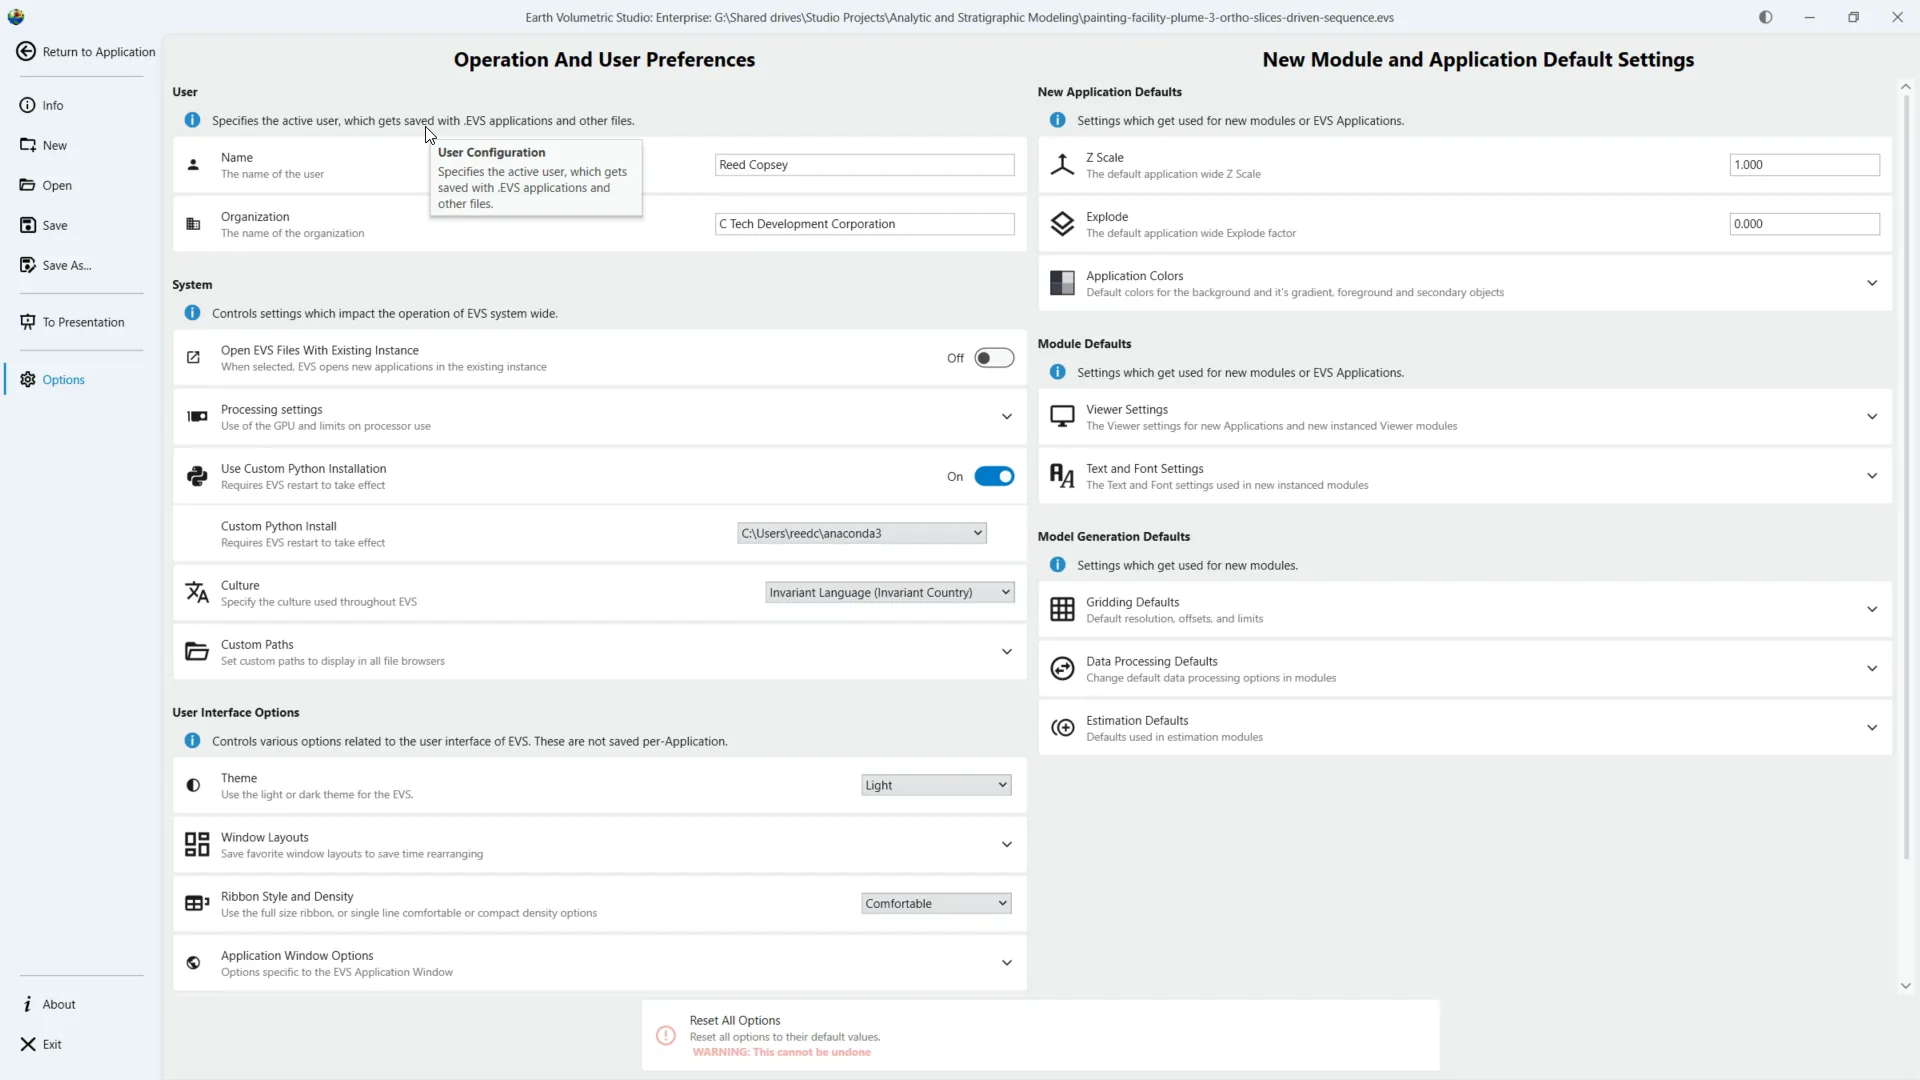
17Set Defaults for New Modules
The settings on the right side of the options window let you change defaults for instancing modules or creating new applications.
18Return to the Application
Close the options window to return to the main Application interface.
19Improved Application Window
Now we will focus on improvements to the Application Window. The Application Window can now be dragged out and moved to a second monitor for improved multi-screen workflows.
20Modules now Integrated into Application Window
Modules and the application overview are no longer their own Windows, and are now part of the main application window for better cohesion.
21Keep Modules Within Application Context
Modules are kept within the application window since they are only usable within your application context.
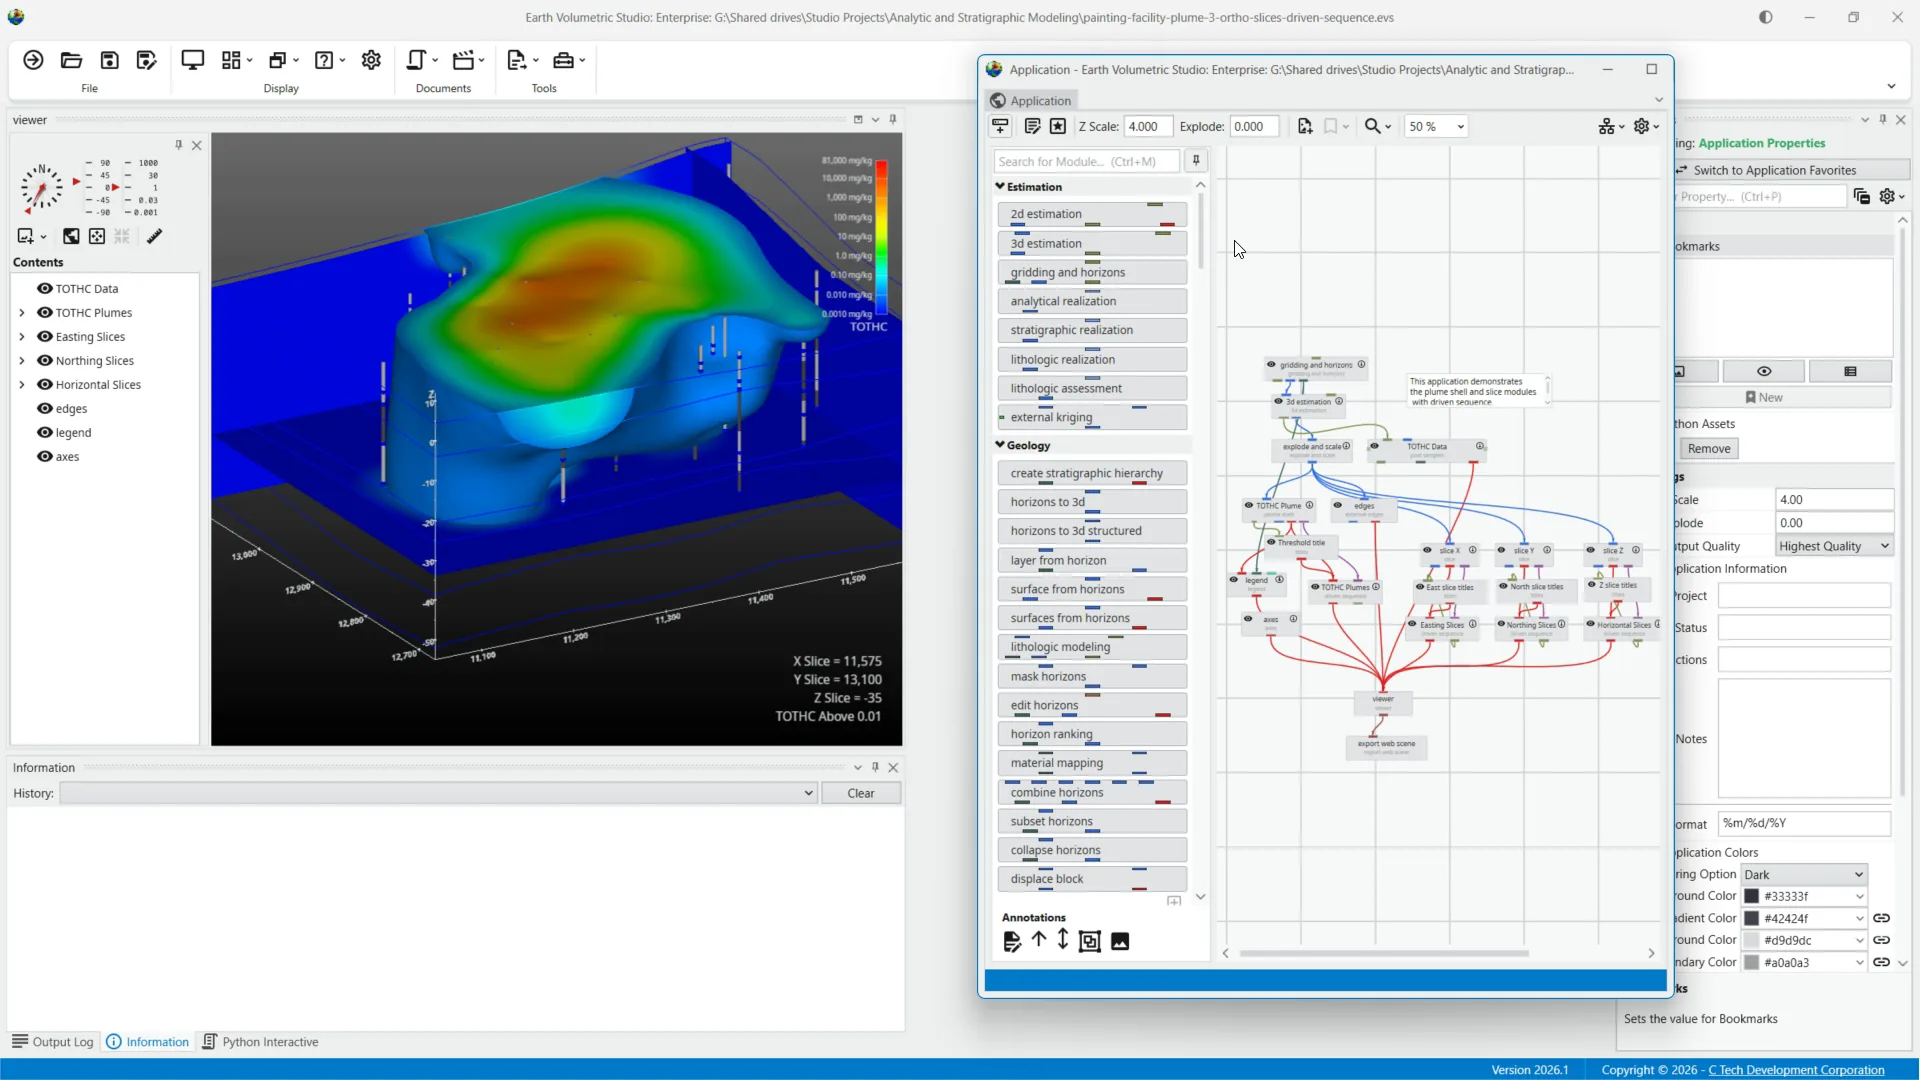
22Pin or Auto-Hide Modules Pane
The modules window can be pinned or unpinned to auto-hide, which is useful on smaller screens or laptops.
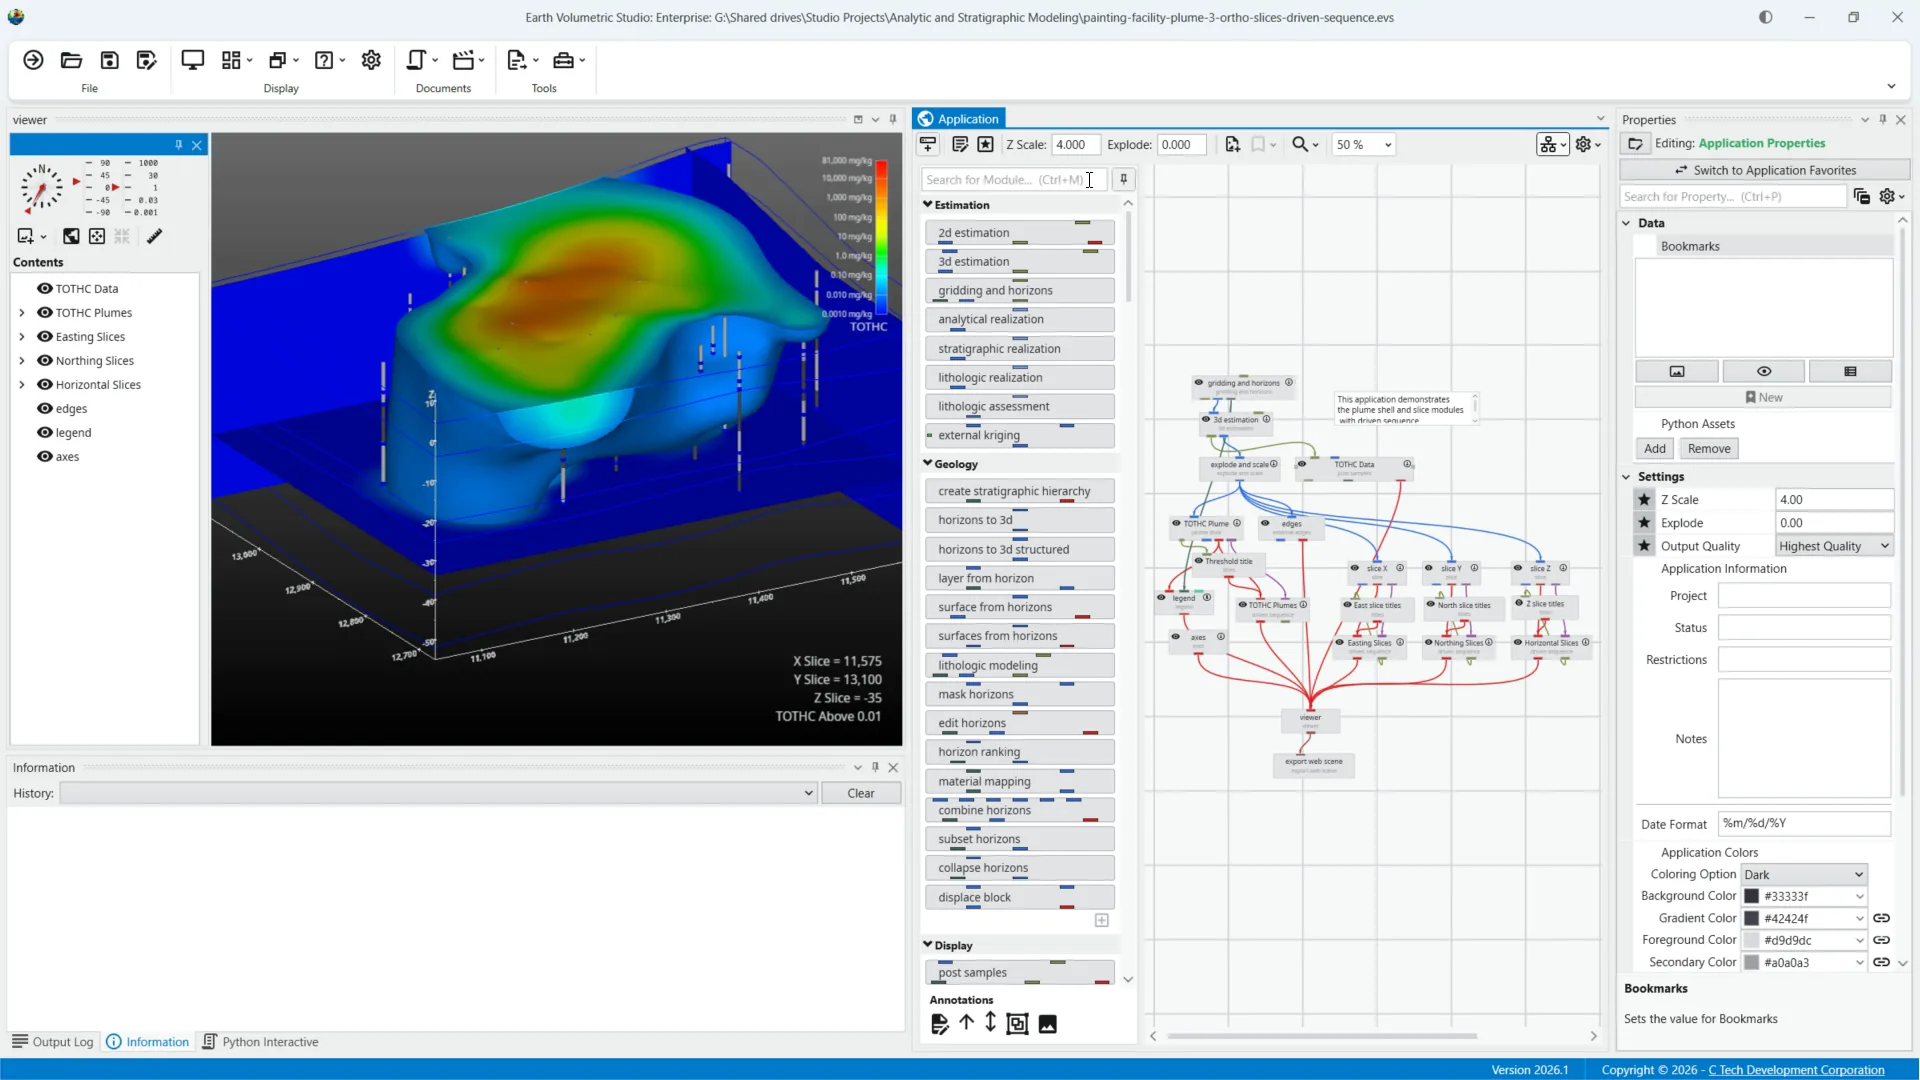
23Optimize Modules Pane for Small Screens
Auto-hiding the modules pane helps maximize workspace on smaller screens or laptops.
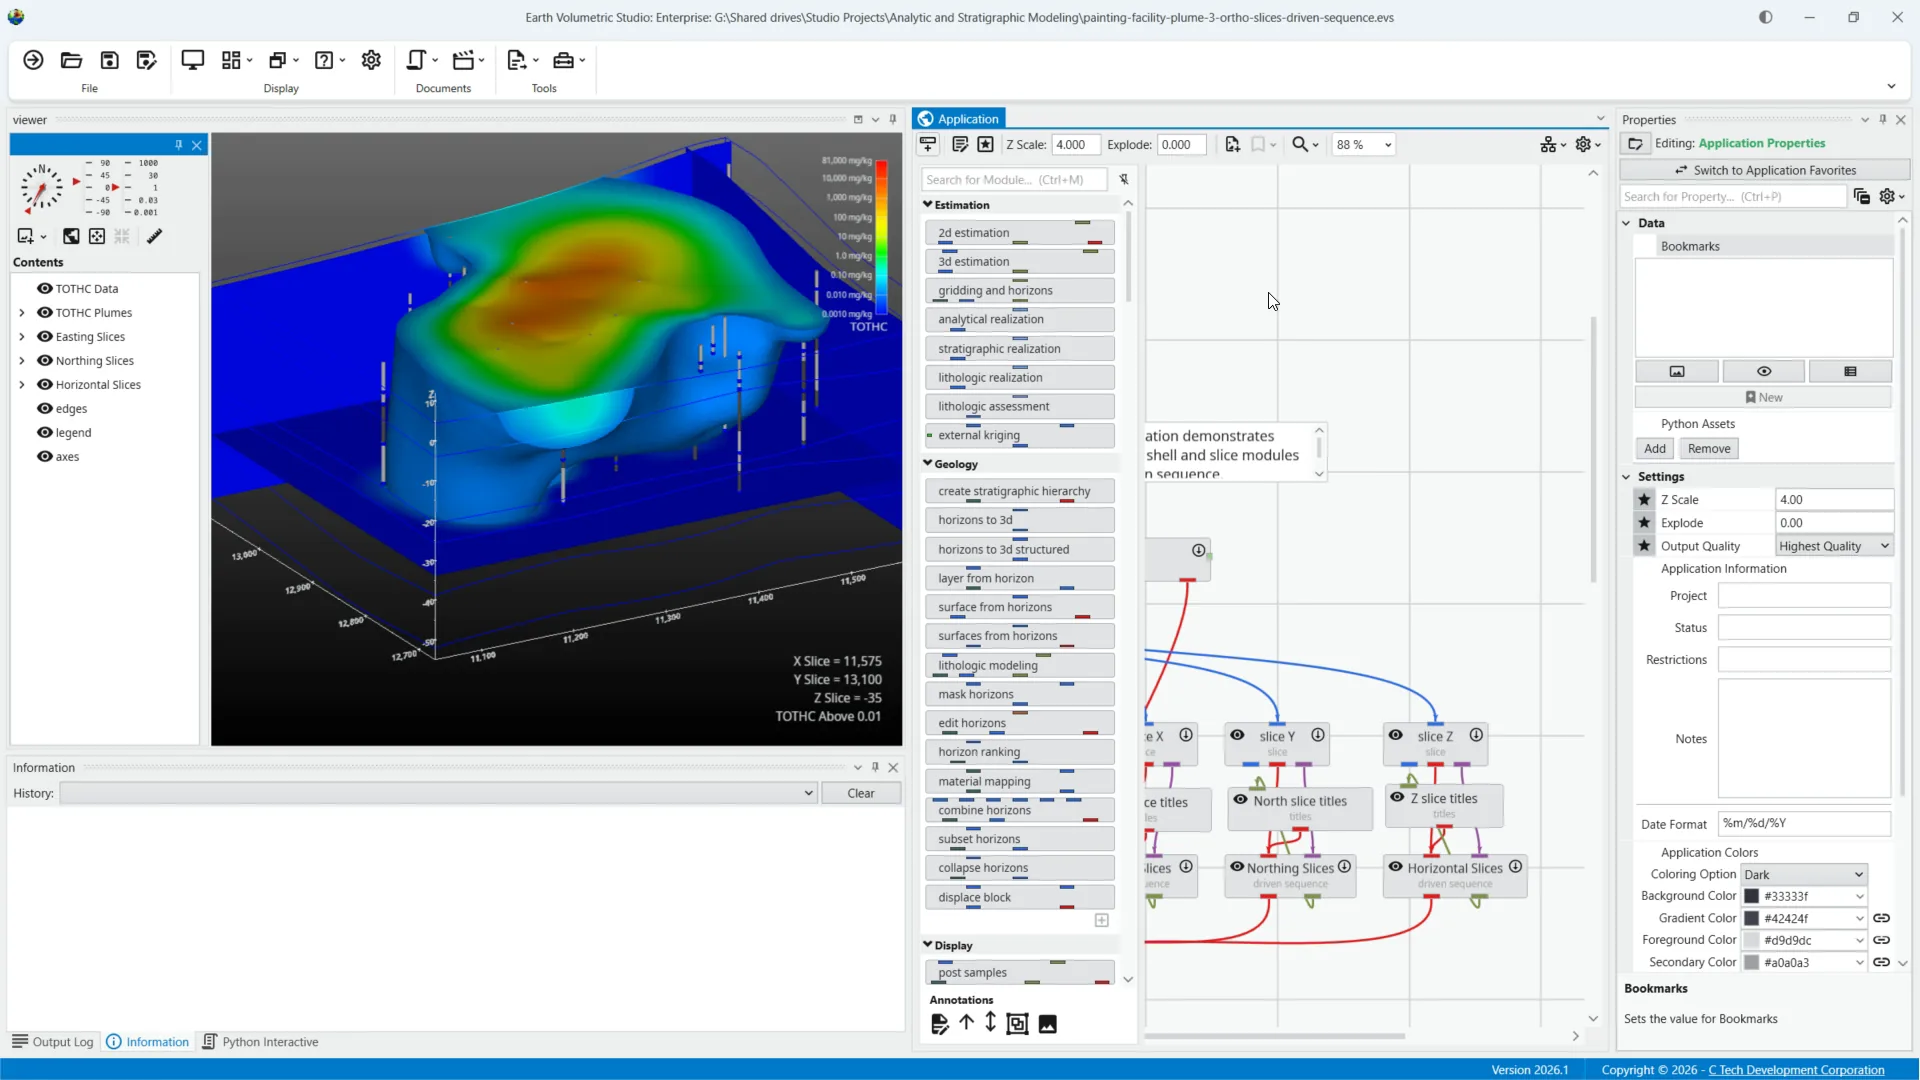
24Open Modules Pane
Use the Modules Button in the Application toolbar, or press Control plus M to open the modules pane when needed.
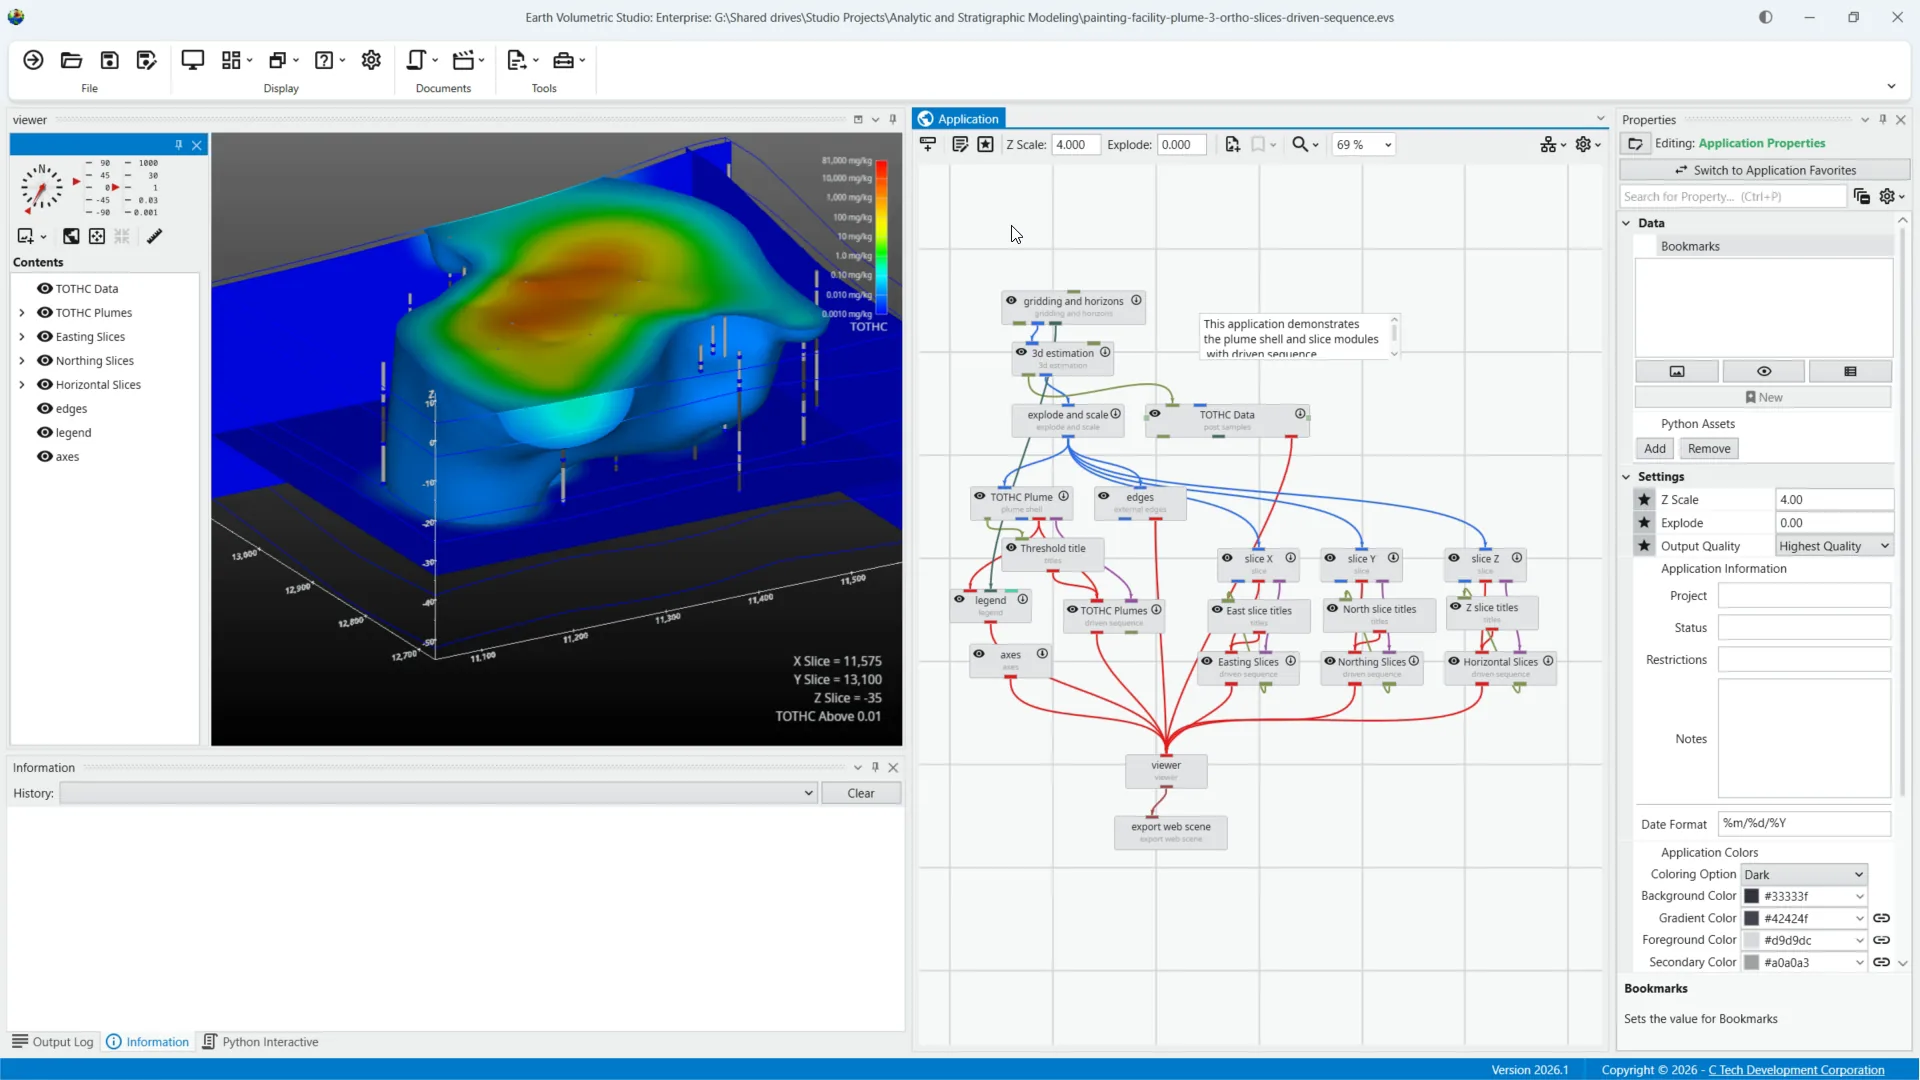
25Use Search to Find Modules
A search bar at the top helps you quickly find modules by name or type within your application.
26Search Modules by Name or Type
Typing keywords like 'slice' shows all modules matching that name or type for easy access.
27Select Module to Center and Activate
Clicking a module centers it in your application and activates its properties for editing.
28Choose Specific Module
Select a module from the search results to work with its properties.
29Now Editing Slice Y
Notice that Slice Y is now centered in our Application, as well as having it's properties selected for editing in the Properties Window.
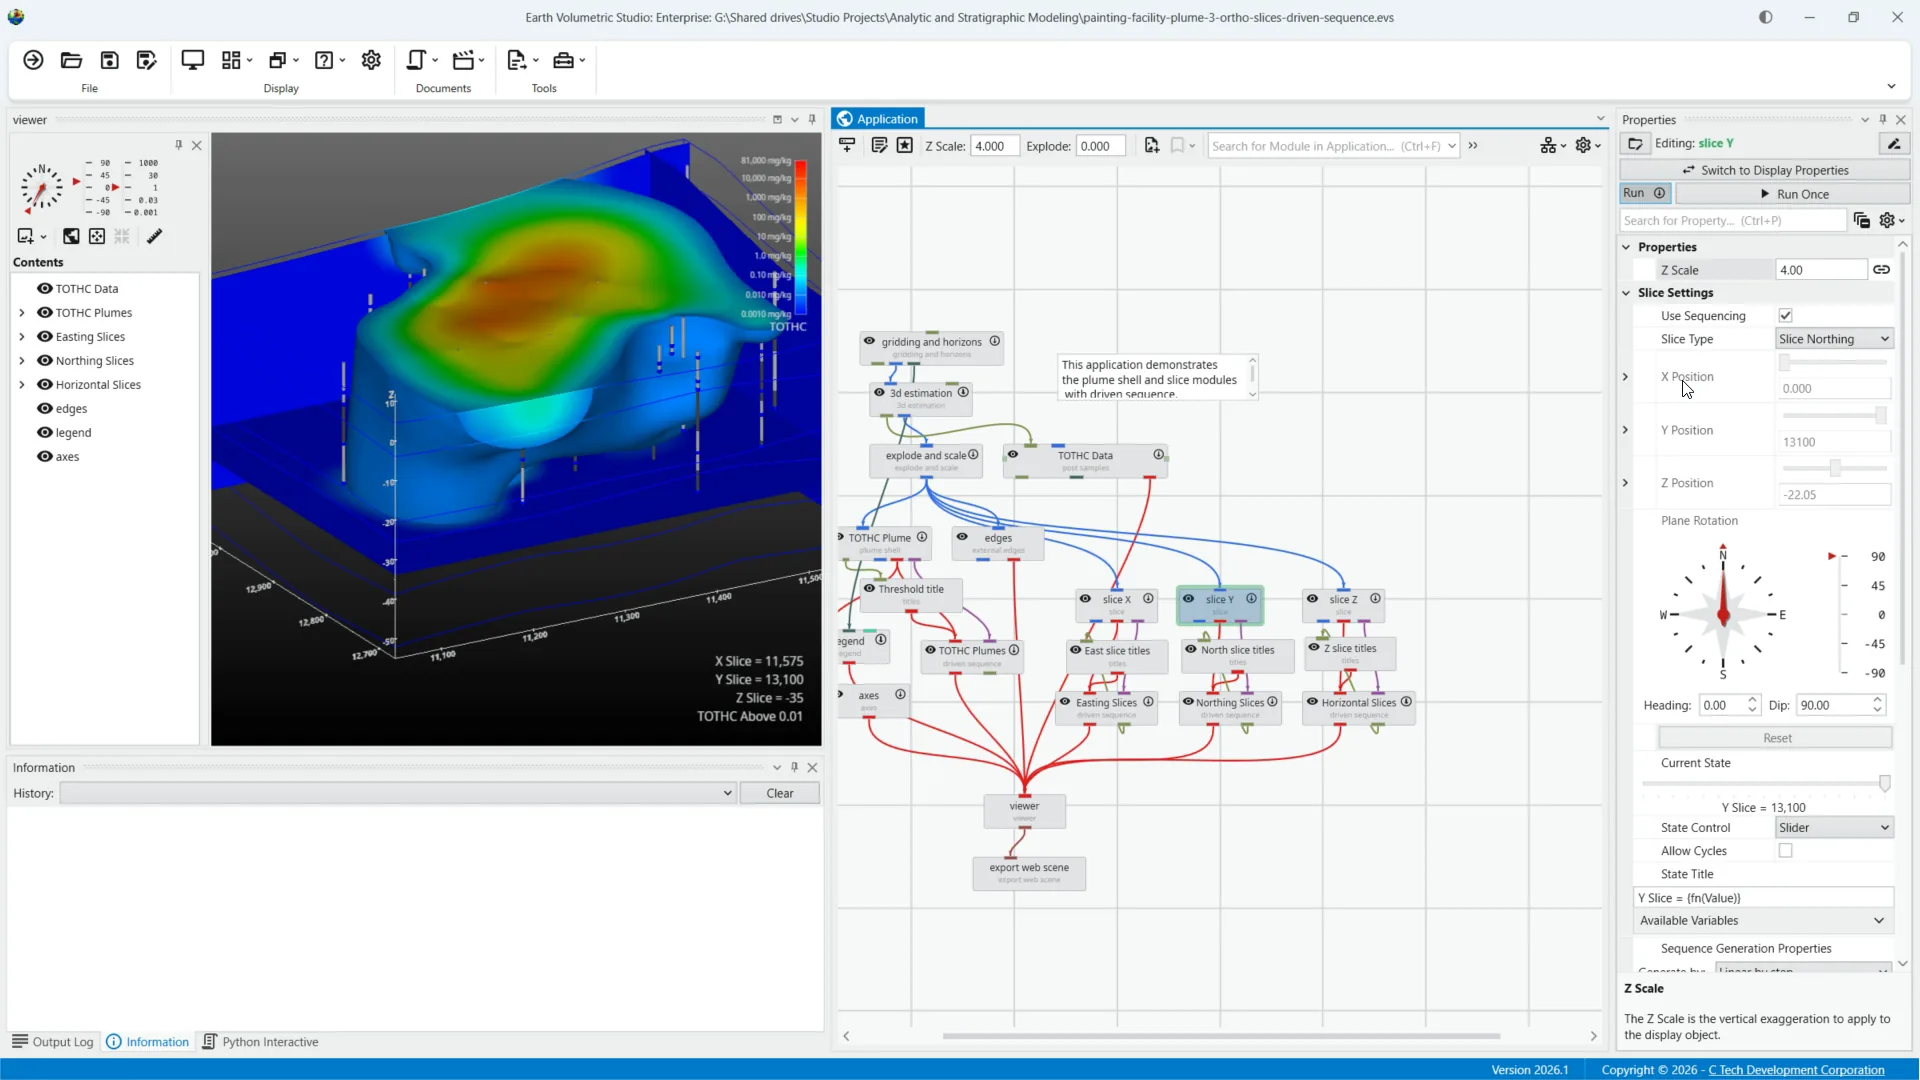
30Changes to Application Properties
Application wide options have been reworked significantly for this release.
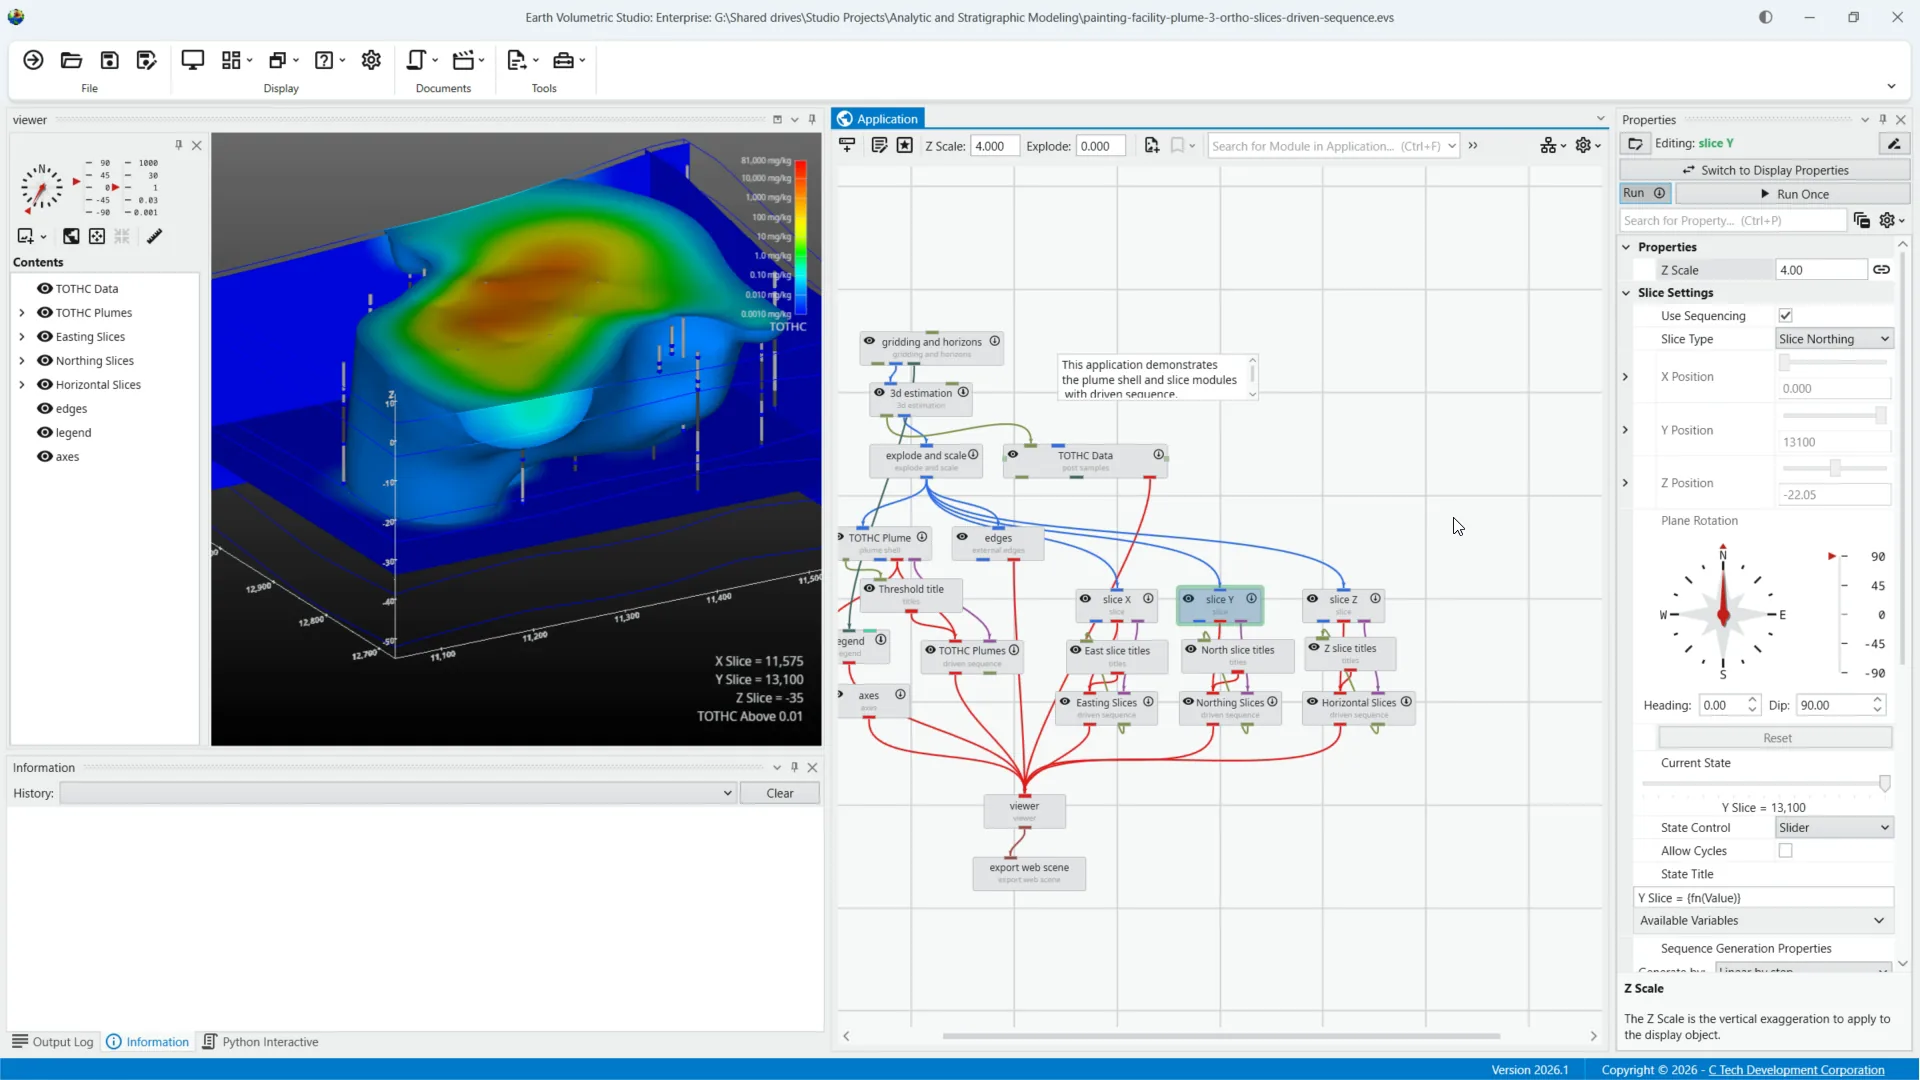
31Application Favorites
What used to be called application properties is now renamed to application favorites.
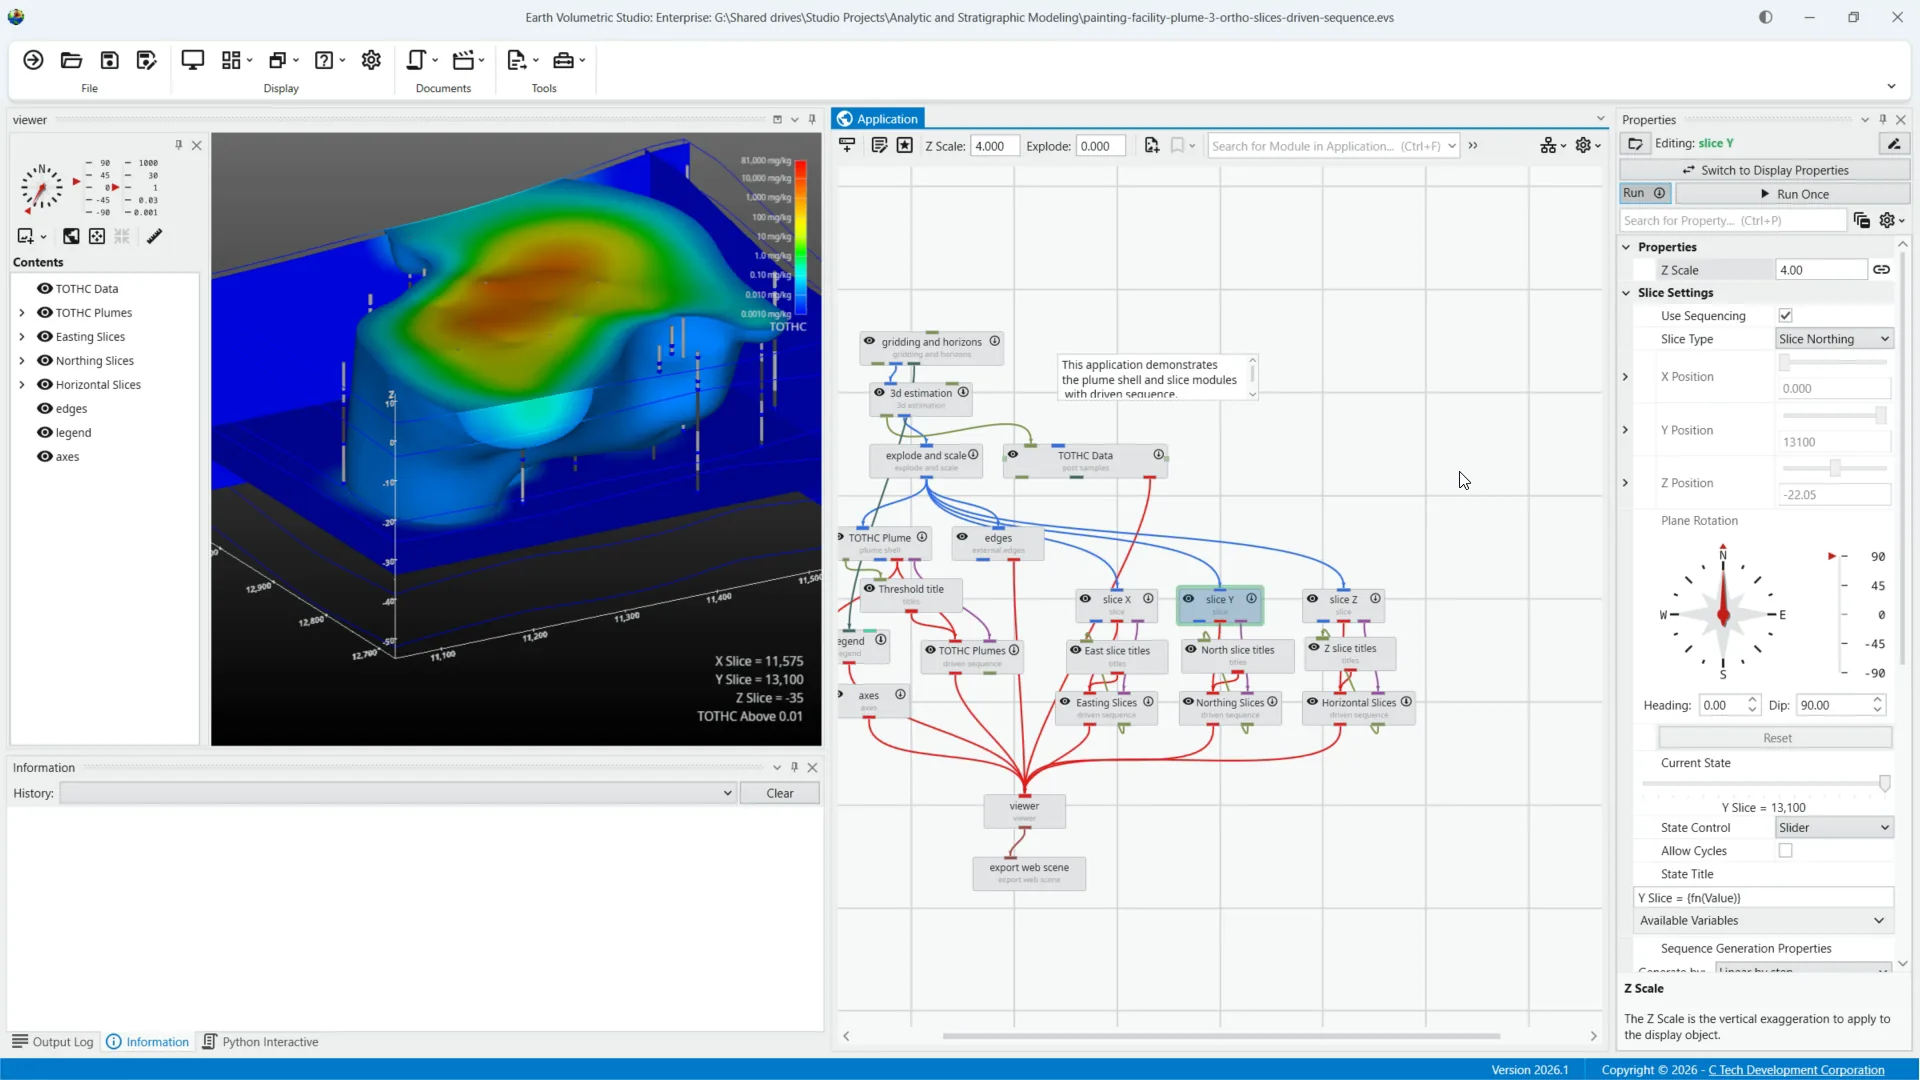
32Edit Application Favorites
Editing application favorites lets you manage properties from any modules you've marked as favorites.
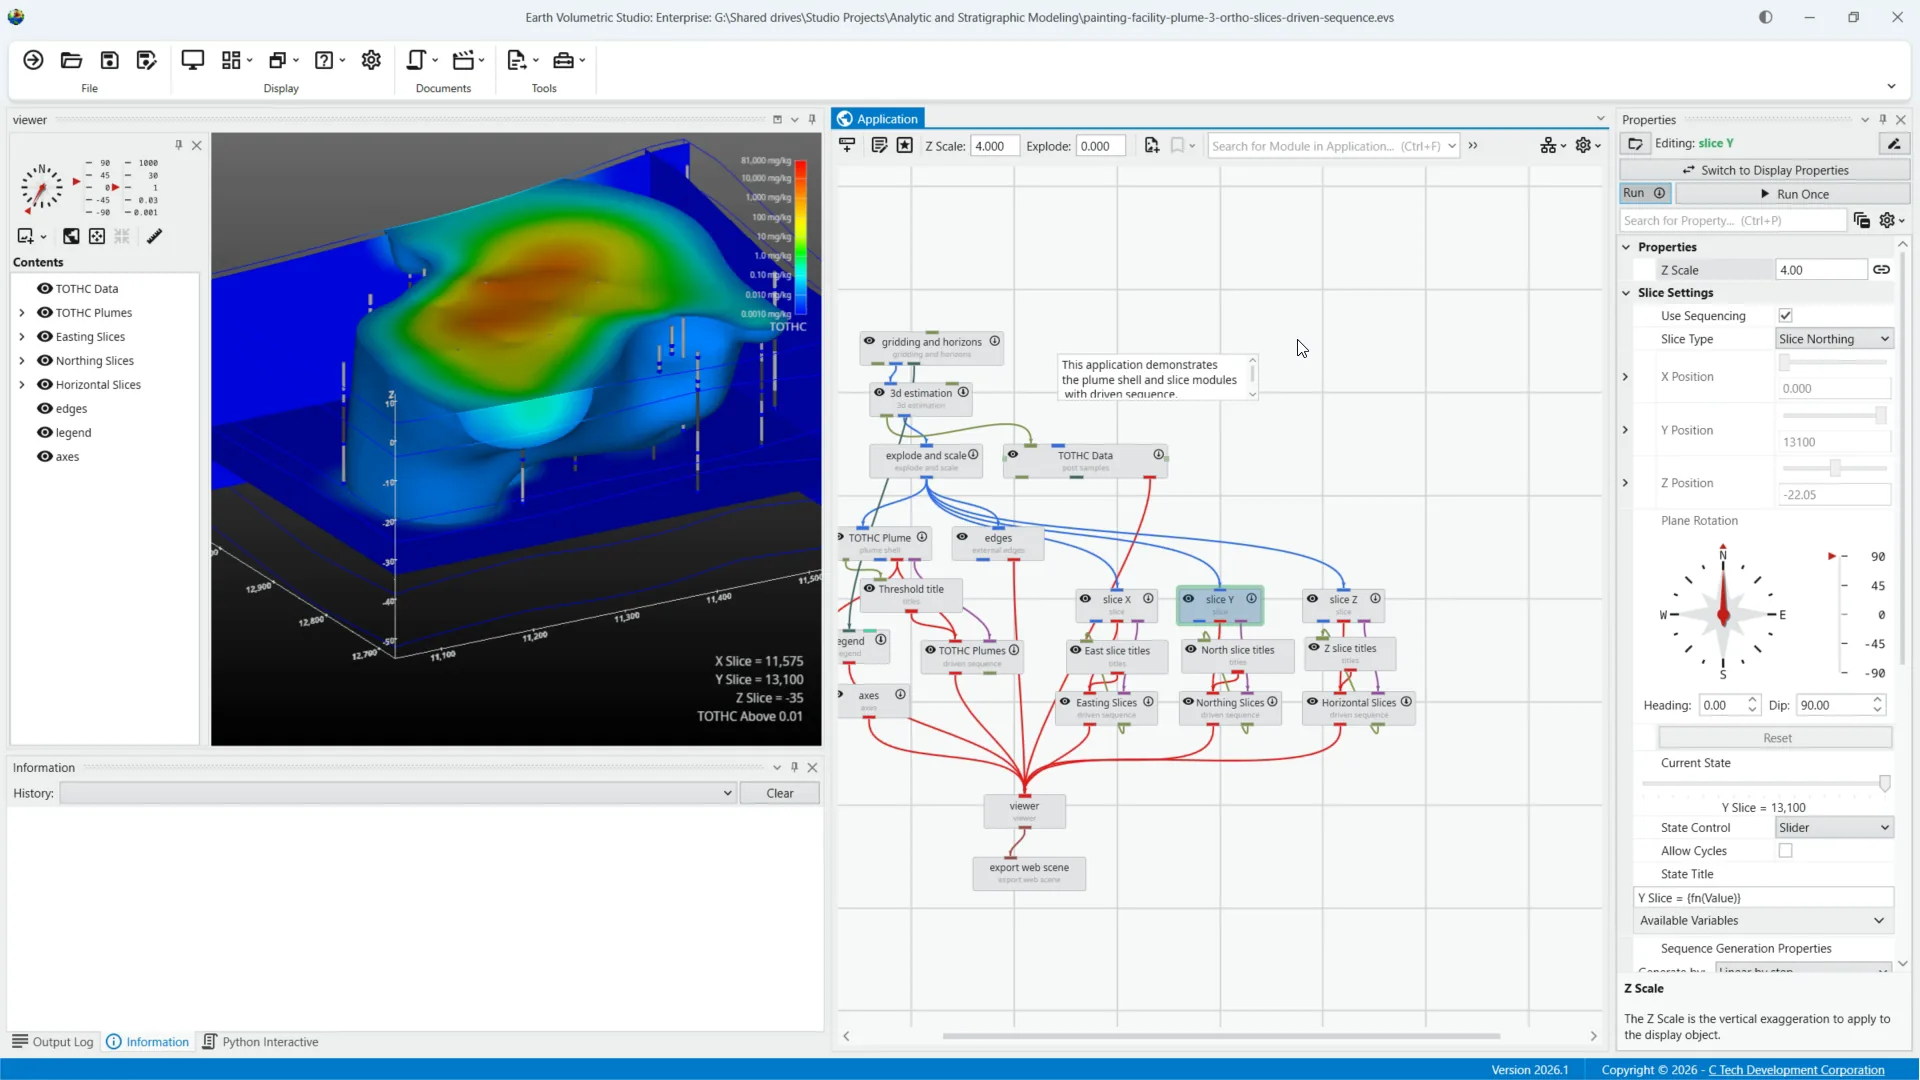
33Add Any Module Property to Favorites
You can add any property of a module, such as the current state of a sequence, to your application favorites for quick access.
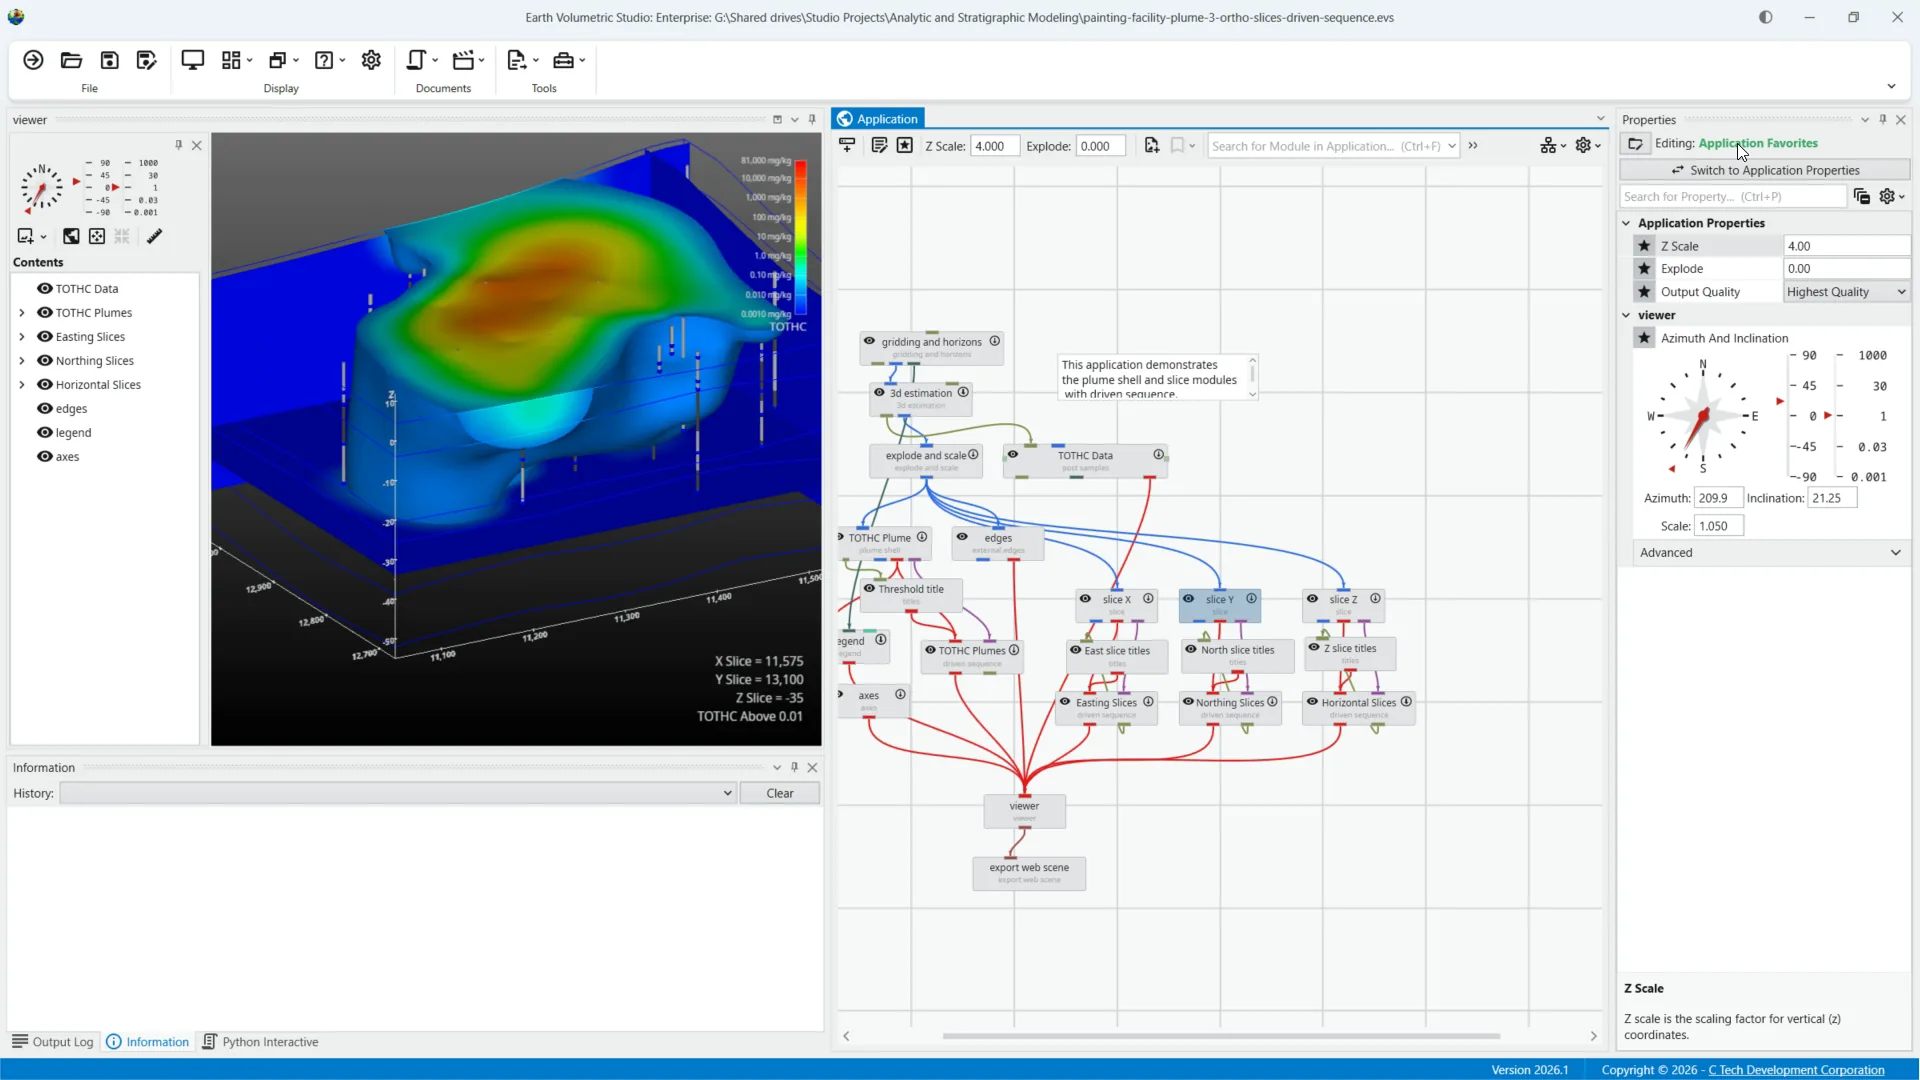
34Select Module for Favorites
Select a module to include its property in your application favorites.
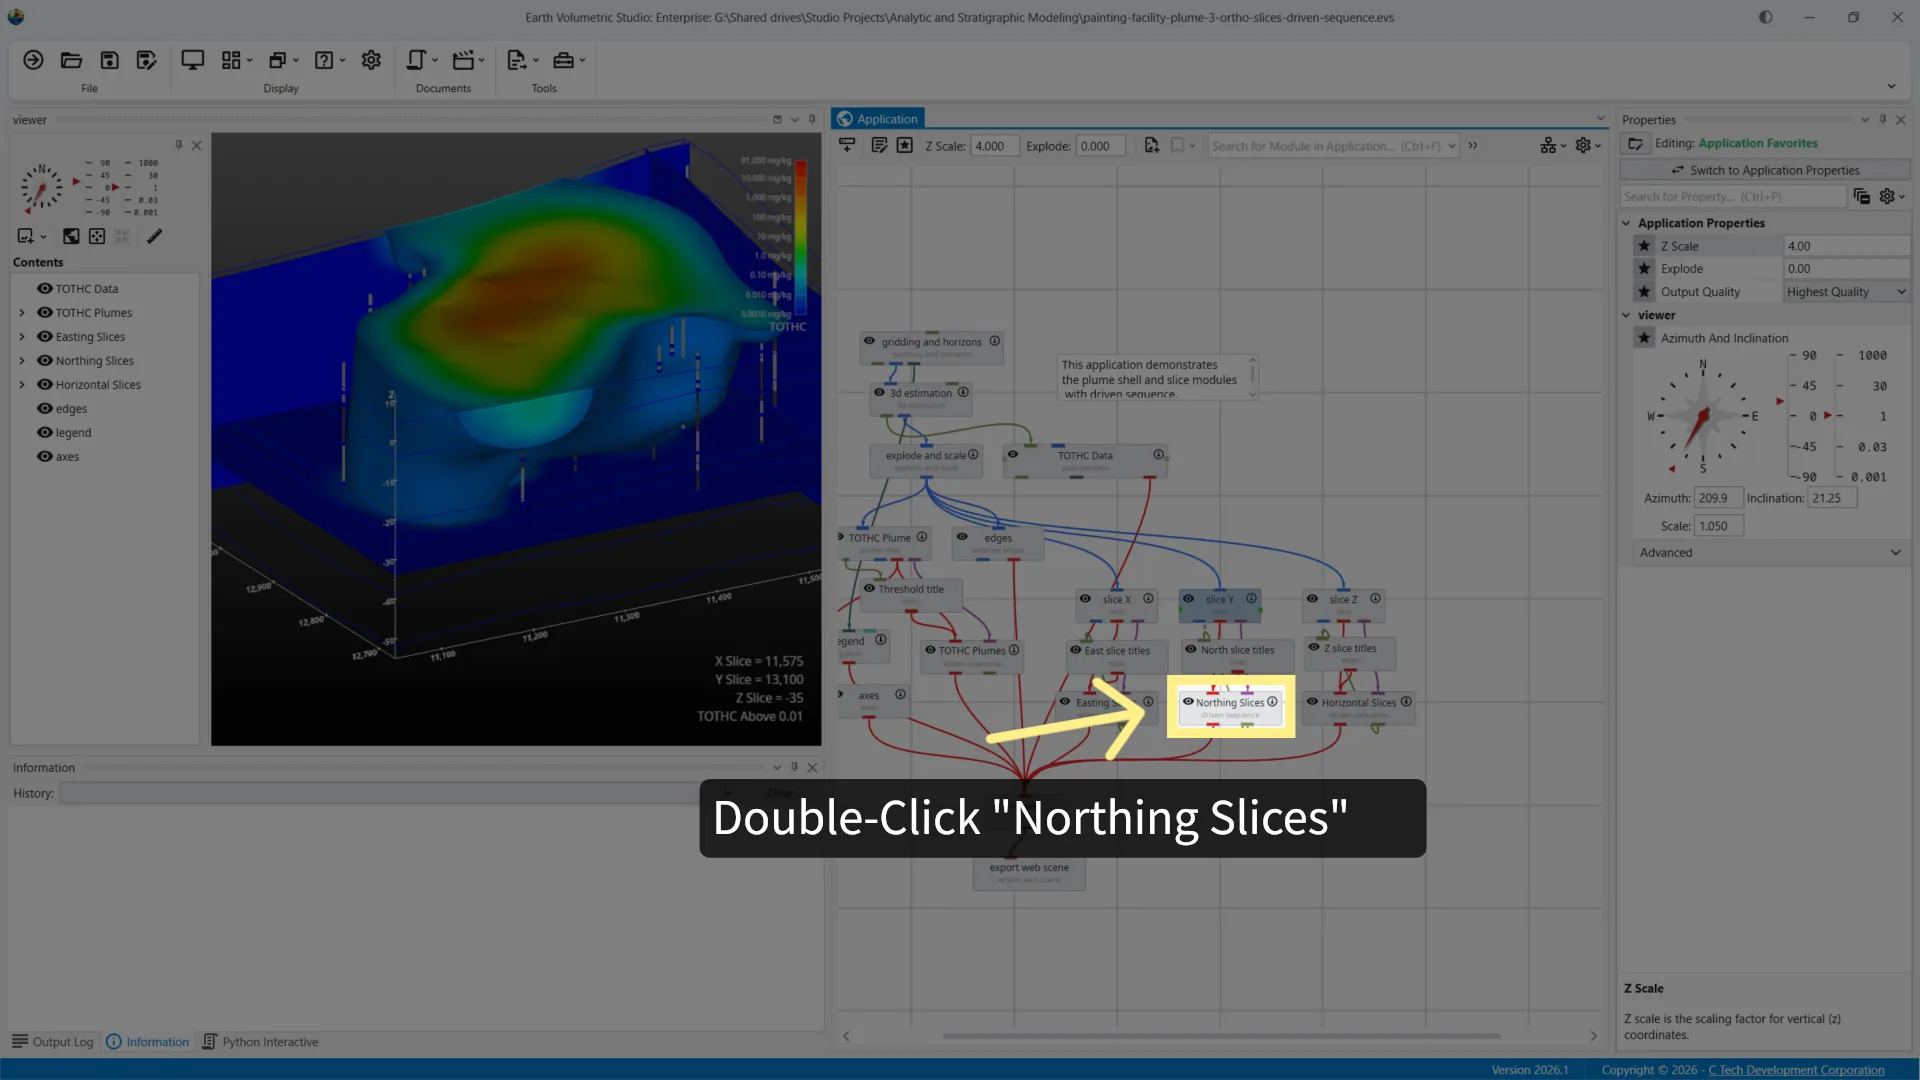
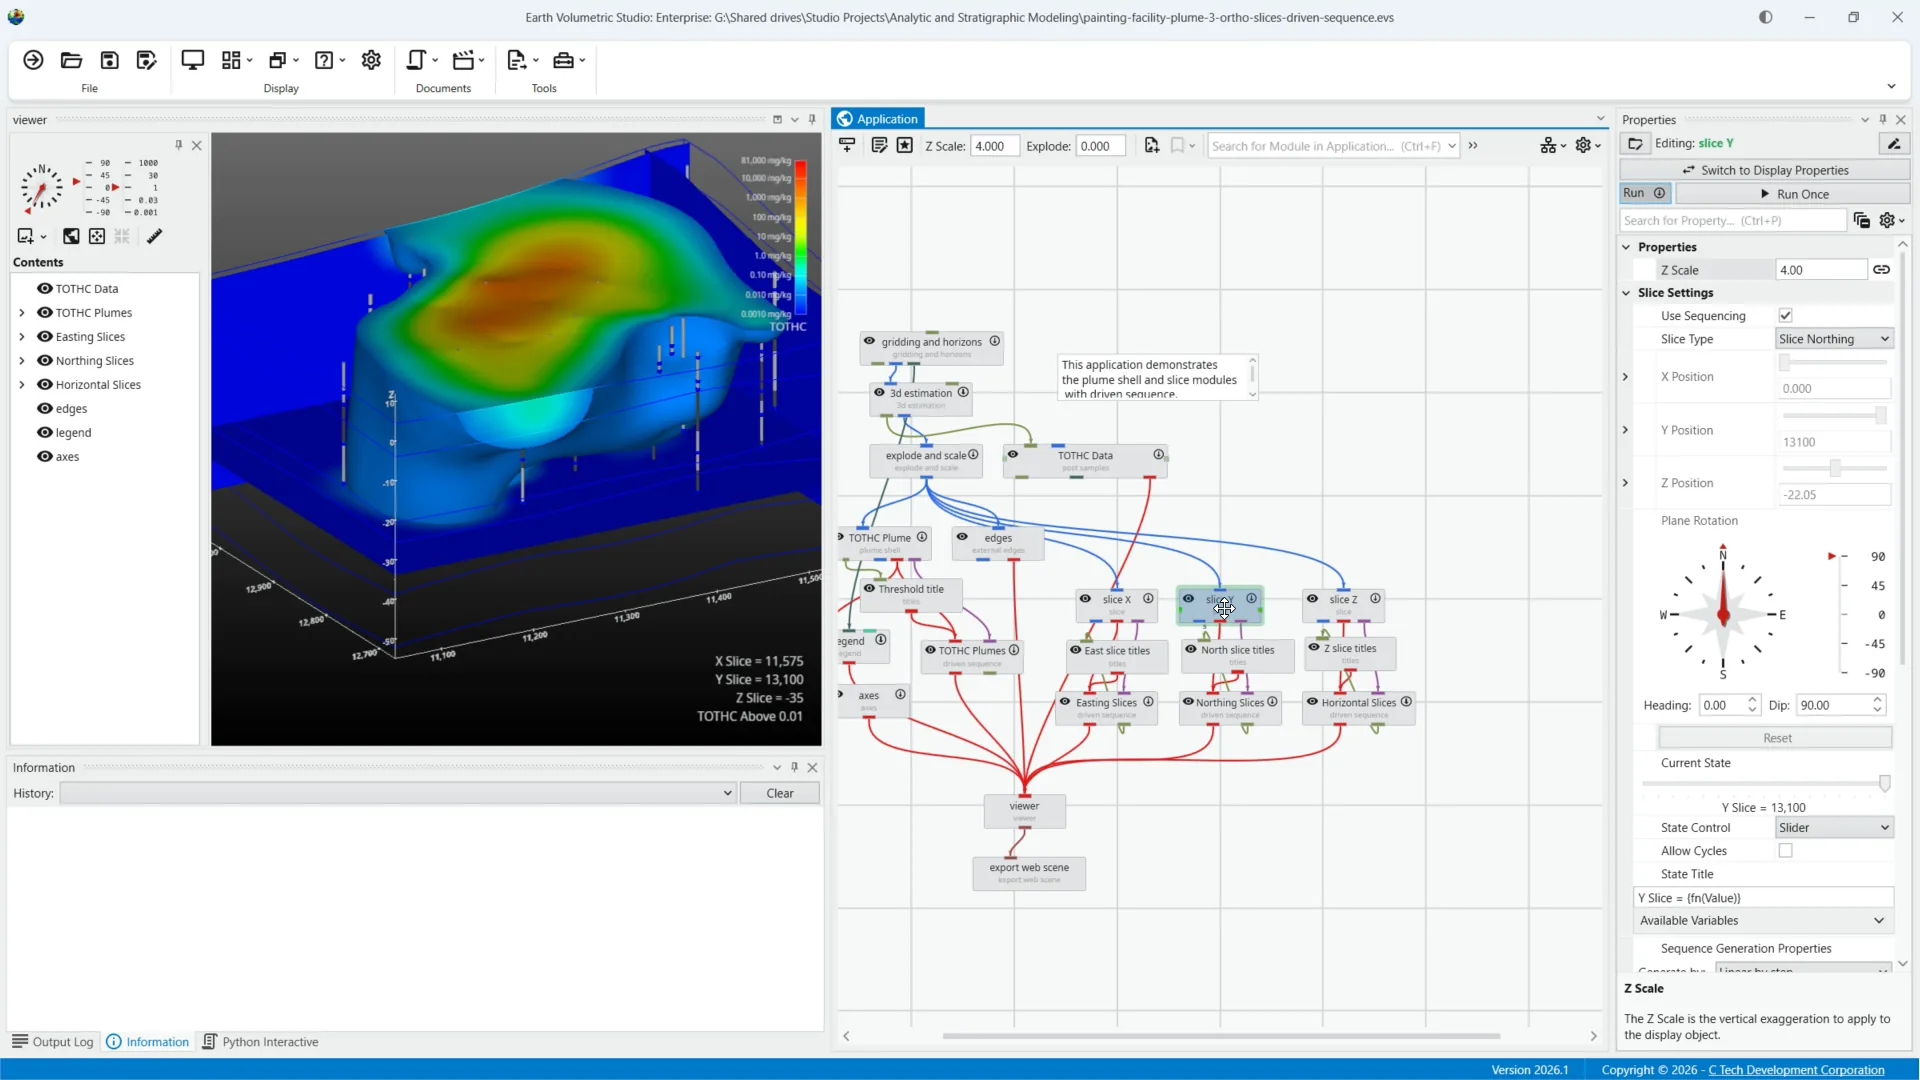
35Add to Application Favorites
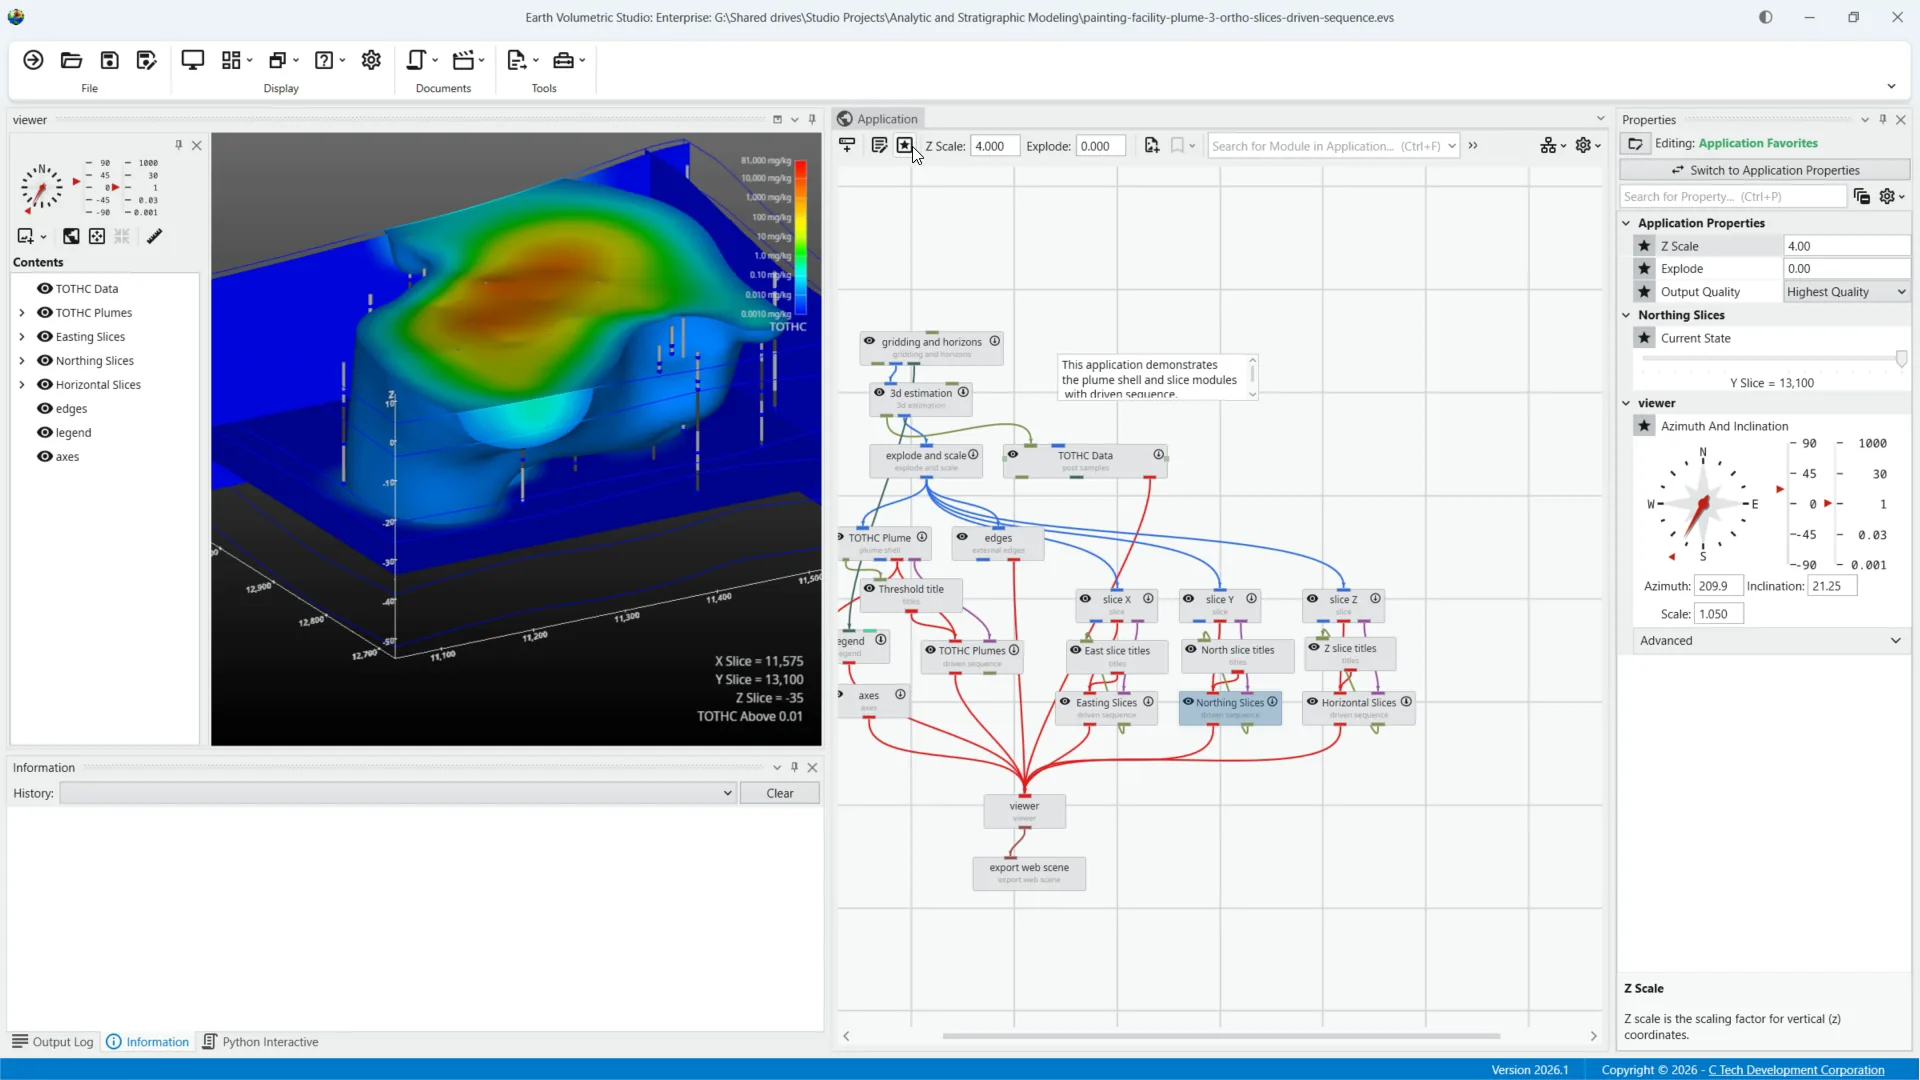
Clicking to the left of a property adds it to the Application Favorites. In this case, the current state will now appear in your application favorites.
36View Updated Application Favorites
The Application Favorites will also be available when creating an EVS Presentation Application.
37The new Application Properties
A new application properties window contains application-wide settings like Z Scale and Explode. Features previously in the ribbon, such as project and status information, are now included in the application properties window along with coloring options.
38Discover New Python Assets and Bookmarks
The application properties window also includes new features like Python assets and bookmarks.
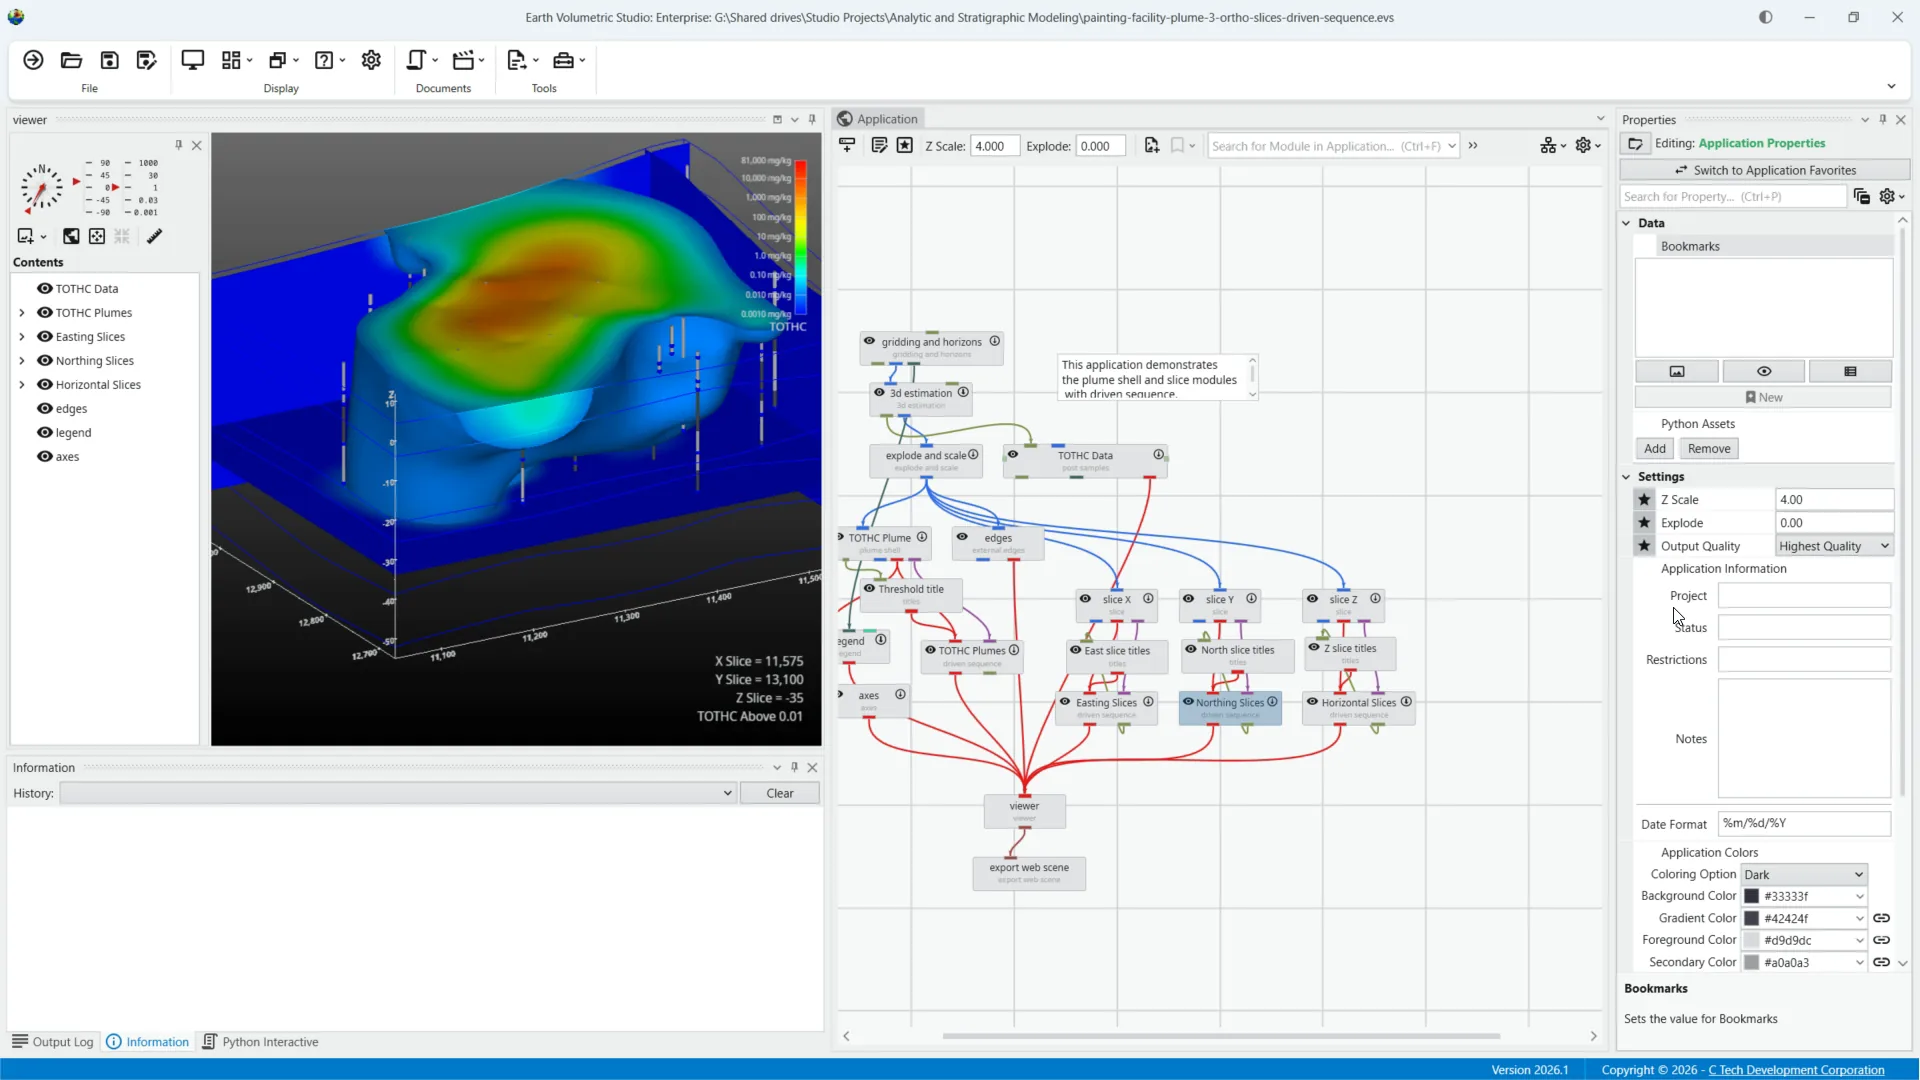
39Understand Difference Between Favorites and Properties
Application favorites and application properties are separate, but switching between them is easy.
40Switch Between Favorites and Properties
A button at the top will switch back and forth between Application Favorites and Application Properties
41Thank you
Thank you. If you have any questions, always feel free to contact support. And I hope you enjoy the new release.
Summary
Get started immediately by exploring the simplified interface and new features in Earth Volumetric Studio 2026.1. For additional help, visit our support resources or contact support anytime to ensure a smooth transition.