
Introduction
This tutorial demonstrates how to create EVS data files using C Tech AI Skills. Before starting, ensure you have access to the Claude AI platform, have installed the C Tech AI Skills, and have your Excel data files ready for processing.
For this video, I'm going to walk through how to use AI, in this case, Claude, to create EVS data files automatically. The C Tech AI Skills are installed for all major AI systems. However, C Tech has seen the best results with Claude Code.
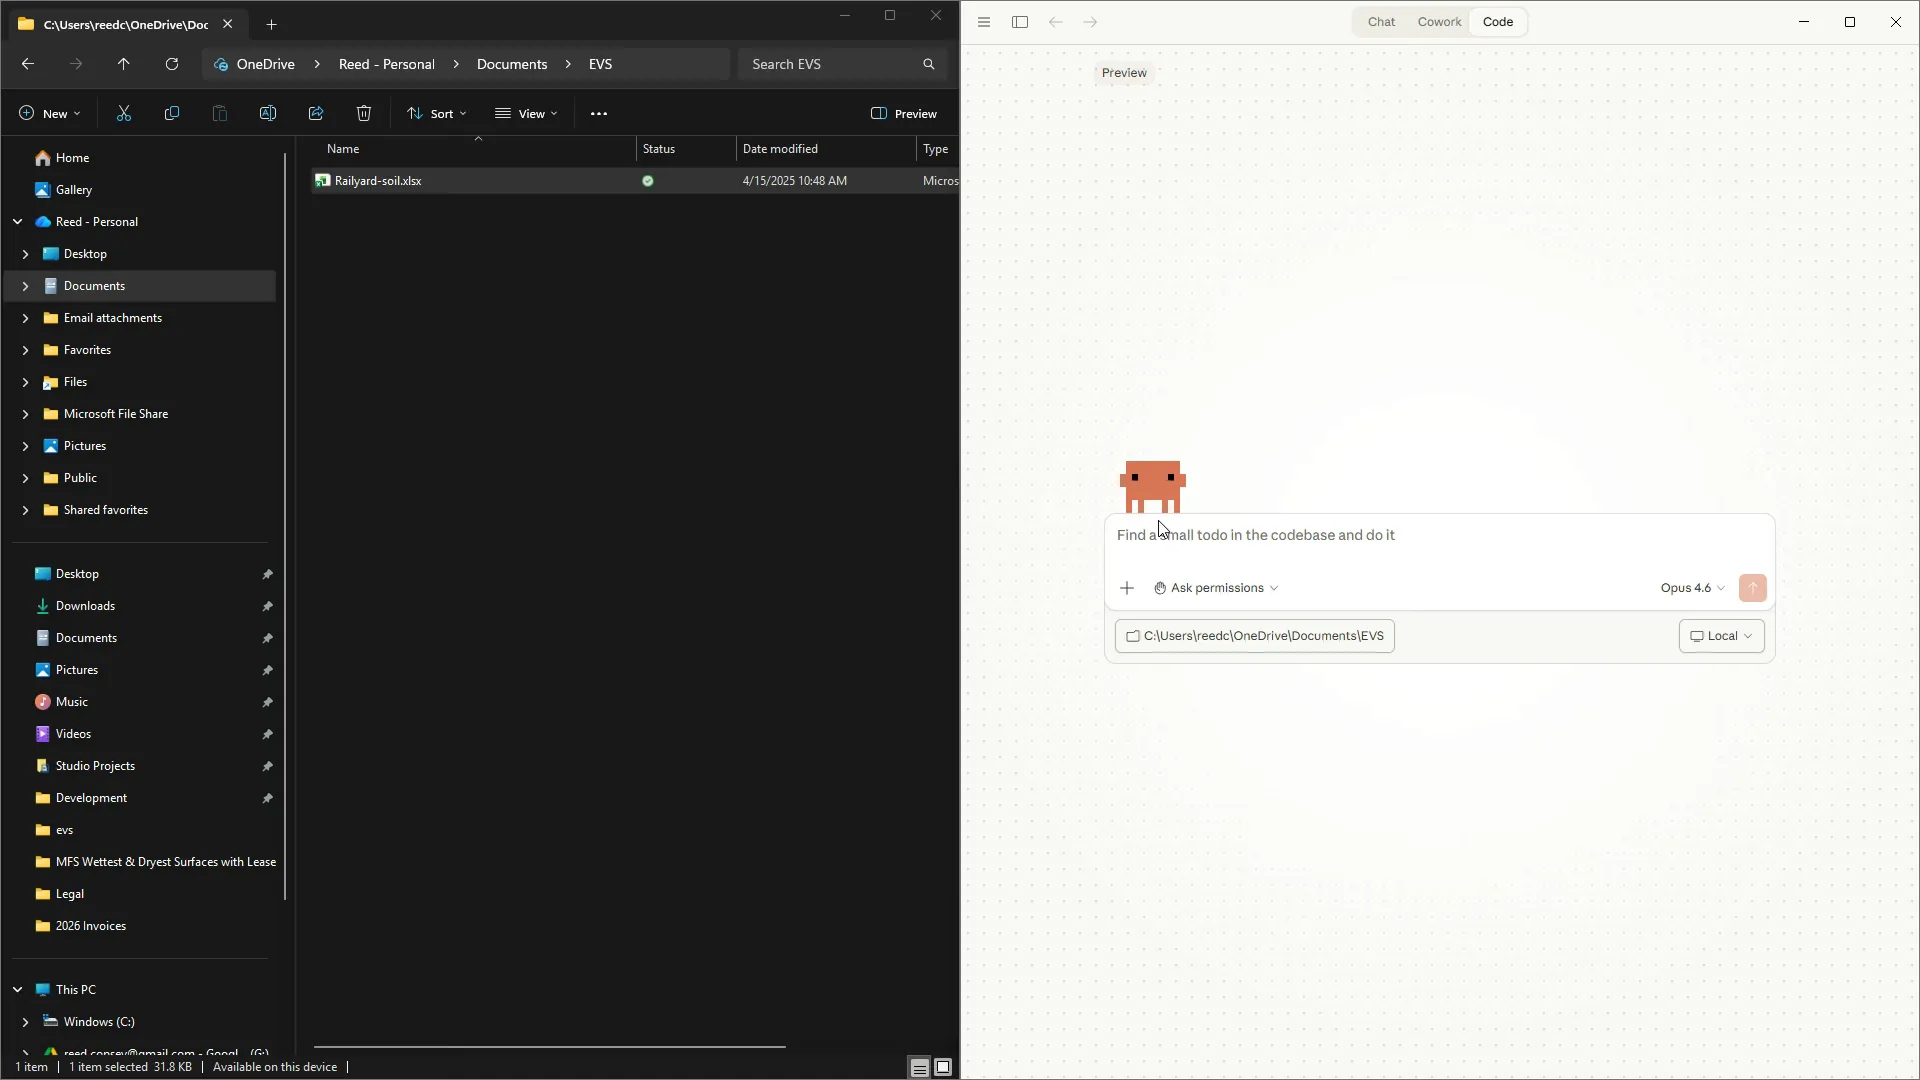
First thing you'll notice, I'm running Claude Code, and I have this folder with an Excel file. This is a file from our sample projects used to walk through the EVS Tools.
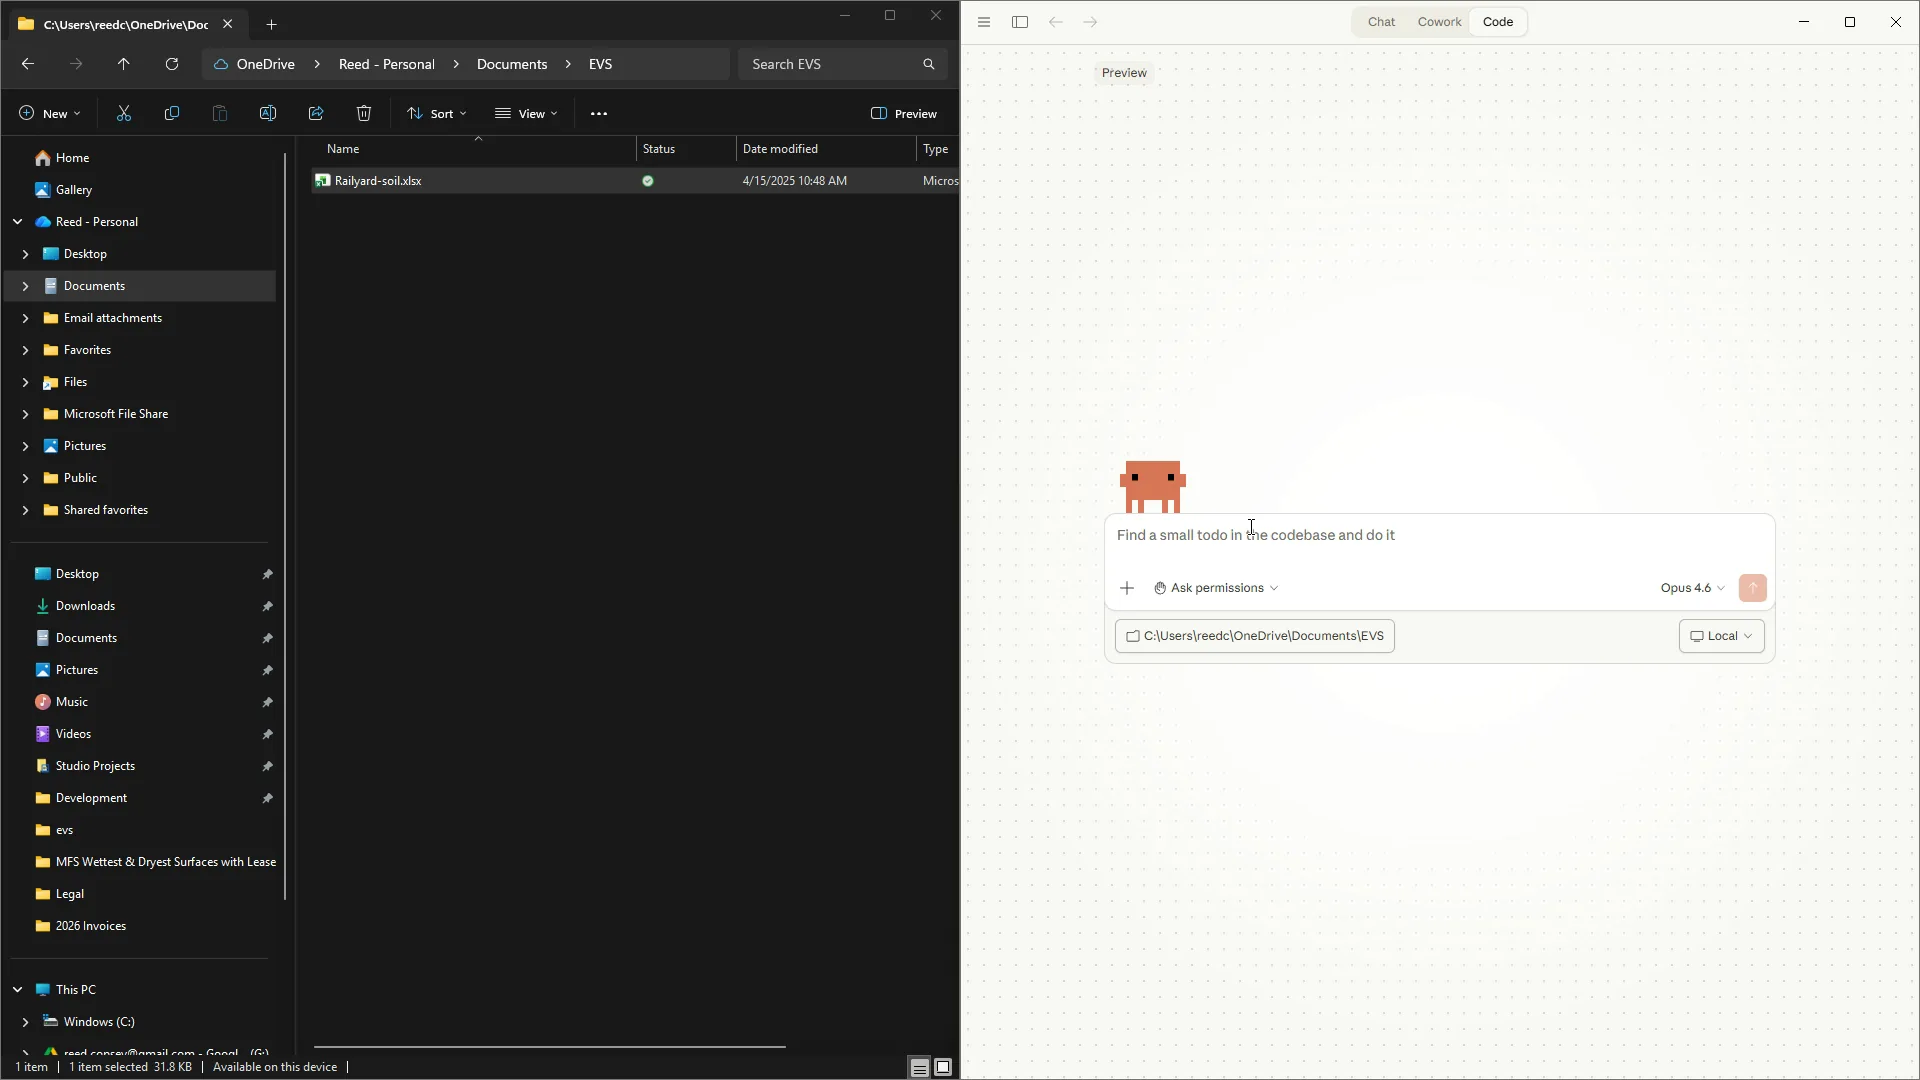
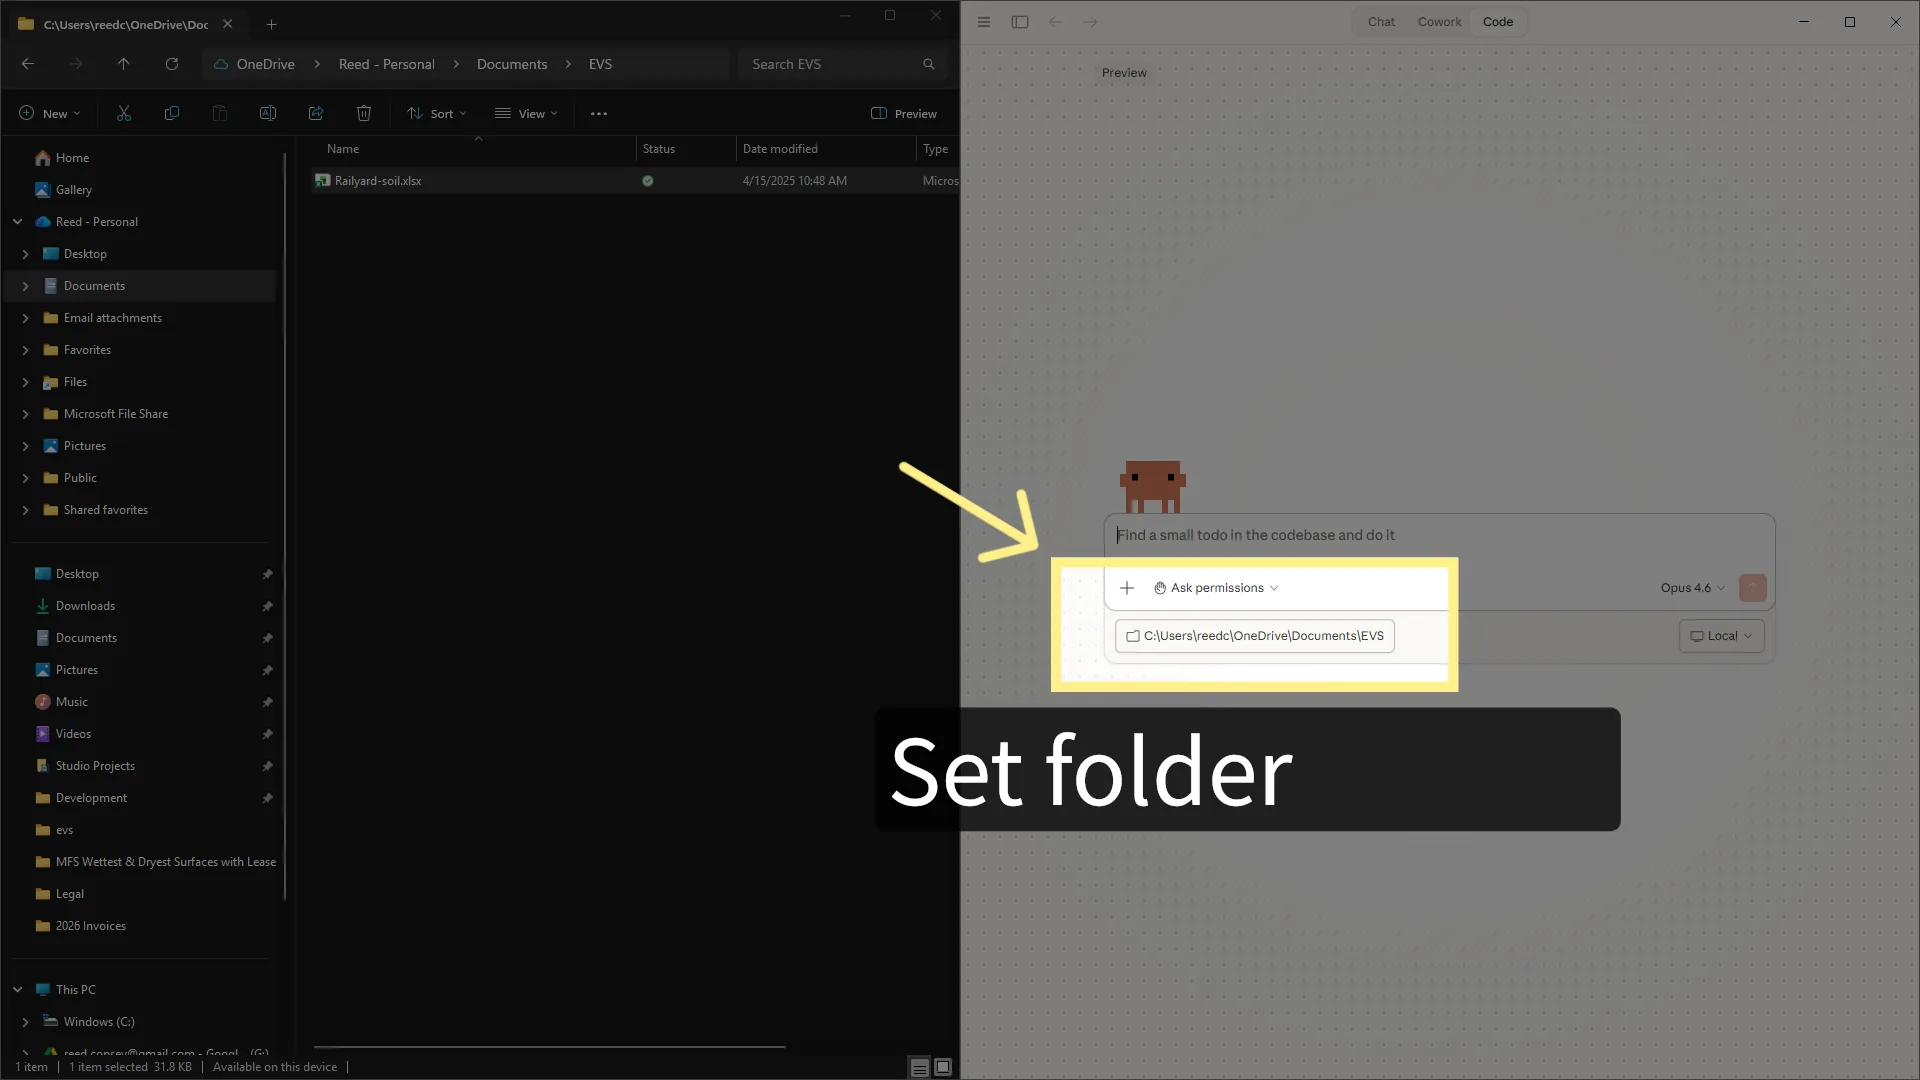
Set the folder in Claude Code to your project folder with the Excel file.
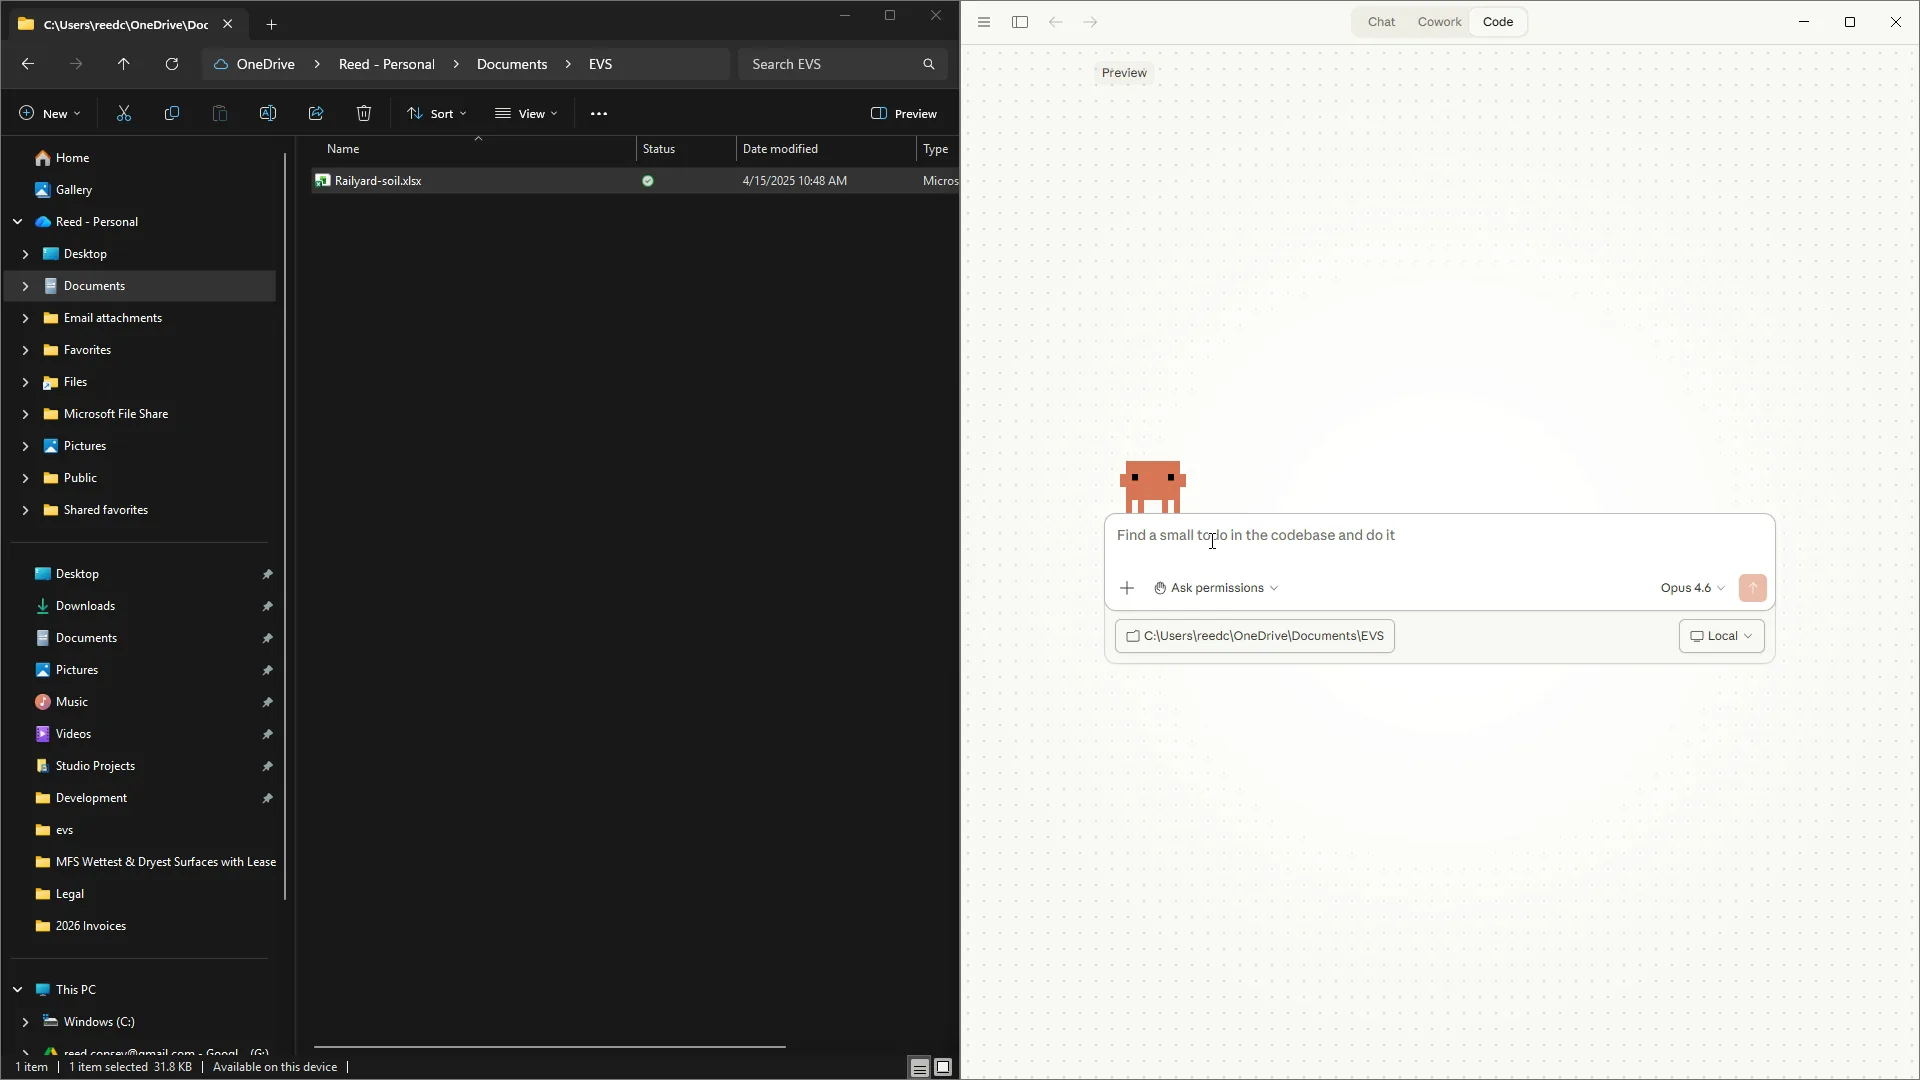
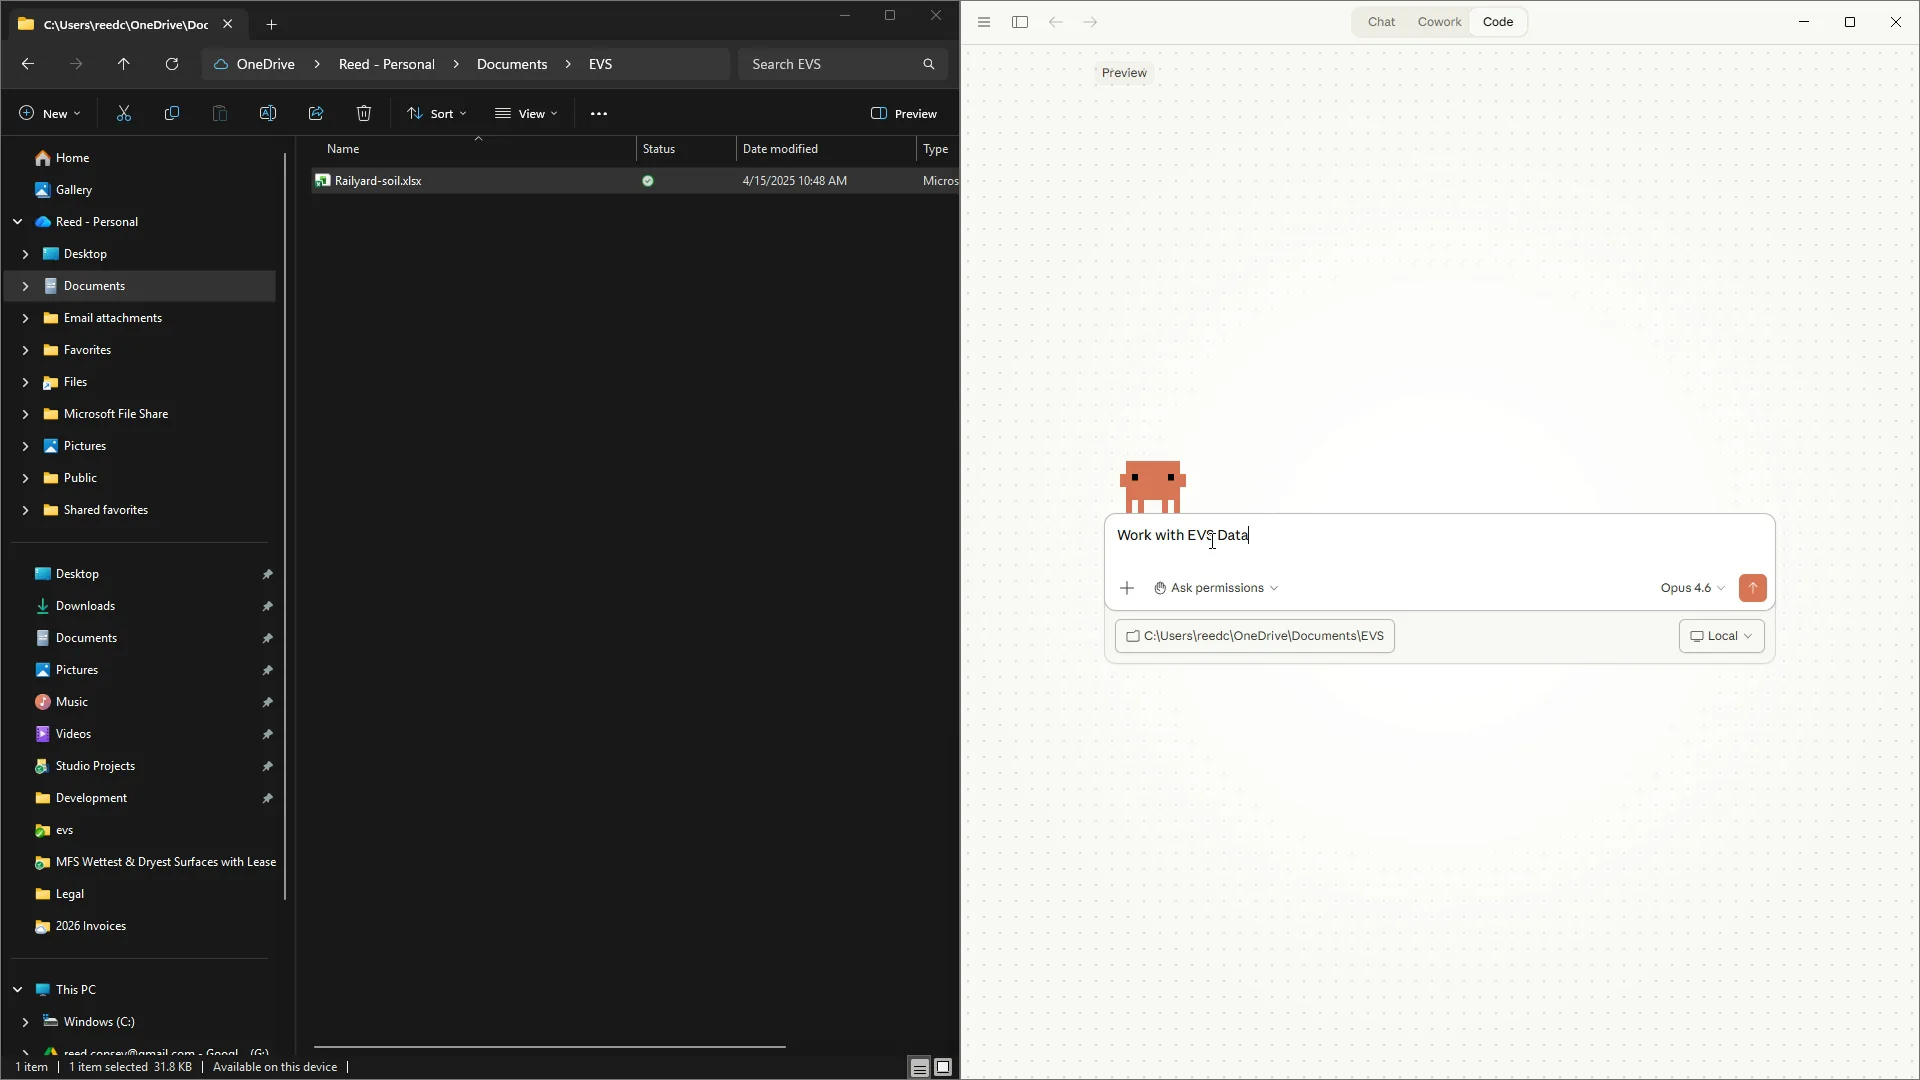
We need to start with saying that we want to work with EVS data.
This is important because this helps Claude understand what type of files we're going to be working with, so it loads the proper skills from your system. You always want to start with a prompt that says that you're working with or creating EVS data.
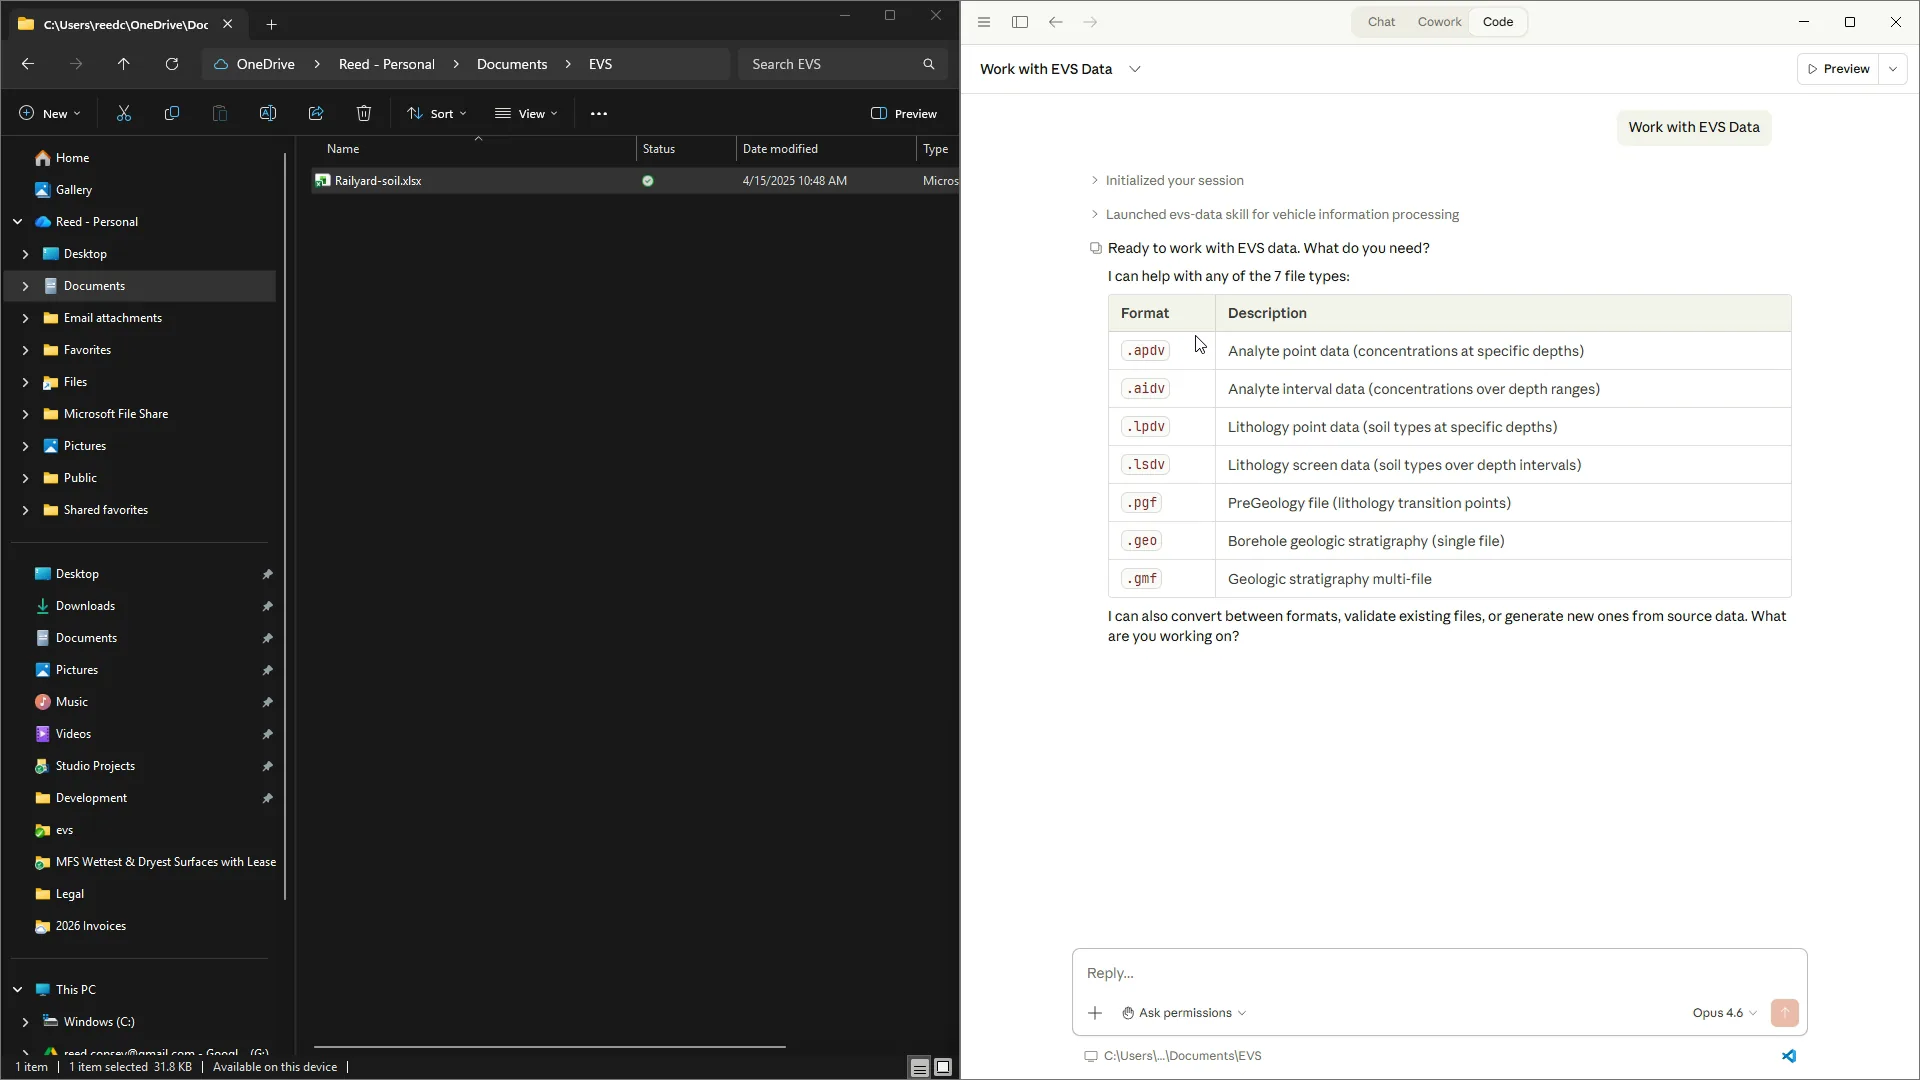
Notice it automatically shows us that we can create one of seven different input file formats and convert between them. I'm going to take our sample file that was used in our tutorials, just drop it in and let Claude think about it for a minute.
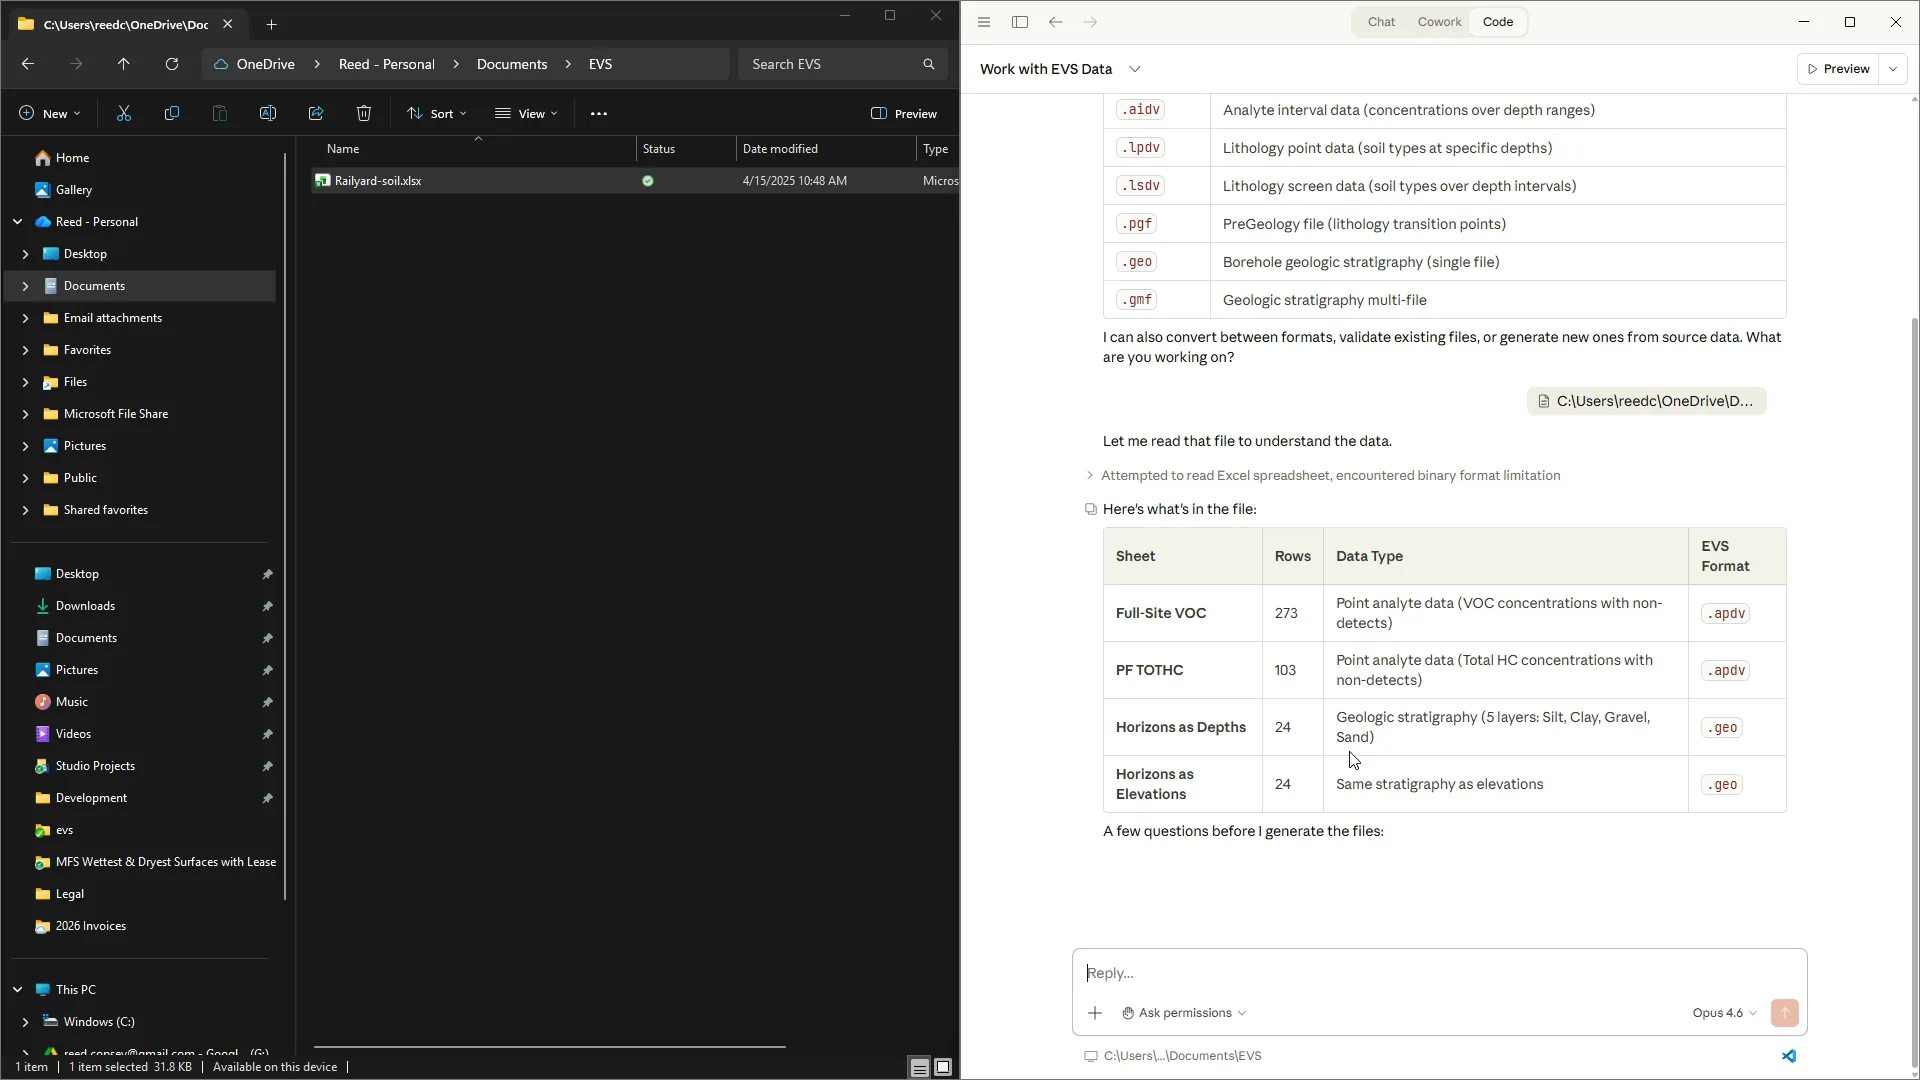
Claude tells us that we have two worksheets with point analytical data and two worksheets with geology data, and recognizes that the horizon data in the two sheets are really a single dataset. Claude then asks what we want to do with it. In this case, I'm going to tell it to generate all three appropriate types of data files.
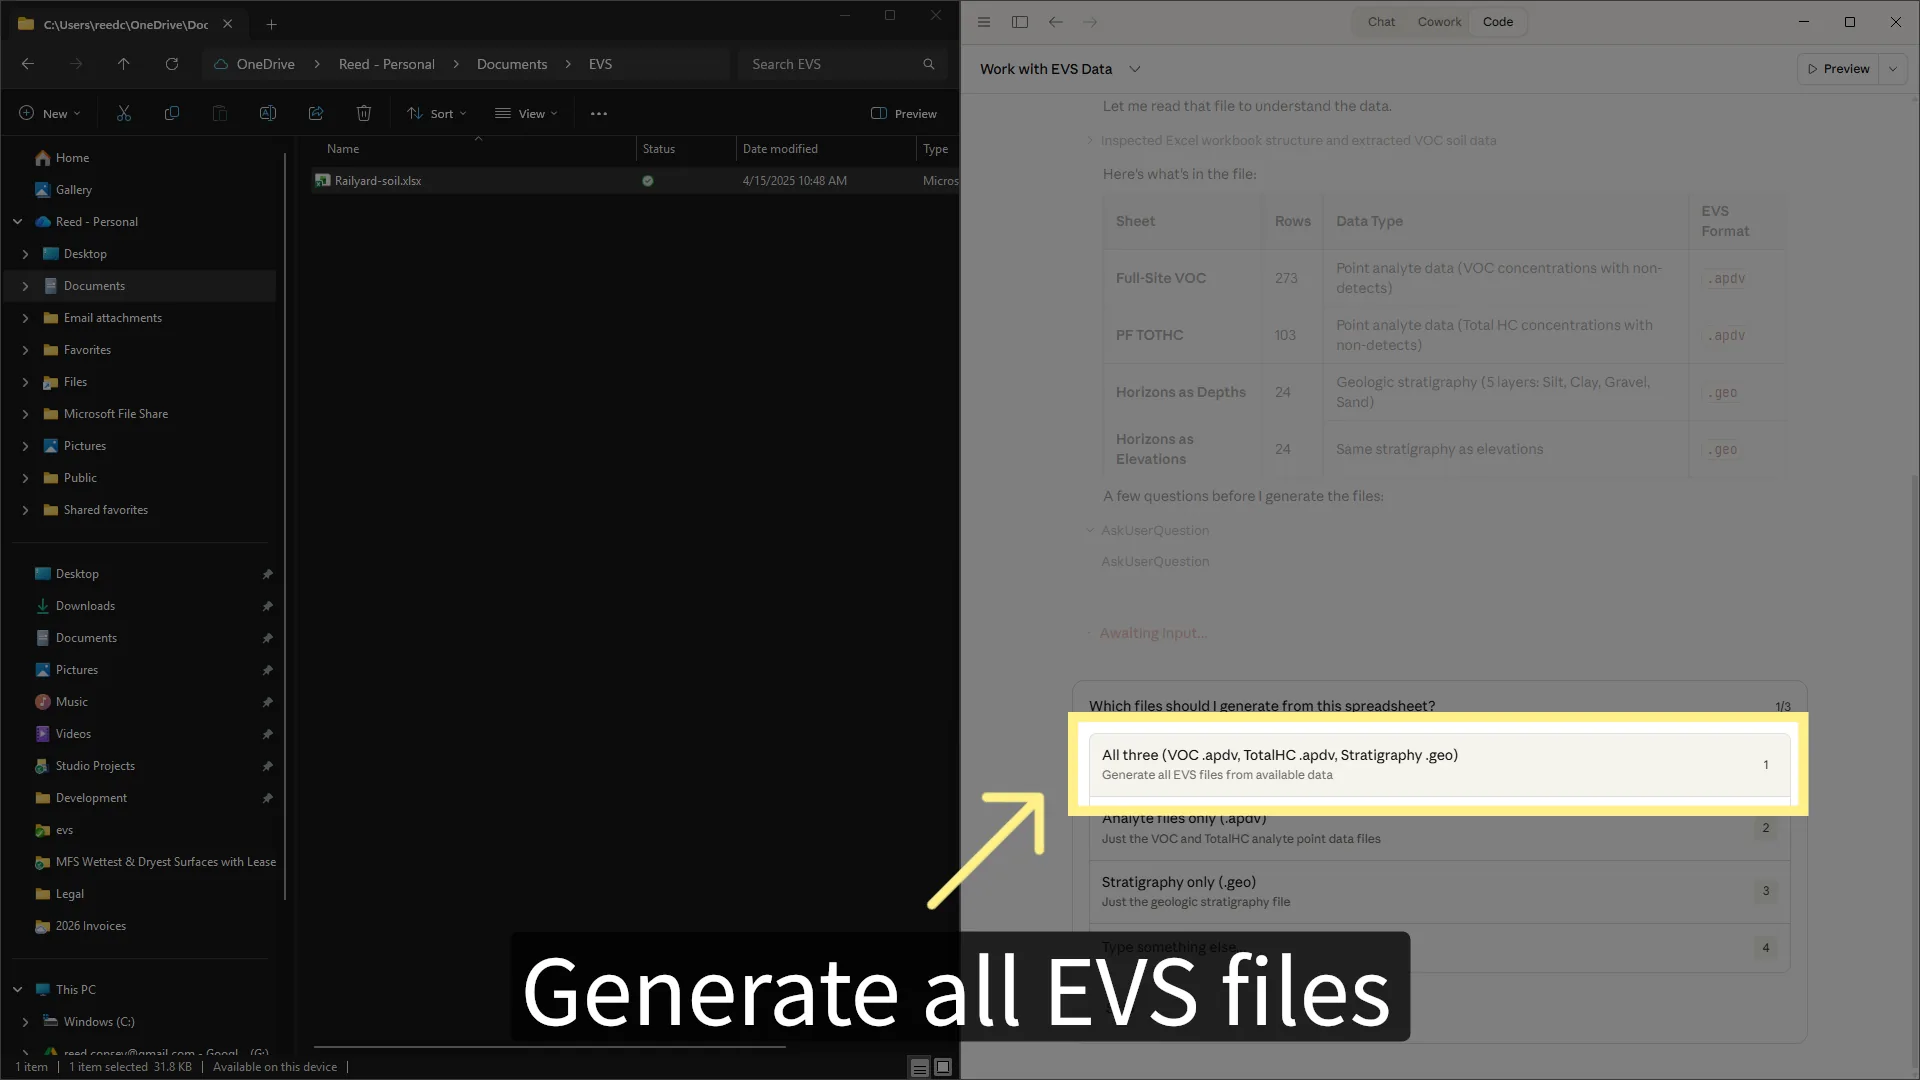
Select all three VOC APDV, Total HC APDV, and Stratigraphy GEO to generate all EVS files from available data.
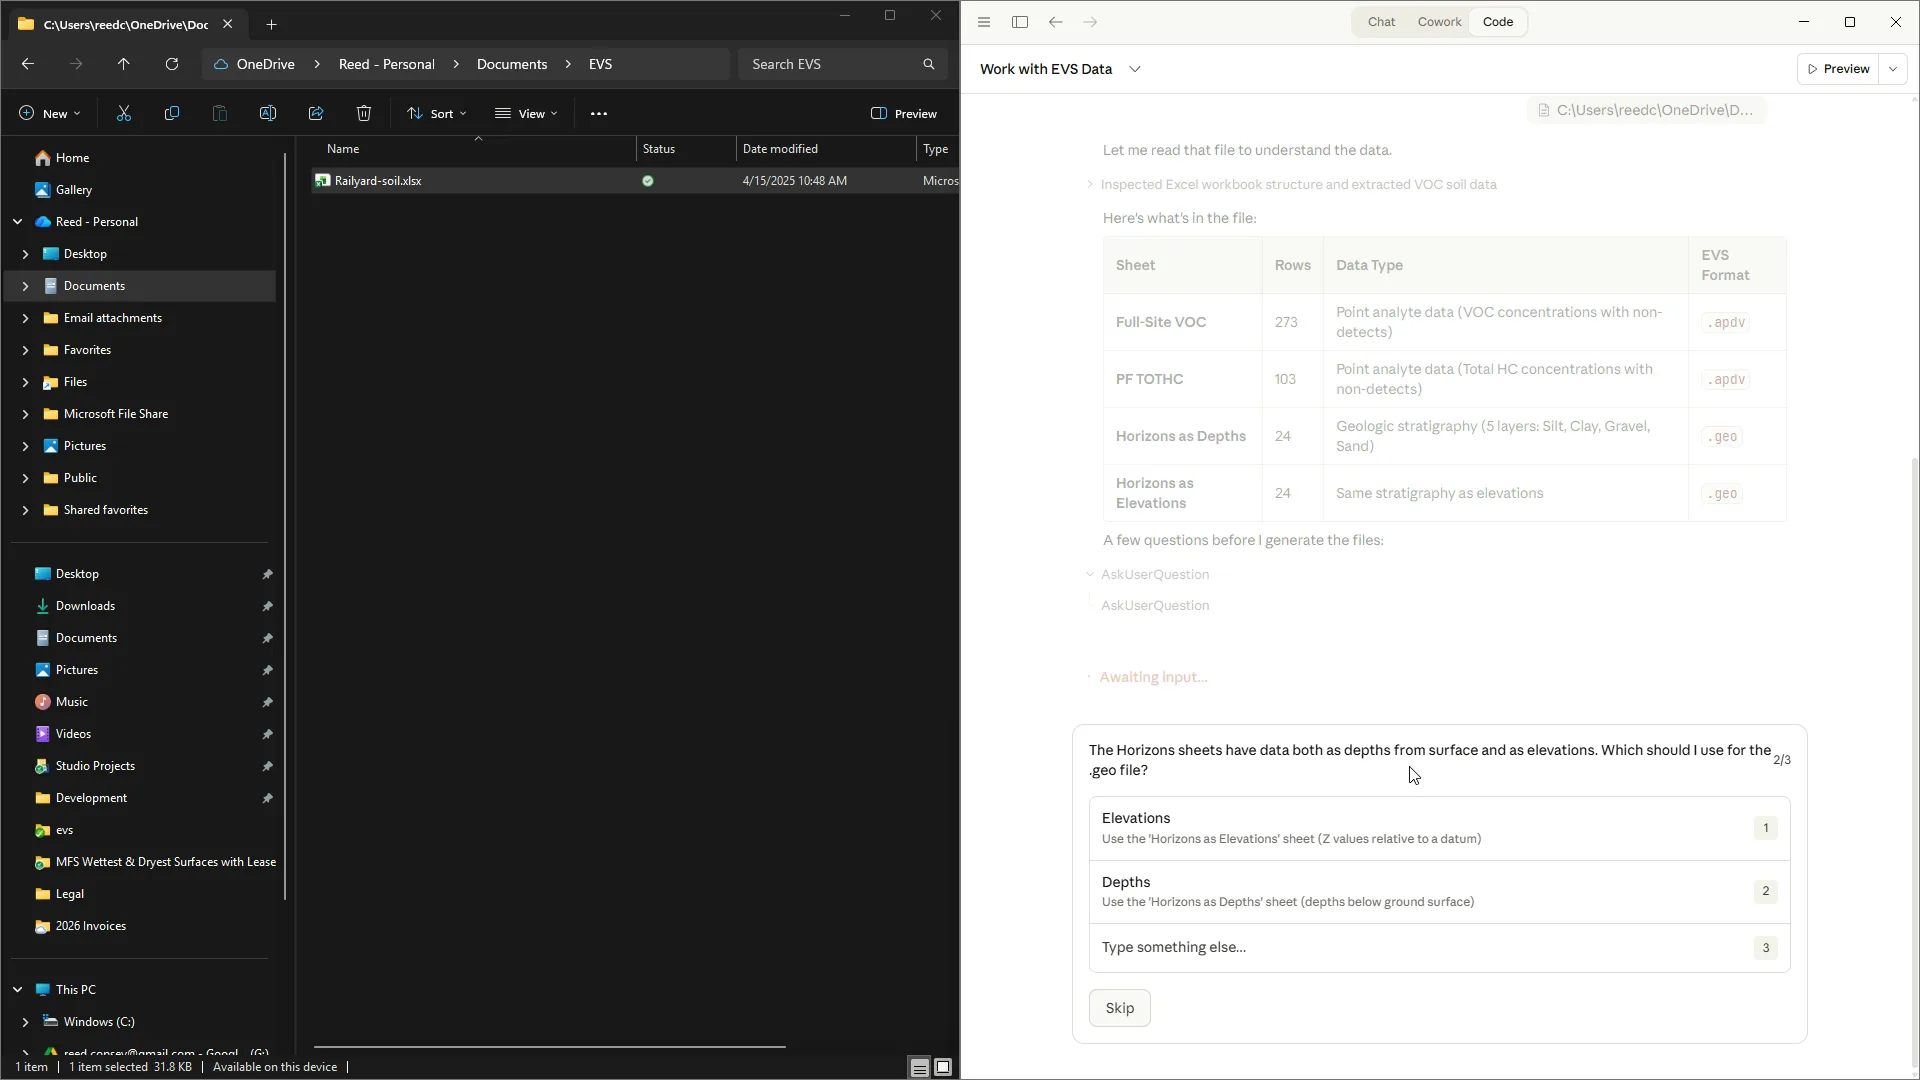
Claude then prompts me whether I want to work in elevations or depth for the geology because this worksheet or this workbook contains both options.
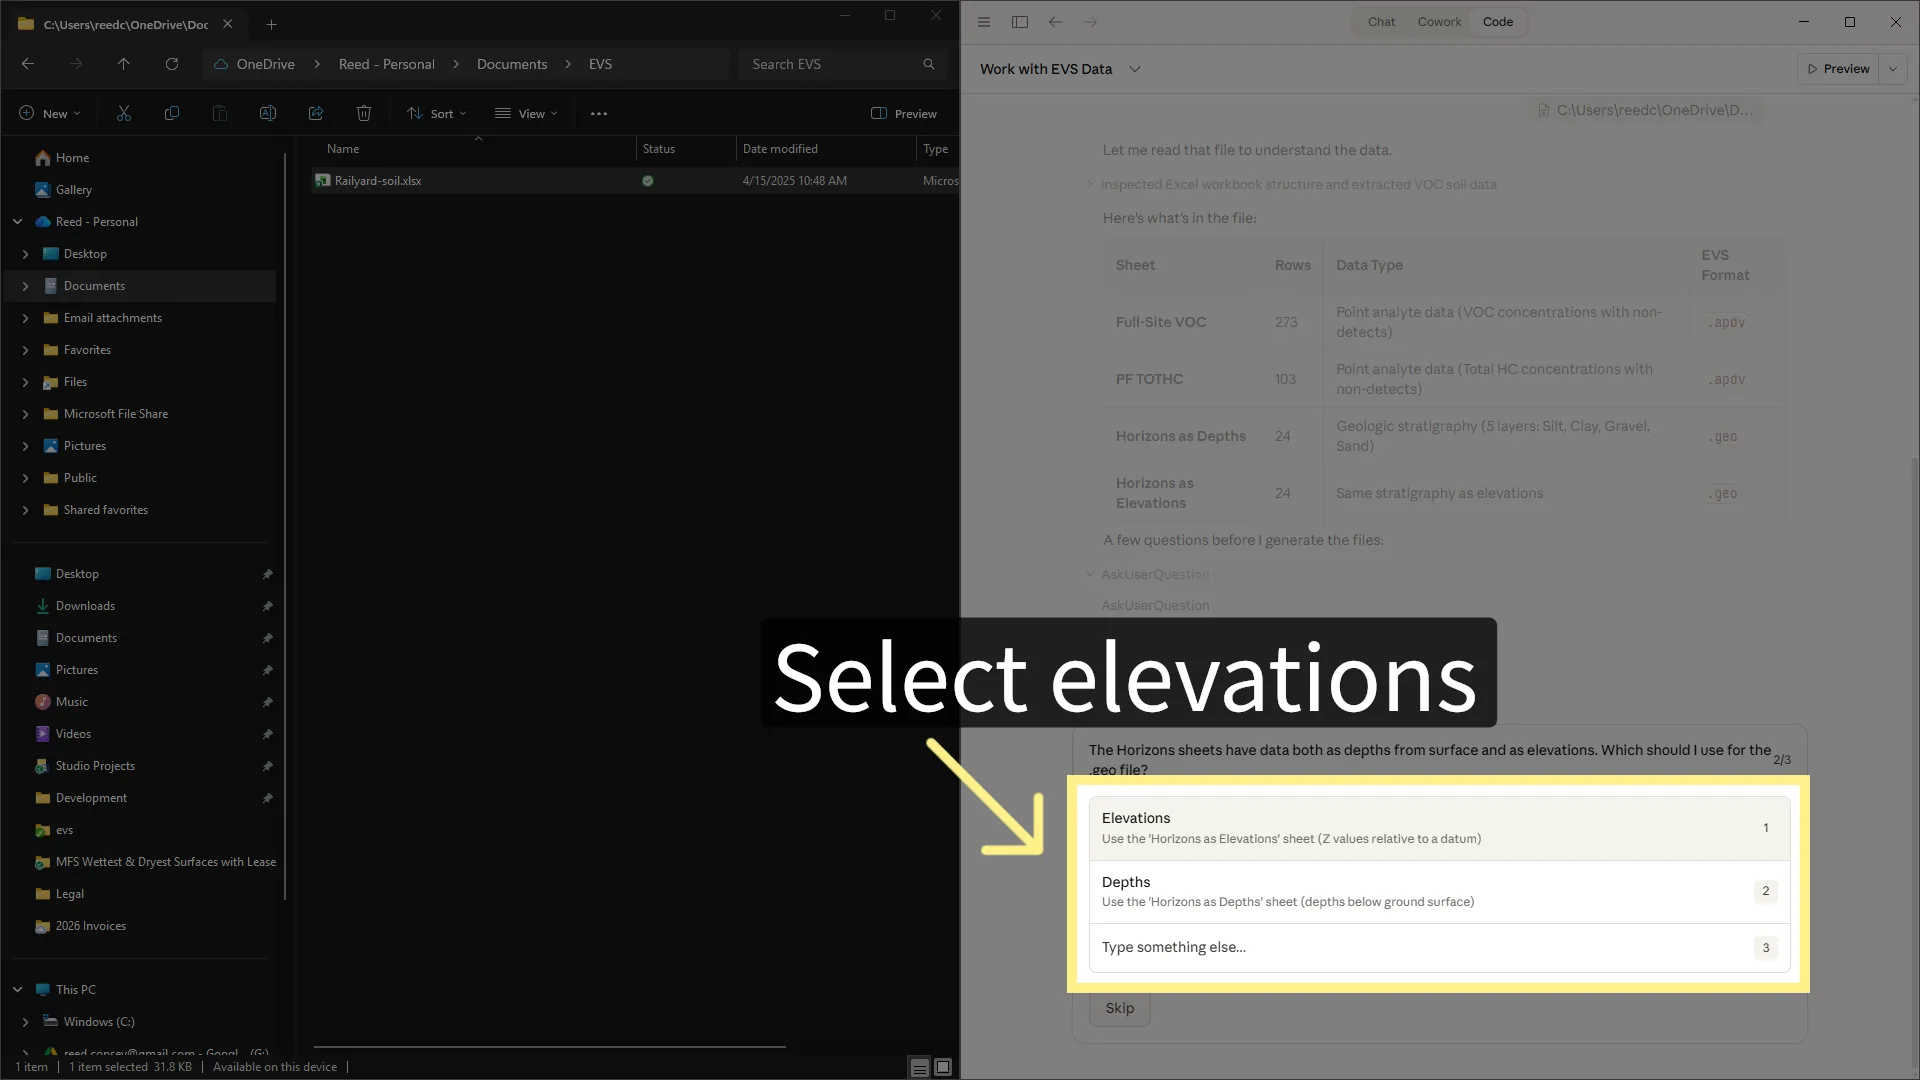
I choose to use the 'Elevations' sheet where Z values are relative to a datum.
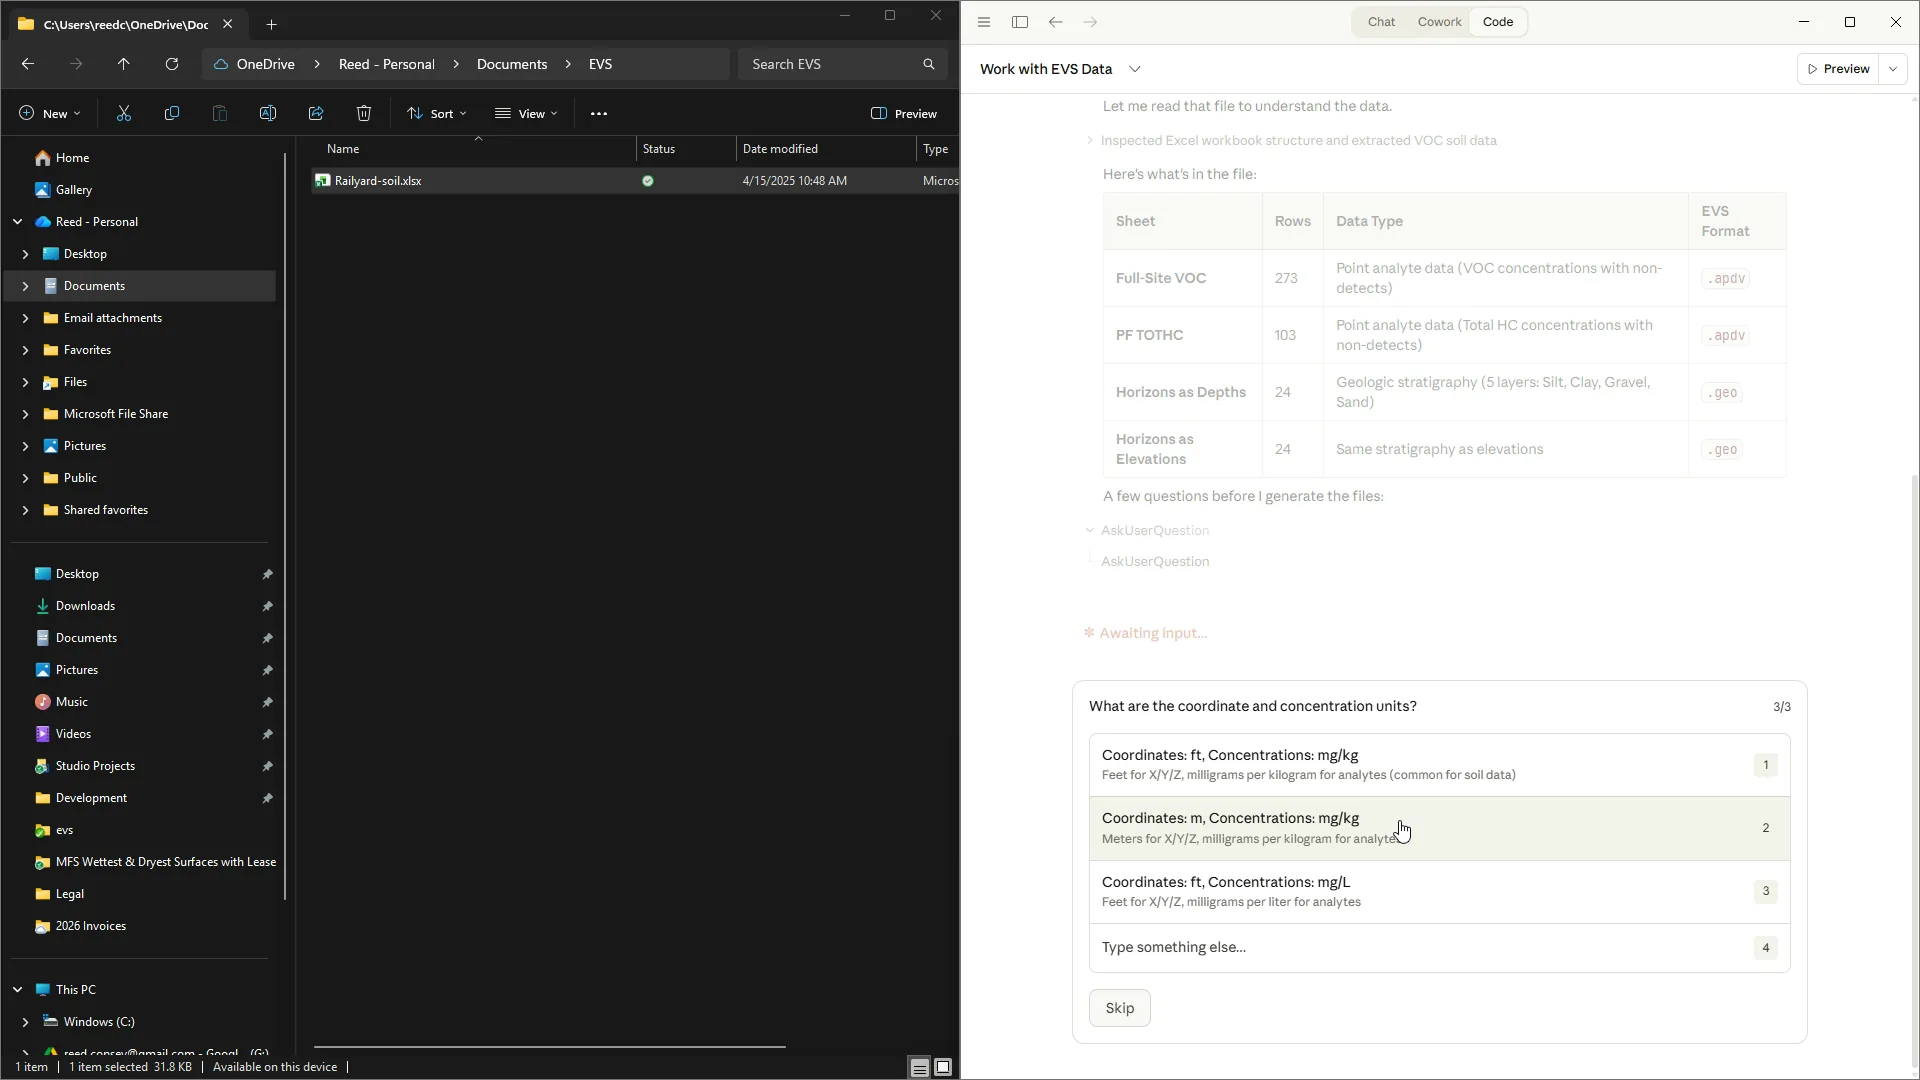
Claude then prompts us what concentrations and coordinates we have for our data. In our case, these are feet with milligrams per kilogram. You can type any units if the prompts are not appropriate, including specify different units per analyte.
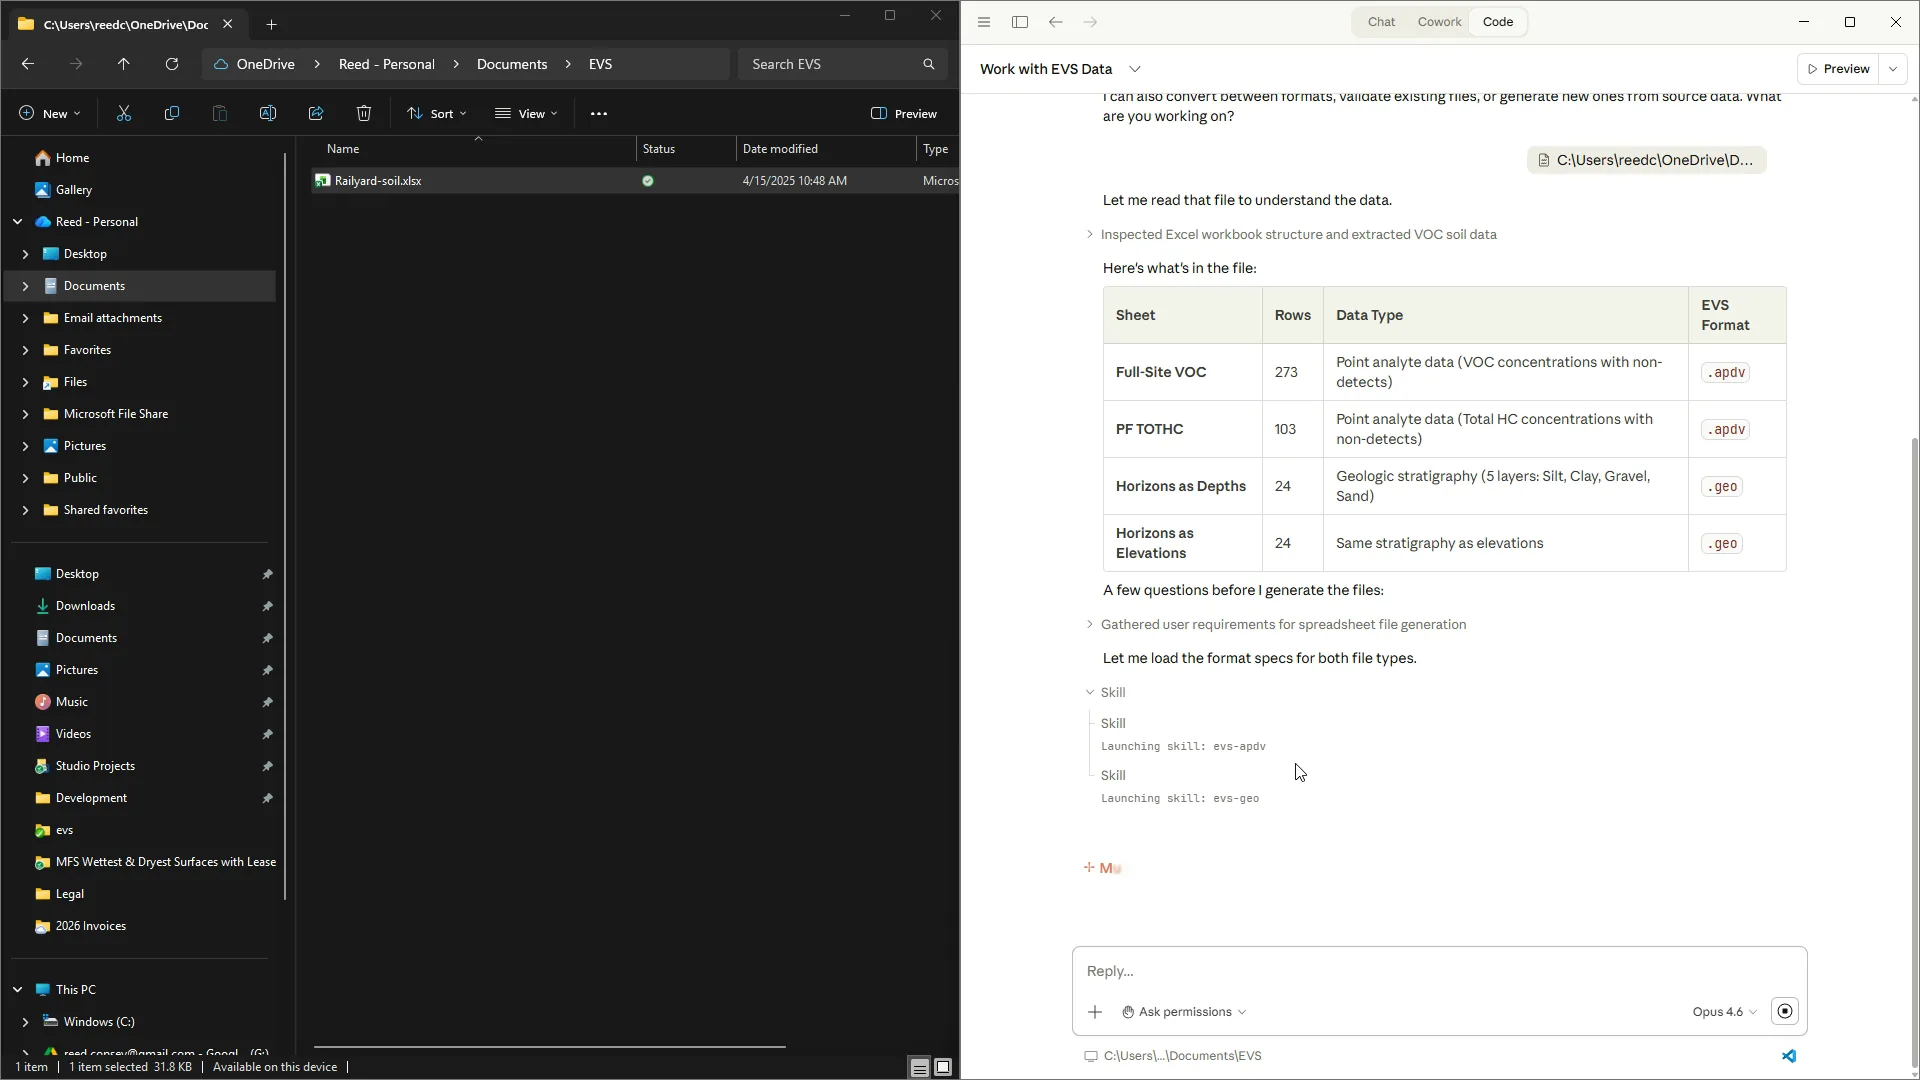
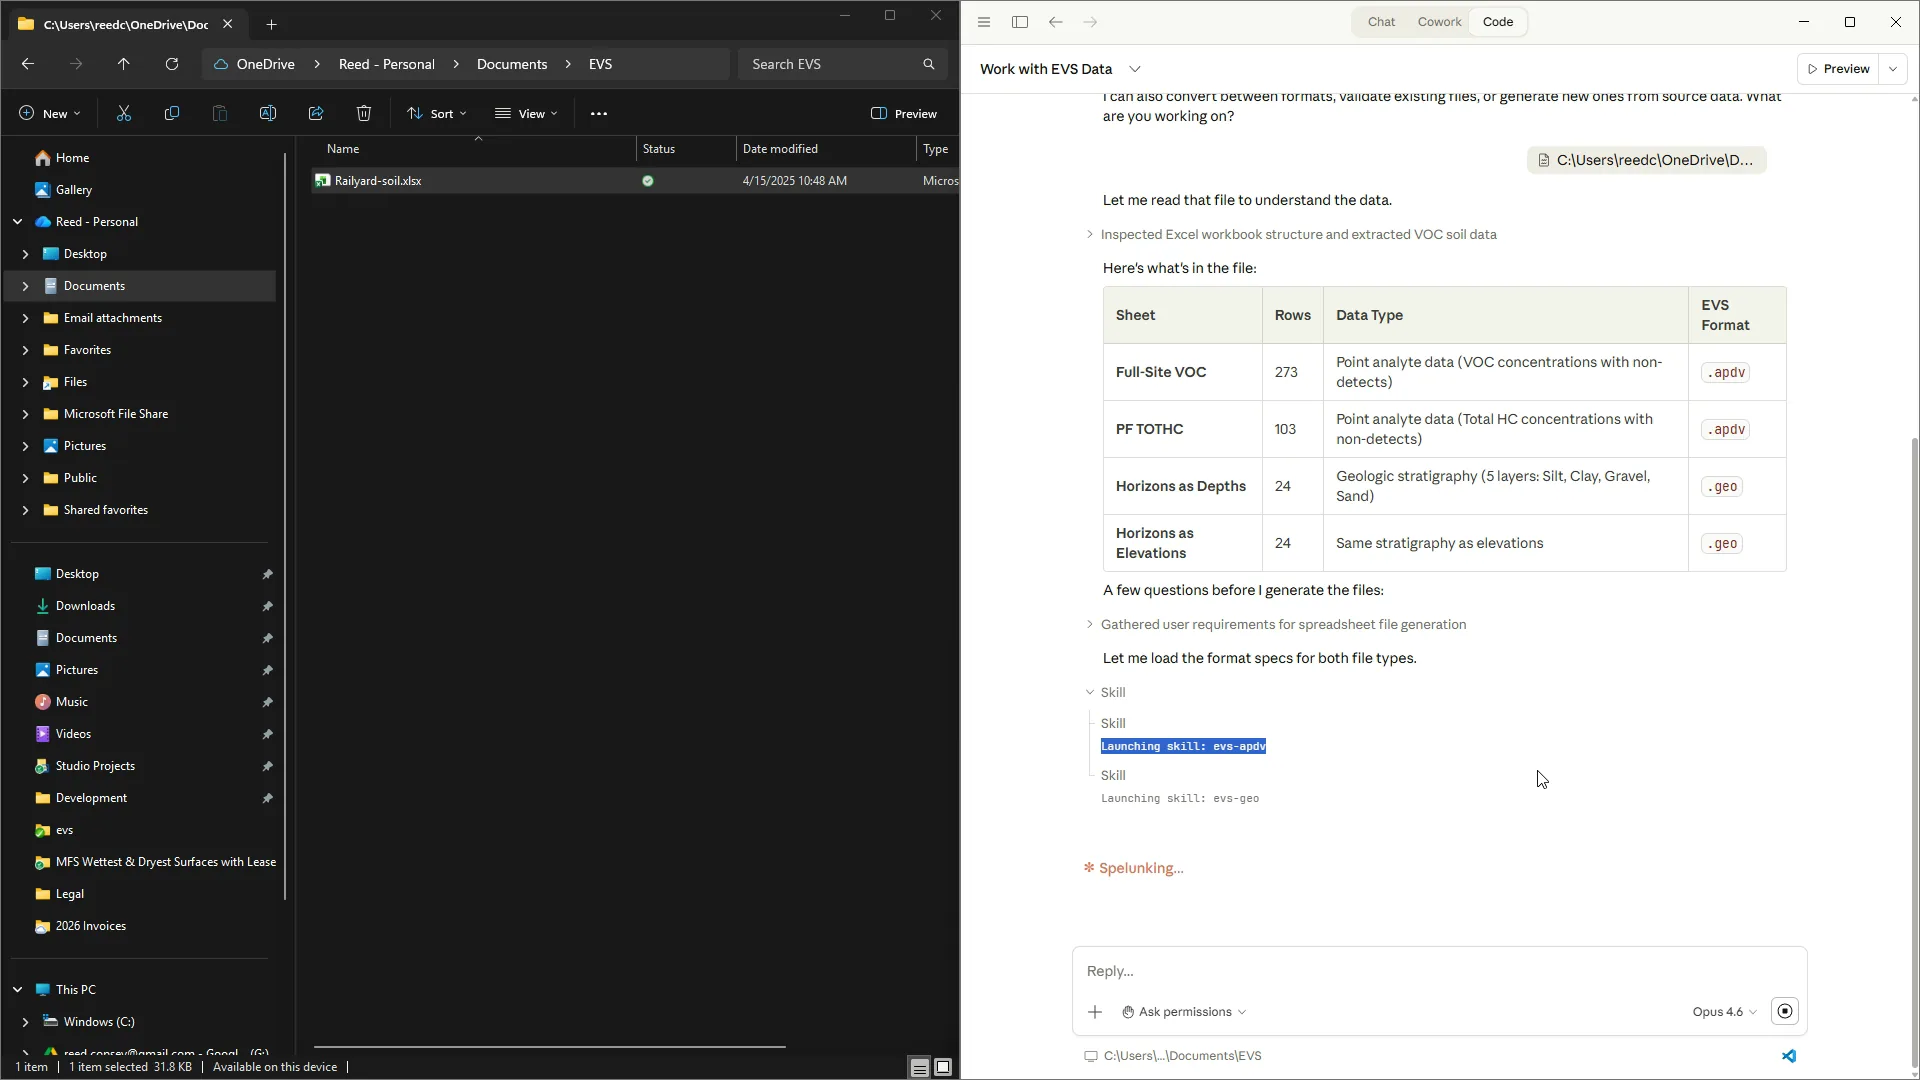
Now it'll tell you it's loading the format specifications for APDV and GEO. Here you can see the EVS APDV skill has been loaded.
Claude will often process for a couple of minutes as it deciphers and figures out the requirements.
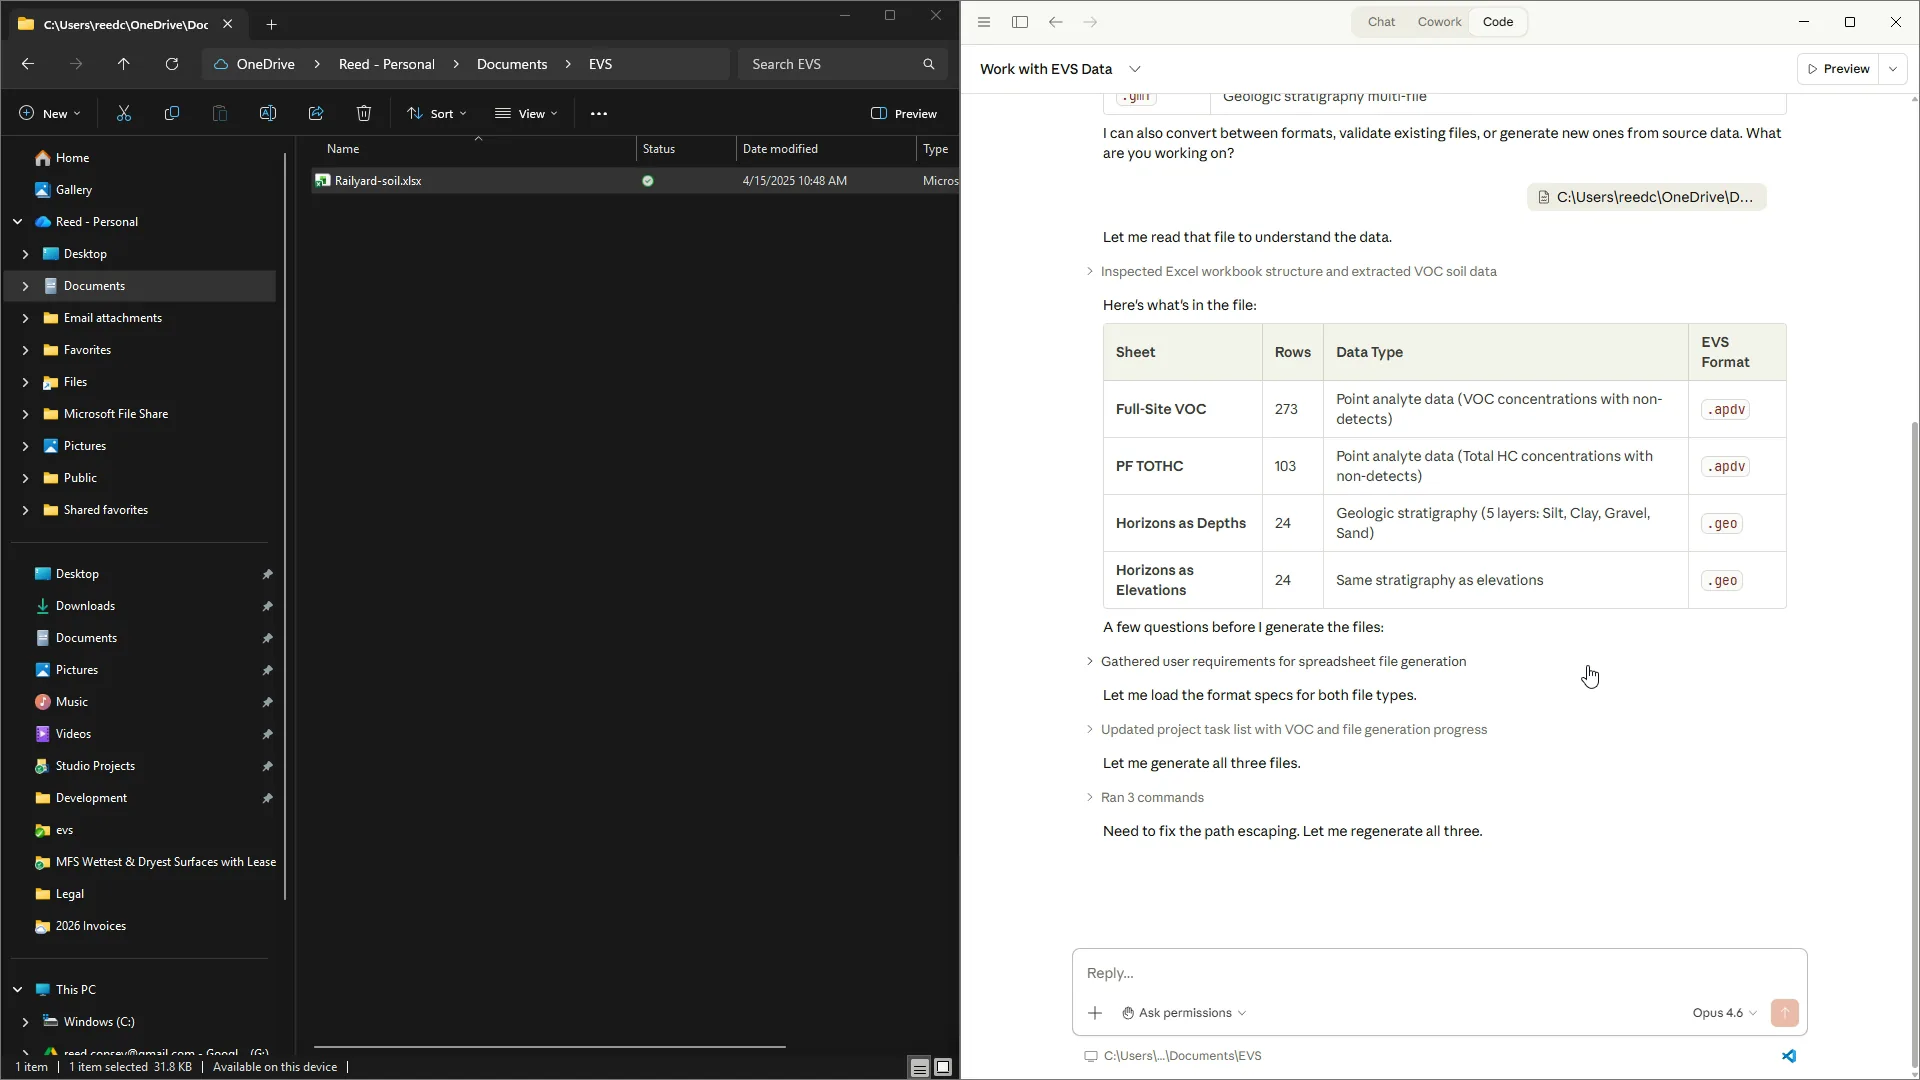
As Claude works, it sometimes needs to read other data or run scripts. You should choose to allow it to continue.
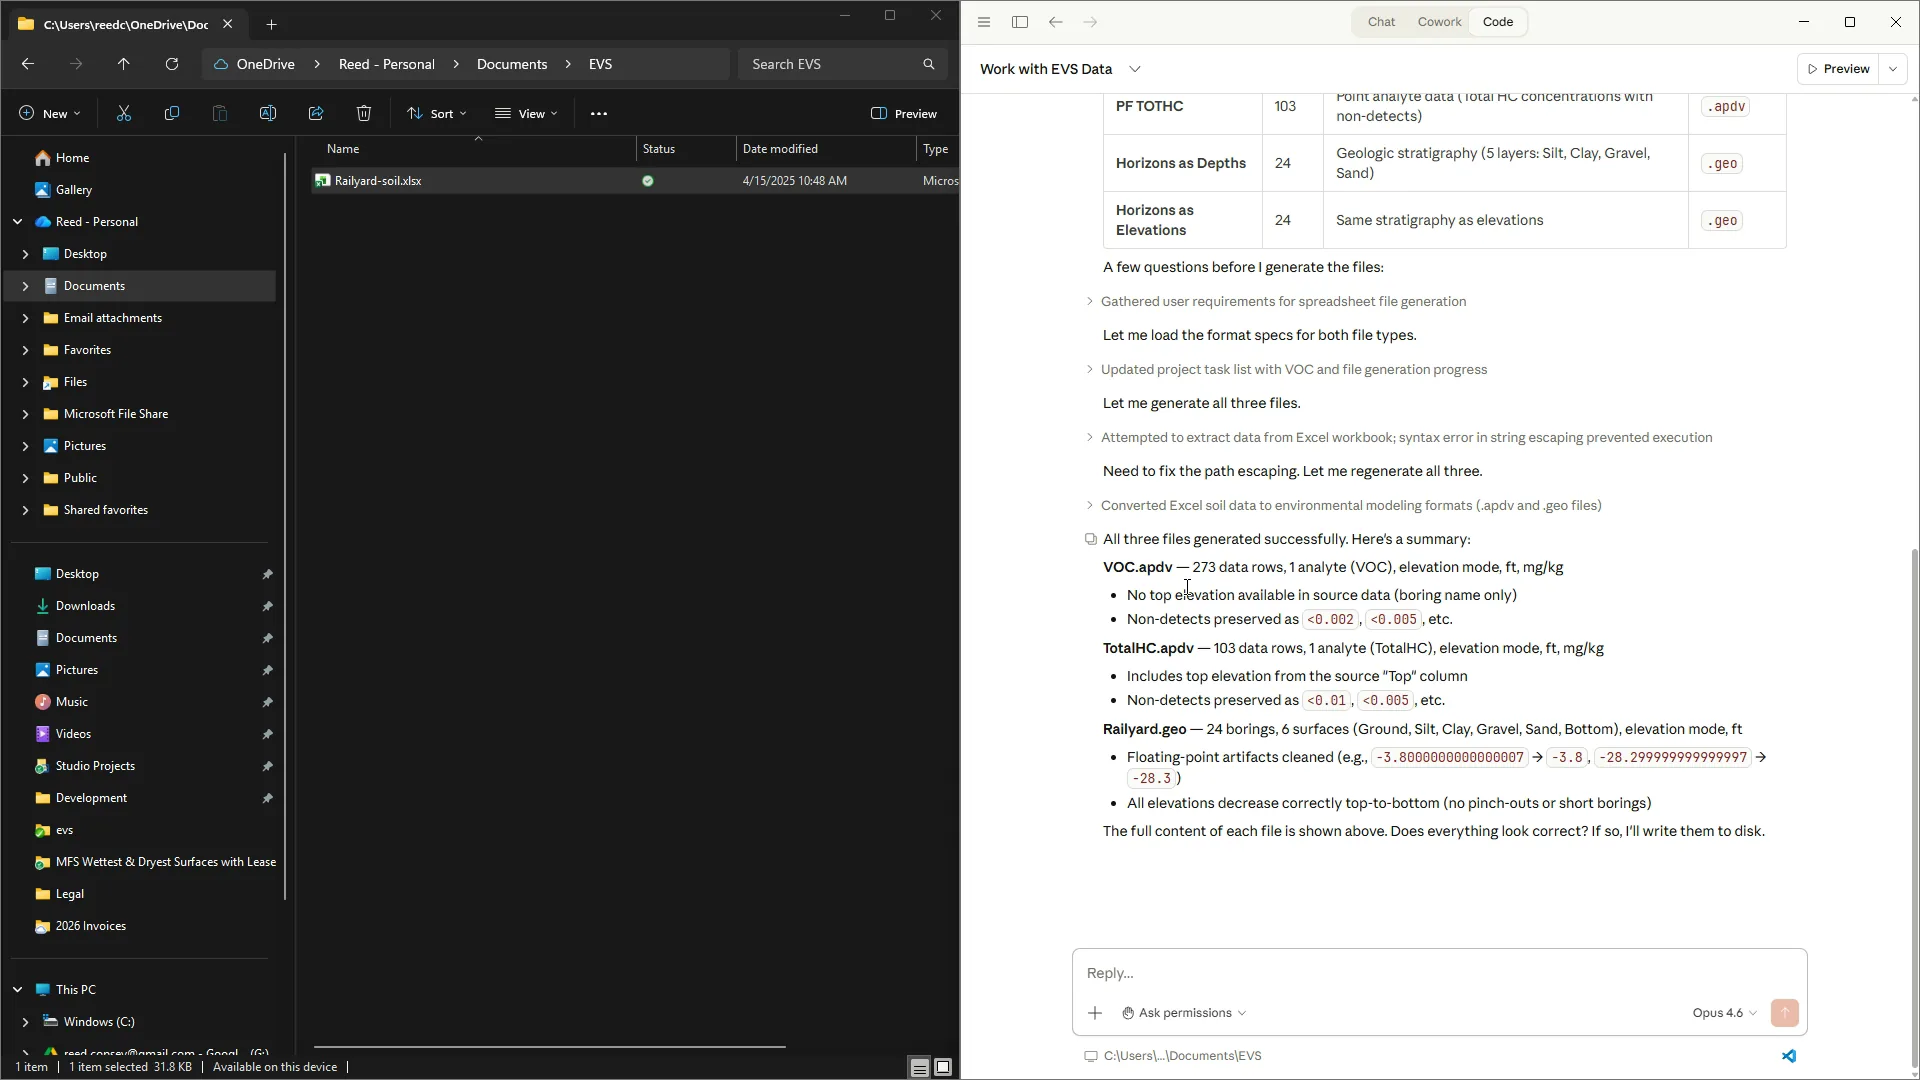
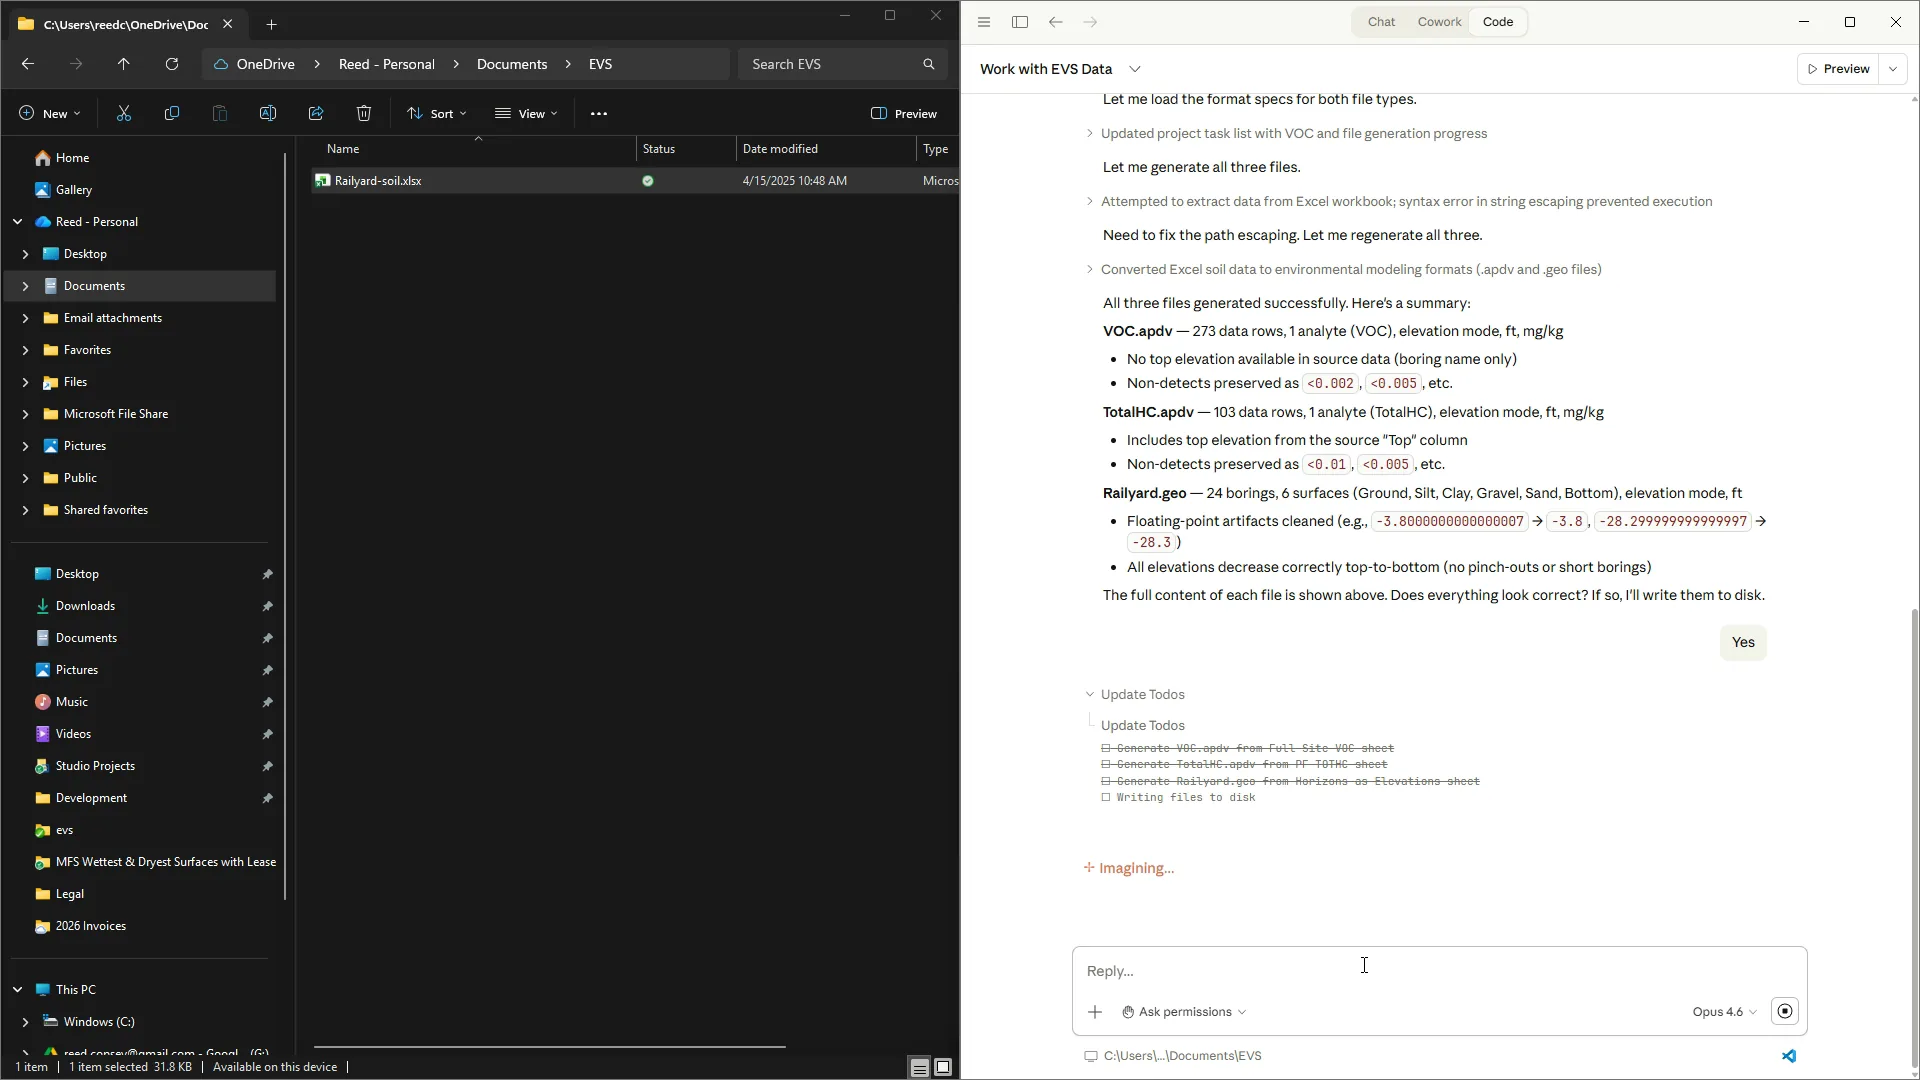
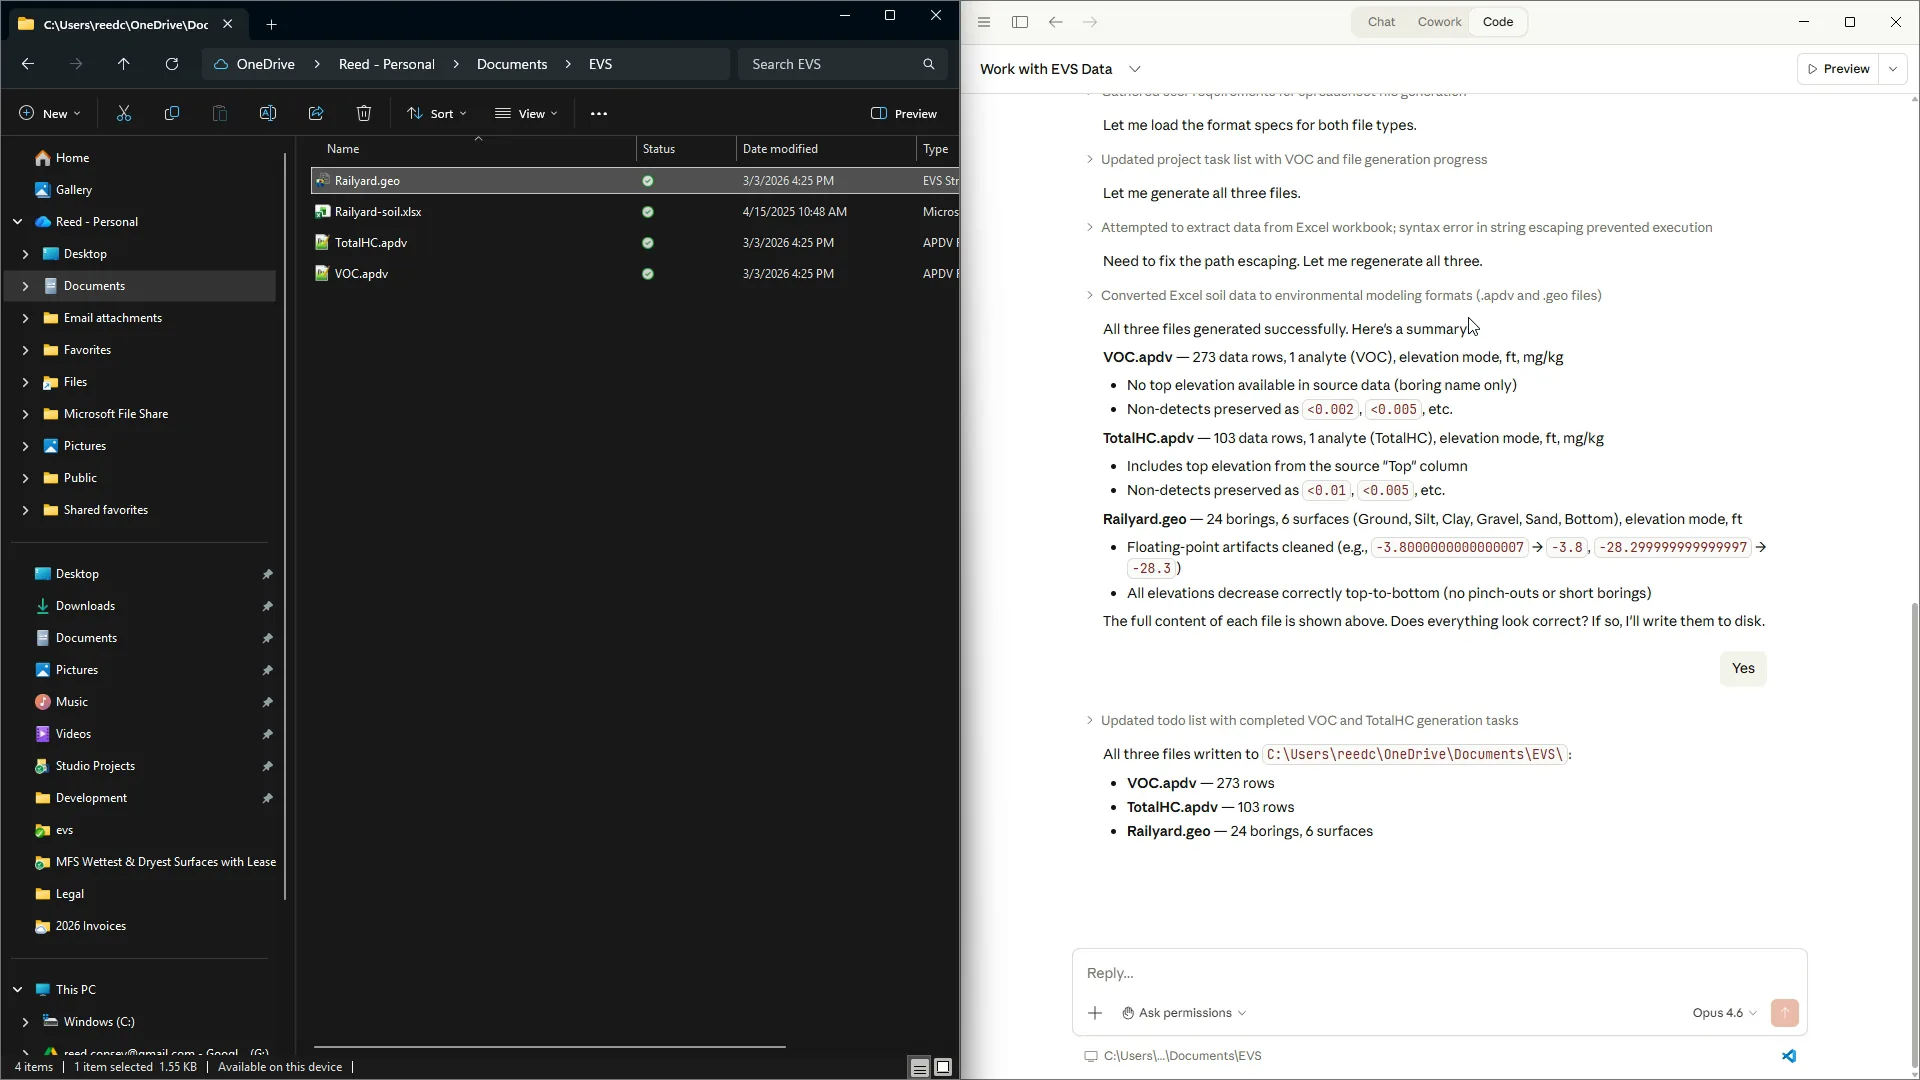
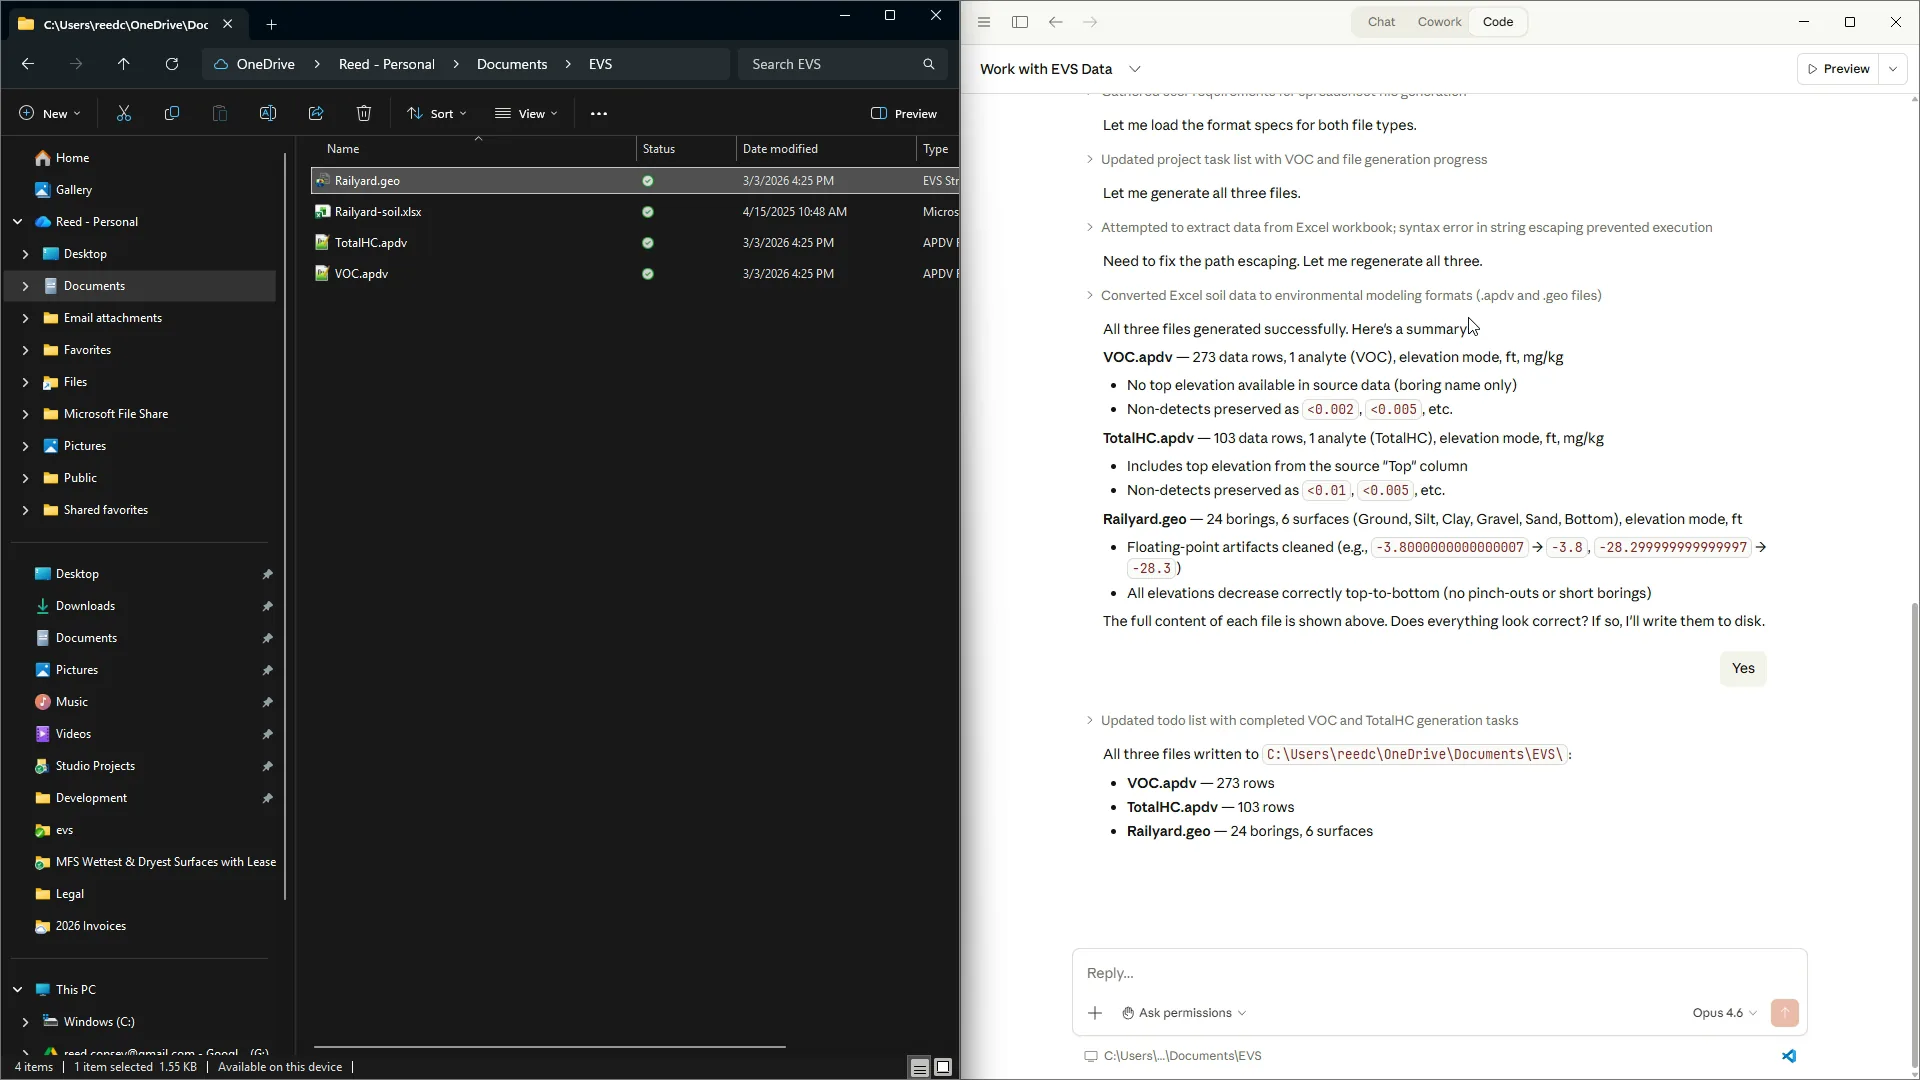
Claude now summarizes it's results. It lists VOC data with 273 data rows, TotalHC data with 103 data rows, and GEO data with 24 borings. It also details how it will handle non detects, as well as points out that it's cleaning up some ridiculously long numbers caused by floating point precision. The skills take extra care to never lose important precision, but to still clean up data issues.
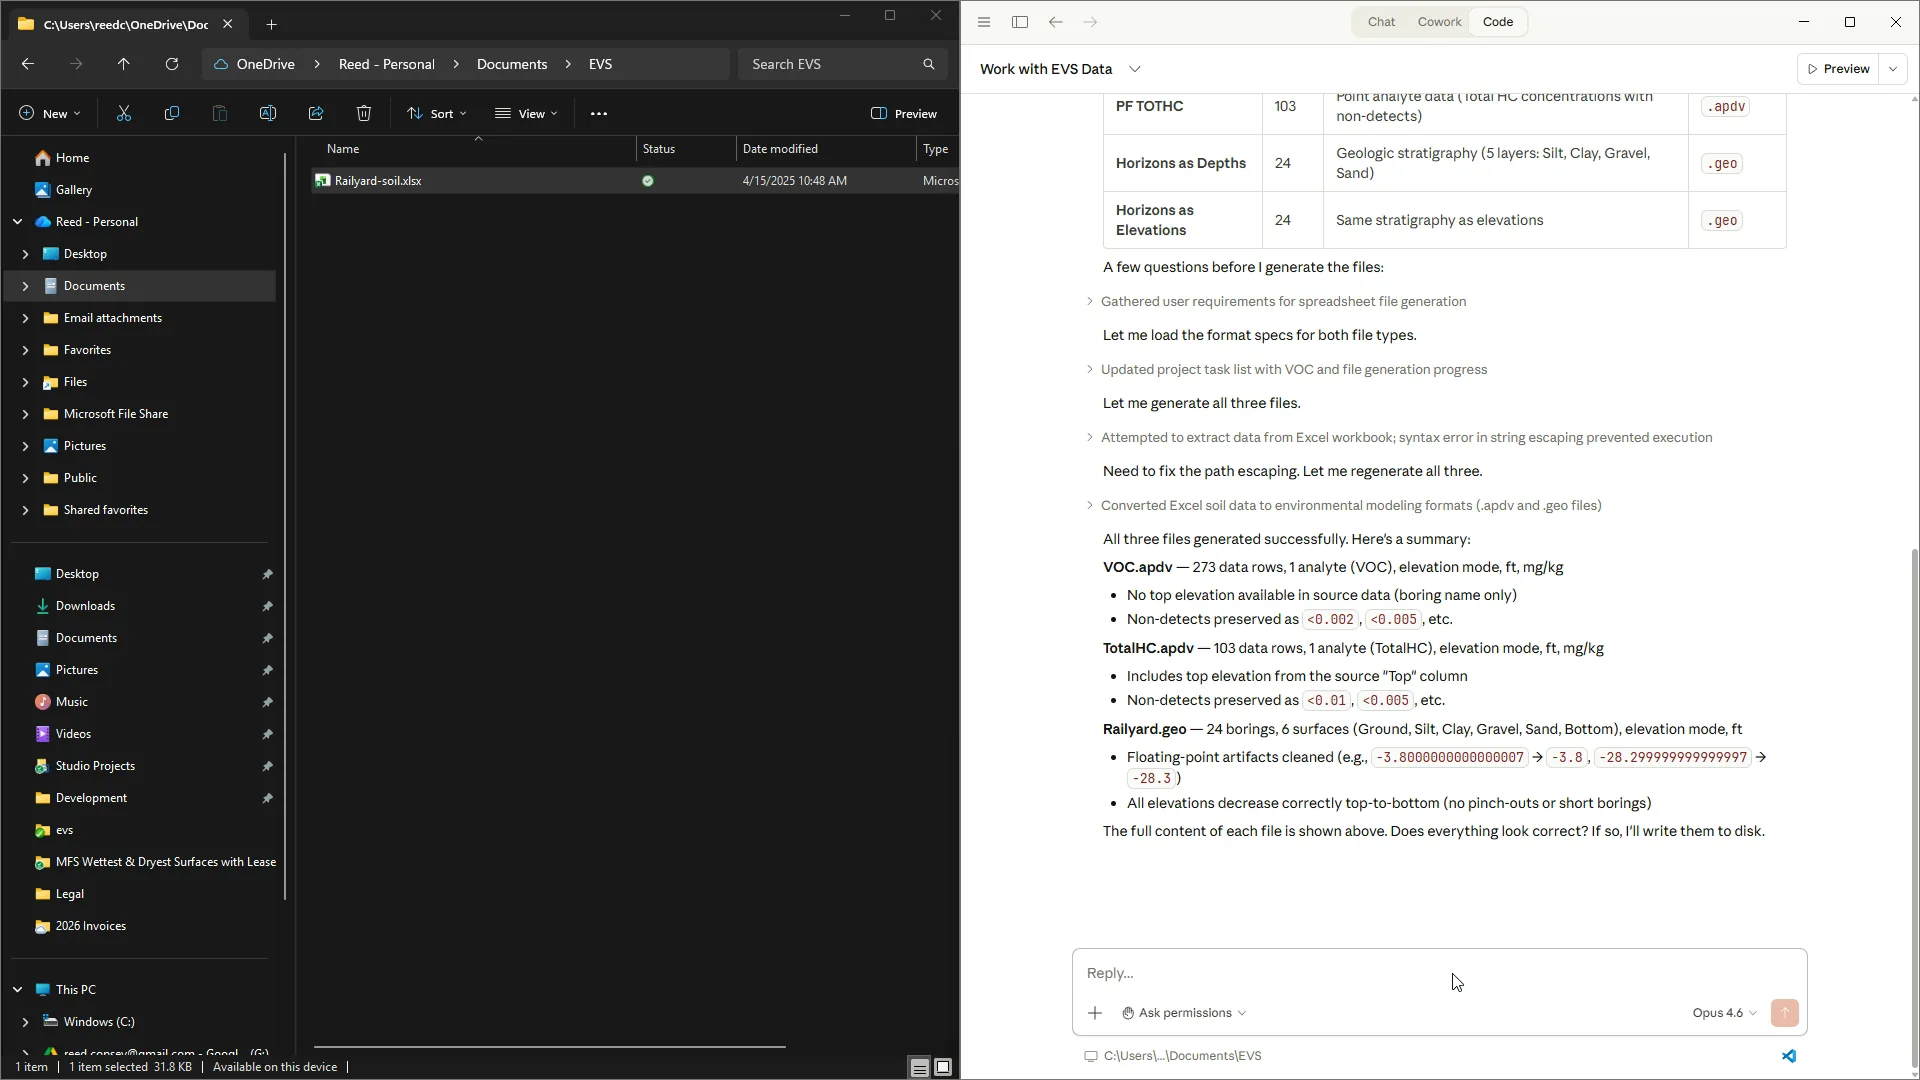
Once I've confirmed that everything is correct, I will say yes, and Claude will write the files. These skills are very particular about prompting for every decision instead of making decisions automatically. Expect to answer questions about what units you have. If there are issues in the data, it will prompt you about them.
For example, if you try to write an AIDV file and there's overlapping intervals, Claude will prompt you how to handle it and how to correct that data.
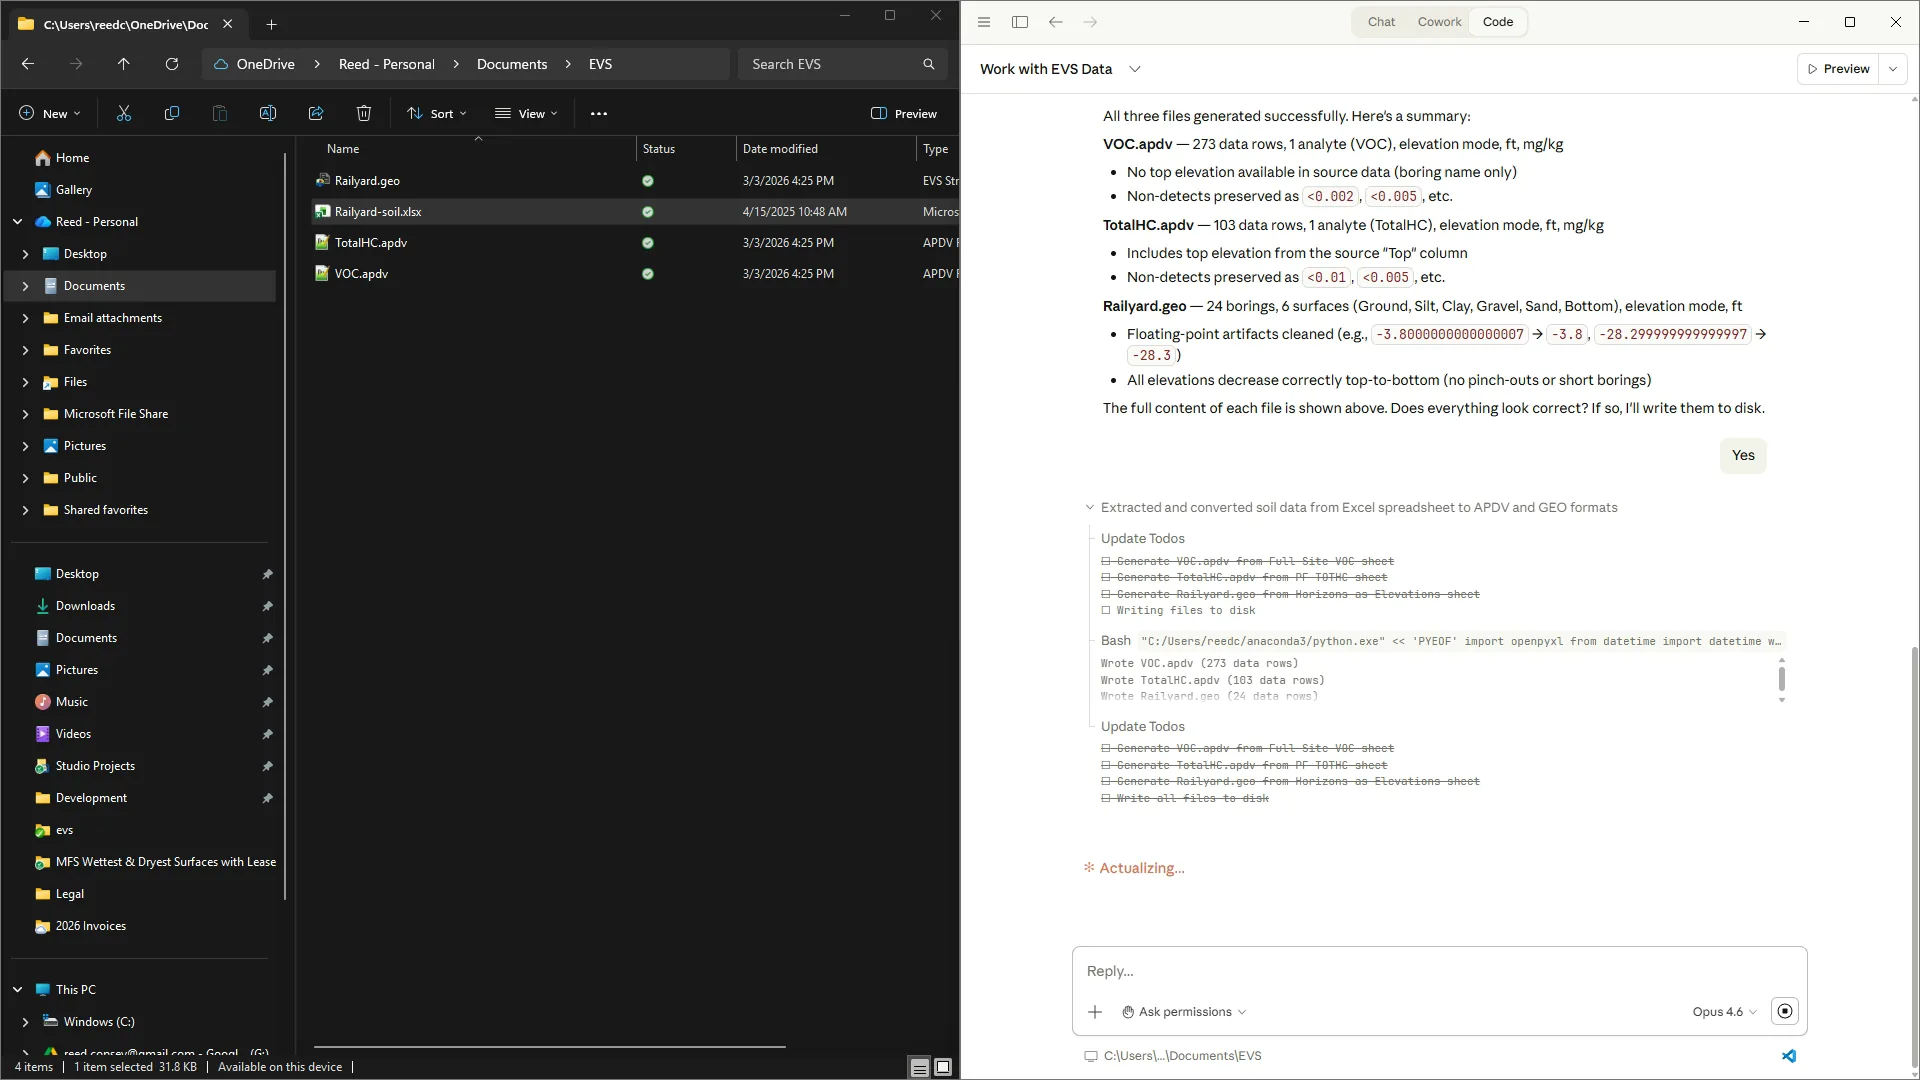
Claude wrote out all three files, which are now visible in File Explorer. I will look at one of these now.
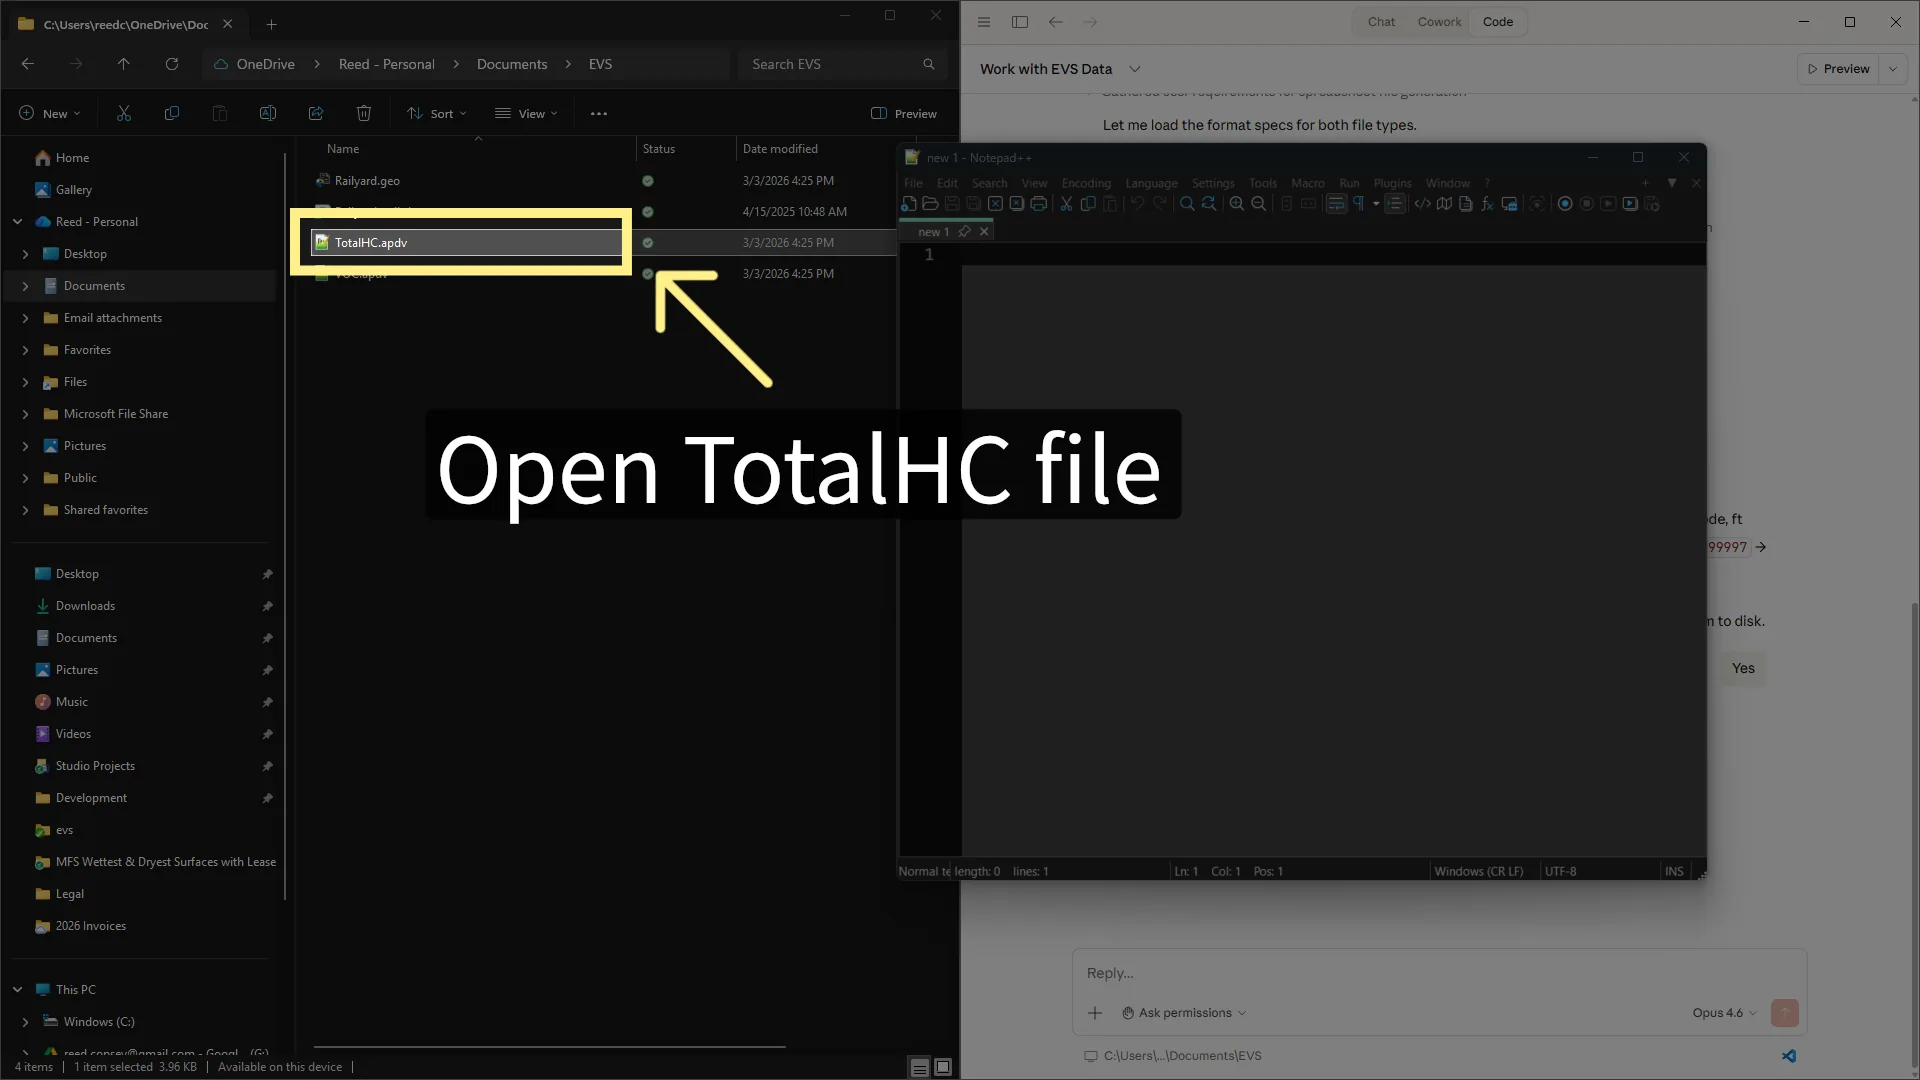
I'll open the TotalHC APDV file to review its contents and verify data accuracy.
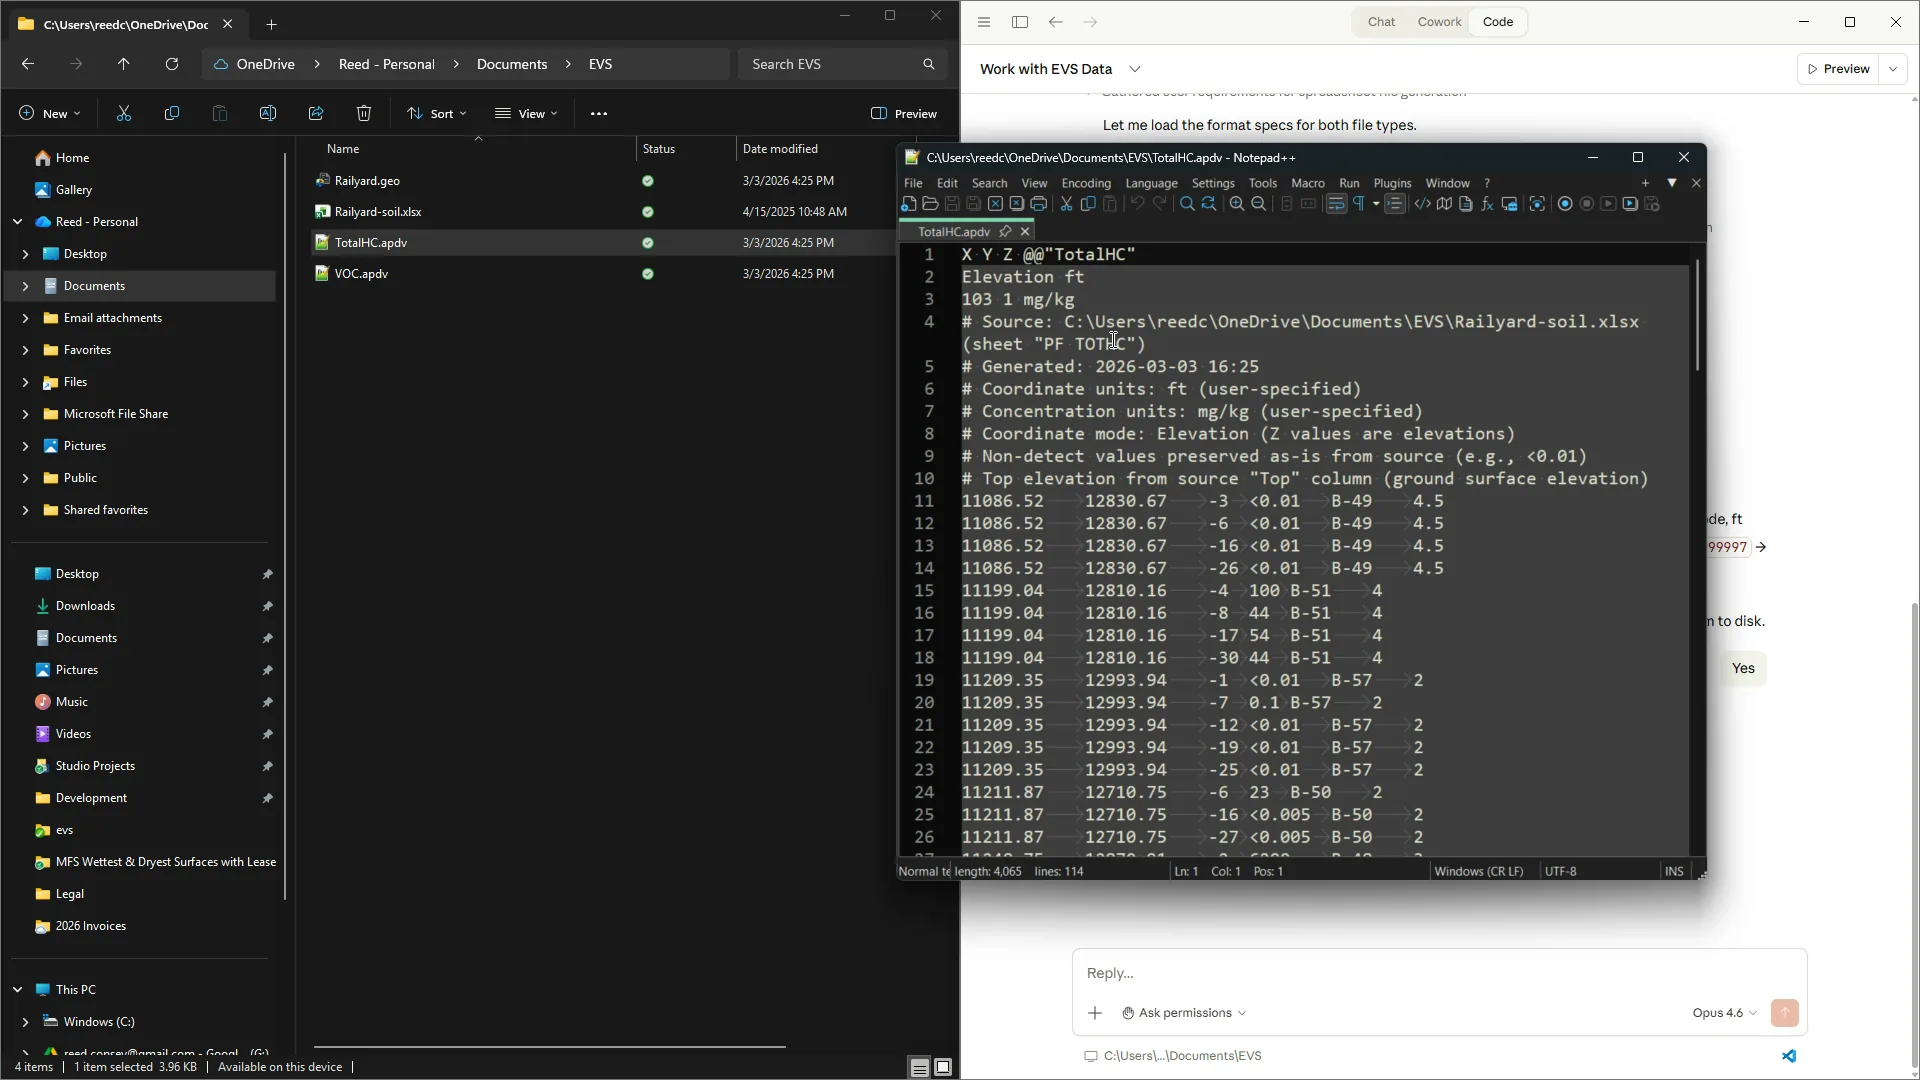
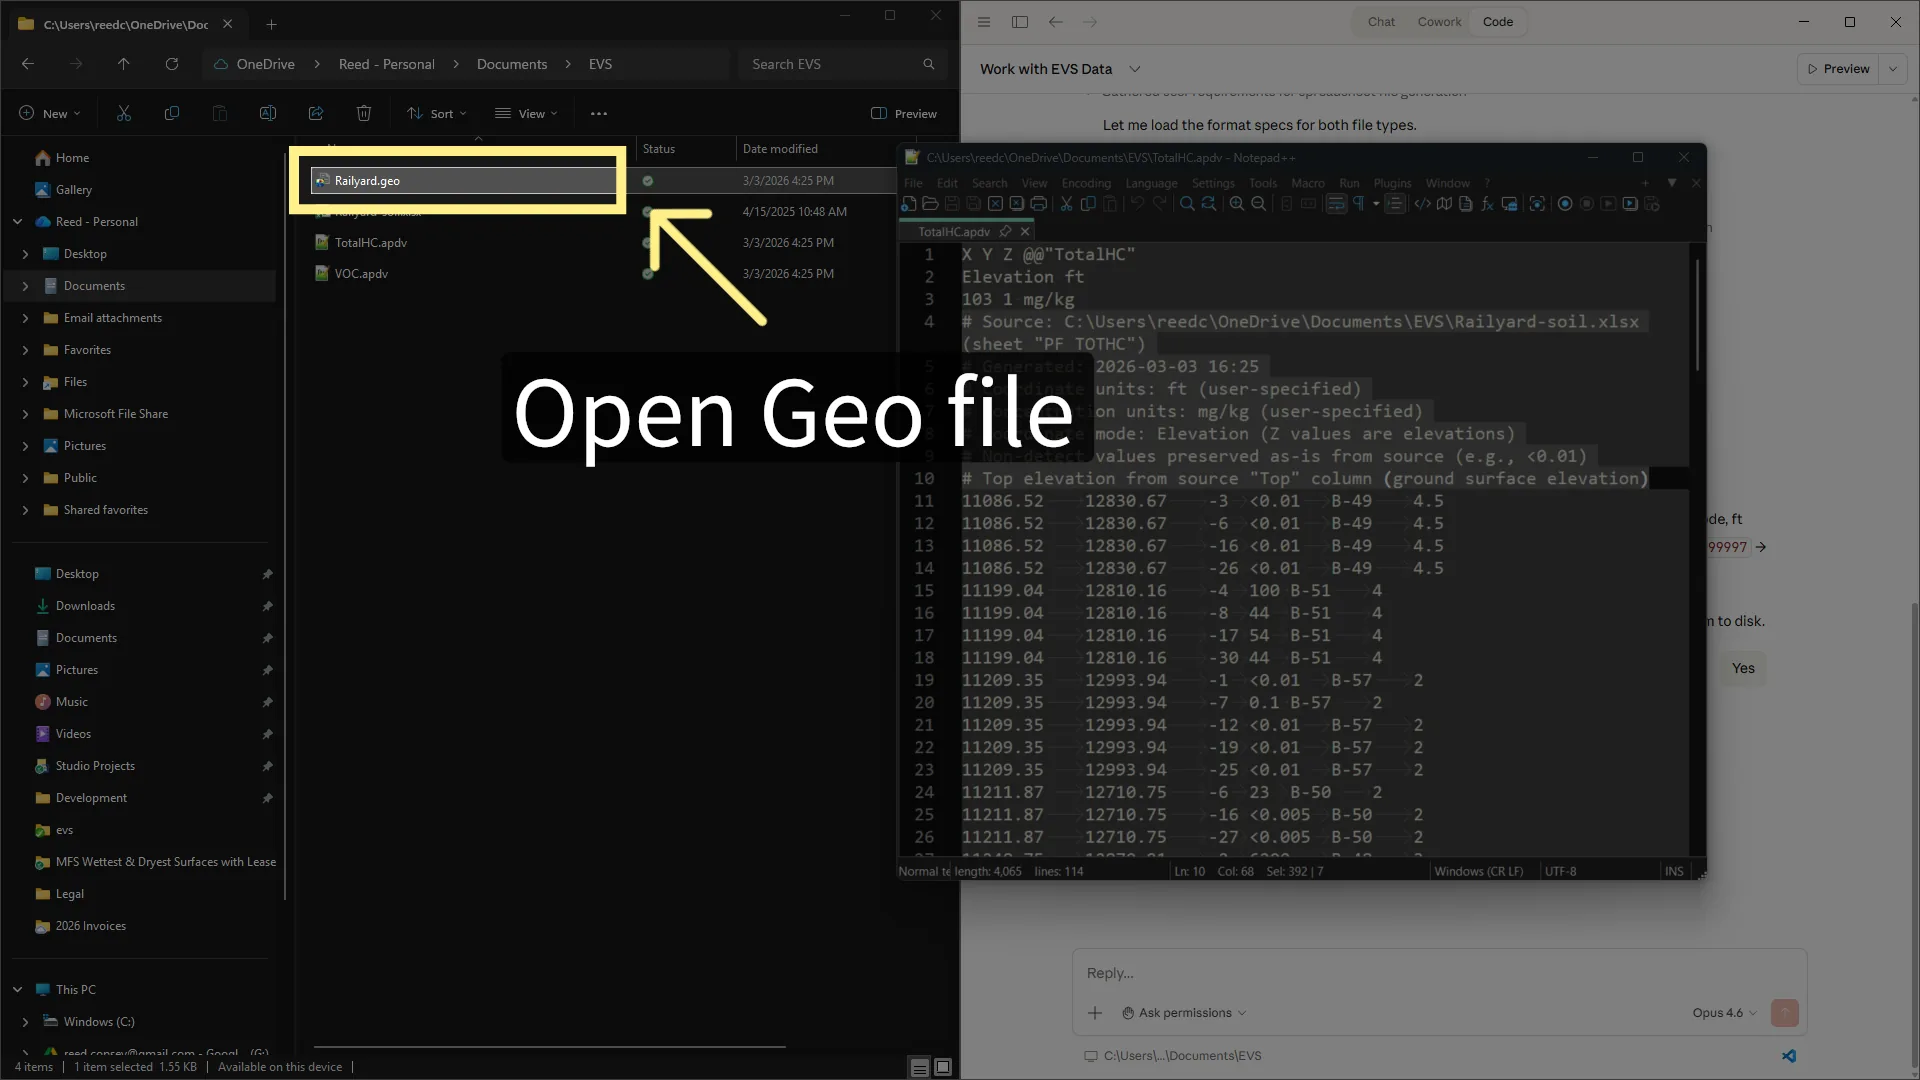
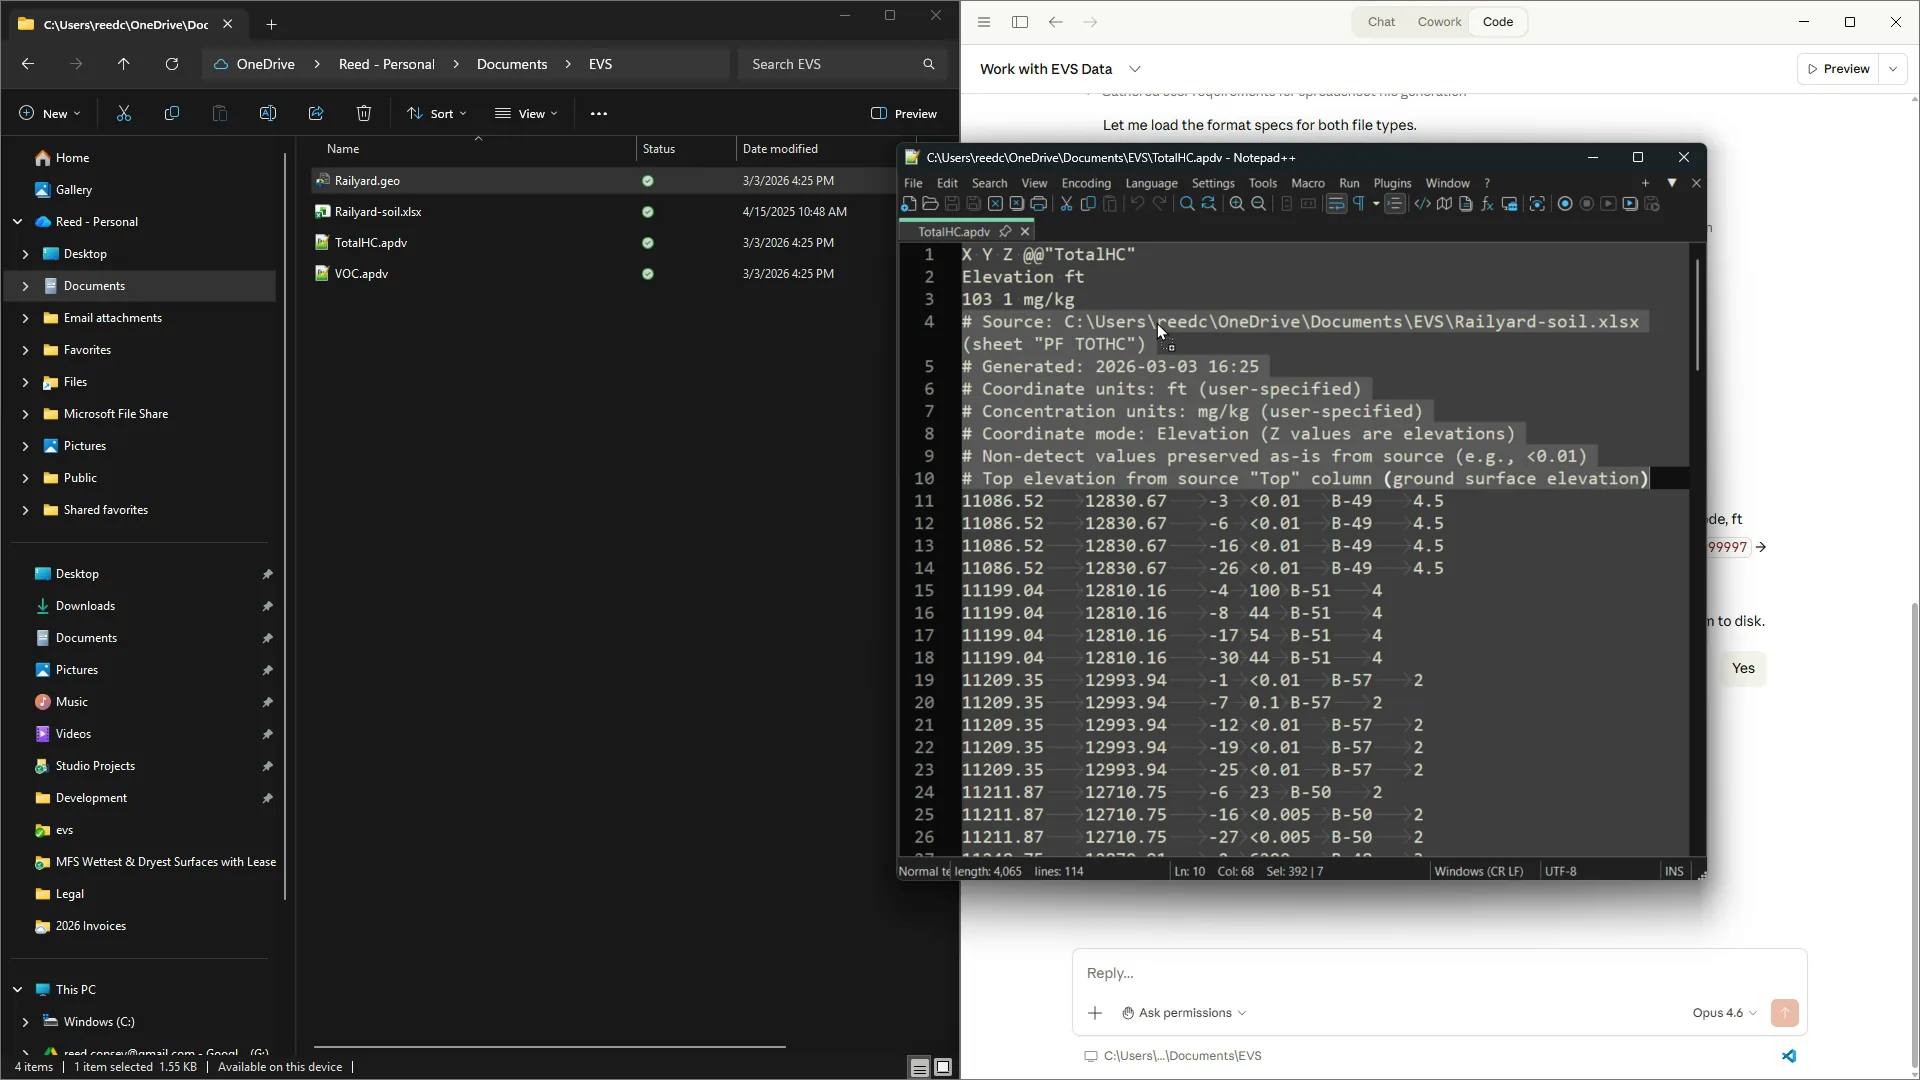
This is a proper EVS APDV file. It adds comments automatically for what the source data was, when it was generated, what units and concentration units and coordinate units were specified, how non-detects were handled, and where the top elevations came from.
I'll now open the Railyard GEO file to examine the geological data formatting and details.
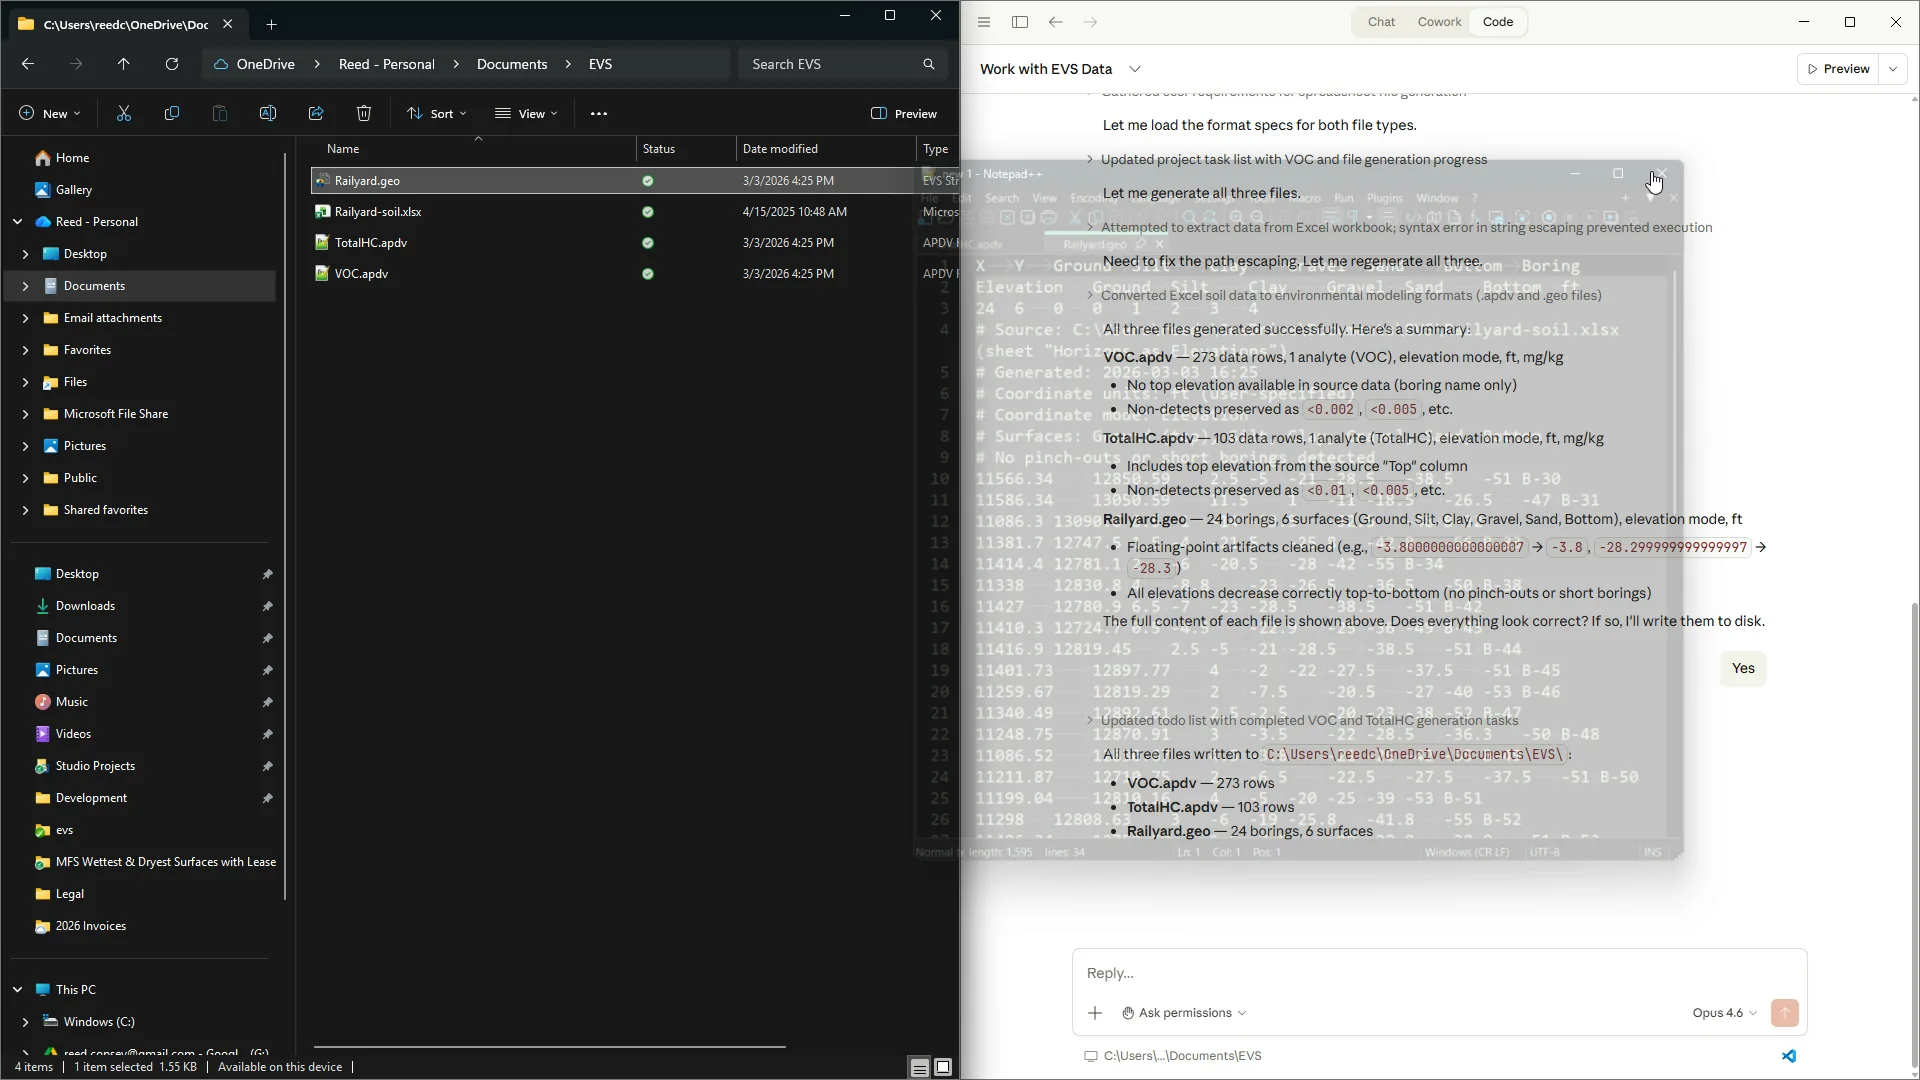
Similarly, we can look at the geo file. Again, properly formatted. All of the rows are there with nice coordinates generated.
The C Tech AI skills make working with Claude much easier for creating data files.
You can also use Claude to clean up and modify existing data files.
The skills teach AI systems the proper information about the EVS file formats, as well as a lot of clues and things to look for.
This tutorial guided you through creating EVS data files using C Tech AI Skills, including file preparation, format specification, data verification, and file management. You can now explore creating, cleaning, and modifying EVS data files or learn more about advanced AI data processing techniques.
Introduction
This tutorial demonstrates how to create EVS data files using C Tech AI Skills. Before starting, ensure you have access to the Claude AI platform, have installed the C Tech AI Skills, and have your Excel data files ready for processing.
1Introduce AI Setup
For this video, I'm going to walk through how to use AI, in this case, Claude, to create EVS data files automatically. The C Tech AI Skills are installed for all major AI systems. However, C Tech has seen the best results with Claude Code.
2Run Claude Code
First thing you'll notice, I'm running Claude Code, and I have this folder with an Excel file. This is a file from our sample projects used to walk through the EVS Tools.
3Choose the folder in Claude Code
Set the folder in Claude Code to your project folder with the Excel file.
4Specify EVS Data Usage
We need to start with saying that we want to work with EVS data.
5Explain "EVS Data" Importance
This is important because this helps Claude understand what type of files we're going to be working with, so it loads the proper skills from your system. You always want to start with a prompt that says that you're working with or creating EVS data.
6Initial Claude results
Notice it automatically shows us that we can create one of seven different input file formats and convert between them. I'm going to take our sample file that was used in our tutorials, just drop it in and let Claude think about it for a minute.
7Claude Identifies Data
Claude tells us that we have two worksheets with point analytical data and two worksheets with geology data, and recognizes that the horizon data in the two sheets are really a single dataset. Claude then asks what we want to do with it. In this case, I'm going to tell it to generate all three appropriate types of data files.
8Generate All EVS Data Files
Select all three VOC APDV, Total HC APDV, and Stratigraphy GEO to generate all EVS files from available data.
9Choose Elevations Or Depth
Claude then prompts me whether I want to work in elevations or depth for the geology because this worksheet or this workbook contains both options.
10Use Elevations Sheet
I choose to use the 'Elevations' sheet where Z values are relative to a datum.
11Specify Concentrations And Units
Claude then prompts us what concentrations and coordinates we have for our data. In our case, these are feet with milligrams per kilogram. You can type any units if the prompts are not appropriate, including specify different units per analyte.
12Load APDV and GEO Format Specs
Now it'll tell you it's loading the format specifications for APDV and GEO. Here you can see the EVS APDV skill has been loaded.
13Decipher Format Specifications
Claude will often process for a couple of minutes as it deciphers and figures out the requirements.
14Allow Claude Permissions
As Claude works, it sometimes needs to read other data or run scripts. You should choose to allow it to continue.
15Data File Summary
Claude now summarizes it's results. It lists VOC data with 273 data rows, TotalHC data with 103 data rows, and GEO data with 24 borings. It also details how it will handle non detects, as well as points out that it's cleaning up some ridiculously long numbers caused by floating point precision. The skills take extra care to never lose important precision, but to still clean up data issues.
16Confirm File Accuracy
Once I've confirmed that everything is correct, I will say yes, and Claude will write the files. These skills are very particular about prompting for every decision instead of making decisions automatically. Expect to answer questions about what units you have. If there are issues in the data, it will prompt you about them.
17Handle Data Issues Prompt
For example, if you try to write an AIDV file and there's overlapping intervals, Claude will prompt you how to handle it and how to correct that data.
18Verify Files On Disk
Claude wrote out all three files, which are now visible in File Explorer. I will look at one of these now.
19Open TotalHC File
I'll open the TotalHC APDV file to review its contents and verify data accuracy.
20Review EVS APDV File Details
This is a proper EVS APDV file. It adds comments automatically for what the source data was, when it was generated, what units and concentration units and coordinate units were specified, how non-detects were handled, and where the top elevations came from.
21Open Railyard Geo File
I'll now open the Railyard GEO file to examine the geological data formatting and details.
22Examine Formatted Geo File
Similarly, we can look at the geo file. Again, properly formatted. All of the rows are there with nice coordinates generated.
23C Tech AI Skills Benefits
The C Tech AI skills make working with Claude much easier for creating data files.
24Clean And Modify Data Files
You can also use Claude to clean up and modify existing data files.
25Skills Purpose
The skills teach AI systems the proper information about the EVS file formats, as well as a lot of clues and things to look for.
Summary
This tutorial guided you through creating EVS data files using C Tech AI Skills, including file preparation, format specification, data verification, and file management. You can now explore creating, cleaning, and modifying EVS data files or learn more about advanced AI data processing techniques.