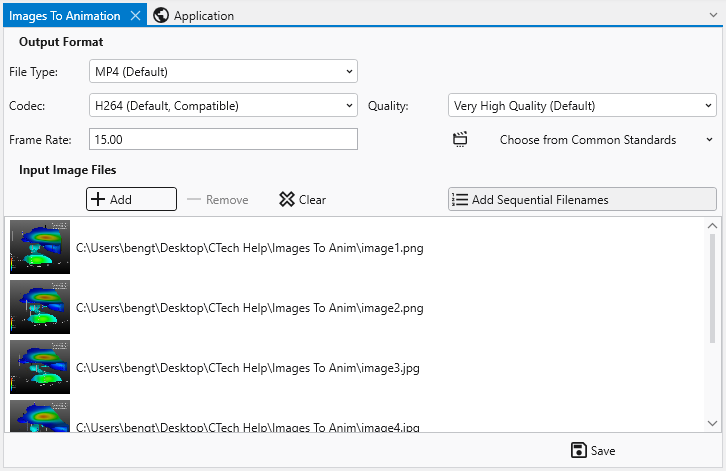
The Images To Animation tool allows you to compile a sequence of individual image files into a single video animation. This is ideal for creating time-lapse visualizations, showcasing model changes over time, or presenting a series of related images, for example written by EVS through sequences and Python Scripting, as a dynamic video.
Accessing the Images to Animation Tool
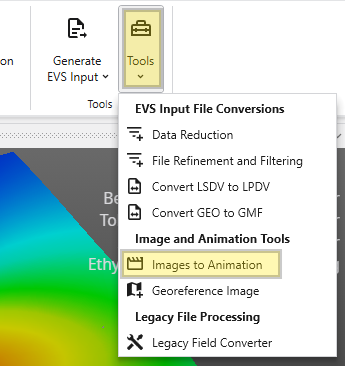
The Images to Animation tool can be opened from the Tools button in the Main Toolbar.
Animation Settings
Before creating your animation, you can configure the output settings to meet your specific needs for quality, file size, and compatibility.
| Setting | Description |
|---|---|
| Frame Rate | Determines the number of frames (images) displayed per second. You can enter a custom value or select from standard presets:
|
| File Type | Lets you choose the container format for your output video file.
|
| Quality | Controls the trade-off between visual quality and file size.
|
| Codec | Determines the compression algorithm used to encode your video.
|
Managing Files
The File List section is where you add and manage the images that will make up your animation.
| Function | Description |
|---|---|
| The File List View | This area displays the list of images you have added. Each entry shows a small preview thumbnail of the image on the left and its full file path on the right. The order of the files in this list determines the sequence in which they will appear in the final animation. |
| Adding and Removing Files | To add images, click the Add button to open a file dialog, where you can browse for and select one or more files. To remove a specific image, select it from the list and click the Delete button. The Clear button will remove all images from the list, allowing you to start over. |
| Adding Sequential Filenames | When the Add Sequential Filenames toggle is enabled, the behavior of the Add button is modified to streamline the import of numbered image sequences. If you select a single file that has a number at the end of its name (e.g., image1.png), the tool will automatically search for and add all other files in the same directory that share the same base name and have a matching extension (e.g., image2.png, image3.png, etc.). |
Note that this feature requires both the file extension and the base filename (the part before the number) to match exactly. For example: Adding image1.png would add image2.png, but not image3.jpg because of its differing extension. |
About source image sizes
You may encounter a warning messages about image dimensions during conversion. This occurs because most video codecs require the dimensions of the video frame (both width and height) to be even numbers. This requirement is due to the way video compression algorithms process images. If a source image has an odd dimension, the encoder may not be able to process it. To ensure compatibility, the Images to Animation tool will automatically resize the image to the nearest even resolution before adding it to the video. While this automatic resizing is necessary for the video encoding process, it may result in a slight loss of image quality or the softening of fine features in the image.