The Georeference Image tool is a useful utility for assigning real-world geographic coordinates to raster images. This process, known as georeferencing, allows you to accurately overlay images with other spatial data in your project. The tool enables you to create and edit world files (e.g., .jgw, .tfw) or ground control point files (.gcp), which store the image’s location, scale, and orientation information.
When you launch the tool, you will first be prompted to open an image file. Once loaded, the main interface provides all the necessary functions to link pixel coordinates on the image to known map coordinates.
Accessing the Georeference Image tool
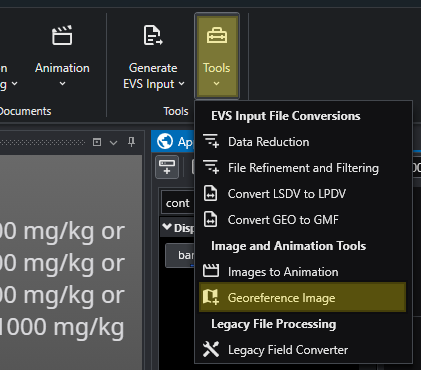
The Georeference Image tool can be opened from the main Tools tab in the Main Toolbar.
Interface Overview
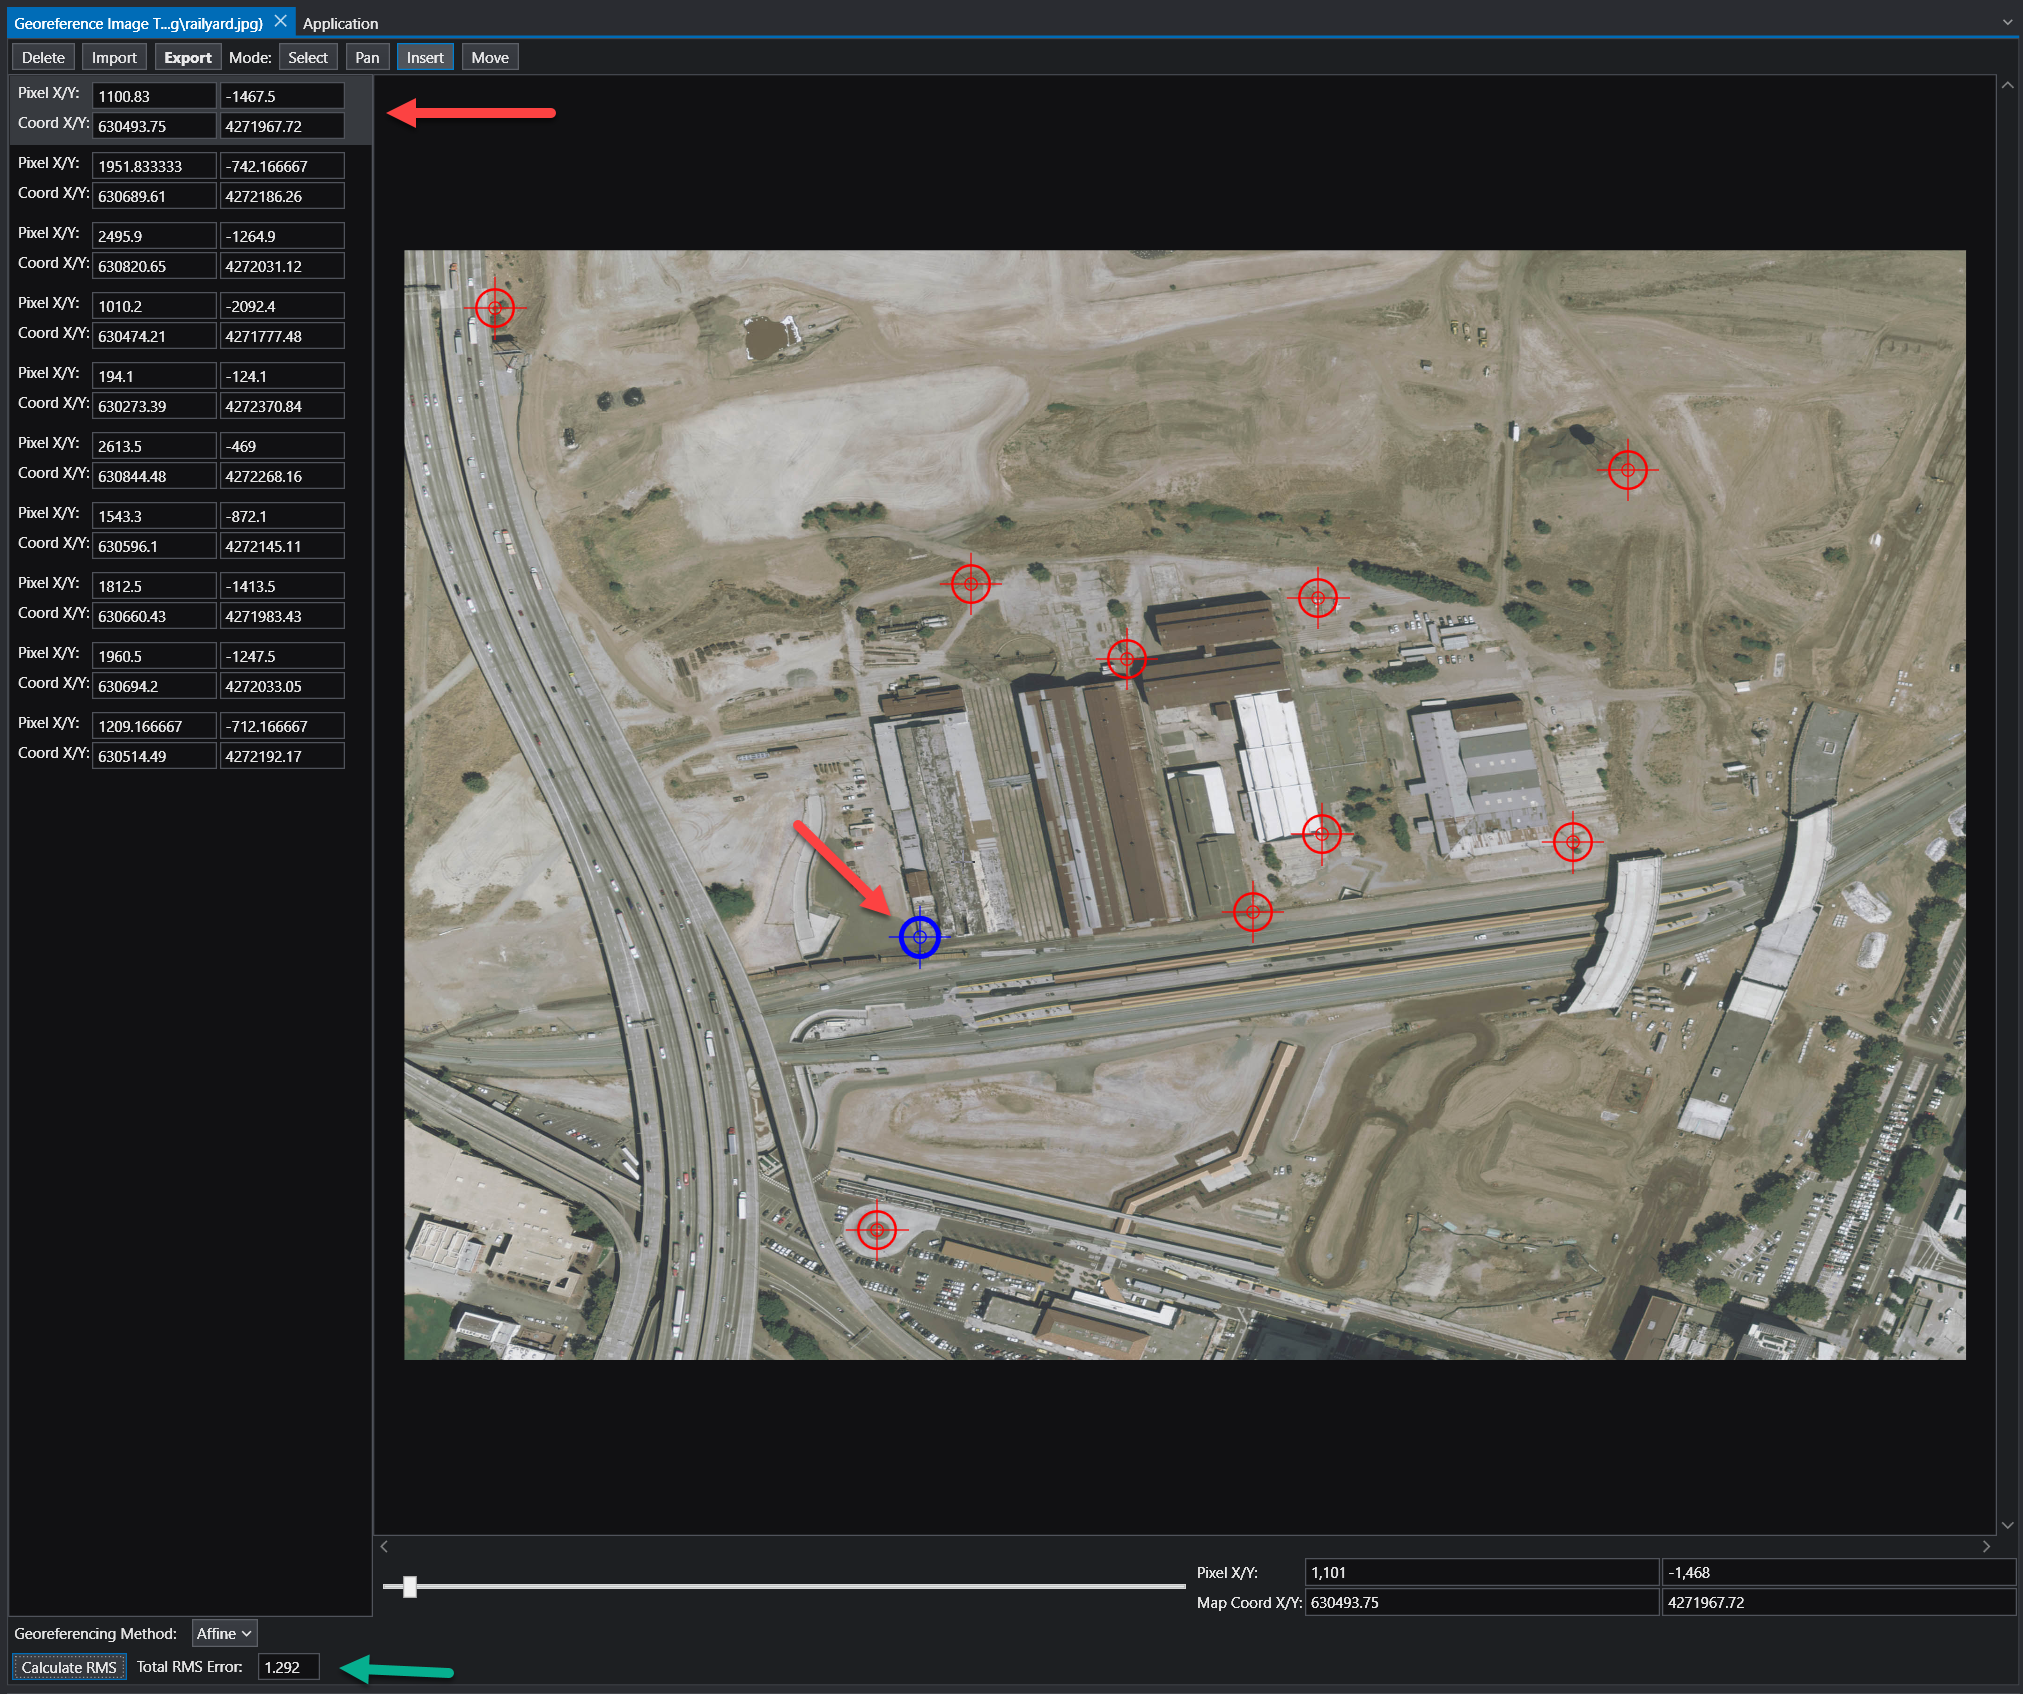
The Georeference Image tool is organized into several key areas:
| Component | Description |
|---|---|
| Image Panel | The central part of the window displays your image. This is your primary workspace for viewing the image and placing, selecting, and moving ground control points. |
| GCP List | The panel on the left lists all the Ground Control Points (GCPs) for the current image. Each point has an entry showing its pixel coordinates (Pixel X/Y) and the corresponding map coordinates (Coord X/Y). |
| Toolbar | Located at the top, the toolbar provides access to the main functions for managing GCPs and the georeferencing process. |
| Status Bar | The area at the bottom of the window displays important information, including the georeferencing method, accuracy metrics, and live coordinate readouts for your cursor’s position. |
Workflow: How to Georeference an Image
Georeferencing involves creating links between points on the image and their known real-world coordinates. These links are called Ground Control Points (GCPs).
Choose a Georeferencing Method: Use the Georeferencing Method dropdown in the status bar to select the mathematical model that will be used to transform the image from pixel coordinates to map coordinates. The best method depends on the quality of the image and the number of GCPs you have. The available methods are:
- Map to Min/Max: Stretches the image to fit a bounding box defined by two GCPs representing the minimum and maximum map coordinates. Requires 2 GCPs.
- Translate: Shifts the entire image based on the location of a single GCP without any rotation or scaling. Requires 1 GCP.
- 2 Point Translate / Rotate: Moves and rotates the image to align with two GCPs, but does not perform any scaling. Requires 2 GCPs.
- Translate / Scale: Moves and uniformly resizes the image to fit two GCPs, but does not perform any rotation. Requires 2 GCPs.
- Affine: A first-order polynomial transformation that can perform translation, scaling, rotation, and skewing. This is a versatile and common method for standard georeferencing. Requires a minimum of 3 GCPs. This is the recommended option, but requires at least 3 GCP points to be specified.
- 2nd, 3rd, and 4th Order: These are higher-order polynomial transformations used to correct for more complex, non-linear distortions in an image (e.g., lens distortion or terrain relief). They require progressively more GCPs (a 2nd Order transformation needs at least 6 GCPs) and should be used when a simpler model like Affine is not sufficient.
Add Ground Control Points:
- Set the Mode on the toolbar to Insert.
- Zoom and pan to a recognizable feature on the image (e.g., a road intersection, a building corner).
- Click on the feature. A new entry will be created in the GCP in the list on the left of the pixel location selected.
- Alter the X/Y coordinates to your desired real-world coordinates.
- Repeat this process for several points distributed across the image.
Review Accuracy:
- Once you have enough GCPs for your chosen method, click the Calculate RMS button. The Total RMS Error value will update. This value represents the root mean squared error, which is a measure of the average distance between the true map locations of your GCPs and their calculated locations based on the current transformation. A lower RMS error indicates a more accurate fit.
Export the Georeference File:
- When you are satisfied with the accuracy, click the Export button on the toolbar. This will save the coordinate information to a file (e.g., a world file or a
.gcpfile) that accompanies your image.
NOTE: In general, add as many control points as possible. More control points will almost always result in a better georeferencing, as any error due to precision will be averaged out across all of the entered control points. Our recommendation is to use an Affine transformation method (which is typically the industry standard) with as many control points as possible. While three is the minimum required, ten or more is typically recommended.
- When you are satisfied with the accuracy, click the Export button on the toolbar. This will save the coordinate information to a file (e.g., a world file or a
Toolbar Functions
| Function | Description |
|---|---|
| Delete | Deletes the currently selected GCP. |
| Import | Loads GCPs from an existing file (e.g., a .gcp file). |
| Export | Saves the current set of GCPs to a world file or .gcp file. The .gcp files are compatible with ArcGIS image link files. |
| Mode | Select: Allows you to select a GCP from the list or by clicking it on the image. |
| Pan: Allows you to pan around the image by clicking and dragging. You can also pan using the middle mouse button. | |
| Insert: Enables you to add new GCPs by clicking on the image. | |
| Move | Allows you to adjust the position of a selected GCP. After clicking this button, select a GCP and click its new desired location on the image to update its pixel coordinates. |
Interpreting Coordinates
Once an image is georeferenced, you can use the tool to find the map coordinates of any point. As you move your cursor over the image, the Pixel X/Y and Map Coord X/Y displays in the status bar will update in real-time, showing the pixel location and the corresponding calculated geographic coordinate.