Animations in EVS
Animations allow you to generate video files of smoothly changing content and views. This allows for complete control over the messaging conveyed in a single, often small deliverable file.
In Earth Volumetric Studio, an animation is built from one or more timelines. Each timeline represents a single, animatable property within your application. This could be anything from the camera’s position in the 3D viewer to the visibility of a specific object, a numeric value like a plume level, or the current frame of a sequence.
Each timeline is controlled through keyframe animation. You define specific points in time, called keyframes, where you set a specific value for one or more properties (timelines). For example, at time 0.0s, you might set an object’s opacity to 0%, and at time 2.0s, you set its opacity to 100%. EVS will then automatically calculate all the in-between values, creating a smooth transition (interpolation) from transparent to opaque over two seconds. By adding multiple timelines and setting keyframes for each, you can create complex, multi-faceted animations where many different aspects of your scene change simultaneously.
Accessing the Animation Window
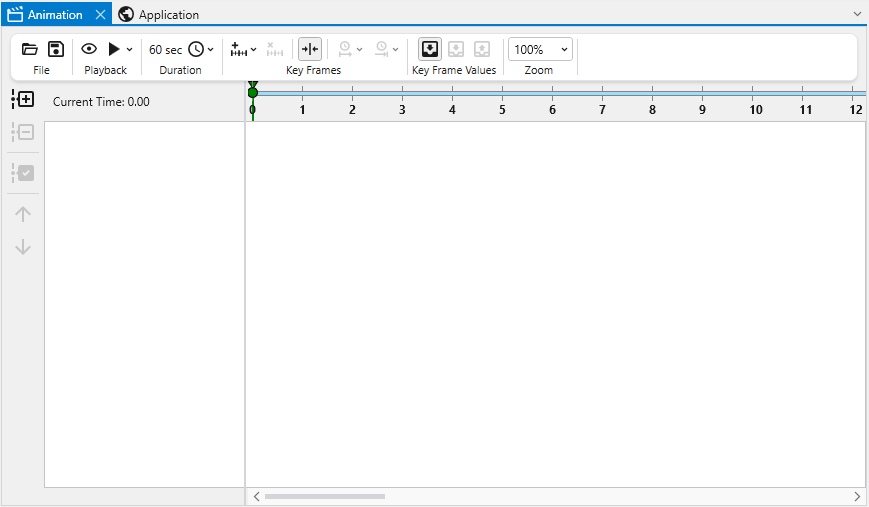
The Animation Window can be opened through the Animation button in the Main Toolbar.

Animations Window Controls
The Animations window allows users to create, edit, and export animations by managing timelines and keyframes. The following tables describe the available commands found in the toolbar and the timeline management sidebar.
Animating a Property through Timelines
To animate a property, you must first add a timeline for it. This is an easy process using the Select Property dialog.
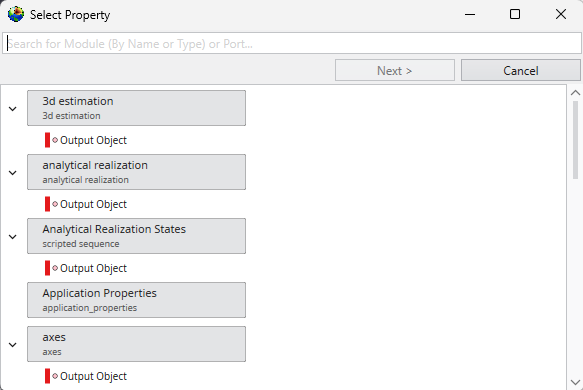
- Click the Add Timeline
 button in the timeline management sidebar. This opens the first view of the Select Property dialog.
 - This initial view presents a hierarchical list of every module and object in your current application. You can either browse through the list or use the search bar at the top to quickly find a specific module or object by name. Select the target object and click Next.
- After clicking Next, the dialog updates to show a list of all animatable properties for the module you selected. These properties are organized into categories (e.g., “Properties”, “Grid Settings”).
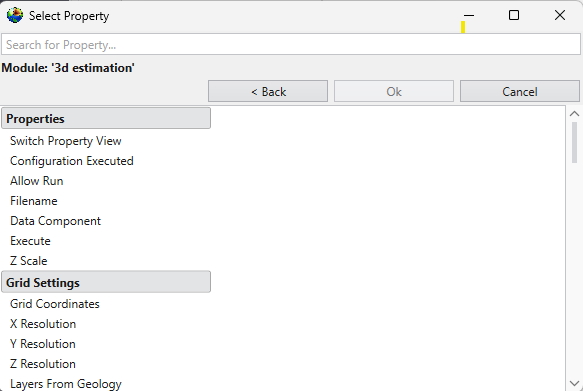
- Use the “Search for Property…” bar to filter the list, or browse to find the specific property you wish to animate. Select it from the list.
- Click Ok. A new timeline for the selected property will be added to the animation window, ready for you to add keyframes.
One you’ve added one or more timelines, you can add key frames. Animated sections will display in different colors, depending on the interpolation mode of the property in the timeline.
For example, in the following timeline, Azimuth and Inclination are interpolated linearly from 0s to 5s, then changed following a curve from 7s to 10s:

The two colors show different interpolation modes, which can be controlled by right clicking on the icon when values change in a timeline:
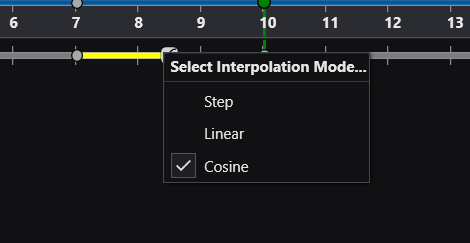
Different timelines will have various options for allowable interpolation modes, depending on the type of property being animated.
Timeline Management Commands
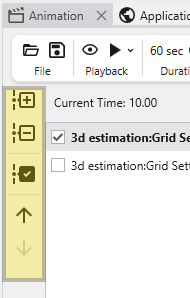
The left sidebar provides controls for managing the specific timelines included in your animation project.
| Button | Icon | Description |
|---|---|---|
| Add Timeline |
| Add an additional timeline to the animation. |
| Remove Timeline | 
| Remove the selected timeline from the animation. |
| Select All | 
| Select all timelines currently in the list. |
| Move Timeline Up | 
| Move the selected timeline up in the list order. |
| Move Timeline Down | 
| Move the selected timeline down in the list order. |
Toolbar Commands
The top toolbar contains tools for file management, playback control, duration settings, keyframe manipulation, and value transfer.

| Group | Button | Icon | Description |
|---|---|---|---|
| File | Open | 
| Browse to open a new .EVS Animation. |
| Save | 
| Save the current .EVS Animation. | |
| Playback | Preview | 
| Set animation to preview mode. When in preview mode, the animation can be run without generating an output file. |
| Play | 
| Modify output settings and generate or preview the animation. Clicking this opens the Output Formatsettings, allowing you to configure:
| |
| Duration | Change Length | 
| Change the total length of the animation (in seconds). |
| Key Frames | Add Key Frame | 
| Add a new key frame to the animation at the current time cursor position. |
| Delete Key Frame | 
| Delete the current key frame. | |
| Snap to Key Frames | 
| Snap the current time cursor to existing key frames when dragging or navigating. | |
| Set Duration | 
| Set the specific duration of the currently selected key frame. | |
| Set Time | 
| Set the start time of the current key frame. | |
| Key Frame Values | Automatically Push Values | 
| Automatically pull values from the application and overwrite all values in the selected timelines of the animation for the current keyframe. |
| Pull Values |
| Automatically pull values from the application and overwrite all values in the selected timelines of the animation for the current keyframe. | |
| Push Values | 
| Push the values from the selected timeline in the animation and set the corresponding values in the Application. | |
| Zoom | Zoom Level | Adjust the visual scale of the timeline (e.g., 50%, 100%, 200%) or reset to the default view. |
A highly recommended free legacy training video on how to use the Animator is available at this link:
Animation in Earth Volumetric Studio
The appearances of the animator controls have changed, but they are still recognizable, and the concepts in the video still apply.