Georeferencing an image for use with overlay_aerial requires two important criteria:
- An aerial photo that is clear and oriented close to North.
- A set of X-Y coordinates in your project coordinate system that define the locations of multiple distinguishable places in the image.
If you have these two things, you open your image in the Georeference Image Tool
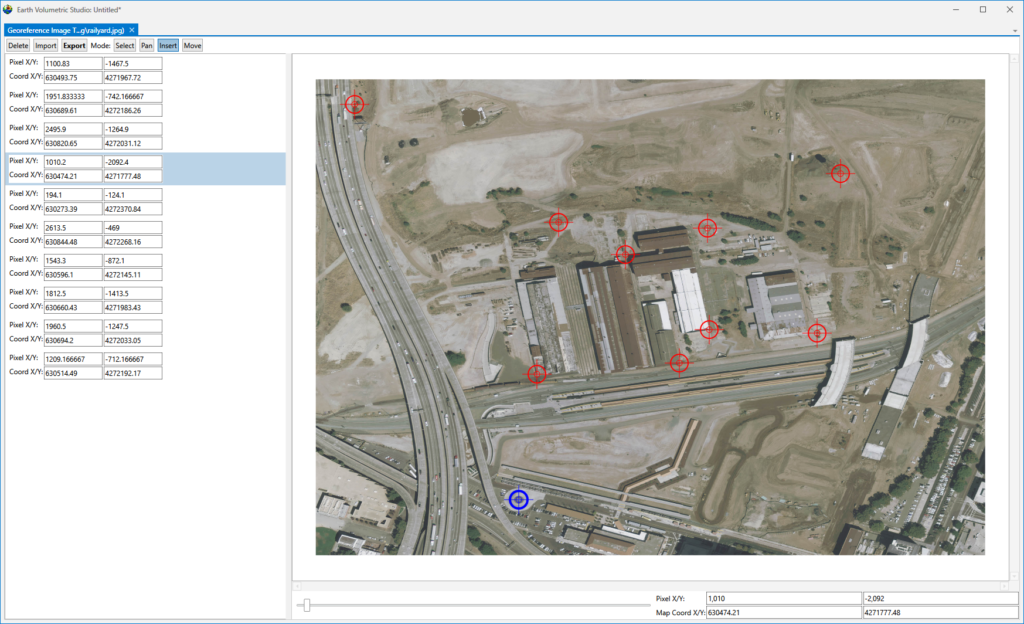
Once it opens, it is best to undock it and make it full screen (or at least fairly high resolution) as shown below:
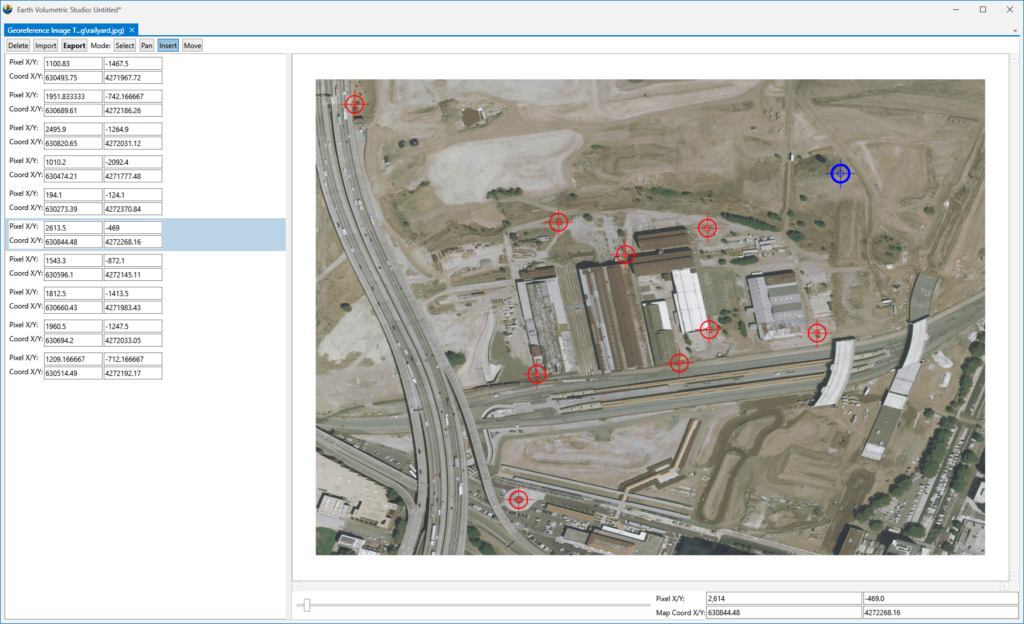
In the images above and below, we have already added 10 “control” points. These are added using the “Insert” button and CTRL-Left-Mouse to probe on a location that meets criteria #2.
When you insert a new point, it will show up as a BLUE crosshair. You must then enter the correct X-Y location for that Pixel location.
It is important that you have points which span a significant portion of the image as shown below where we have a point near the NE corner and above where the highlighted point (blue) is near the SW corner.
Once you have at least 6 (preferably more) locations, you export a .GCP file to the same folder where the image is located.
The overlay_aerial module will look for a .GCP file with the same base name as the image and use it to properly locate your image.


